Table of Contents
Tired of the same old toothy grin on your Jack-O'-Lantern? Ready to unleash some serious Halloween fright? Then you've come to the right haunted house! This year, ditch the predictable and dive headfirst into the realm of unique scary pumpkin carving ideas. We're not talking about slightly tweaked triangles here; we're talking about next-level designs that will make your neighbors scream (with delight, of course!).
Eerily Easy: BeginnerFriendly Scary Pumpkin Carving Ideas
Eerily Easy: BeginnerFriendly Scary Pumpkin Carving Ideas
Simple Silhouettes: Spooky Shapes for Starters
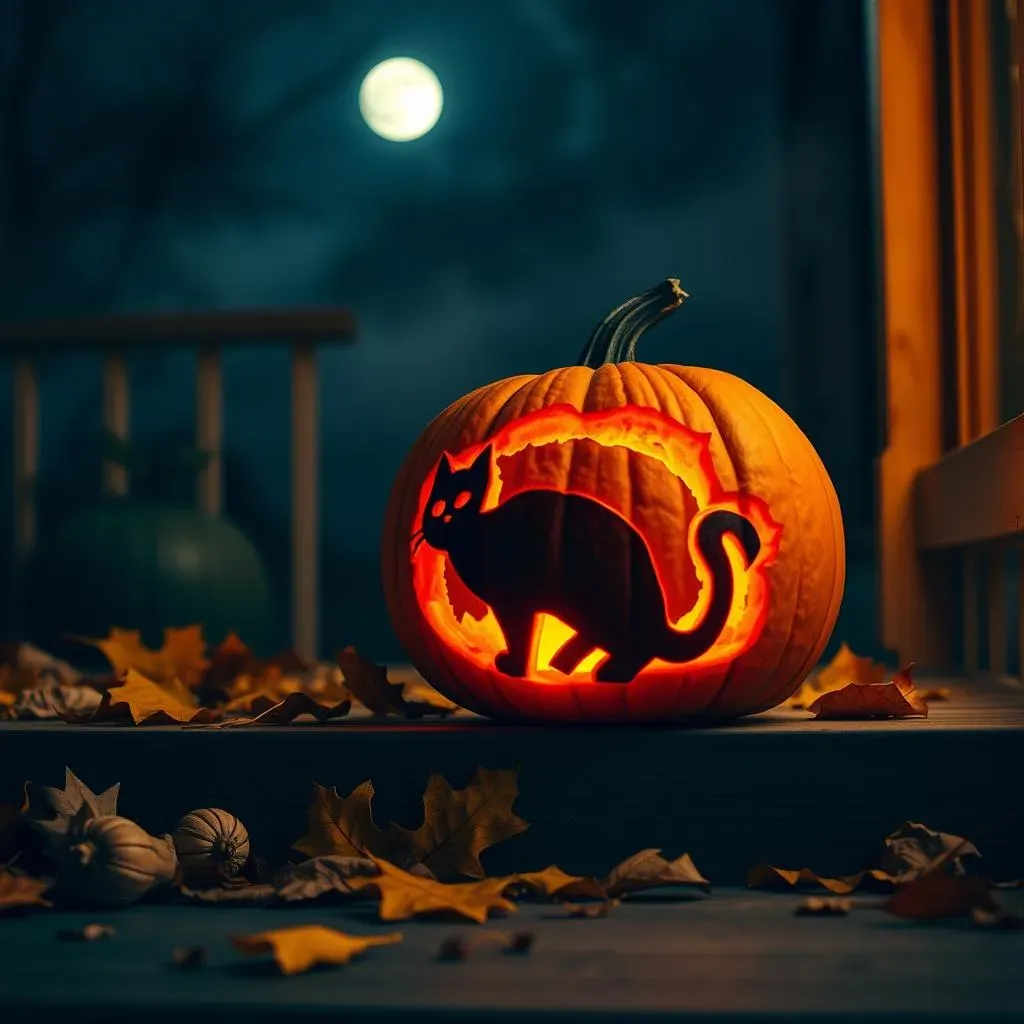
so you're new to the pumpkin carving game? No sweat! We're kicking things off with designs so simple, they're practically foolproof. Think classic Halloween silhouettes: a black cat arching its back, a creepy bat in flight, or a ghostly apparition floating in the night. These designs rely on basic shapes and clean lines, making them super easy to trace and cut out.
The key here is to use a stencil. You can find tons of free printable stencils online – just search for "easy Halloween pumpkin stencils." Tape the stencil to your pumpkin, trace the design with a marker, and then carefully cut along the lines with your carving tools. Remember, safety first! Always carve away from yourself, and consider using a pumpkin carving kit designed for kids if you're working with little ones. Don't worry about perfection; even slightly wonky silhouettes add to the spooky charm!
The Power of the Poke: Dot-to-Dot Terror
Want a scary pumpkin that requires minimal cutting? Then, embrace the power of the poke! This technique involves using a poking tool (like an ice pick or a small screwdriver) to create a design using a series of holes. Think of it as a dot-to-dot picture, but with a spooky twist. Create scary faces using a collection of different sized holes. The result is a cool, textured effect that looks way more complicated than it actually is.
Start by drawing your design on the pumpkin with a marker. Then, use your poking tool to create holes along the lines. Vary the size and spacing of the holes to add depth and dimension. For example, use larger holes for the eyes and mouth of a scary face, and smaller holes to create shadows and details. You can even use different sized poking tools to achieve different effects. When you're done, pop a candle inside and watch your spooky creation come to life! The flickering light will cast eerie shadows, making your pumpkin look even more terrifying.
Beyond the Basic JackO'Lantern: Intermediate Unique Scary Pumpkin Carving Ideas
Beyond the Basic JackO'Lantern: Intermediate Unique Scary Pumpkin Carving Ideas
Layered Looks: Carving with Depth
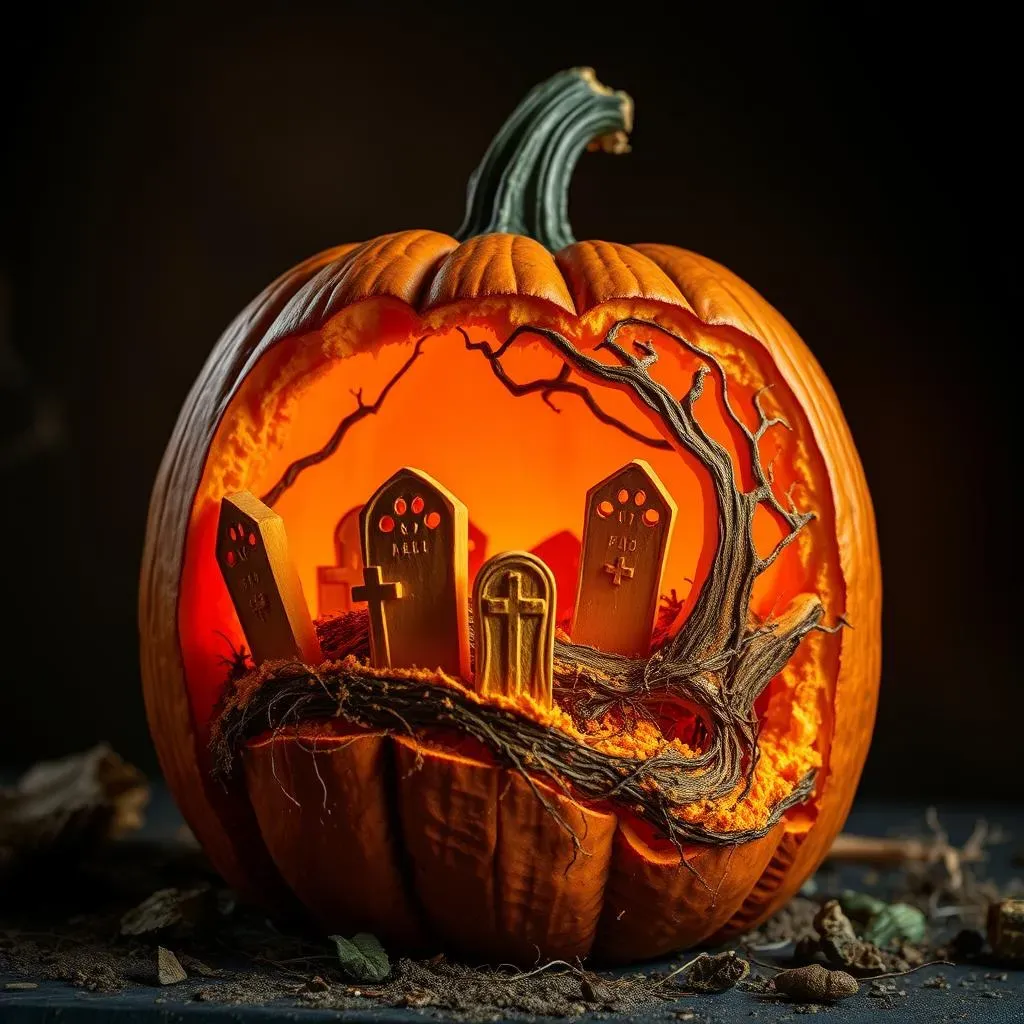
Ready to take your pumpkin carving to the next level? It's time to think about adding depth and dimension to your designs. Instead of just cutting all the way through the pumpkin, try carving at different depths to create a layered effect. This technique involves carefully removing layers of pumpkin flesh to allow more or less light to shine through, creating shadows and highlights that will make your design pop.
For example, you could carve a spooky graveyard scene with tombstones that appear to be receding into the distance. Carve the tombstones in the foreground deeper than the ones in the background to create a sense of perspective. Or, you could carve a creepy face with sunken eyes and a protruding brow by varying the depth of the cuts. Experiment with different carving tools to achieve different textures and effects. A small gouge or V-shaped tool can be used to create fine details, while a larger spoon or scoop can be used to remove larger areas of flesh. This is where the unique scary pumpkin carving ideas really start to come alive!
Depth Level | Light Effect | Tool Recommendation |
|---|---|---|
Full Cut-Through | Brightest Light | Thin Saw or Knife |
Shallow Cut (1/4 inch) | Dim Light, Soft Glow | Gouge or Small Spoon |
Very Shallow Cut (Surface Scrape) | Almost No Light, Subtle Shadow | Clay Ribbon Tool or Vegetable Peeler |
Stencils with a Twist: Incorporating Texture
You're probably thinking "stencils again?" But hold on! We're not talking about those basic, flat stencils. Instead, let's use stencils as a starting point and then add texture and detail to make your design truly unique. Find a stencil you like – maybe a creepy skull, a menacing monster, or a spooky spider web. Trace the stencil onto your pumpkin, but instead of just cutting along the lines, use the stencil as a guide for creating a more elaborate design.
For example, if you're carving a skull, use a small gouge to add cracks and crevices to the bone structure. Or, if you're carving a spider web, use a thin knife to create a delicate, lacy effect. You can also use different carving tools to create different textures. A serrated knife can be used to create a rough, jagged texture, while a smooth knife can be used to create a smooth, polished texture. Don't be afraid to experiment and add your own personal touch. The goal is to take a simple stencil and transform it into a one-of-a-kind masterpiece. Are you ready to elevate your pumpkin carving game with these unique scary pumpkin carving ideas?
Master Carver's Domain: Advanced Unique and Scary Pumpkin Carving Ideas
Master Carver's Domain: Advanced Unique and Scary Pumpkin Carving Ideas
Sculpting Terror: 3D Pumpkin Art
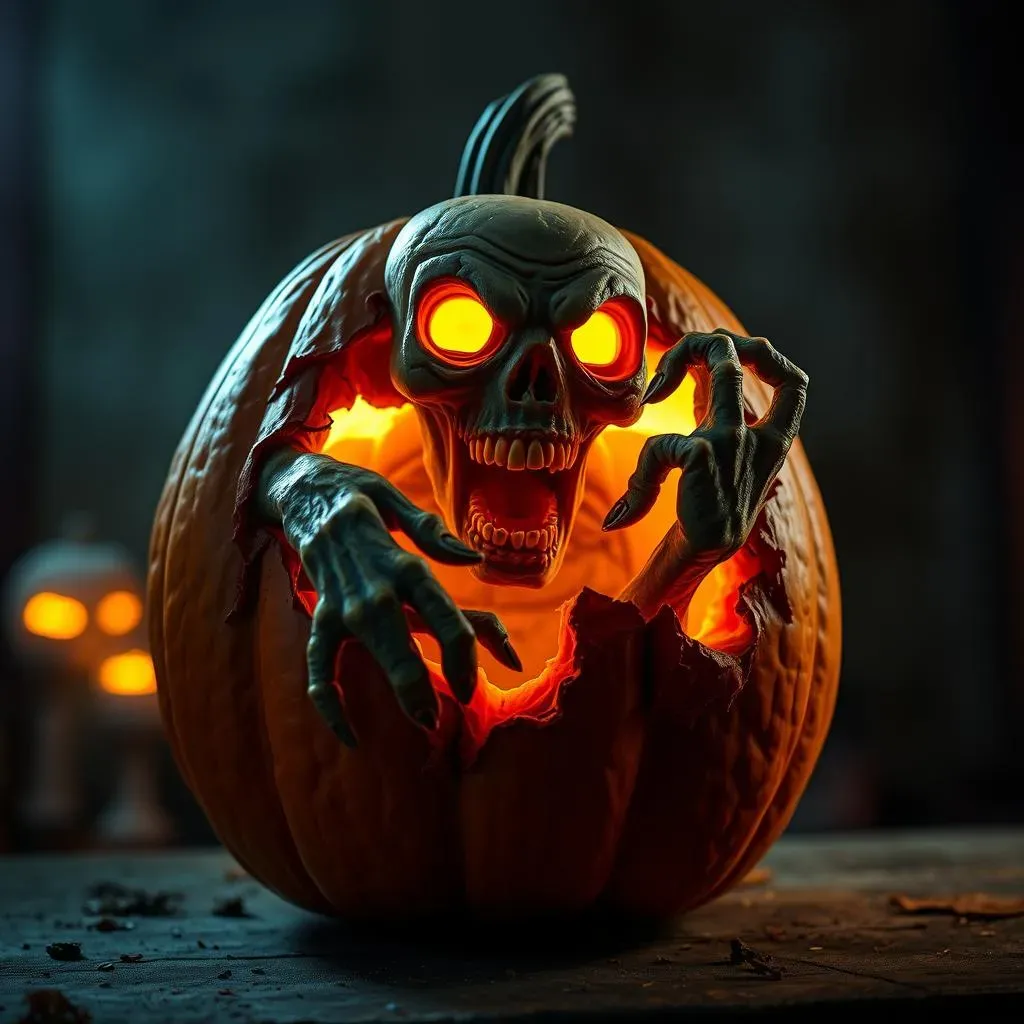
Alright, aspiring pumpkin Picassos, let's talk about taking your carving skills to the third dimension! Forget flat designs – we're diving into the world of 3D pumpkin sculpting. This is where you transform your pumpkin into a true work of art, with realistic features, intricate details, and a whole lot of spooky personality. Think grotesque gargoyles, terrifying trolls, or even a zombie bursting out of the pumpkin's surface. The possibilities are endless!
The key to successful 3D pumpkin sculpting is patience, planning, and the right tools. You'll need a variety of carving tools, including gouges, loop tools, and detail knives, to create the different shapes and textures. Start by sketching out your design on the pumpkin, paying close attention to the contours and proportions. Then, begin carefully removing layers of pumpkin flesh, working slowly and deliberately to create the desired effect. Remember, it's always better to remove too little than too much! You can always go back and remove more, but you can't put it back on.
The Art of the Airbrush: Adding Color and Depth
So, you've sculpted your masterpiece, but it's still missing that certain something? It's time to break out the airbrush! Adding color and shading to your pumpkin carving can take it from spooky to spectacular. An airbrush allows you to create subtle gradients, realistic shadows, and vibrant highlights that will bring your design to life. Think blood-red accents on a vampire's fangs, sickly green hues on a zombie's skin, or eerie blue glows emanating from a ghostly figure. The creative possibilities are boundless.
When it comes to airbrushing pumpkins, acrylic paints are your best friend. They're durable, water-resistant, and come in a wide range of colors. Start by applying a base coat of white or light grey to the entire pumpkin. This will help the colors pop and create a more even finish. Then, use your airbrush to apply thin layers of color, building up the intensity gradually. Don't be afraid to experiment with different techniques, such as stippling, masking, and blending, to create unique effects. Just make sure you're working in a well-ventilated area and wearing a mask to protect yourself from the paint fumes. These unique scary pumpkin carving ideas are not for the faint of heart!
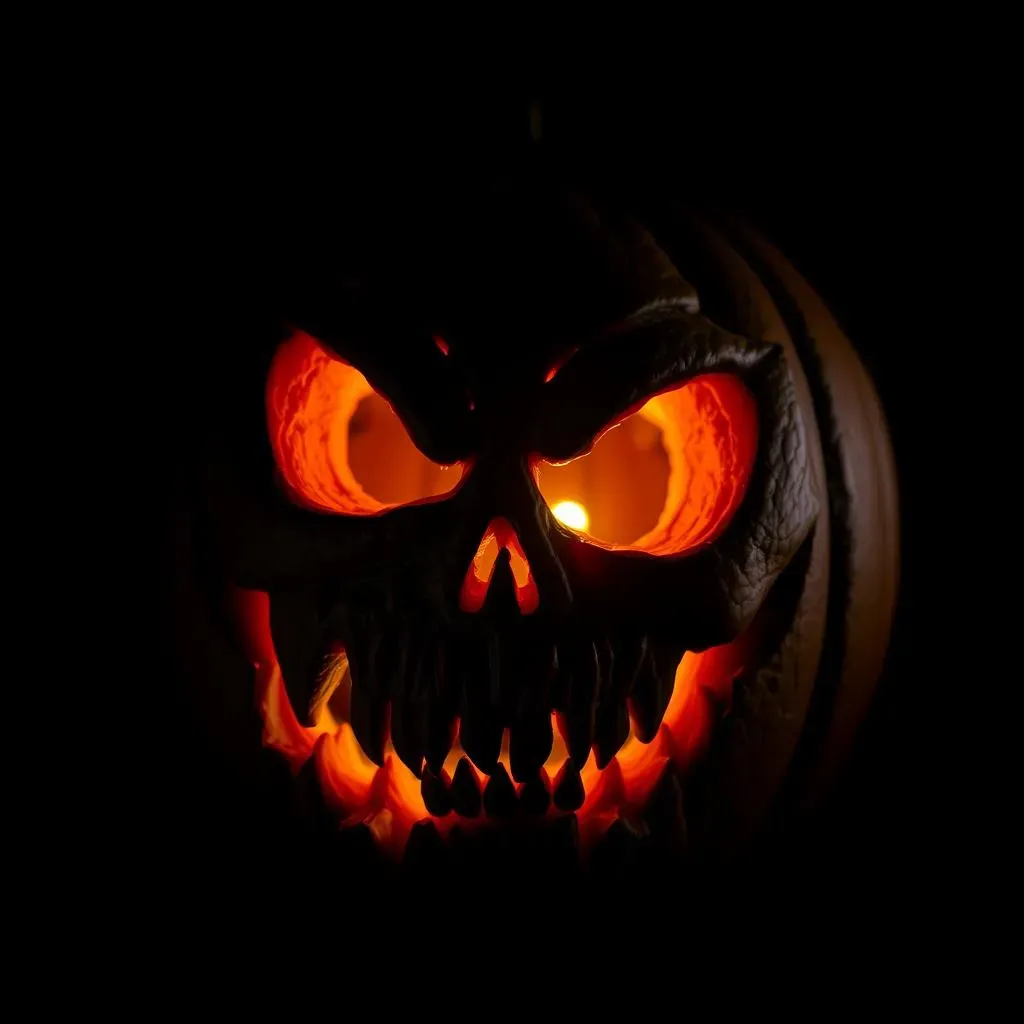
Illuminating Evil: Advanced Lighting Techniques
You've got the sculpting skills, you've got the airbrushing down, but now it's time to truly bring your creation to life with some advanced lighting techniques. Forget the standard candle – we're talking about using LEDs, fiber optics, and even projectors to create a truly immersive and terrifying experience. Imagine a pumpkin with glowing red eyes that follow you as you walk by, or a ghostly apparition that flickers and fades in and out of existence. With the right lighting, you can transform your pumpkin into a haunted spectacle that will send chills down your spine.
Experiment with different colors and intensities of light to create different moods and effects. Use a strobe light to create a flickering, disorienting effect, or a black light to make certain colors glow in the dark. You can even use a small projector to project images onto your pumpkin, such as creepy crawlies, spooky shadows, or even scenes from your favorite horror movies. Just be sure to use low-wattage bulbs or LEDs to avoid overheating the pumpkin. With these advanced lighting techniques, your unique scary pumpkin carving ideas will shine brighter than ever before!
Lighting Technique | Effect | Equipment Needed |
|---|---|---|
LED Spotlights | Focused beams of light, highlighting specific areas | LED spotlights, batteries or power adapter |
Fiber Optics | Delicate, ethereal glow, perfect for details | Fiber optic strands, light source, drill |
Projector | Dynamic images and animations | Mini projector, USB drive with content |
Tools and Tips for Killer Unique Scary Pumpkin Carvings
Tools and Tips for Killer Unique Scary Pumpkin Carvings
Essential Carving Arsenal: Gear Up for Gourd Glory
So, you're ready to carve some seriously scary pumpkins? First things first: you need the right tools for the job. Forget that flimsy plastic knife that came with your grocery store pumpkin – we're talking about a proper carving arsenal that will allow you to create intricate designs with precision and ease. A good pumpkin carving kit is a great place to start. Look for kits that include a variety of saws, gouges, and detail knives. Different tools are designed for different tasks, so having a range of options will give you more flexibility and control.
Beyond the basic kit, consider investing in a few specialized tools to take your carving to the next level. A small, flexible saw is perfect for cutting out intricate shapes, while a set of wood carving gouges will allow you to create depth and texture. A clay ribbon tool is great for scraping away thin layers of pumpkin flesh, and a detail knife is essential for fine-tuning your design. And don't forget about safety! Always wear gloves to protect your hands, and use a sturdy cutting surface to prevent accidents. With the right tools in hand, you'll be well on your way to creating some truly killer unique scary pumpkin carvings.
- Pumpkin Carving Kit: A must-have for beginners, includes basic saws and scoops.
- Wood Carving Gouges: For adding depth and texture.
- Clay Ribbon Tool: Perfect for removing thin layers of pumpkin.
- Detail Knife: Essential for fine-tuning intricate designs.
Pumpkin Prep Power: Choosing and Priming Your Canvas
You've got your tools, now it's time to choose your canvas – the pumpkin itself! Not all pumpkins are created equal, so take your time and select one that's perfect for your design. Look for a pumpkin that's relatively smooth and free of blemishes. A flat side is also a plus, as it will provide a stable surface for carving. Tap the pumpkin to make sure it sounds hollow – a dull thud could indicate that the pumpkin is starting to rot. And don't be afraid to get creative with your pumpkin selection! Odd shapes and sizes can add character and uniqueness to your design. Maybe use a long pumpkin for a scary witch or use a round pumpkin for a scary clown.
Once you've chosen your pumpkin, it's time to prep it for carving. Start by washing the pumpkin with soap and water to remove any dirt or debris. Then, cut a hole in the top or bottom of the pumpkin (depending on your preference) and scoop out the seeds and pulp. Scrape the inside walls of the pumpkin until they're relatively smooth. This will make it easier to carve and will also help the pumpkin last longer. Some carvers recommend rubbing the inside of the pumpkin with petroleum jelly to help prevent it from drying out. Now your pumpkin is primed and ready for your unique scary pumpkin carving ideas!
Light It Up: Illuminating Your Evil Creation
You've carved your masterpiece, now it's time to bring it to life with light! While a traditional candle is always an option, there are many other ways to illuminate your pumpkin and create a truly spooky effect. Battery-operated LED lights are a great alternative to candles, as they're safer, last longer, and come in a variety of colors. You can use a single LED light to create a focused beam of light, or string multiple lights together to create a more diffused glow. For a truly eerie effect, try using a flickering LED light to simulate the flickering of a candle flame.
If you're feeling adventurous, you can even experiment with more advanced lighting techniques. Fiber optic cables can be used to create delicate, ethereal glows, while small projectors can be used to project images onto your pumpkin. You can even use a combination of different lighting techniques to create a truly unique and terrifying effect. Just remember to be careful when working with electricity and always follow the manufacturer's instructions. With the right lighting, your unique scary pumpkin carving ideas will shine brighter than ever before, scaring everyone who dares to approach!
Lighting Option | Pros | Cons |
|---|---|---|
Candles | Classic look, warm glow | Fire hazard, short lifespan |
LED Lights | Safe, long-lasting, variety of colors | Can look artificial |
Fiber Optics | Delicate, ethereal glow | More complex setup |
Unleash the Gourdian of Gore: Your Spooktacular Creation Awaits!
So, there you have it – a treasure trove of unique scary pumpkin carving ideas to elevate your Halloween game. From the subtly spooky to the downright terrifying, we've explored designs and techniques to suit every skill level and scare preference. Remember, the most important ingredient is your own creativity! Don't be afraid to experiment, put your own spin on these ideas, and most importantly, have fun. Now go forth, grab your gourds, and unleash the gourdian of gore upon your neighborhood. Happy haunting!