Table of Contents
Alright, let's be real, Halloween is creeping up, and that means one thing: it's pumpkin carving season! But, who has time for those super intricate designs that look like they belong in an art museum? Not me, and probably not you either. That's why we're diving headfirst into the world of simple pumpkin carving ideas 2023. This isn't about creating a masterpiece, it's about having some fun and getting a spooky jack-o'-lantern on your porch without needing a PhD in pumpkinology. We'll explore some super easy designs perfect for beginners, even if your artistic skills are more "stick figure" than "Picasso." I’ll share some clever hacks to make the process smooth, and we’ll even peek at some of the coolest, yet simple, designs folks are rocking this year. So, grab your carving tools, maybe a pumpkin spice latte, and let's get carving. This guide will give you all the inspiration and basic skills you need to create an awesome pumpkin, no matter how much of a beginner you are.
Easy Pumpkin Carving Ideas for Beginners in 2023
Easy Pumpkin Carving Ideas for Beginners in 2023
The Classic Jack-o'-Lantern
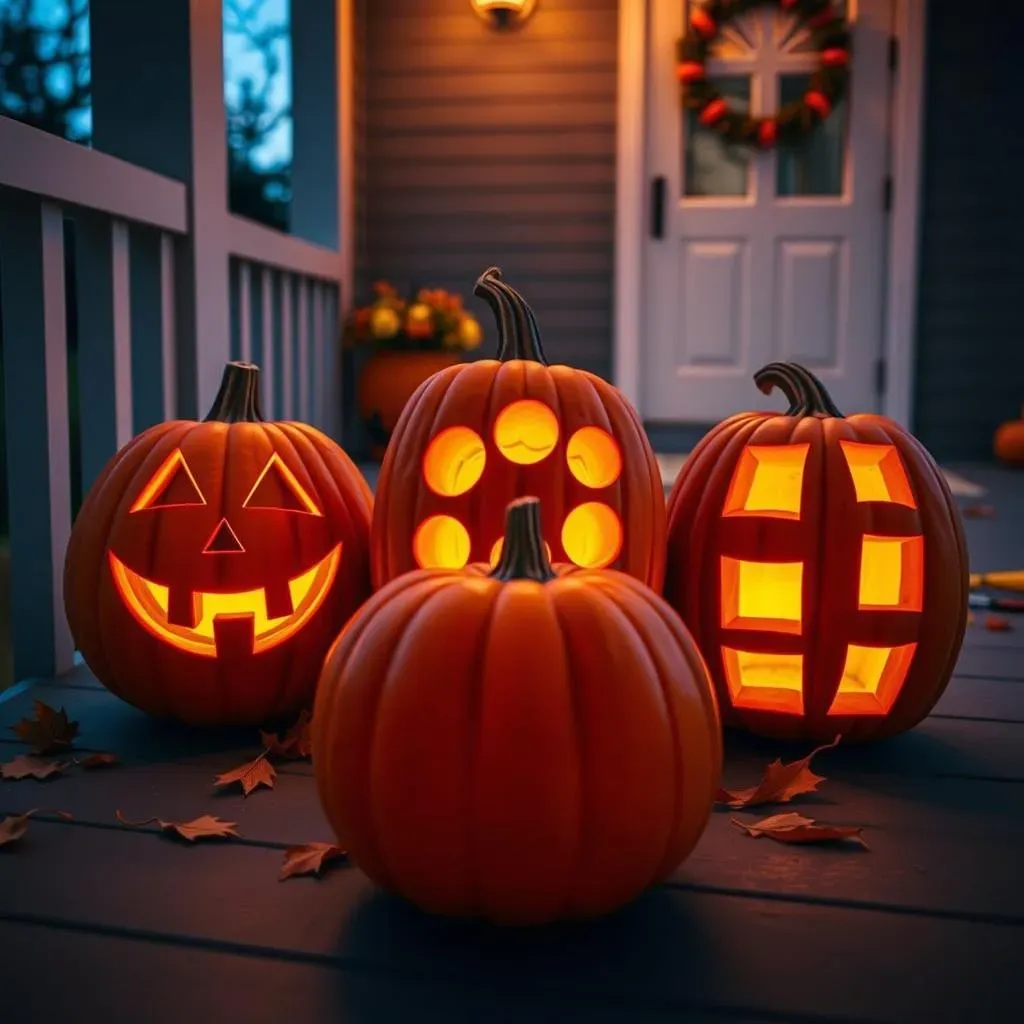
Let's kick things off with the OG of pumpkin carving: the classic jack-o'-lantern. You know, the one with the triangle eyes, a toothy grin, and maybe a crooked nose. It's simple, it's iconic, and honestly, it’s really hard to mess up. The beauty of this design is that it doesn't require any fancy tools or artistic talent. You just need a basic carving kit, a pumpkin, and a little bit of patience. I remember my first attempt at this. My triangles were wonky, and the grin looked like it belonged on a deranged chipmunk, but you know what? It was still a jack-o'-lantern, and it looked great on my porch. Don't overthink it, just go for it, and you'll have a perfectly spooky pumpkin in no time.
To make it even easier, you can use a stencil. There are tons of free templates online that you can print out and tape to your pumpkin. Then, just poke holes along the lines and start cutting. Seriously, it is that easy. Even if your lines are not perfect, it will still look great. Plus, a little imperfection adds character. Think of it as your pumpkin's unique personality shining through. I've seen some seriously wonky jack-o'-lanterns, and they're often the most charming. Embrace the chaos, my friend.
"The best way to get good at something is to start. Don't worry about perfection, just enjoy the process." - Some Randomly Smart Person
Simple Shapes and Patterns
maybe triangles are too ambitious for you right now, and that's totally fine. You can still make a super cool pumpkin using simple shapes. Think circles, squares, or even just some random lines. You can create polka dots, stripes, or even a moon and stars design. The key here is to keep it simple and repetitive. I once carved a pumpkin using only different sized circles, and it looked like some sort of futuristic space pumpkin. It was ridiculously easy, and everyone loved it. Sometimes, less is more, especially when you're just starting out. Don't feel pressured to do something super complicated. The goal is to have fun, not to stress out.
Another easy idea is to use cookie cutters. Press them into the pumpkin, and then trace around them with your carving tool. This is a great way to get consistent shapes, and it's super easy for kids to do. I remember doing this as a kid, and it felt like I was some kind of pumpkin carving genius. Little did I know, I was just using a cookie cutter. But hey, it worked! So, if you're feeling overwhelmed by the idea of freehand carving, grab some cookie cutters and get creative. You'll be surprised at how awesome your pumpkin will turn out.
Shape | Difficulty | Description |
|---|---|---|
Triangles | Easy | Classic Jack-o'-lantern eyes and nose. |
Circles | Easy | Can be used for polka dots or moon designs. |
Squares | Easy | Good for creating a blocky, modern look. |
Lines | Easy | Great for stripes or abstract designs. |
Creative & Simple Pumpkin Designs Using Stencils
Creative & Simple Pumpkin Designs Using Stencils
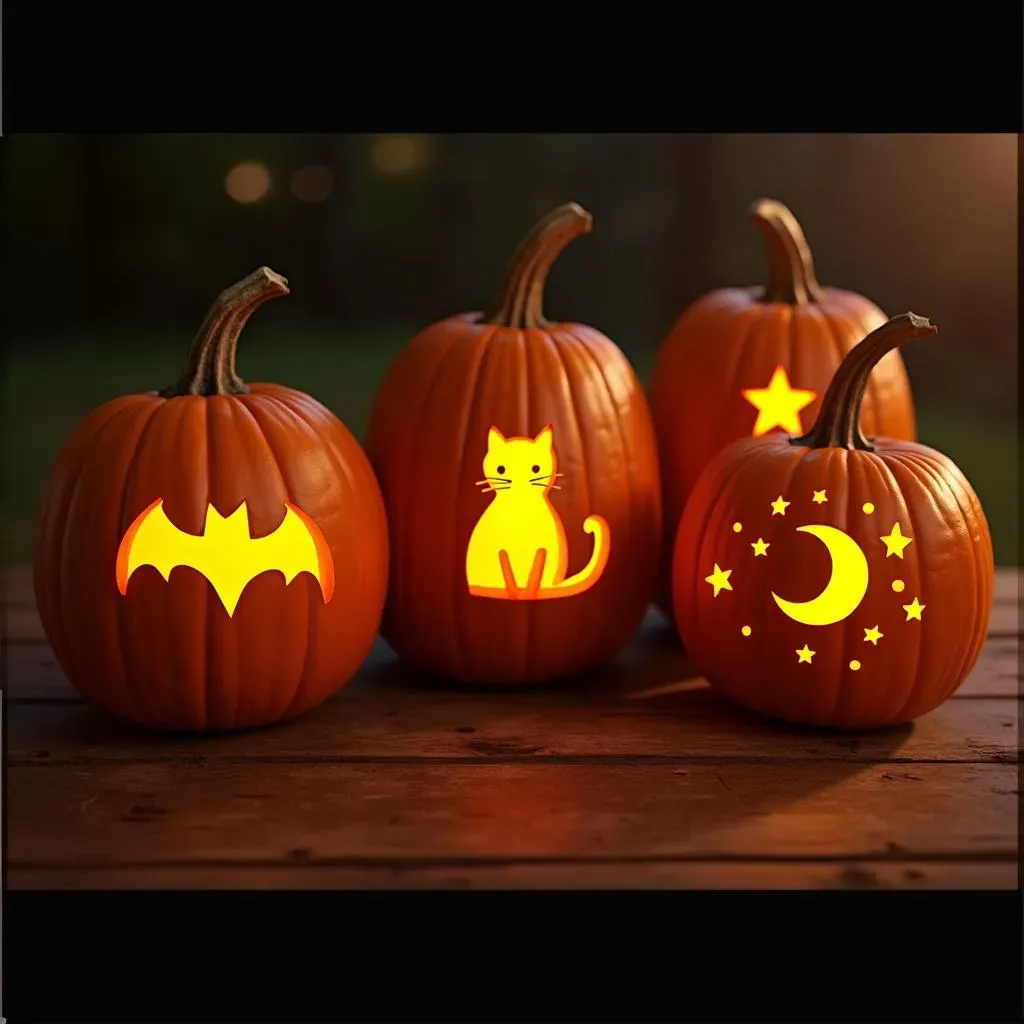
so you're digging the simple shapes, but maybe you want something a bit more *designed*? Stencils are your secret weapon! They take the guesswork out of carving and let you create intricate-looking designs without needing to be a pro artist. Think of stencils as training wheels for pumpkin carving. You get the cool design, but without the stress of trying to draw it yourself. There are tons of free stencils online, from spooky bats and ghosts to cute cats and cartoon characters. You can even find stencils for your favorite movie or TV show. I once used a stencil of a very popular mouse, and it was a hit at my Halloween party. It looked like I spent hours carving it, but it was all thanks to the magic of stencils.
Using a stencil is super easy. Just print it out, tape it to your pumpkin, and then use a poking tool (or even a toothpick) to poke holes along the lines of the design. Once you've poked all the holes, remove the stencil and start carving along the dotted lines. It's like connect-the-dots, but with a knife! maybe not a knife if you're a kiddo, more like a plastic carving tool. The key is to take your time and be careful not to slip. Trust me, I’ve had a few close calls, and those carving tools can be surprisingly sharp! But seriously, stencils are a game-changer for anyone who wants to create a cool pumpkin without having to be a master carver. They make complex designs totally accessible, and they are fun to use.
"Simplicity is the ultimate sophistication." - Leonardo da Vinci (probably not about pumpkins, but it still fits.)
Stencil Ideas
- Spooky Bats
- Friendly Ghosts
- Cute Cats
- Cartoon Characters
- Movie or TV Show Logos
- Geometric Patterns
- Stars and Moons
Simple Pumpkin Carving Techniques & Hacks
Simple Pumpkin Carving Techniques & Hacks
Tools of the Trade
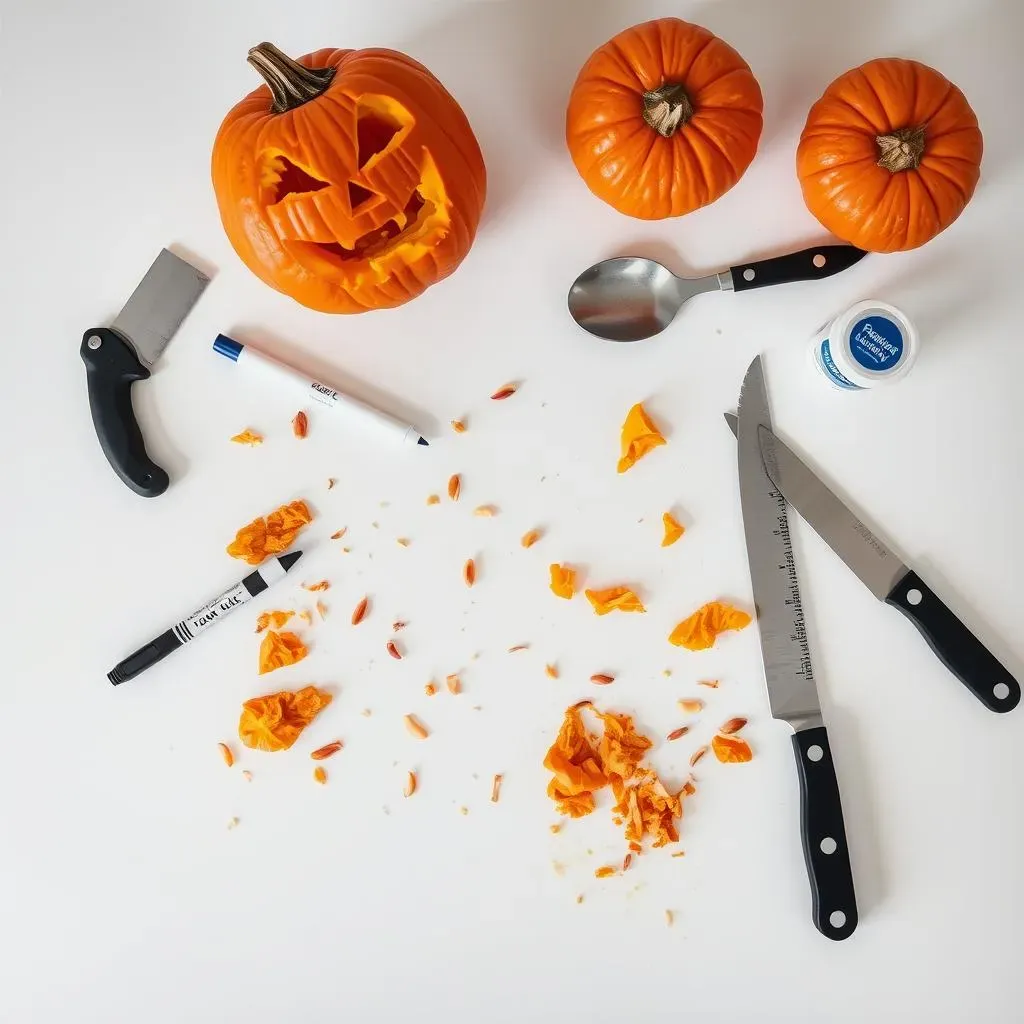
let's talk tools. You don't need a fancy surgeon's kit to carve a pumpkin. In fact, a basic pumpkin carving kit from the store works wonders. These kits usually come with a small saw, a scooper, and some poking tools. If you don't have one of those, a serrated kitchen knife, a large spoon, and a toothpick or skewer can do the trick. The most important thing is to make sure your tools are sharp enough to cut through the pumpkin easily, but not too sharp that you risk a carving catastrophe. I once tried using a butter knife, and let's just say, it was a very frustrating experience. Learn from my mistakes, people. Get something with a bit of an edge!
Also, don't forget about safety! Always carve in a well-lit area and on a stable surface. And, please, if you're a kid, have an adult supervise. Pumpkin carving can be fun, but it's not worth an ER visit. I’ve seen enough bandaged fingers to know that accidents happen, so be careful out there. Oh, and a little tip: wear gloves if you don't want pumpkin guts all over your hands. They can get pretty sticky, and no one likes that. Trust me, a little prevention goes a long way in this messy business.
"A dull tool is the enemy of a good carving." - Some wise pumpkin carver
The Carving Process
Alright, so you’ve got your tools, now what? First, cut a lid around the stem of your pumpkin. Make sure you angle your knife inward, so the lid doesn't fall into the pumpkin. This is crucial, trust me on this one. Then, scoop out all the seeds and stringy bits. This is the part that most people find gross, but I find it oddly satisfying. It's like giving your pumpkin a little spa treatment. Once your pumpkin is empty, you can start carving your design. Use a poking tool to trace the outline and then start cutting with your saw or knife. Remember to take your time and don't force anything. If you're having trouble, try making smaller cuts instead of one big one. Patience is key here.
Another cool trick is to use a dry-erase marker to draw your design on the pumpkin first. If you mess up, you can just wipe it off and start again. This is a game-changer for those of us who are artistically challenged. Plus, it helps you visualize your design before you start cutting. I wish I'd known about this trick when I was younger, would have saved me a lot of wonky pumpkins. When you are carving, start with the center of the design and work your way out. This will help to avoid cracking the pumpkin if you put too much pressure on one area. And when you're done, use a wet paper towel to wipe off any dry-erase marker lines or pumpkin guts.
Hacks for Success
Let’s talk about some pro tips. Want your pumpkin to last longer? Try coating the inside with petroleum jelly or vegetable oil. This will help to prevent it from drying out and rotting too quickly. I’ve tried this myself, and it definitely makes a difference. Another neat trick is to use battery-operated tea lights instead of candles. They're safer, and you don't have to worry about your pumpkin catching fire. Plus, they come in different colors, so you can get creative with your lighting. I'm a big fan of the color-changing tea lights, they make my pumpkin look like it's having a rave.
Also, if you want to create a 3D effect, try carving different depths into the pumpkin. For example, carving deeper for the eyes and shallower for the mouth. This adds a lot of visual interest and makes your pumpkin look more professional. You can even use different carving tools to create textures, like using a potato peeler to create ridges or a small knife to create tiny dots. It’s all about experimenting and having fun. Remember, pumpkin carving is supposed to be a fun, creative process, so don't be afraid to try new things and make mistakes. That’s how you learn and improve. I’ve made my share of pumpkin carving mistakes, and I’ve learned something new every time. Embrace the mess and enjoy the process.
Hack | Description |
|---|---|
Petroleum Jelly/Vegetable Oil | Coat the inside to prevent drying out. |
Battery-Operated Tea Lights | Safer and come in different colors. |
Vary Carving Depths | Create a 3D effect. |
Dry-Erase Marker | Draw your design first, easy to erase if you mess up. |
Showcase of Simple Pumpkin Carving Ideas 2023

Showcase of Simple Pumpkin Carving Ideas 2023
so you've got the basic techniques down, and you're armed with your tools and stencils. Now, let's get to the fun part: checking out some awesome simple pumpkin carving ideas that are totally doable for 2023. I've been scouring the internet and my neighborhood, and let me tell you, people are getting creative, even with the simple stuff. We're talking beyond the basic jack-o'-lanterns, but nothing that's going to require a degree in pumpkin art. I'm seeing lots of cool geometric patterns, some super cute and spooky characters, and even some fun takes on pop culture. It's all about finding inspiration and putting your own spin on it. The best part is that you don't need to be a master artist to make any of these designs work. It's all about the execution and a little bit of imagination. So, get ready to be inspired, and maybe even steal a few ideas for your own pumpkins!
One trend I've been loving is the use of minimalist designs. Instead of trying to carve out intricate details, people are focusing on simple shapes and patterns that create a big impact. Think bold lines, geometric shapes, and even just a few well-placed holes. It's amazing how effective a simple design can be when done well. Another cool idea is to use different sized drill bits to create a pattern of holes, almost like a constellation. It's super easy, but it looks really sophisticated. And if you're not feeling like carving at all, you can always just paint your pumpkin. There are tons of cool paint designs out there, from ombre effects to chalkboard paint, where you can write a spooky message. I even saw one pumpkin that was covered in glitter, and it was absolutely dazzling. The possibilities are endless, so don't be afraid to think outside the box and make your pumpkin truly unique.
Idea | Description |
|---|---|
Geometric Patterns | Simple shapes like squares, circles, and triangles. |
Minimalist Designs | Focus on bold lines and negative space. |
Constellation Patterns | Use drill bits to create a pattern of holes. |
Painted Pumpkins | Use paint to create colorful and unique designs. |
I've also noticed a lot of people are using stencils to create adorable characters. You can find stencils of all sorts of things, from friendly ghosts and cute bats to popular cartoon characters. It's an easy way to add some personality to your pumpkin without needing to be a professional artist. I've seen some really cute designs that are perfect for kids, but even adults are getting in on the fun. One year, I carved a pumpkin with a stencil of a popular video game character, and it was a big hit with all my friends. It was easy, but it looked like I had spent hours on it. That’s the beauty of stencils, they make it easy to be creative. Another cool idea is to use a stencil to create a silhouette design, where you carve around the outside of the design, leaving the center intact. It creates a really striking effect.
And let's not forget about the classic spooky designs. There are tons of simple ways to create a scary pumpkin without going overboard. Think jagged teeth, crooked eyes, and maybe a few well-placed scars. You can even use a stencil to create a spooky spider or bat design. I've seen some really creative designs that use different depths of carving to create a creepy, three-dimensional effect. It's all about adding a little bit of visual interest to make your pumpkin stand out. Remember, it's all about having fun and experimenting. Don't be afraid to try new things and make mistakes. That's how you learn and improve. And who knows, you might just come up with the next big pumpkin carving trend.
"Creativity is intelligence having fun." - Albert Einstein (He probably carved a pumpkin or two)
Wrapping Up Your Simple Pumpkin Carving Adventure
So, there you have it – a bunch of easy peasy ways to get your pumpkin carved and ready for Halloween. Remember, it's not about perfection; it's about having fun and maybe scaring a few neighborhood squirrels. Whether you went with a classic face, a silly ghost, or even a polka-dotted pumpkin, you've officially conquered the carving challenge. And hey, if things got a little messy, that's all part of the fun, right? Now, go forth and proudly display your spooky creation. You’ve nailed the simple pumpkin carving ideas for 2023; until next year, happy haunting!