Table of Contents
Halloween is just around the corner, and what's more fun than carving pumpkins? If you're like me, you might want to get the kids involved, but the thought of intricate designs can be a bit daunting. That's where simple pumpkin carving face ideas come to the rescue! Forget the complicated patterns and scary monsters, we're talking about easy-peasy faces that even the littlest hands can help create. This article is your guide to making pumpkin carving a blast for the whole family. We'll explore some super simple face ideas, talk about the right tools to use so everyone stays safe, and walk through a step-by-step process to make carving a breeze. Plus, we’ll share some tips to turn it into a fun family activity you’ll remember for years. So, grab your pumpkins, and let's get carving some simple, but awesome, faces!
Easy Pumpkin Face Ideas for Little Hands
Easy Pumpkin Face Ideas for Little Hands
Classic Smiles and Goofy Grins
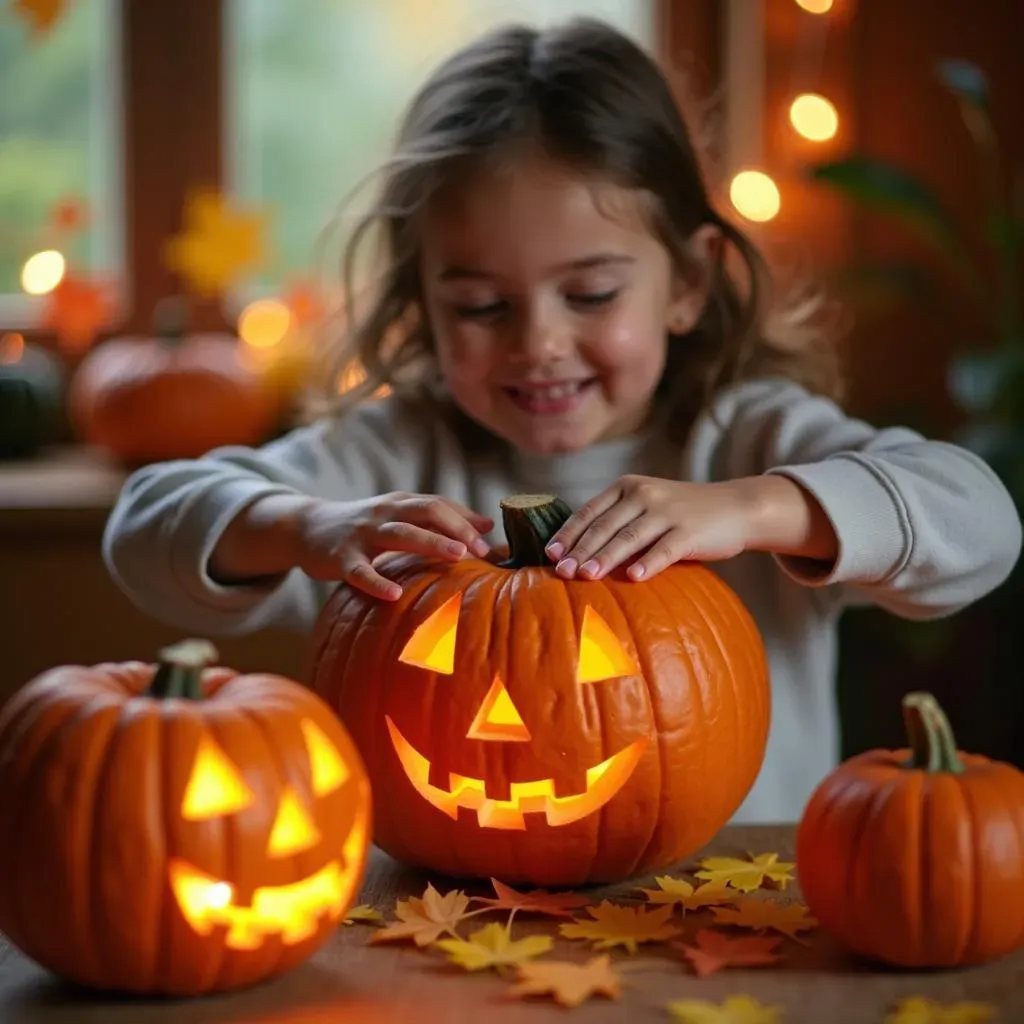
Let's be honest, the best pumpkin faces are the ones that make you chuckle. For little ones, big, simple shapes are the way to go. Think classic triangle eyes and a wide, toothy grin. You don't need to be an artist; in fact, the goofier, the better! Instead of trying for perfect symmetry, embrace the wonkiness. A slightly crooked smile or eyes that are a bit mismatched? That's pure charm right there. You can even use cookie cutters to trace out shapes if you're feeling fancy, but freehand is totally acceptable too.
Another fun idea is to create a "silly face" pumpkin. Think zig-zag mouths, circle eyes, or even a few extra "teeth" made from small triangle cutouts. The key is to keep it simple and let your kids' imaginations run wild. The best part about these easy designs? They're quick to carve, which is great for little ones who might not have the longest attention spans. It's all about having fun, not creating a masterpiece, so don't sweat the small stuff.
Simple Shapes, Big Impact
Sometimes, the simplest designs are the most effective. Instead of trying to carve out detailed features, try using basic geometric shapes to create a face. Circles, squares, and triangles can be combined in different ways to make surprisingly expressive faces. For example, two large circles for eyes and a rectangle for a mouth creates a cute and friendly look. You can also cut out smaller shapes and arrange them on the pumpkin to create fun designs, almost like building blocks.
Don't underestimate the power of dots! You can use a drill or a small knife to poke holes in your pumpkin to make polka-dot eyes or a dotted mouth. This is a great option for younger kids who might not be ready to use knives. You can also use cookie cutters to create fun shapes like stars, hearts, or moons and then carve around them. The possibilities are endless, and the best part is that these designs are easy for little hands to help with. It's all about getting creative and having fun with the process.
Shape | Face Element | Description |
|---|---|---|
Circles | Eyes | Use different sizes for funny effects |
Triangles | Eyes, Nose, Teeth | Easy to cut and arrange |
Squares/Rectangles | Mouth | Can be straight or jagged for different looks |
Dots | Eyes, Mouth, Details | Use a drill or small knife for easy poking |
Simple Tools for Safe Pumpkin Carving
Simple Tools for Safe Pumpkin Carving
Kid-Friendly Carving Kits
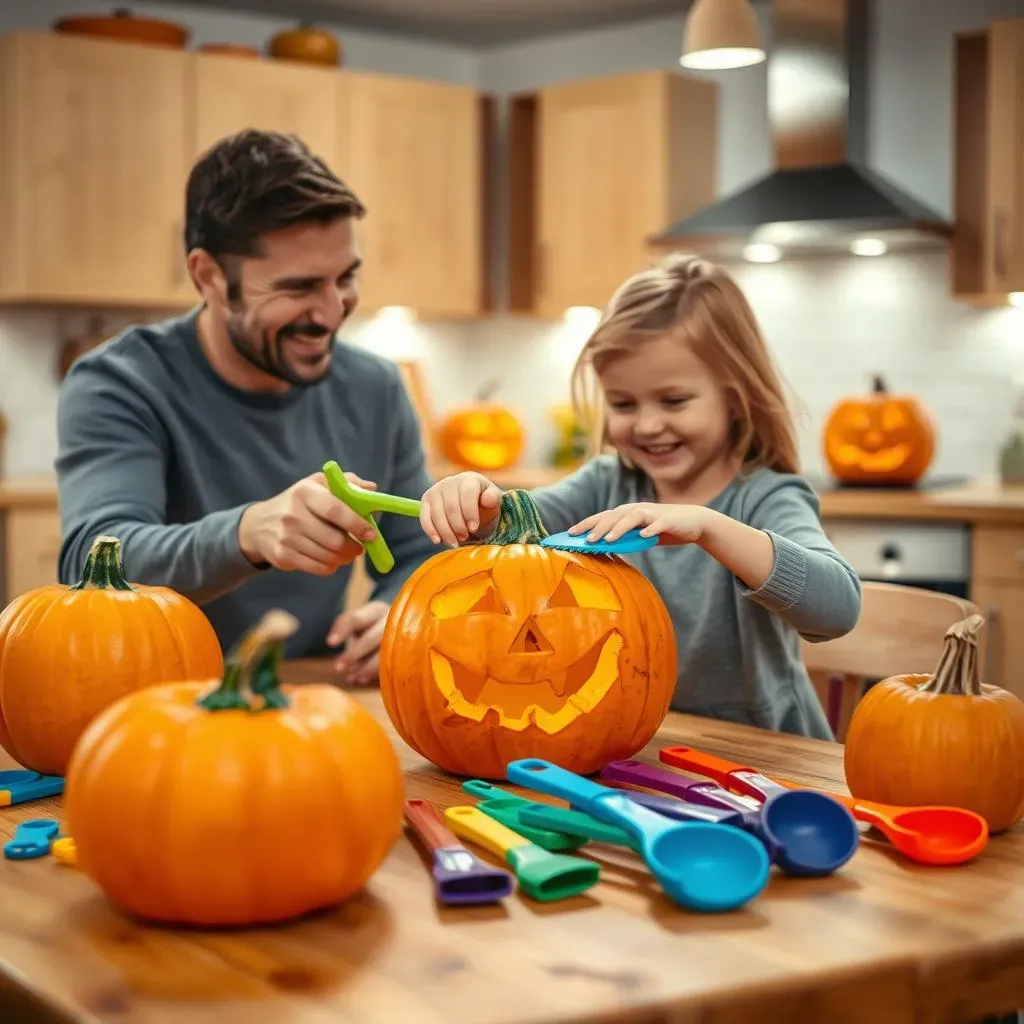
let's talk tools. Forget those giant, scary knives you see in horror movies. For kids, we need something much safer. Kid-friendly carving kits are a lifesaver. They usually come with small, plastic saws that are less likely to cause accidents, and they are much easier for little hands to handle. These kits often include other helpful tools like scoops for getting the pumpkin guts out, and small pokers for transferring patterns. The best part? They're designed with safety in mind, so you can relax a little bit while the kids get creative.
When picking a kit, look for ones with blunt tips and sturdy handles. Avoid the super cheap kits where the tools might break easily. You want tools that will last for the whole carving session and not fall apart halfway through. A good kit will make the whole experience smoother and less stressful for everyone. Remember, safety first, then fun!
Scoops and Spoons: The Guts Brigade
Before any carving begins, you gotta get rid of the pumpkin's insides. This is where scoops and spoons come in handy. A metal ice cream scoop is great for getting the big chunks out, but a sturdy plastic spoon works well too. I've found that using a plastic scraper, like the kind you get with cake decorating sets, can really help get all the stringy bits off the sides. It's like a little pumpkin spa treatment, and the kids usually love getting their hands dirty with this part.
Don’t underestimate the power of a good, old-fashioned spoon. It might seem simple, but it’s perfect for scooping out the last bits of seeds and pulp. And let’s be honest, that’s half the fun for kids, right? It's messy, it's gooey, and it's a necessary step before the real carving can start. Plus, you can save those seeds for roasting later – a delicious bonus!
Tool | Use | Safety Tips |
|---|---|---|
Plastic Saw | Cutting shapes | Choose blunt tips and sturdy handles |
Scoop/Spoon | Removing pulp and seeds | Use metal for big pieces, plastic for details |
Poker/Awl | Transferring patterns | Use under adult supervision |
Small serrated knife | For adult use only | Use for more intricate work |
Adult Supervision and Safety Tips
this is super important: adult supervision is a must. Even with kid-friendly tools, there's still a risk of accidents. Make sure an adult is always present to guide and help with the carving process. It’s not about hovering; it’s about keeping everyone safe and making sure the little ones don’t get carried away. A good tip is to have the adults do the more detailed parts or tricky cuts, while the kids can focus on the easier parts.
Another thing: always carve on a stable surface, like a big table. Don't try to carve on the floor or in your lap. And make sure the area is well-lit. This way, everyone can see what they’re doing and avoid any mishaps. Remember, carving pumpkins is supposed to be fun, not a trip to the ER. By taking a few simple precautions, you can make sure everyone has a safe and happy carving experience. A good carving session is about teamwork, safety, and a little bit of mess!
StepbyStep: Creating a Simple Pumpkin Face

StepbyStep: Creating a Simple Pumpkin Face
Prep Your Pumpkin
so you've got your pumpkin, your tools, and your eager little helpers. First things first, let's prep that pumpkin! Start by drawing a circle around the stem on top of the pumpkin. This will be your lid. Now, grab your adult-only knife and carefully cut along that line, making sure to angle the knife inwards slightly. This way, the lid won’t fall inside when you put it back. Once the lid is off, the real fun starts – scooping out all the gooey insides. Make sure to get all the seeds and stringy bits out. The cleaner the inside, the easier it will be to carve. I like to use a big spoon and scrape the sides really well. It's a bit messy, but that's part of the fun, right?
After the inside is clean, it’s time to decide on your design. If you're going for a classic face, draw your eyes, nose, and mouth on the pumpkin with a marker. Don't worry about making it perfect. Remember, simple is the name of the game. If you want to use a template, you can trace it onto the pumpkin using a poke tool to make dotted lines, making it easy to follow when you start cutting. Make sure your design is big and simple so it’s easy for little hands to follow, and that's the prep work done! You're now ready to move on to the exciting part – the carving.
Carving the Face
Now for the main event, carving the face! If you’re using a plastic saw, let the kids have a go at the outlines you’ve drawn or traced. Remember, these are kid-friendly saws, so they’re not going to cut through like a hot knife through butter, and that’s a good thing. It teaches patience and precision. When the kids are cutting, make sure they're using slow, controlled motions. It's not a race. If they’re having trouble, that’s where you jump in and help. This is where teamwork really shines. For any tricky bits, or if you’re using a small serrated knife, the adults should take over. I usually do the fine cuts, while the kids watch and give me direction.
Once you’ve carved out all the shapes, gently push out the pieces and clean up any rough edges. If you're using a poke tool, you can poke out small details. And there you have it, a simple pumpkin face, ready to light up the night! If you want to add a bit of sparkle, you can use some craft paint or glitter around the edges of the cut-outs. But honestly, the simplicity is what makes these faces so charming. Once the carving is done, it's time to put a candle or LED light inside, pop the lid back on, and admire your work.
Step | Action | Tips |
|---|---|---|
1 | Cut the lid | Angle inwards, adult supervision |
2 | Scoop out insides | Use a spoon/scraper |
3 | Draw/trace design | Keep it simple, use a marker |
4 | Carve the face | Slow, controlled motions |
5 | Clean up edges | Push out pieces gently |
Making Pumpkin Carving a Fun Family Activity
Making Pumpkin Carving a Fun Family Activity
Theme Nights and Costume Carving
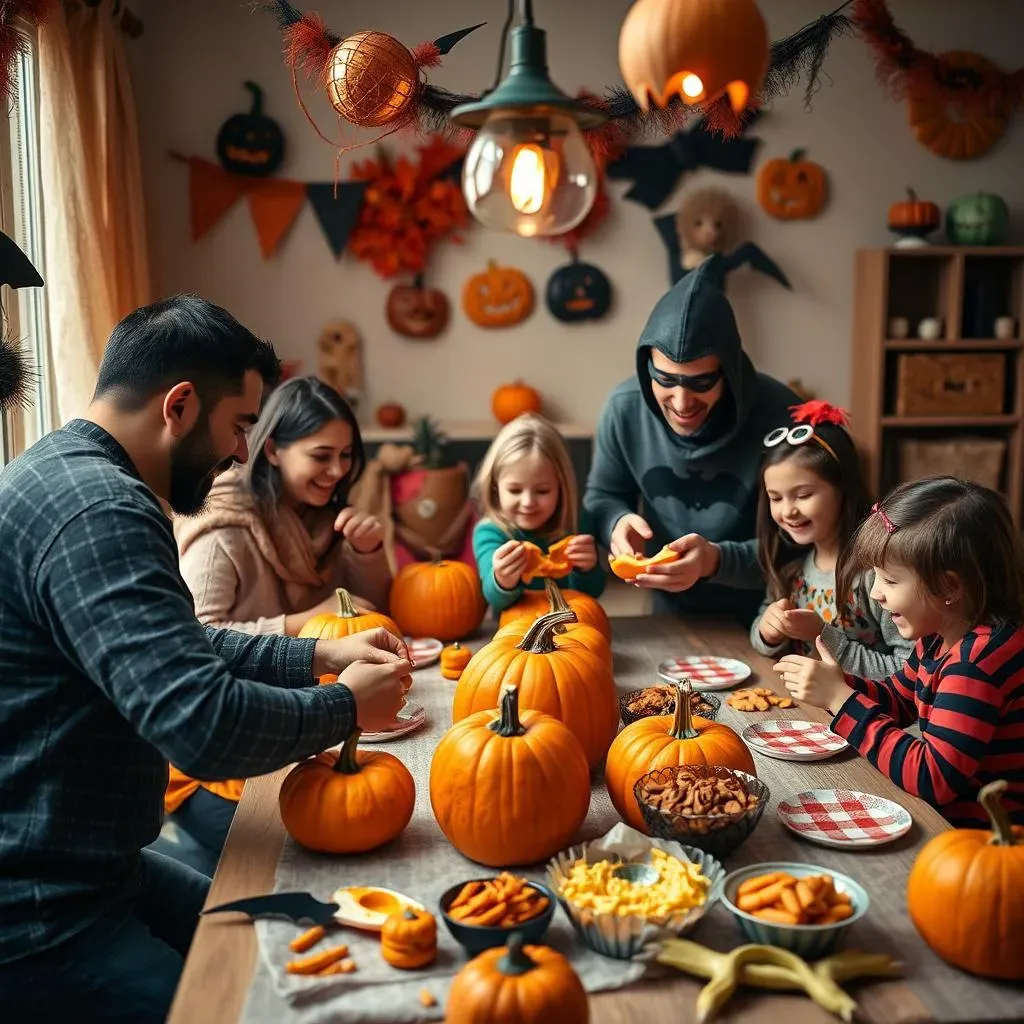
so you've got the basics down, but how do you make pumpkin carving a truly memorable family event? I say, let’s turn it into a full-blown theme night! Why not pick a theme, like "funny faces" or "spooky characters"? You could even have everyone dress up in costumes related to the theme. Imagine carving pumpkins while dressed as pirates or silly monsters – it adds a whole new level of fun and silliness to the mix. Themed snacks can be part of the fun too, like spooky-shaped cookies or pumpkin spice everything (because, why not?). It's about making the whole evening feel special and creating those moments that you’ll all look back on with a smile. Don't be afraid to go all out; the more over-the-top, the better!
Another thing that works really well is to make it a competition. Not a serious, stress-inducing competition, but a lighthearted "who can make the goofiest face" type of thing. You can even have a vote at the end and give out silly prizes like "Most Creative Pumpkin" or "Funniest Face." It's all about getting everyone involved and having a good laugh together. The goal is to create a positive and engaging atmosphere where everyone feels excited to participate. So, let's ditch the pressure and focus on the fun!
Music, Snacks, and Storytelling
Let's set the mood! Good music can make all the difference. Put on a playlist of fun Halloween tunes or some upbeat background music. It keeps the energy up and makes the carving process more enjoyable. And, of course, you can’t forget the snacks. Have some pumpkin-themed treats ready or even a simple bowl of popcorn. The key is to keep everyone fueled and happy. I've found that when everyone is munching on something tasty, the carving session goes much smoother and we just have a really good time together. It’s about creating a cozy and festive atmosphere, where everyone feels relaxed and ready to create!
And here’s a little secret: storytelling can be a great addition to your carving night. While you’re carving, you can share some funny Halloween stories, read spooky tales, or even just talk about your favorite Halloween memories. It adds a personal touch and makes the whole experience more meaningful. It’s a great way to connect with your kids and make lasting memories. The combination of music, food, and stories creates an atmosphere of fun and togetherness, making pumpkin carving more than just a task—it becomes a cherished family tradition. So, let's get those tunes on, the snacks out, and the stories flowing!
Element | Description | Why it works |
|---|---|---|
Theme Nights | Pick a theme, costumes, snacks | Adds a unique twist, more engaging |
Friendly Competition | Silly awards, lighthearted games | Encourages participation, fun for all |
Music | Upbeat tunes, Halloween playlists | Sets the mood, keeps energy high |
Snacks | Pumpkin treats, popcorn | Keeps everyone happy and fueled |
Storytelling | Share tales, memories | Adds personal touch, creates memories |
Capture the Memories
Don’t forget to capture all the fun! Take lots of photos and videos of your carving night. These memories are something you’ll want to look back on for years to come. You can even set up a little photo booth with some Halloween-themed props. It's a fun way to document everyone's creative efforts and the silly moments that happen along the way. I love looking back at old photos and seeing how everyone has grown and changed over the years. It's a great reminder of all the fun times we've had together as a family.
And here’s another idea: after the carving is done, why not have everyone write down their favorite part of the night? You can put these notes in a jar and read them next year. It’s a sweet way to reflect on the memories you've made. It’s the little details that make these moments special. The photos and notes create a tangible reminder of all the laughter, creativity, and family bonding that pumpkin carving brings. So, grab your cameras and get ready to capture those precious memories!
Wrapping Up Your Simple Pumpkin Faces
So, there you have it! Creating simple pumpkin carving face ideas doesn't have to be a scary task. With a few easy designs, the right tools, and a little help, it can become a fun family tradition that everyone enjoys. The goal isn't perfection, it's about making memories and having a good time. Whether your pumpkin ends up with a goofy grin or a surprised expression, it's unique, it's yours, and it's ready to light up your Halloween night. Now, go get those pumpkins carved and have a spooktacular Halloween!