Table of Contents
Ready to make your Halloween a hoot? Forget those complicated, scary pumpkin carvings; this year, we're going for adorable with some simple owl pumpkin carving ideas. It’s easier than you think, and I promise, even if you’re not a master artist, you can totally nail these designs. We will start by getting your tools ready, followed by easy owl designs that anyone can do, then we'll walk through a step-by-step guide, making sure you don’t miss anything. Finally, we'll talk about how to show off your awesome owl creation. This guide is all about making pumpkin carving fun, not frustrating. So, grab your pumpkin, get your tools ready, and let’s create some cute, spooky magic together. No crazy artistic skills needed, just a little bit of patience and a lot of enthusiasm. Let's get carving!
Gather Your Tools for Simple Owl Pumpkin Carving
Gather Your Tools for Simple Owl Pumpkin Carving
Pumpkin Prep Essentials
so before we even think about carving an owl, we need to talk about the most important part: the pumpkin itself! First off, pick a pumpkin that’s not too soft. You want it to be firm so it can hold its shape when you start cutting. Give it a good tap, it should feel solid, like a mini-boulder. Also, make sure it has a flat bottom, this will save you a lot of headaches later when you're trying to get it to sit up straight. Before you start, give your pumpkin a wash to get any dirt off. Think of it as a spa day for your future owl.
Next, you'll need a good scooping tool. Forget those flimsy plastic things, I'm talking about a sturdy metal spoon, or better yet, an ice cream scoop. Those things are beasts for getting all the pumpkin guts out. You gotta get all that stringy stuff and seeds out to have a clean canvas to work with. Don’t be shy, really dig in there. And hey, if you're feeling adventurous, roast those seeds later for a snack!
Carving Tools Checklist
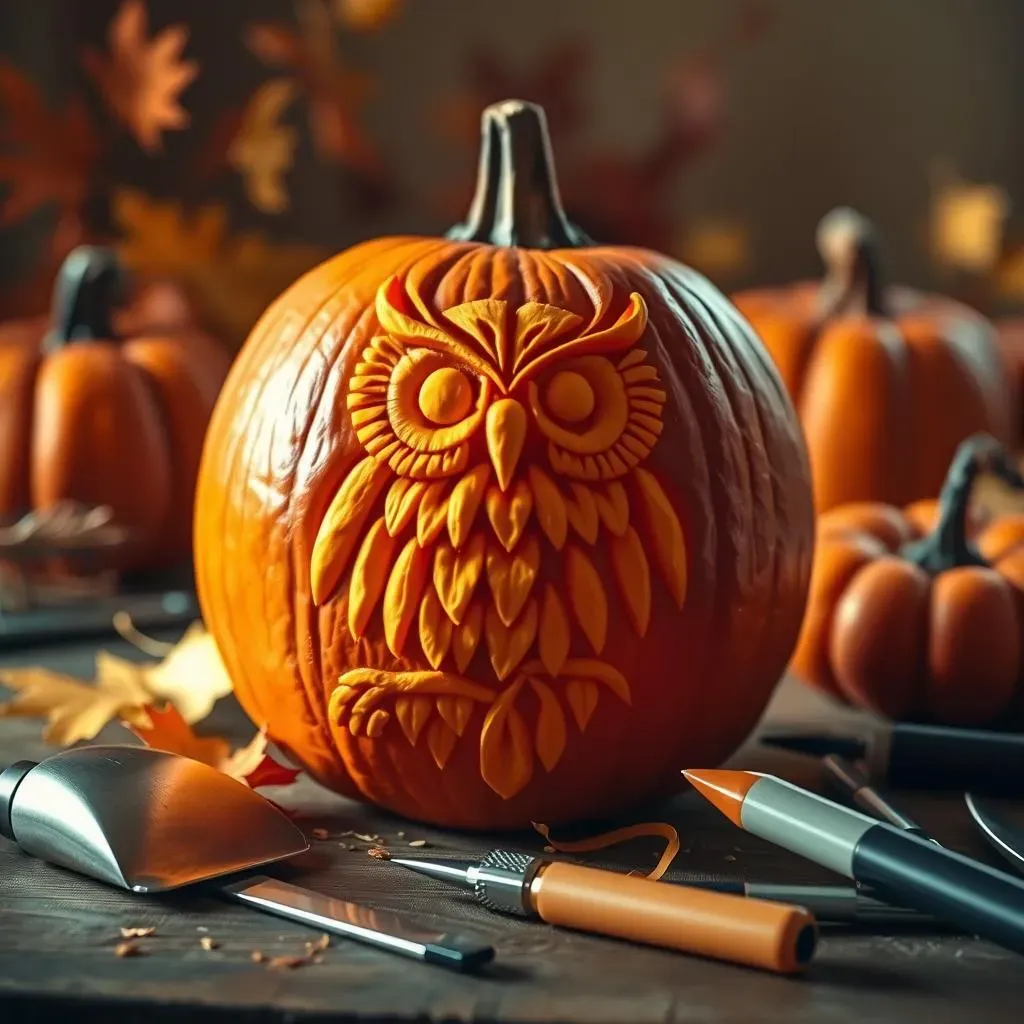
Now, for the fun part, the carving tools! You don’t need a fancy kit, just some basics that will get the job done. First, grab a thin marker, like a dry-erase marker, to sketch out your owl design. This makes it easy to fix mistakes. For the actual carving, you'll want a small, serrated knife for the bigger cuts. Something like a paring knife works great. And for the smaller details, a thin, pointy tool is your friend. You can even use a clay sculpting tool if you have one. It's all about precision with these little details. Safety first, though! Keep a first-aid kit nearby and be sure to carve on a flat, stable surface.
Tool | Purpose |
|---|---|
Firm Pumpkin | The canvas for your owl |
Sturdy Spoon or Ice Cream Scoop | Gutting the pumpkin |
Thin Marker | Sketching the design |
Small Serrated Knife | For bigger cuts |
Pointy Tool | For small details |
Safety First, Carving Always
Before you get all excited and start hacking away at that pumpkin, remember safety! Carving is a fun activity, but it involves sharp tools, so we need to be careful. Always make sure an adult is around, especially if you are young. Use a slow and controlled movement. It’s not a race, and we’re aiming for a nice owl, not a pumpkin massacre. And most importantly, if you are tired, take a break. You can always come back to it later. There’s no need to rush, we have got all the time in the world to get this owl looking its best! Remember, safety first then art!
Easy Owl Designs for Pumpkin Carving
Easy Owl Designs for Pumpkin Carving
Simple Circle Owl
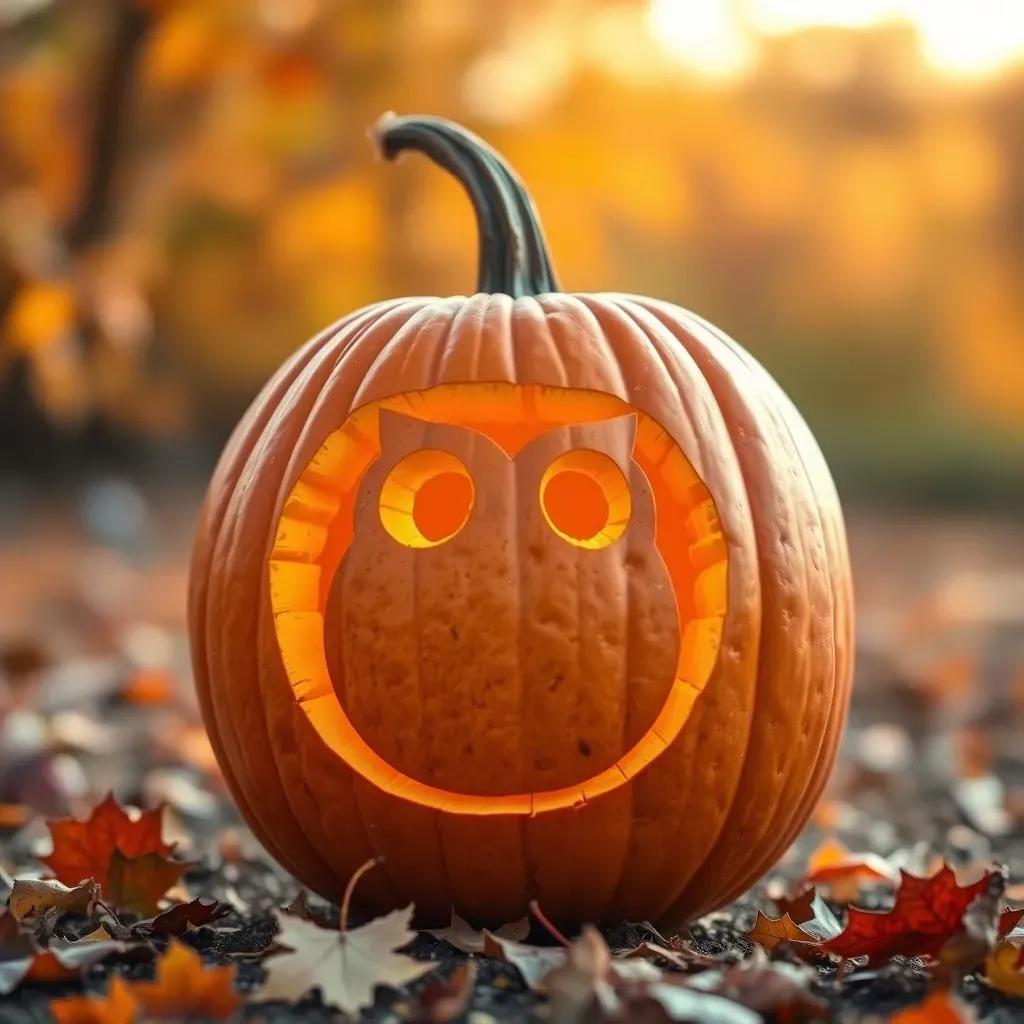
so you wanna carve an owl but are not trying to become a pumpkin Picasso? I got you. Let's start with the super simple circle owl. Imagine a big circle for the body and two smaller circles for the eyes. That's basically it! You carve out the eye circles and maybe a little triangle for the beak. It's like the basic shapes you learned in kindergarten, but now it's on a pumpkin. This design is perfect if you are new to carving, or if you just want something quick and easy. No need to overthink it; just let your inner circle lover shine!
Triangle Tummy Owl
Next up, we've got the triangle tummy owl. This one is still super easy, but it adds a little more character. You still have your basic circle for the owl’s face, but now you add a triangle for the tummy. Then, two smaller circles for the eyes, a tiny triangle for the beak, and bam! You’ve got an owl with a cute, pointy belly. You can add a couple of little triangles above the eyes for eyebrows or even some small slits for feathers. It’s all about keeping it simple, but with a little flair. This is a great way to make your owl stand out without needing complicated carving skills. It is like adding a little bit of spice to a simple meal, just enough to make it interesting!
Design | Description | Difficulty |
|---|---|---|
Simple Circle Owl | Basic circles for body and eyes, triangle beak. | Very Easy |
Triangle Tummy Owl | Circle face, triangle body, circle eyes, triangle beak. | Easy |
Googly Eye Owl
Alright, for our last easy design, let's get a little goofy with the googly eye owl. This is where you can get creative and use some fun materials. Start with a simple circle or oval for the owl’s face. Then, instead of carving out the eyes, you're going to leave them as they are and use googly eyes! You can buy them at any craft store. This is a great way to make your owl look extra silly and cute. Add a small triangle for the beak, and maybe even some drawn-on feathers with a marker. It’s all about having fun and not taking it too seriously. I mean, who doesn’t love a good googly eye? It's like giving your pumpkin a personality boost with a touch of silliness!
StepbyStep Guide to Simple Owl Pumpkin Carving

StepbyStep Guide to Simple Owl Pumpkin Carving
Draw Your Owl Design
Alright, so you've got your pumpkin, it's all clean and gutted, and you're ready to go. Now, before you start hacking away, let's get our design down on the pumpkin. Grab that thin marker we talked about and lightly sketch out your owl. If you are doing the circle owl, just draw a big circle and two smaller ones for the eyes, a triangle for the beak. If you are going for the triangle tummy owl, draw a circle, then a triangle underneath, add circles for the eyes, and a little triangle for the beak. It doesn't have to be perfect, this is just a guide. Remember, it's a pumpkin, not a museum piece. And if you mess up, no biggie, just wipe it off and try again. That's why we use a dry erase marker. It's all about the process of creating something fun, not about making a masterpiece.
Don't overthink it, just get the basic shapes down. If you are doing the googly eye owl, draw a circle or an oval for the face and skip the eye circles, we will add those later. You can add some simple lines for feathers or little details if you want, but the simpler, the better. The key here is to make sure you can see the lines clearly, so when you start carving, you know where to go. It’s like drawing a map for your carving adventure, making sure we don’t get lost in the pumpkin wilderness. After you're done with the sketch, take a step back, look at it, and make sure you're happy with your design. Once you like it, it's time to grab your knife.
Carve with Care
Now for the main event, the carving! Grab your small serrated knife and, with slow and controlled movements, start following the lines you drew. Remember, it’s not a race, so take your time. Start with the bigger parts of the design, like the eyes or the tummy, if you are doing the triangle tummy owl. You are not trying to cut straight through the pumpkin, you are trying to remove the outer layer carefully. This will make the edges look cleaner. For the smaller details, like the beak or any little feather markings, use your pointy tool. It's like doing surgery on a pumpkin, you need to be precise and careful. Always make sure you are cutting away from yourself and be sure to keep your other hand away from the blade.
If you are doing the googly eye owl, skip carving the eyes and just focus on the other parts of the design. After you’ve carved out the main parts, take a step back and see how it looks. If there are any rough edges, smooth them out with your knife or pointy tool. And if you are feeling extra creative, you can add some extra details, like small triangles or slits for feathers. It's all about bringing your owl to life. Once you are happy with your carving, give it a good clean to get rid of any pumpkin bits. Now you are ready to add your googly eyes. Just stick them on where the eyes should be, and bam! Your simple owl pumpkin is ready to go.
Step | Action |
|---|---|
1 | Sketch your owl design on the pumpkin with a thin marker. |
2 | Carefully carve along the lines, starting with larger areas. |
3 | Use a pointy tool for small details. |
4 | Attach googly eyes for the googly eye owl. |
Displaying Your Simple Owl Carved Pumpkin
Displaying Your Simple Owl Carved Pumpkin
Choosing the Perfect Spot
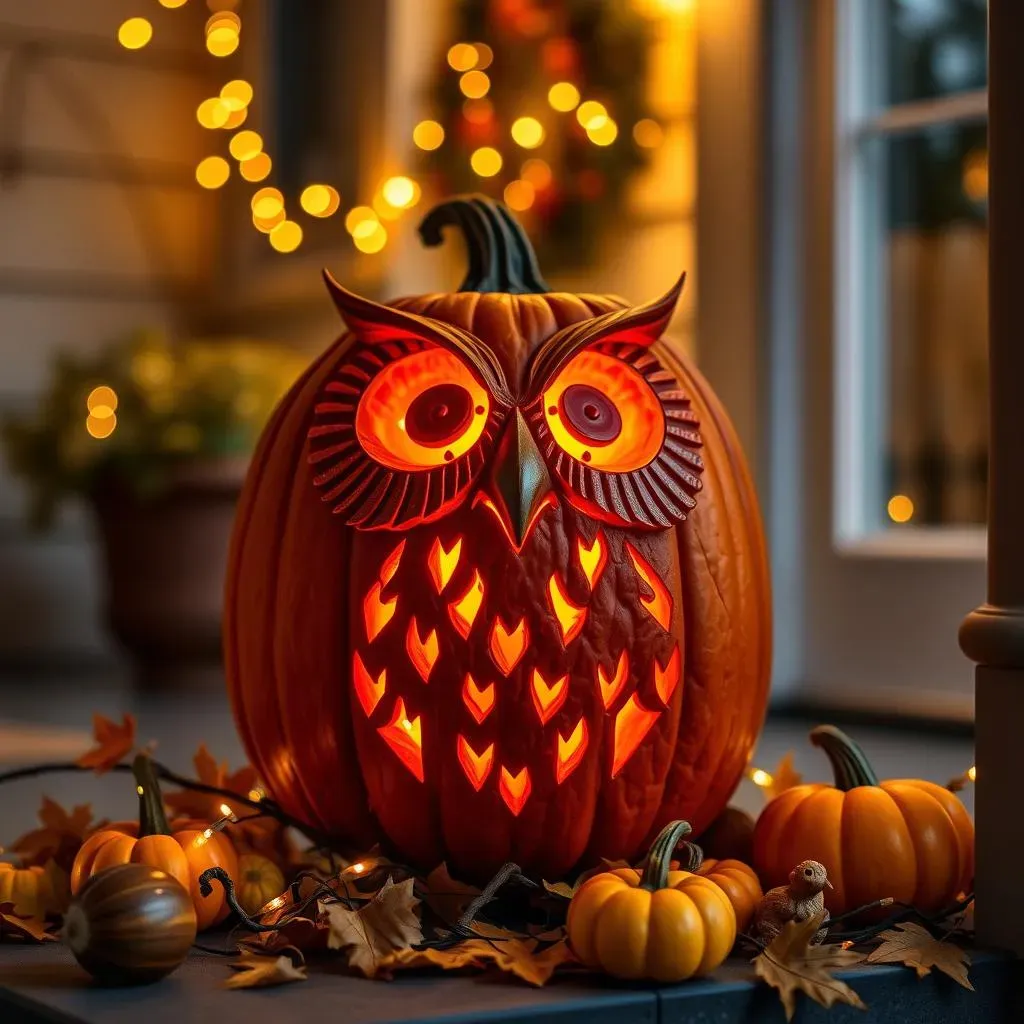
so you've put in the work, carved your super cute owl, and now you're wondering where to show it off? First things first, think about where it'll get the most attention! A front porch is a classic choice, where everyone can see it as they walk by. You could also put it on a table near your front door, so it greets people as they come in. If you have a garden or a backyard, that’s also a great place to display your owl, especially if you're going for a spooky vibe. Just make sure it's somewhere flat and stable, so it doesn’t fall over. And remember to keep it away from anything that might be flammable, especially if you're using candles inside the pumpkin. We're going for spooky, not hazardous!
Think about the lighting too, you know? If you’re putting it outside, a porch light might be enough, but if you want to make it extra special, you could use a small spotlight to really show off your carving skills. Indoors, you can place it near a window or on a mantle where the light catches it nicely. Consider the overall look and feel of your space. You want your owl to fit in and enhance the ambiance, not stick out like a sore thumb. It’s all about finding that sweet spot where your owl can shine!
Lighting Up Your Owl
Now let’s talk about lighting, because a carved pumpkin without light is like a stage without a spotlight – it's just not going to have the same impact. The old-school way is to use a candle, and it definitely gives that classic, flickering effect. But if you’re worried about fire hazards, there are plenty of alternatives. Battery-operated tea lights are a great option, they’re safe and they come in all sorts of colors. You can even get little LED lights that change colors or flicker to mimic a real candle. If you are feeling fancy, you can use a string of fairy lights. It gives a warm glow and makes your owl look magical. Just make sure whatever light you choose fits inside the pumpkin and doesn’t get too hot.
It’s also cool to experiment with different colors. A white light will make your owl look classic and crisp, while a colored light can add a playful or spooky touch. You can even use multiple lights for a more dramatic effect. The key is to make sure the light isn’t too bright or too dim, you want it to highlight your carving without overpowering it. Think of it as the final touch that brings your owl to life.
Light Source | Pros | Cons |
|---|---|---|
Candle | Classic look, flickering effect. | Fire hazard, needs supervision. |
Battery-Operated Tea Lights | Safe, easy to use, various colors. | May not be as bright as a candle. |
LED Lights | Safe, long-lasting, color options. | May require batteries. |
Fairy Lights | Warm glow, magical effect. | May need to be arranged carefully. |
Adding Extra Flair
Alright, so your owl is lit up, it's in a great spot, but why stop there? Let’s add some extra flair to make it even more awesome! You can place your owl on a bed of fall leaves, it’s a simple but effective way to give it a seasonal touch. Or, you could scatter some small gourds or mini pumpkins around it for a cute, festive display. If you have some spooky props, like fake spiderwebs or plastic skeletons, you can use those to create a fun, Halloween scene. The idea is to make your owl part of a bigger picture, not just a standalone piece. You know, it's like dressing up your owl for a party, and who doesn't love a good party?
You can also get creative with the area around the pumpkin. Maybe you could put some glow-in-the-dark paint on the leaves, or add some small Halloween figurines. You can even create a little backdrop with a piece of fabric or some branches. The possibilities are endless! The key is to have fun and let your creativity shine. Remember, it’s your owl, so you can do whatever you want with it. It’s about making it unique and special. So, go ahead, add that extra sparkle and make your owl the star of the show!
Your Owl-some Creation Awaits
So, there you have it! Creating a simple owl pumpkin carving doesn't have to be a scary challenge. With the right tools, some easy-to-follow designs, and a bit of patience, you can make a super cute and spooky owl that'll make your porch the envy of the neighborhood. Remember, it’s all about having fun, not about perfection. Now that you've got the skills, go ahead and make your own owl masterpiece, and don't forget to show it off! Happy carving and Happy Halloween!