Table of Contents
Halloween is just around the corner, and what better way to celebrate than by carving a jack-o'-lantern? Carving pumpkins is a quintessential Halloween tradition, but let's be honest, those same old triangle eyes and toothy grins can get a little… predictable. If you're yearning to break free from the basic and explore some simple but cool pumpkin carving ideas, you've come to the right place!
Gear Up: Essential Tools for Simple Pumpkin Carving
Gear Up: Essential Tools for Simple Pumpkin Carving
The Pumpkin Prep Kit
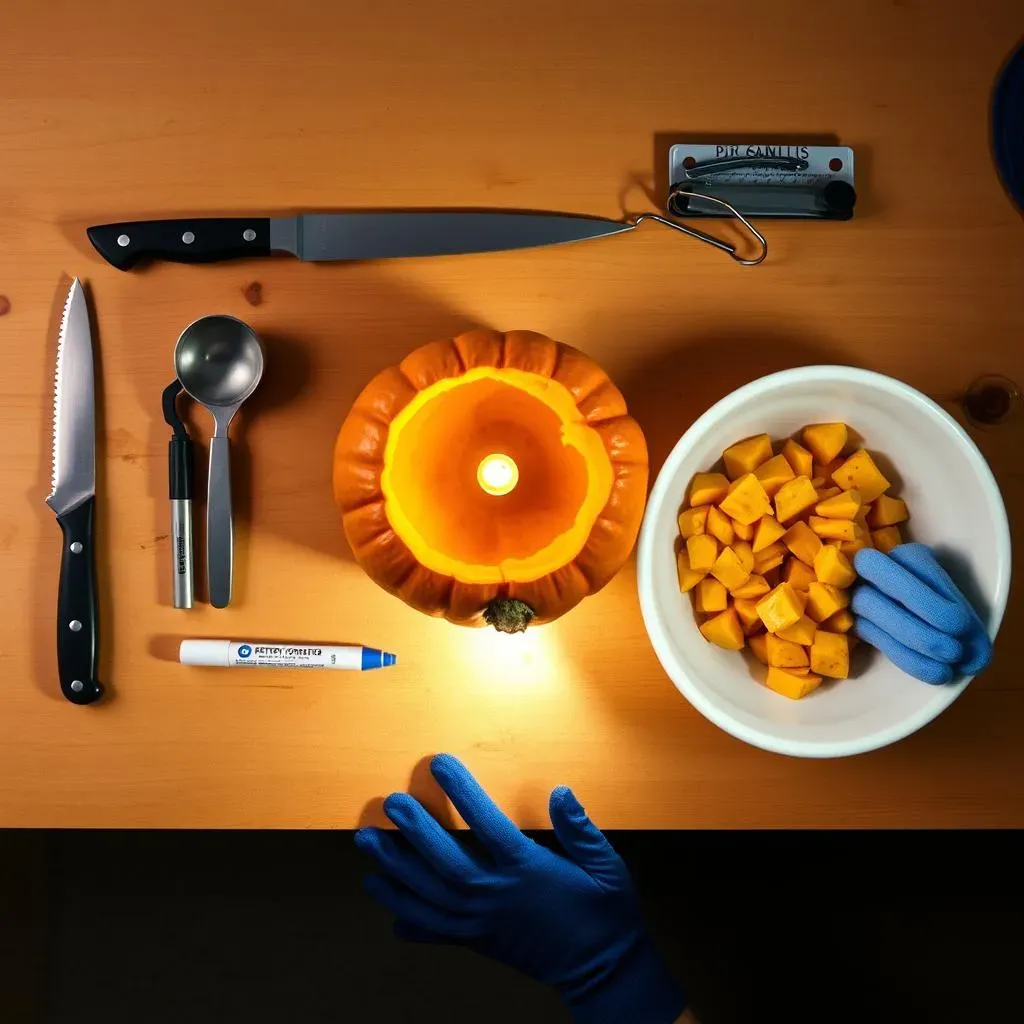
Before you even think about carving, you'll need the right tools to wrangle that gourd. Forget flimsy plastic knives – we're aiming for precision and safety here. First up, a good serrated knife is your best friend for cutting open the top (or bottom, if you're feeling rebellious). A sturdy spoon or ice cream scoop is essential for gutting the pumpkin and scraping the walls clean. Nobody wants stringy pumpkin guts messing with their masterpiece!
Consider a pumpkin carving kit. These kits usually come with small saws, gouges, and pokers that are perfect for detail work. They're also safer for kids (with adult supervision, of course) than a big kitchen knife. Don't forget a large bowl for all the pumpkin guts – you can roast the seeds later for a tasty snack. And finally, have some paper towels or a damp cloth handy for wiping down your tools and workspace. Trust me, it gets messy!
Carving Essentials: Precision is Key
Once your pumpkin is prepped, it's time to get down to the nitty-gritty of carving. A variety of tools can help you achieve different effects. Small, thin saws are ideal for intricate designs and fine details. Gouges and chisels can be used to create texture and depth. And don't underestimate the power of a simple poking tool for creating dots, lines, and other small details.
If you're planning on using stencils, transfer paper and a tracing wheel can be helpful for transferring the design onto the pumpkin's surface. A dry-erase marker is also a great option for drawing freehand designs. And finally, a good light source is essential for seeing what you're doing – a headlamp or a bright desk lamp will do the trick.
Finishing Touches & Safety First
Once your carving is complete, there are a few finishing touches you can add to make it really stand out. Petroleum jelly can be applied to the cut edges to help prevent them from drying out and cracking. A battery-operated candle or LED light is a safer and more convenient alternative to a traditional flame candle. And finally, consider displaying your jack-o'-lantern on a stable surface where it won't be easily knocked over.
- Safety Glasses: Protect your eyes from flying pumpkin bits.
- Gloves: Keep your hands clean and prevent blisters.
- First-aid kit: Just in case of any accidental cuts.
Safety should always be your top priority when carving pumpkins. Always carve in a well-lit area and on a stable surface. Use sharp tools with caution and always cut away from yourself. And never let young children carve pumpkins unsupervised.
From Goofy to Ghastly: Simple but Cool Pumpkin Face Ideas
From Goofy to Ghastly: Simple but Cool Pumpkin Face Ideas
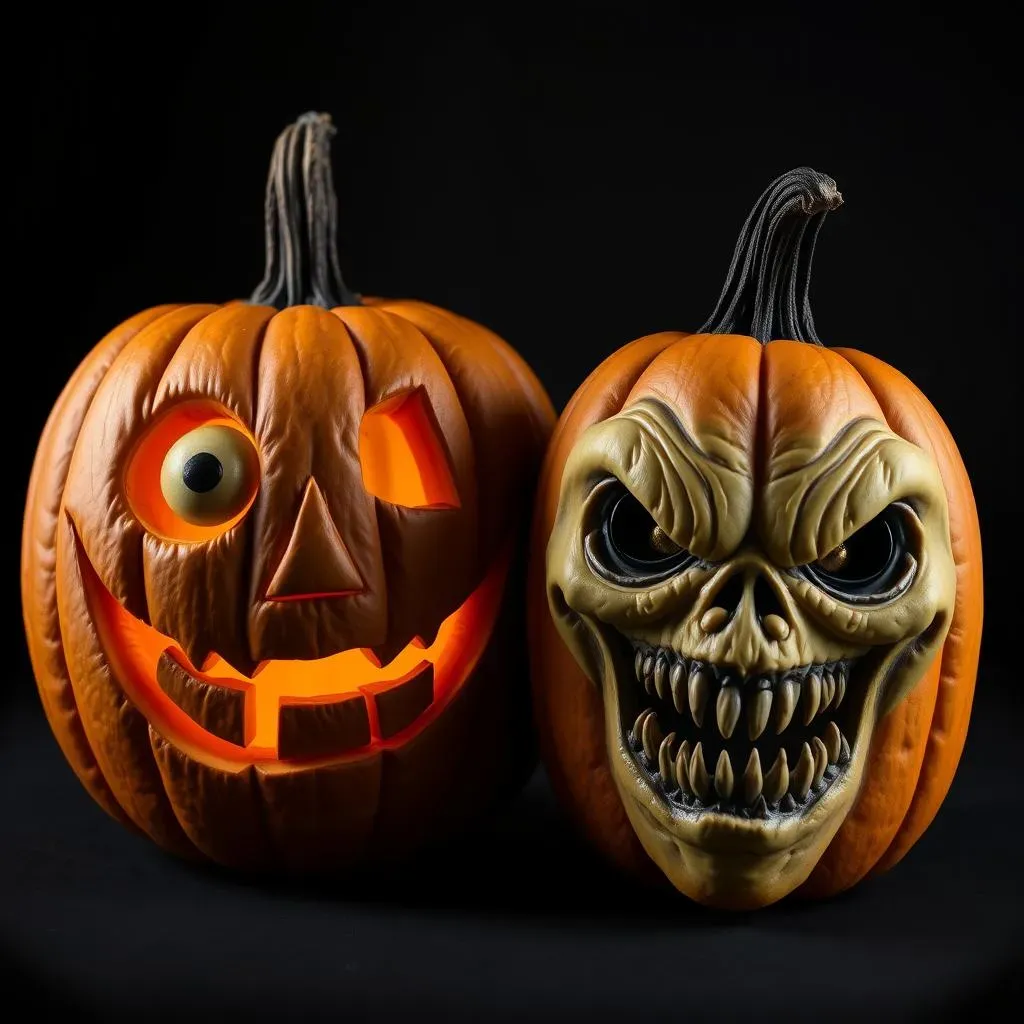
Alright, so you've got your pumpkin prepped and your tools ready. Now comes the fun part: deciding what kind of face to carve! Forget those boring, symmetrical grins – let's get creative! When it comes to simple but cool pumpkin face ideas, the possibilities are endless. Start with the classics, but give them a twist. Maybe your jack-o'-lantern has one giant eye instead of two, or a crooked smile that stretches from ear to ear. Asymmetry is your friend here – it adds character and a touch of the unexpected.
Think about exaggerating features. What about a pumpkin with huge, goofy buck teeth, or eyebrows that are perpetually raised in surprise? You could even try carving a monocle onto your pumpkin for a touch of sophistication. And don't be afraid to play with different shapes and sizes. Use cookie cutters to trace out fun shapes for eyes and mouths, or create your own stencils from cardboard. Remember, the goal is to have fun and let your imagination run wild!
Face Type | Description | Difficulty |
|---|---|---|
Classic Grin | Traditional smile with triangle eyes | Easy |
Goofy Grin | Asymmetrical smile with odd shapes | Easy |
Ghastly Grin | Sharp teeth and furrowed brows | Medium |
For a ghastlier look, think sharp angles and menacing expressions. A furrowed brow, jagged teeth, and deep-set eyes can transform your pumpkin from friendly to frightening in an instant. Try carving a snarl instead of a smile, or add some scars and stitches for a truly terrifying effect. You can also use different carving depths to create shadows and highlights, making your pumpkin face look even more three-dimensional. And don't forget the power of lighting! Experiment with different colors and intensities to create the perfect spooky ambiance.
Beyond the Basic Jacko'Lantern: Creative Pumpkin Carving Ideas
Beyond the Basic Jacko'Lantern: Creative Pumpkin Carving Ideas
Animal Kingdom Creations
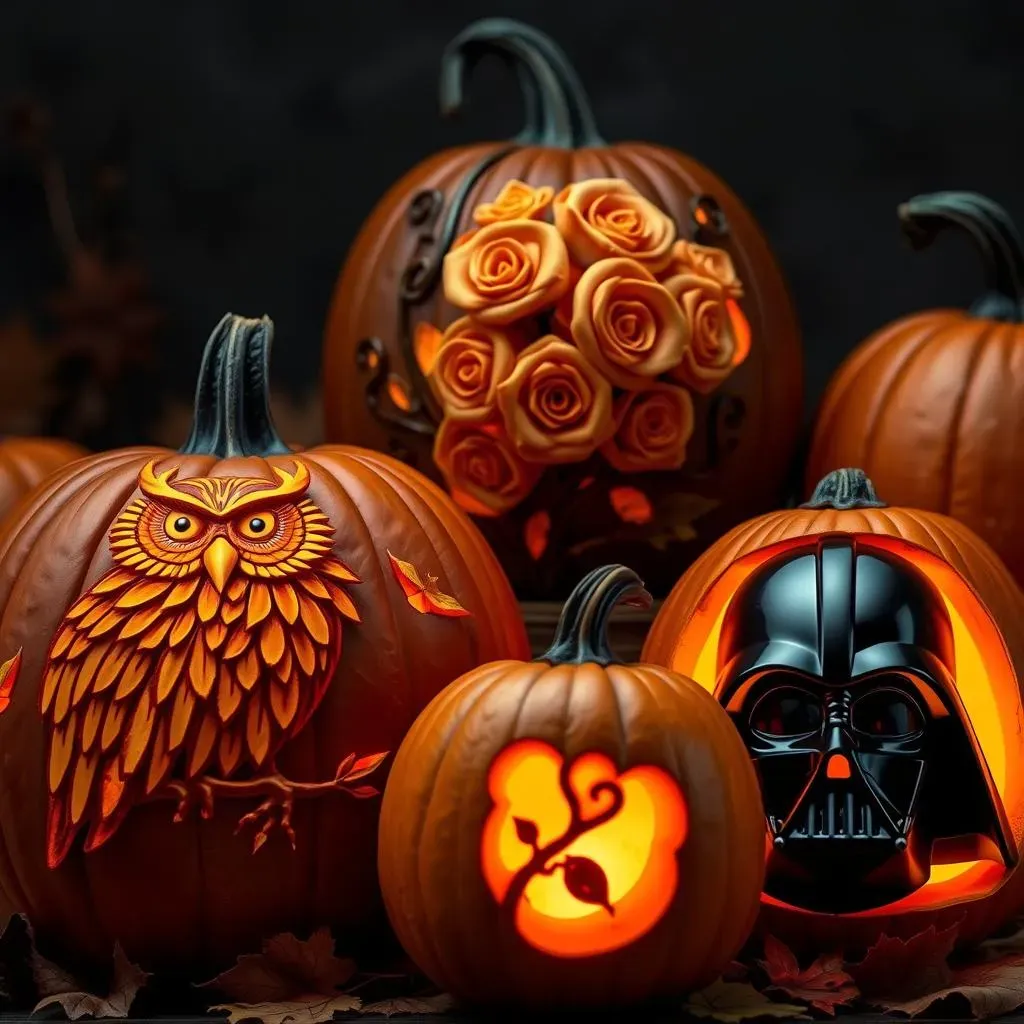
Ready to ditch the spooky faces and embrace something a little more…wild? Carving animals into your pumpkins is a fantastic way to showcase your artistic skills and add a touch of whimsy to your Halloween display. Think beyond cats and bats – although those are always a solid choice! Consider carving a majestic owl with intricate feather details, a playful squirrel hoarding acorns, or even a quirky little hedgehog. You can use stencils or freehand draw your design, depending on your comfort level. Remember to use different carving depths to create texture and dimension, bringing your animal creation to life.
If you're feeling ambitious, try carving a whole scene featuring multiple animals. Imagine a pumpkin with a family of foxes frolicking in a forest, or a group of penguins waddling across an icy landscape. The possibilities are endless! Just be sure to plan your design carefully and use a variety of tools to achieve the desired effect.
Nature's Embrace: Floral and Botanical Designs
Why limit yourself to scary faces when you can transform your pumpkin into a stunning work of art inspired by nature? Floral and botanical designs are a beautiful and elegant alternative to traditional jack-o'-lanterns. Think delicate roses, intricate vines, or even a whole bouquet of wildflowers. You can use stencils or create your own freehand designs, letting your creativity blossom.
- Sunflowers: Cheerful and bright, perfect for a welcoming vibe.
- Leaves: Intricate and detailed, showcasing the beauty of autumn.
- Vines: Elegant and flowing, adding a touch of sophistication.
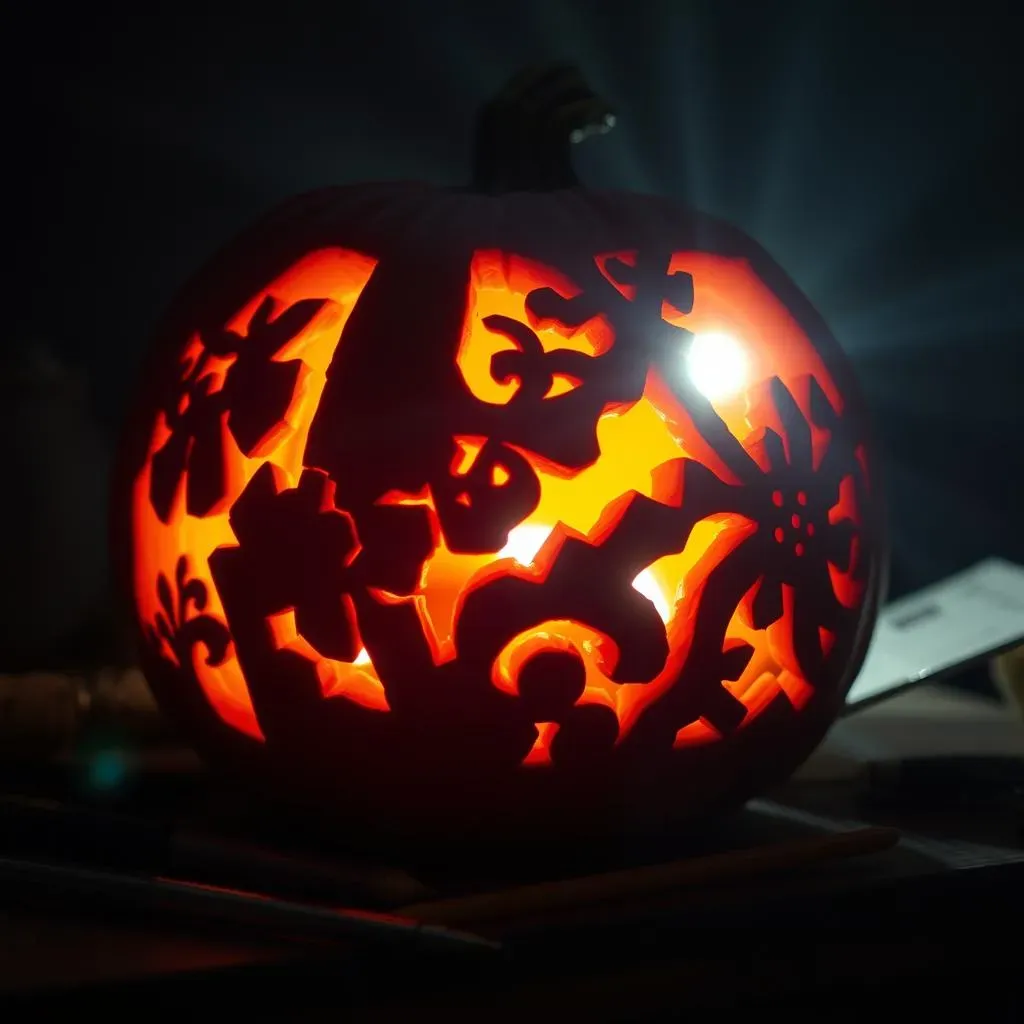
One cool idea is to carve out the negative space around the flowers, creating a silhouette effect. This can be especially striking when lit from within. You can also use different carving depths to create a three-dimensional effect, making the flowers appear to pop off the pumpkin's surface. Consider adding some glitter or paint to enhance the beauty of your floral design.
Pop Culture Pumpkins: Embrace Your Fandom
Show off your love for your favorite movies, TV shows, and video games by carving pop culture-inspired pumpkins! This is a great way to personalize your Halloween display and connect with fellow fans. Think iconic characters, logos, or even memorable scenes. The possibilities are endless, as long as you have a good stencil or a steady hand.
Consider carving a portrait of your favorite superhero, the logo of your favorite band, or even a scene from a classic movie. You can use stencils or freehand draw your design, depending on your skill level. If you're feeling ambitious, try carving a 3D pumpkin that resembles a character's head or a prop from a movie. Just be sure to choose a design that is recognizable and visually appealing.
Pop Culture Theme | Carving Idea | Difficulty |
|---|---|---|
Star Wars | Darth Vader's Helmet | Medium |
Harry Potter | The Hogwarts Crest | Medium |
Marvel | Spider-Man's Logo | Easy |
NoCarve is Cool Too: Easy Pumpkin Decorating Ideas
NoCarve is Cool Too: Easy Pumpkin Decorating Ideas
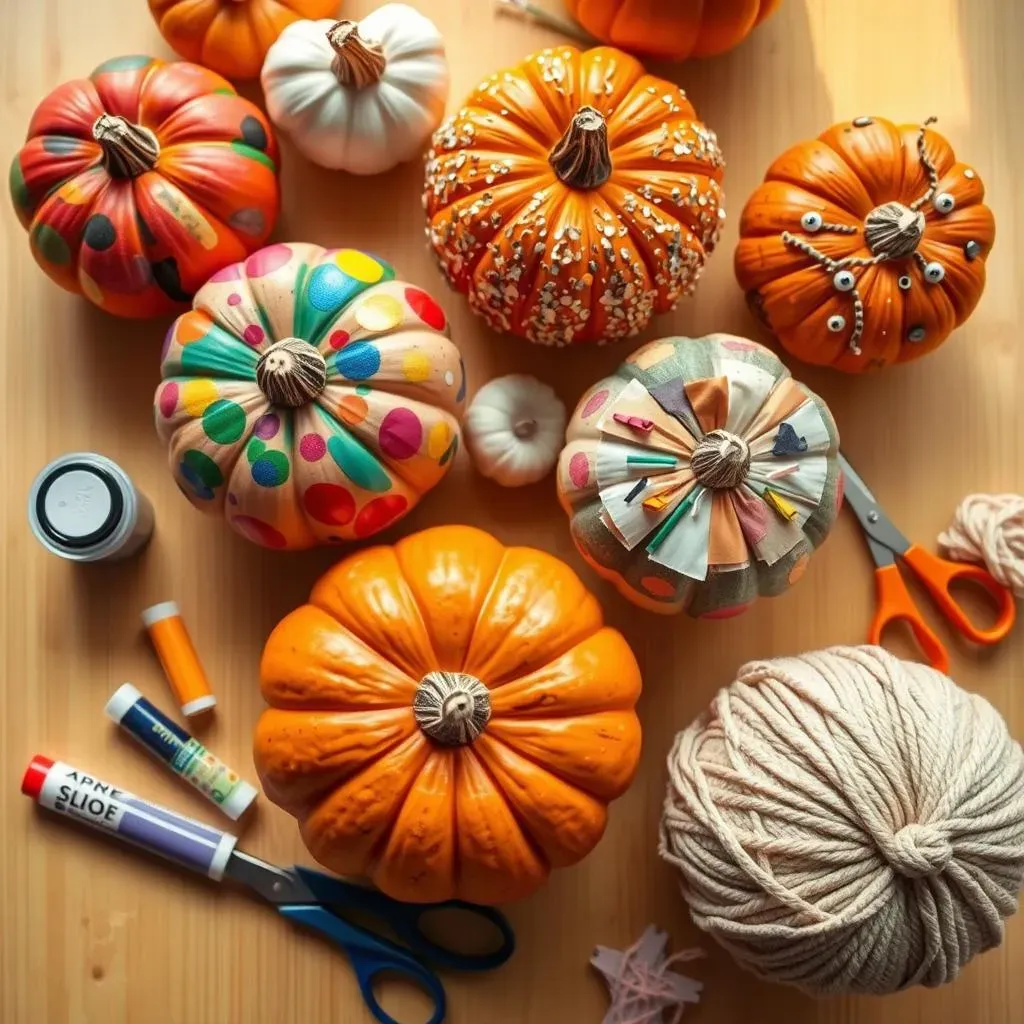
Alright, so maybe wielding a knife isn't your thing, or perhaps you're looking for a safer option for the little ones. Fear not! There are tons of incredibly creative and fun ways to decorate a pumpkin without carving a single slice. When it comes to No-Carve is Cool Too: Easy Pumpkin Decorating Ideas, you're only limited by your imagination. Paint is your best friend here. Grab some acrylics and go wild! You can paint intricate patterns, spooky scenes, or even abstract designs. Get the kids involved and let them create their own pumpkin masterpieces. Glitter, googly eyes, and felt cutouts can add texture and dimension. And don't forget the power of glue! You can use it to attach all sorts of embellishments, from sequins and beads to leaves and twigs.
Another fun idea is to wrap your pumpkin in yarn or ribbon. This is a great way to add color and texture without any mess. You can also use stencils and paint to create a spooky silhouette effect. Or, try decoupaging your pumpkin with fabric scraps or paper cutouts. The possibilities are endless! Just be sure to use a sealant to protect your design from the elements.
No-Carve Technique | Materials Needed | Difficulty |
|---|---|---|
Painting | Acrylic paints, brushes | Easy |
Glittering | Glitter, glue | Easy |
Decoupaging | Fabric scraps, glue, sealant | Medium |
For a more sophisticated look, try using metallic paints or markers to create intricate patterns. You can also use stencils to create geometric designs or floral motifs. Or, try adding some studs or rhinestones for a touch of glam. If you're feeling crafty, you can even create your own embellishments from clay or felt. And don't forget the power of nature! You can use leaves, twigs, and berries to create a rustic and organic design. Just be sure to dry the leaves and twigs before attaching them to the pumpkin.
Level Up Your Carving: Tips & Tricks for Cool Pumpkin Designs
Level Up Your Carving: Tips & Tricks for Cool Pumpkin Designs
So, you've mastered the basics and you're ready to take your pumpkin carving skills to the next level? Awesome! It's time to ditch the cookie-cutter designs and unleash your inner artist. When it comes to Level Up Your Carving: Tips & Tricks for Cool Pumpkin Designs, the key is to think beyond simple shapes and explore more advanced techniques. Start by experimenting with different carving depths. Varying the depth of your cuts can create shadows and highlights, adding dimension and realism to your design. Thin cuts let more light through, creating a glowing effect, while deeper cuts create darker shadows. Practice controlling your carving tools and experiment with different pressures to achieve the desired effect.
Another tip is to use stencils as a guide, but don't be afraid to customize them. Add your own personal touches to make your design unique. You can also try combining multiple stencils to create a more complex and interesting image. And don't forget the power of texture! Use different tools to create different textures on the surface of your pumpkin, such as rough patches, smooth areas, and even raised bumps. This can add a whole new level of visual interest to your carving.
Technique | Description | Effect |
|---|---|---|
Varying Depth | Cutting at different depths | Creates shadows and highlights |
Custom Stencils | Modifying existing stencils | Adds personal touches |
Texture | Using tools to create different surface textures | Adds visual interest |
Lighting is also crucial for showcasing your carving skills. Experiment with different types of lights, such as LED lights, battery-operated candles, and even colored lights. Position the light source carefully to highlight the best features of your design. You can also use multiple light sources to create a more dramatic effect. And don't be afraid to get messy! Carving pumpkins can be a messy process, but it's all part of the fun. Just be sure to protect your work surface and wear clothes that you don't mind getting dirty.
Unleash Your Inner Pumpkin Picasso: Final Thoughts
So, there you have it: over 110 simple but cool pumpkin carving ideas to make your Halloween the most spooktacular yet! Remember, the most important thing is to have fun and let your creativity shine. Whether you go for a classic creepy face or a more modern, abstract design, your jack-o'-lantern is a reflection of your unique personality. Don't be afraid to experiment with different techniques and materials, and most importantly, don't worry about making mistakes. After all, even a slightly wonky pumpkin carving is still a pretty awesome pumpkin carving. Happy Halloween, and happy carving!