Table of Contents
Halloween is creeping closer, and what better way to celebrate than with a jack-o'-lantern that sends shivers down spines? Forget friendly grins; we're diving headfirst into the realm of scary pumpkin face carving ideas. This isn't your grandma's pumpkin patch – we're talking menacing monsters, ghastly ghouls, and downright terrifying visages that will make your porch the talk of the neighborhood. Ready to ditch the cutesy and embrace the creepy? This guide will arm you with everything you need to transform an ordinary pumpkin into a work of art that screams Halloween. We'll cover essential tools and materials, explore classic scary face designs, delve into advanced carving techniques for extra fright, and even offer some creative twists to make your pumpkin truly unique. So, grab your carving kit, unleash your inner ghoul, and prepare for a spooktacular carving experience that's both fun and safe. Let's get carving and bring those scary pumpkin face carving ideas to life!
Tools and Materials for Scary Pumpkin Face Carving
Tools and Materials for Scary Pumpkin Face Carving
Gather Your Ghastly Gear
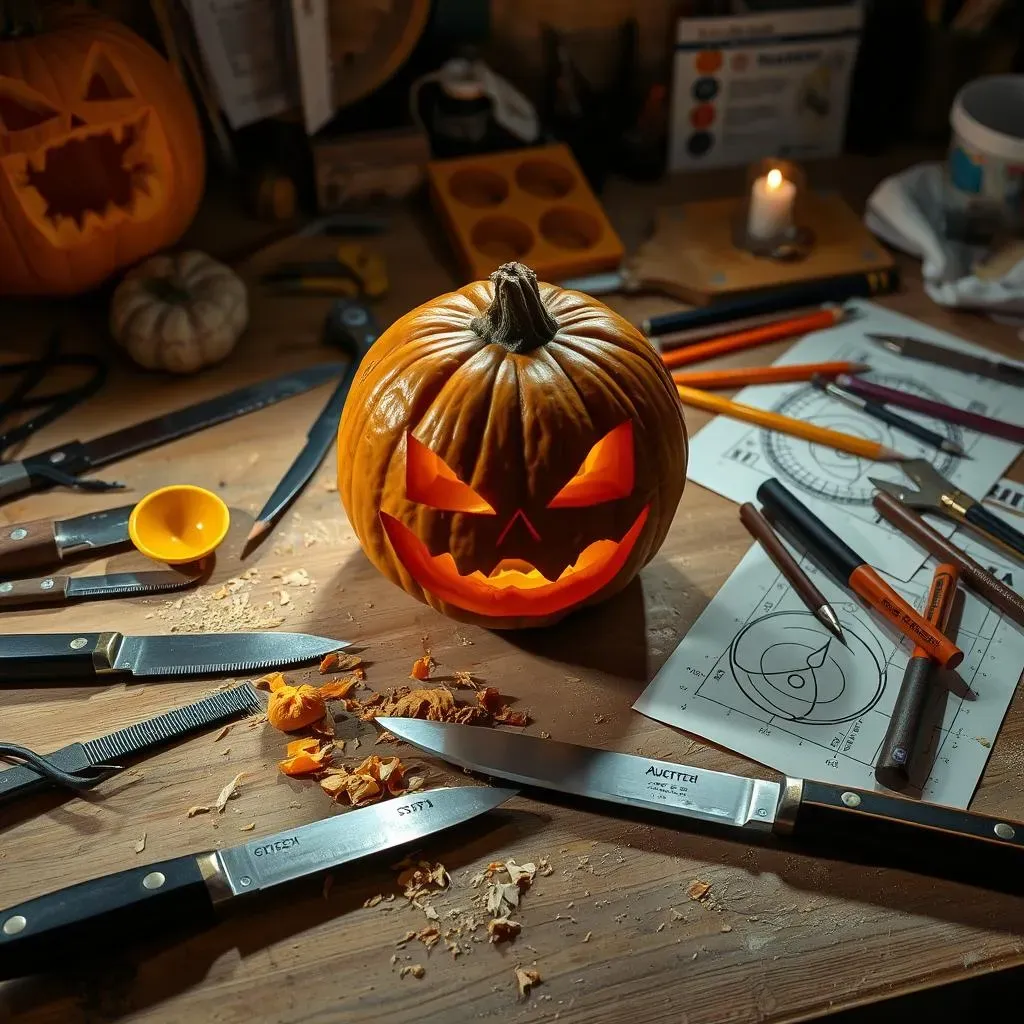
Before you even think about sketching out that terrifying grin, you've got to assemble your arsenal. A basic carving kit is a good starting point, but don't be afraid to customize it. We're talking about more than just those flimsy plastic saws! Think sturdy serrated knives, small gouges, and even power tools if you're feeling ambitious. Remember, the right tools make all the difference between a masterpiece and a mushy mess.
And of course, you'll need a pumpkin! Look for one that's relatively smooth, with a good, solid stem. The size depends on your design, but bigger isn't always better. A medium-sized pumpkin is often easier to handle, especially when you're just starting out. Give it a good thump – you want it to sound hollow, not dense.
Essential Carving Kit Components
Let's break down the must-have items in your scary pumpkin carving toolkit:
- Pumpkin Carving Knife Set: Look for a set with various blade sizes for different levels of detail.
- Pumpkin Scoop: A sturdy scoop is essential for removing the pumpkin's innards.
- Pencils or Markers: For sketching your scary design onto the pumpkin.
- Stencils (Optional): If you're not confident freehanding, stencils can be a lifesaver.
- Battery-Operated Candle or LED Light: Safer and longer-lasting than traditional candles.
Tool | Purpose | Why You Need It |
|---|---|---|
Serrated Knife | Cutting large sections | Provides clean, controlled cuts |
Gouge | Fine detailing | Adds depth and texture |
Pumpkin Scoop | Removing pulp and seeds | Efficiently cleans out the pumpkin |
Beyond the Basics: Pro-Level Pumpkin Prep
Want to take your carving to the next level? Consider these additions to your toolkit. A detail knife, like an X-Acto knife, can be incredibly useful for intricate work. Clay sculpting tools are also great for refining edges and adding texture. And don't forget about lighting! Experiment with different colored LED lights to create spooky effects. Blacklights, for instance, can make certain paints or details glow eerily.
Finally, think about protection. Carving can get messy, so wear gloves to keep your hands clean and protect them from sharp tools. And always carve on a stable surface, preferably covered with newspaper or a drop cloth. Safety first, even when you're trying to scare the neighbors!
Classic Scary Pumpkin Face Designs to Try
Classic Scary Pumpkin Face Designs to Try
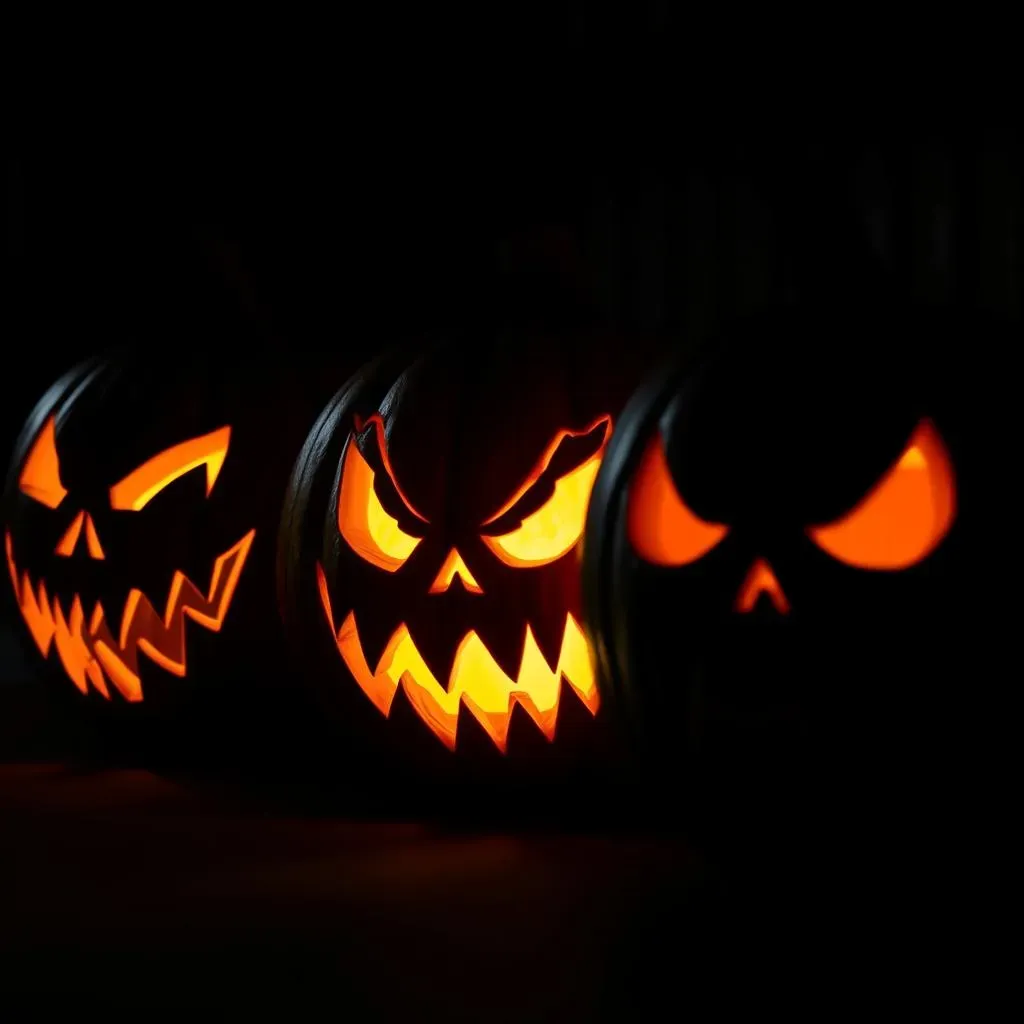
Alright, so you've got your pumpkin prepped and your tools ready. Now comes the fun part: deciding what kind of scary face to carve! When it comes to classic scary pumpkin face designs, you can't go wrong with the traditional menacing grin. Think jagged teeth, wide, staring eyes, and an overall expression of pure evil. This design is a classic for a reason – it's simple, effective, and instantly recognizable.
But don't feel limited by tradition. There are tons of variations you can try. Maybe add a crooked nose, or give your pumpkin a unibrow for extra meanness. Experiment with different shapes for the eyes – triangles, squares, or even just simple slits can create a totally different vibe. The key is to make it look unsettling and slightly off-kilter.
Another option is to go for a more monstrous look. Think bulging eyes, gnashing fangs, and maybe even some tentacles or horns. This is where you can really let your imagination run wild. Look to classic movie monsters for inspiration – Dracula, Frankenstein, or even the Creature from the Black Lagoon. Just remember to keep the design relatively simple, unless you're a carving pro.
- Traditional Grin: Jagged teeth, wide eyes, evil expression.
- Monster Mash: Bulging eyes, fangs, tentacles, horns.
- Ghostly Gaze: Hollow eyes, mournful expression, ethereal feel.
Advanced Scary Pumpkin Carving Techniques for a Frightening Look
Advanced Scary Pumpkin Carving Techniques for a Frightening Look
Adding Depth with Shading and Texture
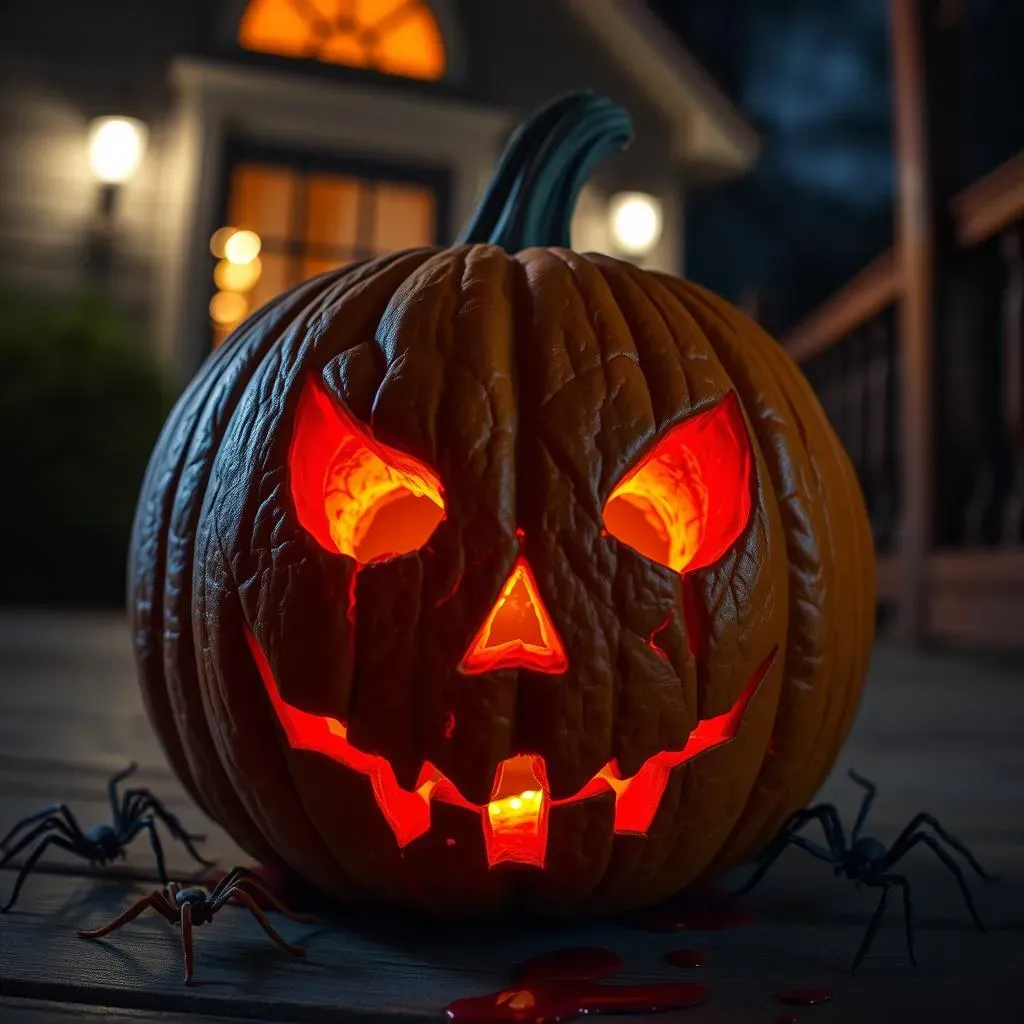
Ready to move beyond basic cut-outs? Advanced scary pumpkin carving techniques are all about adding depth and dimension. Shading is your secret weapon here. Instead of cutting all the way through the pumpkin, try varying the depth of your cuts. Scrape away the outer layer of the pumpkin skin to create lighter areas, and leave some areas untouched for darker shadows. This gives your pumpkin face a more realistic and three-dimensional appearance.
Texture is another key element. Use your gouges or clay sculpting tools to create different textures on your pumpkin's surface. Stipple the skin to create a rough, bumpy texture, or carve fine lines to simulate wrinkles or scars. You can even use cookie cutters or other objects to press patterns into the pumpkin skin. The more texture you add, the more visually interesting and, yes, frightening your pumpkin will become.
Consider using power carving tools for even more detailed work. A rotary tool with various bits can be used to create intricate patterns and textures that would be impossible to achieve with hand tools alone. Just be sure to wear safety glasses and practice on a scrap pumpkin first!
Pro Tips for a Spine-Chilling Effect
Want to really amp up the scare factor? Here are a few more advanced scary pumpkin carving techniques to try:
- Use Light to Your Advantage: Experiment with different colored LED lights to create spooky effects. Flickering lights can also add an extra layer of creepiness.
- Incorporate Props: Add plastic spiders, fake blood, or other props to enhance the scary theme.
- Create a Scene: Carve multiple pumpkins and arrange them to create a spooky scene on your porch.
Another trick is to use forced perspective. Carve the features of your pumpkin face slightly distorted, so that they appear more normal when viewed from a certain angle. This can create a very unsettling and disorienting effect.
Creative Twists on Scary Pumpkin Face Carving Ideas
Creative Twists on Scary Pumpkin Face Carving Ideas
so you've mastered the classics and dabbled in the advanced. Now, let's unleash some serious creativity! Creative twists on scary pumpkin face carving ideas are all about breaking the mold and thinking outside the (pumpkin) box. Forget the same old triangular eyes and jagged teeth. We're talking about incorporating unexpected elements, using unconventional tools, and pushing the boundaries of what a scary pumpkin face can be.
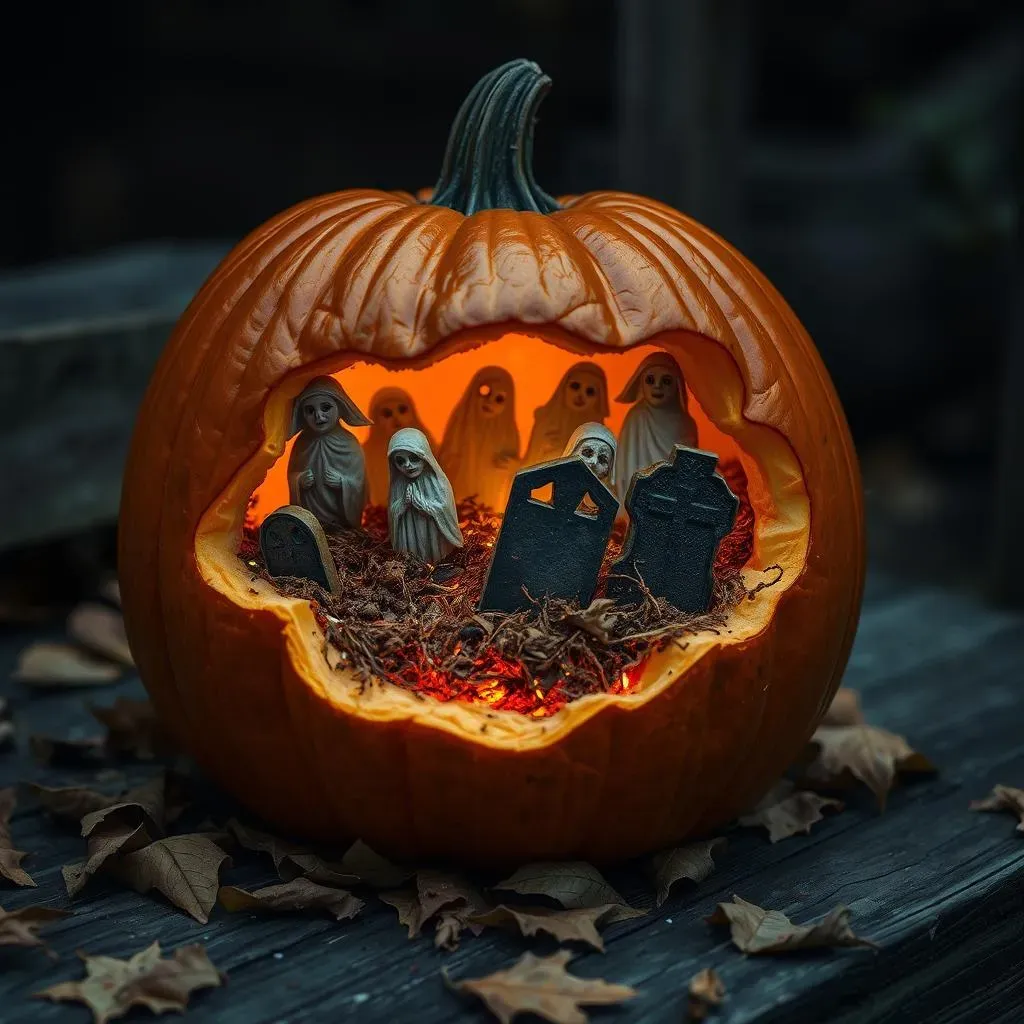
One fun twist is to use your pumpkin as a canvas for a scene. Instead of just carving a face, create a miniature graveyard, a haunted house, or even a creepy forest scene on the surface of your pumpkin. Use small gourds or other materials to add three-dimensional elements to your design. For example, you could carve a spooky tree on your pumpkin, then attach small branches to create a more realistic effect.
Another idea is to incorporate mixed media into your carving. Use paint, glitter, or even fabric scraps to add texture and visual interest to your pumpkin face. You could paint your pumpkin black and then carve out a design that reveals the orange flesh underneath, creating a striking contrast. Or, you could glue on fake eyeballs, plastic spiders, or other creepy embellishments to make your pumpkin even more horrifying.
Creative Twist | Description | Example |
|---|---|---|
Scene Carving | Carve a miniature scene onto the pumpkin | A graveyard with tombstones and ghosts |
Mixed Media | Incorporate paint, glitter, or other materials | Painting a black pumpkin and carving out a design |
Unconventional Tools | Use tools not typically used for carving | Drill, rasp, or wood-burning tool |
Don't limit yourself to traditional carving tools, either. Experiment with drills, rasps, or even wood-burning tools to create unique textures and patterns on your pumpkin's surface. A drill can be used to create a constellation of tiny holes that emit a soft, eerie glow. A rasp can be used to create a rough, weathered texture that adds to the scary effect. And a wood-burning tool can be used to create intricate designs that are permanently etched into the pumpkin's skin.
Ultimately, the goal of creative twists on scary pumpkin face carving ideas is to have fun and let your imagination run wild. Don't be afraid to try new things and experiment with different techniques. The more you experiment, the more likely you are to create a truly unique and terrifying jack-o'-lantern that will impress (and scare) everyone who sees it.
Safety Tips for a Spooktacular Scary Pumpkin Carving Experience
Safety Tips for a Spooktacular Scary Pumpkin Carving Experience
Carve Smart, Not Scared: Prioritizing Safety First
Alright, let's talk safety, because even the scariest pumpkin isn't worth a trip to the ER. Safety tips for a spooktacular scary pumpkin carving experience start with respecting your tools. Those knives are sharp, and pumpkins can be surprisingly tough. Never force a knife – if it's not cutting easily, try a different angle or a different tool. And always carve in a well-lit area, so you can see what you're doing.
Adult supervision is a must, especially when kids are involved. Little hands and sharp objects don't always mix well. Even older kids should be supervised, just to make sure they're using the tools safely and not getting too carried away with their designs. Remember, carving is supposed to be fun, not a competition to see who can create the most gruesome injury.
And speaking of sharp objects, make sure you're using the right tools for the job. Those flimsy plastic saws that come in most carving kits are often more dangerous than they're worth. Invest in a good set of carving knives with sturdy handles and sharp blades. And always keep your knives clean and dry, to prevent them from slipping.
Safety Tip | Description | Why It's Important |
|---|---|---|
Adult Supervision | Always supervise children while carving | Prevents accidents and injuries |
Proper Tools | Use sharp, sturdy carving knives | Provides better control and reduces the risk of slipping |
Well-Lit Area | Carve in a bright, well-lit space | Allows you to see what you're doing and avoid mistakes |
Mastering the Art of Scary Pumpkin Faces: A Final Fright
So, you've journeyed through the chilling landscape of scary pumpkin face carving ideas. From gathering your tools to mastering advanced techniques and adding creative twists, you're now equipped to create a jack-o'-lantern that's the stuff of nightmares. Remember to prioritize safety, let your imagination run wild, and don't be afraid to experiment. Whether you've opted for a classic menacing grin or a uniquely terrifying design, your scary pumpkin face is sure to be a Halloween showstopper, adding a touch of spooktacular artistry to your hauntingly decorated home. Happy carving, and may your Halloween be filled with frightful delights!