Table of Contents
Halloween is creeping closer, and what better way to celebrate than with a jack-o'-lantern that sends shivers down spines? Forget the generic grins and googly eyes; this year, it's time to embrace the eerie with some **scary pumpkin carving ideas simple** enough for anyone to pull off. Whether you're a seasoned sculptor or a first-time carver, we've got a cauldron full of inspiration to transform your pumpkin into a frightful masterpiece. This isn't just another list of templates. We're diving deep into the world of ghoulish grins, menacing monsters, and unsettling silhouettes. From classic scary faces to creative designs that go beyond the basics, you'll discover techniques to make your pumpkin the scariest on the block. We'll explore using stencils for precision, advanced carving methods for a professional look, and most importantly, tips to keep your fingers intact while wielding those sharp tools. So, grab your carving kit, unleash your inner ghoul, and let's get carving! Get ready to learn how to bring simple scary pumpkin carving ideas to life, turning your doorstep into a haunted haven.
Simple Scary Pumpkin Faces: Classic Carving Ideas
Simple Scary Pumpkin Faces: Classic Carving Ideas
The Timeless Terror: Jagged Teeth and Angry Eyes
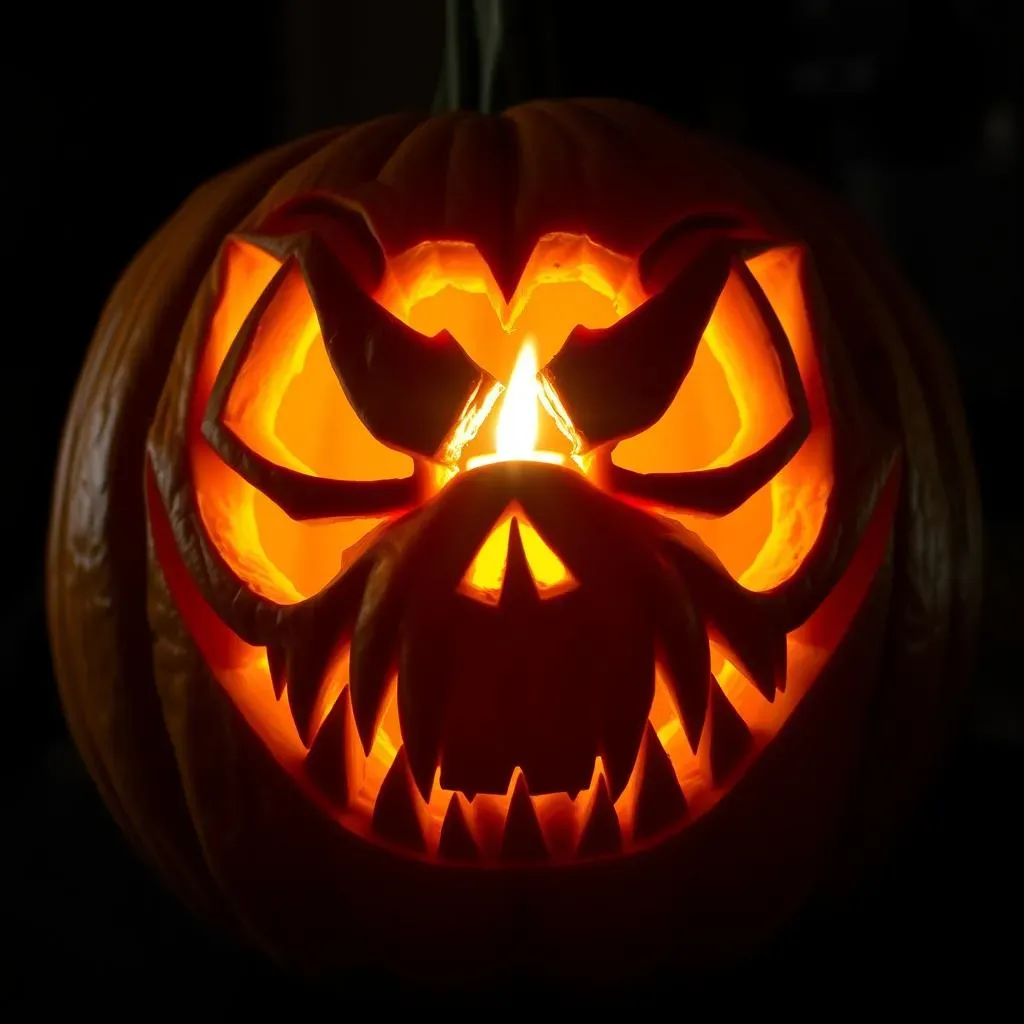
Let's kick things off with the bread and butter of Halloween frights: the classic scary face. You know the one – jagged, uneven teeth, menacing triangular eyes, and an angry, furrowed brow. This design is a guaranteed crowd-pleaser because it's instantly recognizable and easily customizable. The key here is asymmetry. Don't strive for perfection; the more haphazard the cuts, the more unsettling the final product. Think of it as channeling your inner mad scientist – or maybe just a really grumpy monster.
Start by sketching out your design lightly with a marker. Don't be afraid to exaggerate the features. Make those teeth extra pointy, those eyes extra slanted, and that brow extra… brow-y. Remember, the goal is to evoke a sense of unease, so embrace the imperfections. A crooked smile can be far more terrifying than a perfectly symmetrical one.
Level Up: Adding Dimension with Depth
Want to take your classic scary face to the next level? Try playing with depth. Instead of cutting all the way through the pumpkin skin, experiment with shaving away layers to create shadows and highlights. This technique adds a whole new dimension to your carving, making your jack-o'-lantern appear more realistic and, well, scarier.
For example, you could shave down the area around the eyes to make them look like they're sunken and hollow. Or, you could carve deeper grooves around the mouth to create the illusion of a snarling, toothy grin. The possibilities are endless. Just remember to take your time and use a variety of carving tools to achieve the desired effect. A small paring knife or a wood carving tool can be particularly useful for this technique.
Illuminating the Fear: Light and Shadow
The final touch that can truly elevate your simple scary pumpkin face is the lighting. Forget those boring tea lights; let's get creative. Consider using a flickering LED candle to create an eerie, unsettling glow. Or, experiment with colored lights to cast a spooky hue on your creation. A green or red light can instantly transform your jack-o'-lantern from scary to downright horrifying.
Another trick is to strategically place your light source to create dramatic shadows. By positioning the light slightly off-center, you can accentuate the jagged edges and uneven surfaces of your carving, enhancing the overall sense of dread. And don't forget the power of ambient light. Place your jack-o'-lantern near a window or doorway to create a spooky silhouette that will terrify trick-or-treaters and passersby alike.
Easy Scary Pumpkin Carving with Stencils
Easy Scary Pumpkin Carving with Stencils
Stencil Selection: Choosing Your Spooky Design
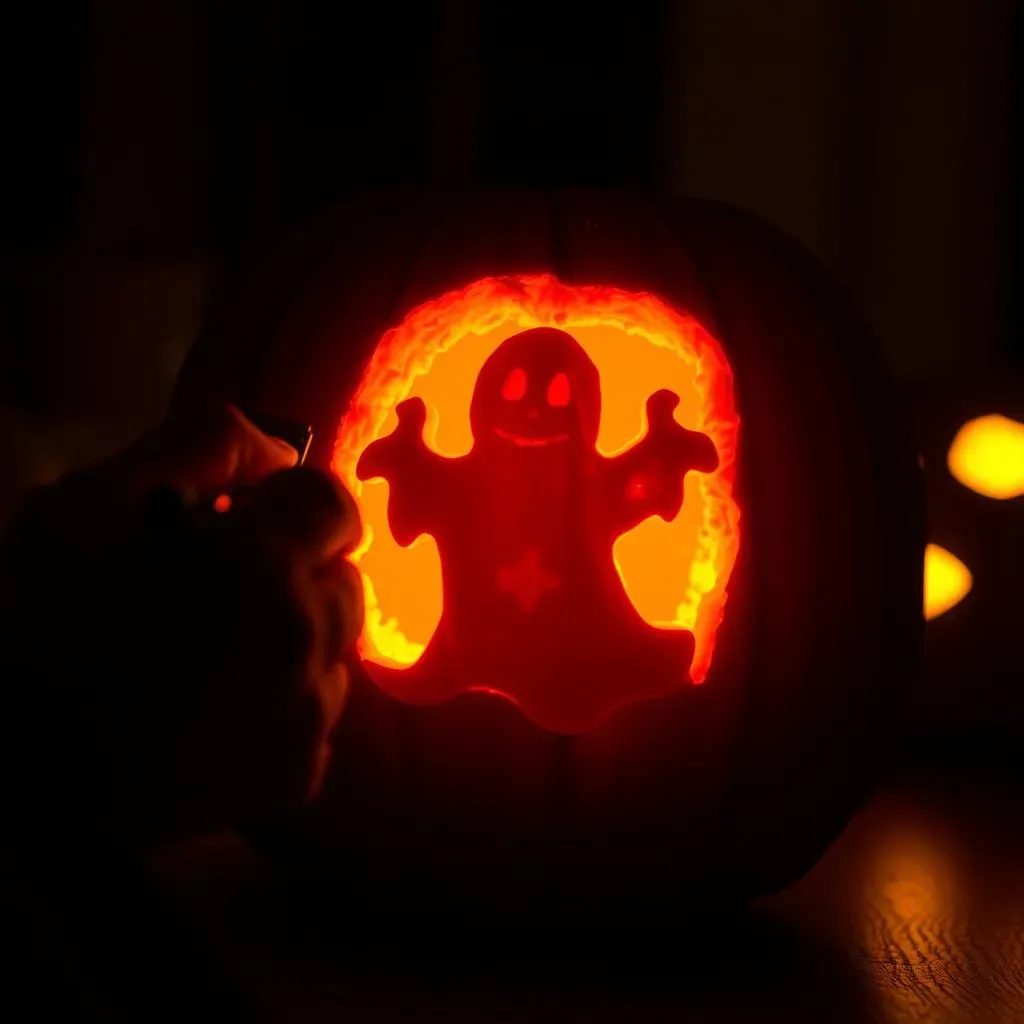
Alright, so you want to get spooky without the stress? Stencils are your best friend! When it comes to **easy scary pumpkin carving with stencils**, the first step is picking the right design. Think about the level of detail you're comfortable with. Super intricate patterns can be a pain, especially if you're a beginner. Start with something bold and simple, like a classic ghost, a menacing skull, or a creepy spiderweb. There are tons of free stencils online – just do a quick search and you'll be drowning in options. Or, if you're feeling fancy, you can even buy pre-made stencil kits at most craft stores. Pro tip: print your stencil at the right size for your pumpkin before you get started. Nothing's worse than realizing your stencil is way too small (or way too big) halfway through the carving process!
Transferring the Terror: Attaching the Stencil
you've got your stencil – now what? The key is to get that design onto your pumpkin cleanly and accurately. Tape your stencil to the pumpkin, making sure it's smooth and wrinkle-free. Now, grab a poking tool – a toothpick, an awl, or even a sharpened pencil will do the trick. Carefully poke holes along the lines of the stencil, transferring the design onto the pumpkin's surface. The closer together you poke the holes, the easier it will be to see the design when you remove the stencil. Once you've traced the entire design, peel off the stencil and admire your handiwork. You should now have a dotted outline of your spooky design on your pumpkin, ready to be carved.
Carving with Confidence: Following the Lines
This is where the magic happens! With your design transferred, it's time to start carving. Use a thin, serrated pumpkin carving saw for best results. Follow the dotted lines of your stencil, using short, controlled strokes. Don't try to cut all the way through the pumpkin in one go; instead, gently saw back and forth, gradually deepening the cut. If you're carving a particularly intricate design, it can be helpful to start with the smaller, more detailed areas first. This will give you more control and prevent you from accidentally damaging the larger sections. Remember, safety first! Always carve away from yourself, and keep your fingers out of the path of the saw.
Stencil Type | Difficulty | Recommended Tools |
|---|---|---|
Simple Ghost | Easy | Pumpkin carving saw, poking tool |
Menacing Skull | Medium | Pumpkin carving saw, poking tool, detail knife |
Creepy Spiderweb | Medium | Pumpkin carving saw, poking tool, detail knife |
DIY Scary Pumpkin Carving: Advanced Techniques
DIY Scary Pumpkin Carving: Advanced Techniques
Sculpting with Light: 3D Carving
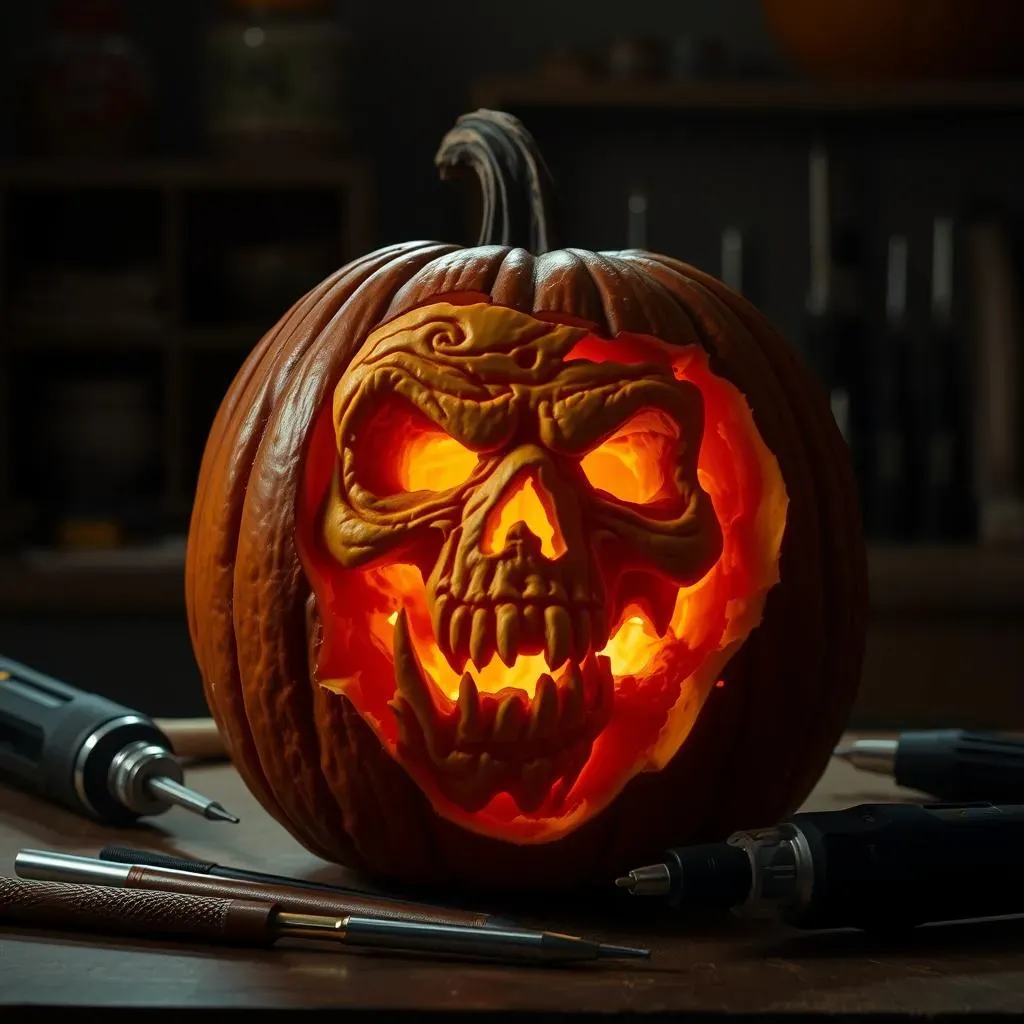
Ready to ditch the flat, two-dimensional carvings? Let's talk 3D! This is where your **DIY scary pumpkin carving** goes from simple to seriously impressive. Think of your pumpkin as a block of clay, and your carving tools as sculpting instruments. Instead of just cutting through the skin, you'll be removing layers to create depth and texture. This technique is perfect for bringing monsters, creatures, and other spooky figures to life. Imagine a zombie bursting out of your pumpkin, or a ghostly face emerging from the shadows. The key is to plan your design carefully and work in stages, gradually removing material to achieve the desired effect.
Start by sketching out your design on the pumpkin, paying close attention to the contours and shadows. Then, using a variety of carving tools – including gouges, loop tools, and detail knives – begin to carefully remove the pumpkin flesh. Remember to work slowly and deliberately, constantly checking your progress and adjusting your technique as needed. The goal is to create a sense of depth and realism, so don't be afraid to experiment with different textures and carving styles. With a little practice, you'll be amazed at what you can create.
Power Tools and Precision: Taking it to the Next Level
so you've mastered the basics of 3D carving. Now it's time to unleash the power tools! Using a rotary tool (like a Dremel) with various bits can take your **DIY scary pumpkin carving** to a whole new level of precision and detail. With a rotary tool, you can create intricate patterns, smooth out rough edges, and even engrave fine details into the pumpkin's surface. This is perfect for adding realistic textures, like wrinkles on a monster's face or scales on a dragon's hide. But be warned: power tools require a steady hand and a lot of practice. Start with a low speed and gradually increase it as you become more comfortable. And always wear safety glasses to protect your eyes from flying debris.
Experiment with different bits to achieve different effects. A small engraving bit is perfect for creating fine lines and details, while a larger sanding drum can be used to smooth out rough surfaces. You can even use a cutting wheel to create precise cuts and openings. Just remember to take your time and work carefully. Power tools can be unforgiving, so it's better to err on the side of caution. With a little practice and patience, you'll be able to create incredibly detailed and realistic pumpkin carvings that will leave everyone in awe.
Creative Scary Pumpkin Designs: Beyond the Basics
Creative Scary Pumpkin Designs: Beyond the Basics
Monster Mash: Combining Classic Horror Elements
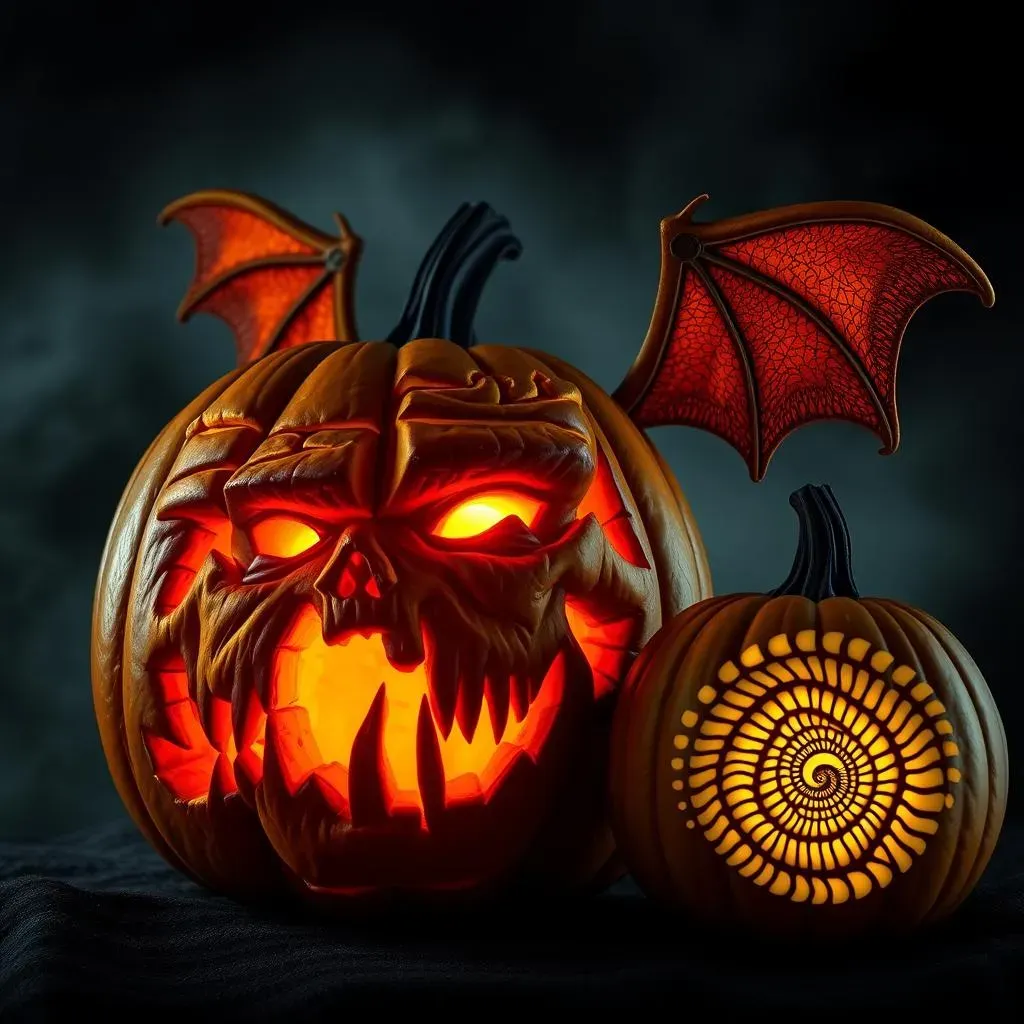
so you've nailed the simple scary faces and maybe even dabbled in some 3D carving. But what if you want to truly stand out this Halloween? It's time to think outside the jack-o'-lantern box with some **creative scary pumpkin designs**. One killer idea is to mash up different monster elements. Think Frankenstein's monster meets a vampire bat, or a zombie pirate with glowing ghost eyes. The more unexpected and outlandish the combination, the better. This approach allows you to flex your creative muscles and create a truly unique and terrifying pumpkin that no one else will have.
Start by brainstorming a list of your favorite horror icons and their signature features. Then, try to come up with ways to combine those features into a single, cohesive design. Sketch out a few different ideas before you start carving, and don't be afraid to experiment. Remember, the goal is to create something that's both scary and visually interesting. A little bit of humor can also go a long way. A monster mash-up that's both frightening and funny is sure to be a hit with trick-or-treaters of all ages.
Optical Illusions: Tricks of the Eye
Ready to mess with people's minds? Try carving an optical illusion into your pumpkin. This is a fantastic way to create a design that's both visually stunning and deeply unsettling. Think about images that play with perspective, depth, or symmetry. A classic example is the "floating head" illusion, where you carve a head that appears to be detached from the pumpkin's body. Or, you could try creating a spiral pattern that seems to suck viewers into the pumpkin's depths. The possibilities are endless. Just remember to choose an illusion that's both visually striking and relatively easy to carve.
The key to a successful optical illusion is precision. Use stencils or templates to ensure that your lines are straight and your shapes are accurate. Pay close attention to the lighting, as this can greatly affect the illusion's effectiveness. Experiment with different light sources and angles to create the desired effect. And don't be afraid to get a little bit abstract. Sometimes, the most unsettling illusions are those that are open to interpretation. Here's a table to inspire your own scary pumpkin masterpieces:
Design Idea | Description | Difficulty Level |
|---|---|---|
Frankenstein's Bat | Combine features of Frankenstein's monster with bat wings and fangs | Medium |
Zombie Pirate | A zombie dressed as a pirate, complete with a tattered hat and glowing eyes | Medium |
Floating Head Illusion | A head that appears to be detached from the pumpkin's body | Hard |
Spiral of Despair | A spiral pattern that seems to suck viewers into the pumpkin | Hard |
Tips for Safe and Spooky Scary Pumpkin Carving
Tips for Safe and Spooky Scary Pumpkin Carving
Carving Kit Essentials: Tools and Safety Gear
Alright, let's talk safety first! **Tips for safe and spooky scary pumpkin carving** always start with the right gear. A dull knife is more dangerous than a sharp one, because you're more likely to slip. Invest in a good pumpkin carving kit with various serrated saws and poking tools. These kits are designed specifically for pumpkin carving and will make the job much easier and safer. And don't forget about safety gear! Wear gloves to protect your hands from cuts and scrapes, and consider wearing safety glasses to protect your eyes from flying pumpkin bits. Trust me, nobody wants a pumpkin seed in their cornea on Halloween night.
A well-lit workspace is also crucial. Carve in a brightly lit area to avoid straining your eyes and to ensure that you can see what you're doing. And finally, make sure you have a stable work surface. A wobbly table can lead to accidents. Clear away any clutter and make sure you have plenty of room to maneuver. With the right tools and a safe workspace, you'll be well on your way to creating a spooky masterpiece without any unwanted injuries.
Kid-Friendly Carving: Alternatives to Sharp Tools
If you're carving with kids, safety is even more paramount. Forget the knives altogether and opt for kid-friendly carving alternatives. There are tons of great options available, such as plastic carving tools, cookie cutters, and even paint. These tools are much safer for little hands and will still allow kids to participate in the fun. You can also let kids decorate the pumpkin with markers, stickers, or glitter. The possibilities are endless. The key is to supervise children closely and make sure they understand the importance of safety.
Another great idea is to let kids scoop out the pumpkin guts. This is a fun and messy activity that kids love. Just make sure they wash their hands thoroughly afterward. And don't forget to save the pumpkin seeds! Roasted pumpkin seeds are a delicious and healthy snack. With a little creativity and supervision, you can make pumpkin carving a safe and enjoyable activity for the whole family. Here's a quick guide to kid-friendly carving options:
Tool/Activity | Safety Level | Description |
|---|---|---|
Plastic Carving Tools | High | Safe alternatives to sharp knives, designed for small hands. |
Cookie Cutters | High | Use cookie cutters to create shapes by gently hammering them into the pumpkin. |
Markers/Paint | High | Decorate the pumpkin's surface without any carving required. |
Pumpkin Gut Scooping | Medium (with supervision) | Let kids scoop out the pumpkin guts - a fun and sensory activity. |
Preserving Your Pumpkin: Keeping the Spook Alive Longer
So, you've put in all that hard work to create a stunning jack-o'-lantern. Now, how do you keep it from rotting before Halloween? **Tips for safe and spooky scary pumpkin carving** also include preservation techniques. One simple trick is to soak your pumpkin in a bleach solution (1 tablespoon of bleach per gallon of water) for about an hour. This will kill any mold or bacteria that could cause the pumpkin to rot. After soaking, pat the pumpkin dry and apply a thin layer of petroleum jelly or vegetable oil to the cut surfaces. This will help to seal in moisture and prevent the pumpkin from drying out.
Another tip is to keep your pumpkin in a cool, dry place. Avoid placing it in direct sunlight or near heat sources. You can also try spraying the inside of the pumpkin with a pumpkin preservative spray. These sprays are designed to inhibit mold growth and extend the life of your jack-o'-lantern. With a little care and attention, you can keep your spooky creation looking fresh and frightful for days to come. Just remember to reapply the petroleum jelly or preservative spray every few days to maintain its effectiveness. With a little effort, you can keep your pumpkin looking its best throughout the Halloween season.
Conclusion: Mastering Simple Scary Pumpkin Carving
So, you've journeyed through the realm of simple scary pumpkin carving, armed with ideas and techniques to transform ordinary pumpkins into chilling creations. Whether you opted for a classic scary face, experimented with stencils, or dared to try advanced carving methods, the most important thing is to have fun and let your creativity shine. Remember to prioritize safety, and don't be afraid to add your own personal touch to each design. This Halloween, let your spooky pumpkin be a testament to your carving skills and a frightful delight for all who dare to approach your doorstep. Happy haunting!