Table of Contents
Halloween's creeping closer, and you know what that means: it's time to unleash your inner artist (or, you know, your inner ghoul) and carve some seriously scary pumpkins! But who says "scary" has to mean "impossible"? Forget those intricate designs that look like they belong in a museum – we're talking easy, achievable frights that even a pumpkin-carving newbie can pull off.
Simple Scary Faces: Classic Pumpkin Carving Ideas Easy
Simple Scary Faces: Classic Pumpkin Carving Ideas Easy
The Timeless Triangle Terror
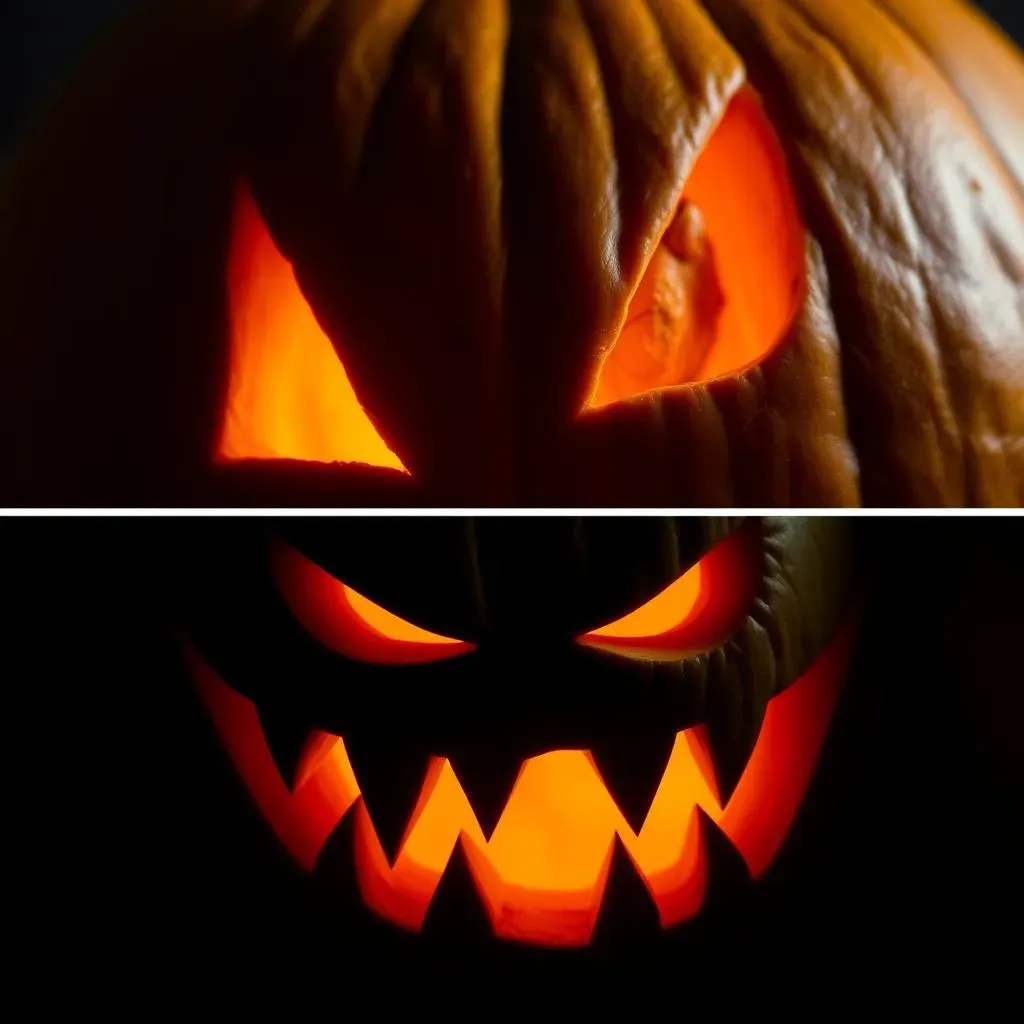
Let's be honest, sometimes the simplest scares are the best. We're talking about the classic jack-o'-lantern face: the triangle eyes, the jagged nose, and the toothy grin. It's a Halloween staple for a reason – it's easy, effective, and instantly recognizable. Don't underestimate the power of the basics! A slightly uneven triangle or a crooked smile can add a touch of unsettling charm.
Think of it like this: you're not aiming for perfection, you're aiming for creepy. Maybe one eye is slightly larger than the other, or the mouth has a few extra "teeth." Imperfection is your friend here. Plus, this design is super forgiving if you're new to pumpkin carving. Mess up a little? No problem! Just call it part of the "scary" design.
Level Up Your Classic Creep
so you've mastered the basic triangle face. Now what? Time to add a little flair! Think about varying the shapes. Instead of perfect triangles, try making them more elongated and sinister. Or, give your pumpkin a menacing brow by carving small triangles above the eyes. Small changes can make a big difference.
Another easy way to level up is to play with the mouth. Instead of a simple jagged smile, try creating a fanged grin with sharp, pointy teeth. You can even use a smaller carving tool to add details like wrinkles around the mouth or deep-set lines around the eyes to give your pumpkin a truly aged and terrifying look. Remember, it's all about the details!
Feature | Classic | Leveled Up |
|---|---|---|
Eyes | Simple Triangles | Elongated, Uneven Triangles with Brows |
Mouth | Jagged Smile | Fanged Grin with Pointy Teeth |
Details | Minimal | Wrinkles, Deep-Set Lines |
Beyond the Basics: Creative Scary Pumpkin Carving Ideas
Beyond the Basics: Creative Scary Pumpkin Carving Ideas
Silhouette Screams
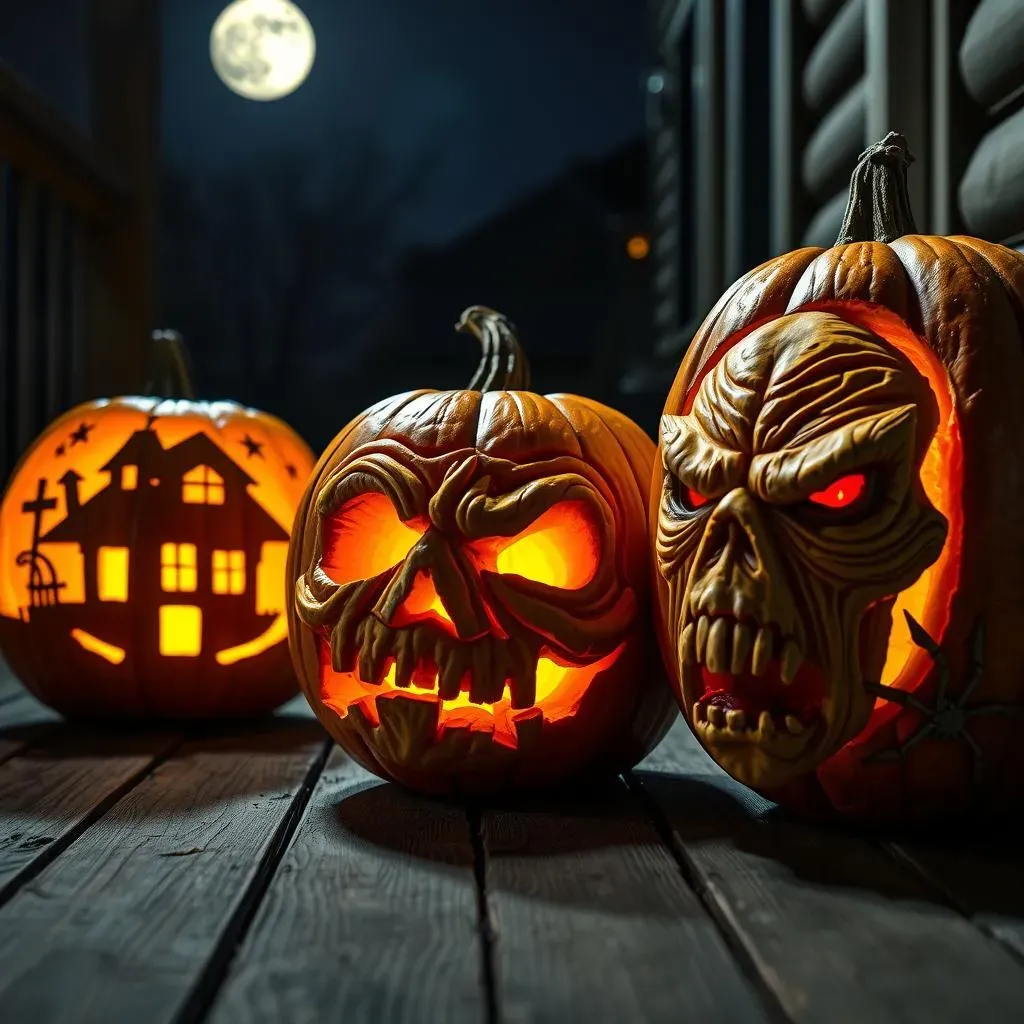
Ready to move past the standard face? Silhouettes are your new best friend. Think creepy trees, haunted houses, or even a menacing silhouette of a witch on a broomstick. The beauty of silhouettes is that they're relatively easy to carve – you're just cutting out the outline of a shape, not worrying about intricate details. Find a spooky image online, print it out, tape it to your pumpkin, and trace away!
Pro tip: use a pushpin or needle tool to poke holes along the outline of your design before you start carving. This will help you create a clean, crisp silhouette. And don't be afraid to get creative with the background! Carve out some stars or a spooky moon to really set the scene.
"The scariest monsters are the ones that hide in the shadows." - Someone smart, probably.
Goulish Textures
Want to add some serious depth and dimension to your scary pumpkin? Experiment with textures! Instead of carving all the way through the pumpkin skin, try scraping away the surface to create different levels of shading. This is a great way to create a ghoulish, decaying effect.
Imagine carving a zombie pumpkin with rotting flesh. You could use a scraping tool to remove the outer layer of the pumpkin skin in certain areas, revealing the lighter flesh underneath. This creates a realistic "rotting" effect. You can also use this technique to add wrinkles, scars, or other gruesome details to your pumpkin's face. Get ready to get your hands dirty!
Texture Type | Description | Effect |
|---|---|---|
Scraping | Removing the outer layer of skin | Creates shading and a "rotting" effect |
Etching | Lightly scratching the surface | Adds fine details like wrinkles or scars |
Poking | Creating small holes with a needle tool | Simulates pores or decaying spots |
Monster Mash-Ups
Why settle for one monster when you can have a whole mash-up? Combine different scary elements to create a truly unique and terrifying pumpkin. Think vampire fangs with zombie eyes, or a ghost with a spiderweb face. The possibilities are endless!
Draw inspiration from your favorite horror movies, books, or video games. What's the creepiest thing you can imagine? Now, how can you translate that into a pumpkin carving? Don't be afraid to experiment and push the boundaries of what's "scary." After all, the best scares are the ones that catch you off guard. So get out there and create a monster mash-up that will haunt the dreams of trick-or-treaters for years to come!
Tools & Tips for Easy (and Safe!) Scary Carving

Tools & Tips for Easy (and Safe!) Scary Carving
Gather Your Ghastly Gear
Alright, before you start hacking away at that pumpkin, you need the right tools. Forget flimsy plastic knives – we're going for precision and safety here. A good carving kit is a must. Look for one with various sized saws, scoops, and etching tools. These kits usually have small, serrated saws that are perfect for cutting out intricate designs. You'll also want a sturdy scoop to clean out the pumpkin guts (more on that later!).
Beyond the kit, consider grabbing a poking tool or an awl. These are great for transferring patterns onto the pumpkin's surface. And don't forget a good work surface! Lay down some newspaper or a plastic tablecloth to protect your table from pumpkin goo. Trust me, it gets messy!
Safety First, Scares Second
Pumpkin carving can be dangerous, especially for little ghouls and goblins. Always supervise children closely, and never let them handle sharp tools without adult supervision. A great alternative for younger kids is to let them decorate the pumpkin with markers, paint, or stickers. No knives required!
When using carving tools, always cut away from yourself, not towards. It seems obvious, but it's easy to forget in the heat of the moment. And be sure to work in a well-lit area so you can see what you're doing. A slip of the knife in a dimly lit room can lead to a nasty cut. Let's keep the scares confined to the pumpkin, okay?
Safety Tip | Description |
|---|---|
Supervise Children | Always supervise children when carving. |
Cut Away From Yourself | Always cut away from your body. |
Work in a Well-Lit Area | Ensure you have adequate lighting. |
Pumpkin Prep: Gutting & Pattern Transfer
Now for the messy part: gutting the pumpkin! Use your sturdy scoop to remove all the seeds and stringy pulp from inside the pumpkin. Scrape the walls clean to create a smooth surface for carving. The cleaner the inside, the easier it will be to carve. Plus, it'll help your pumpkin last longer.
Once your pumpkin is gutted, it's time to transfer your design. If you're using a stencil, tape it to the pumpkin and use a poking tool or awl to poke holes along the outline of the design. Remove the stencil, and you'll have a dotted outline to follow. If you're freehanding it, use a marker to draw your design directly onto the pumpkin. Now you're ready to carve your scary masterpiece!
Show Off Your Scary Masterpiece: Lighting & Display
Show Off Your Scary Masterpiece: Lighting & Display
The Classic Candlelight Glow
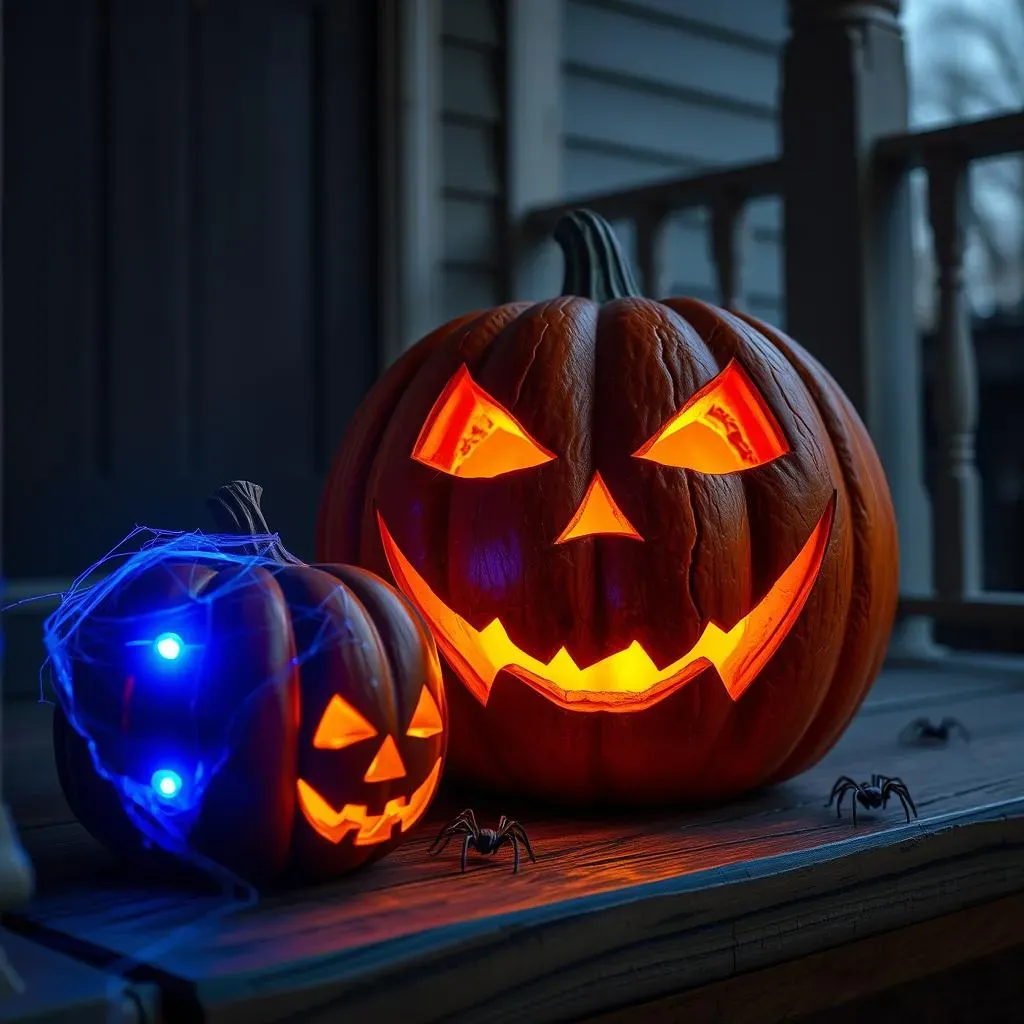
you've carved your masterpiece, now it's time to make it shine (or, you know, flicker menacingly). The classic choice is, of course, a candle. A simple tea light or votive candle placed inside your pumpkin will cast a warm, eerie glow that's perfect for Halloween night. But be careful! Never leave a lit candle unattended, and make sure the pumpkin is placed on a stable surface away from flammable materials. We want scares, not fires!
For an extra spooky effect, try using a colored candle. A red or orange candle will cast a ghoulish light that's sure to send shivers down trick-or-treaters' spines. You can also sprinkle some cinnamon or pumpkin spice inside the pumpkin before lighting the candle. As the candle burns, it will release a delicious, autumnal scent that will fill the air with Halloween spirit (and maybe mask the smell of rotting pumpkin!).
LEDs: The Safe & Spooky Alternative
If you're worried about the safety of candles (especially around kids or pets), LEDs are a fantastic alternative. Battery-operated tea lights or string lights will give you a similar flickering effect without the risk of fire. Plus, they last much longer than candles, so you can keep your pumpkin glowing all night long. You can even find LEDs that change color or flicker in different patterns for an extra spooky touch.
Another advantage of LEDs is that they don't produce heat, which can help your pumpkin last longer. Candles can dry out the pumpkin flesh, causing it to rot faster. LEDs, on the other hand, will keep your pumpkin looking fresh and scary for days. It's a win-win!
Lighting Option | Pros | Cons |
|---|---|---|
Candles | Classic look, warm glow, scent | Fire hazard, short lifespan, dries out pumpkin |
LEDs | Safe, long lifespan, variety of colors/effects | Less authentic look, requires batteries |
Setting the Stage: Display Tips
Your scary pumpkin deserves a proper stage! Think about where you're going to display it. A porch, front steps, or windowsill are all great options. Consider adding some extra spooky elements to your display, like cobwebs, fake spiders, or skeletons. The more atmospheric, the better!
If you're displaying your pumpkin outside, make sure it's protected from the elements. Rain and wind can damage your carving and shorten its lifespan. Place it under a covered porch or in a sheltered area to keep it looking its best. And don't forget to clean up any pumpkin debris that falls around the display. A tidy display is a scary display!
“The night is full of frights, make sure your pumpkin shines bright." - Me, just now.
Your Spooky Masterpiece Awaits!
So, you've got the ideas, the tools, and hopefully, a pumpkin that's trembling in fear. Remember, the best scary pumpkin is the one you had fun creating. Don't stress about perfection; embrace the imperfections – they often add to the creepiness! Whether you go classic with a jagged-toothed grin or get creative with spooky silhouettes, your jack-o'-lantern is sure to be a scream. Now go forth, carve bravely, and have a Happy Halloween!