Table of Contents
Halloween 2021 is calling, and your porch is begging for a frightful makeover! Forget the friendly grins and goofy faces. This year, we're diving deep into the realm of the macabre with scary pumpkin carving ideas 2021 that will send shivers down the spines of trick-or-treaters and impress even the most seasoned Halloween enthusiasts. Are you ready to transform your humble pumpkin into a terrifying masterpiece? This isn't your grandma's pumpkin carving guide. We're talking menacing monsters, eerie apparitions, and designs so unsettling they'll make the neighbors question your sanity (in the best way possible, of course!). Inside, you'll discover a treasure trove of inspiration, from classic scary faces with jagged teeth and piercing eyes to unique and innovative designs that push the boundaries of pumpkin art. We'll arm you with the essential carving techniques and tools you need to bring these visions to life, and we'll even explore creative ways to display your spooky creations and cast an unforgettable glow on Halloween night. So, grab your carving kit, unleash your inner ghoul, and prepare to create the scariest pumpkin on the block!
Embrace the Dark Side: Classic Scary Pumpkin Faces
Embrace the Dark Side: Classic Scary Pumpkin Faces
The Timeless Terror of the Traditional Jack-O'-Lantern
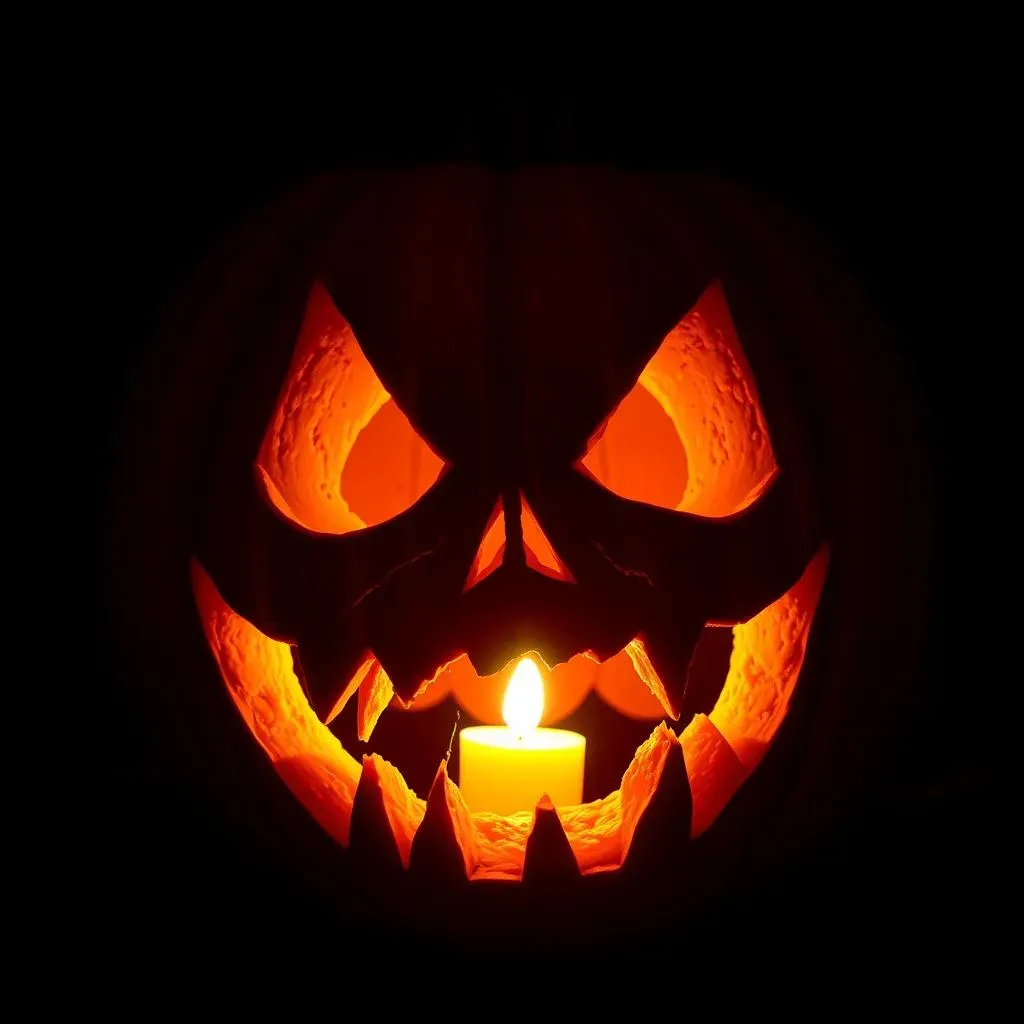
Let's face it, sometimes the simplest scares are the most effective. The classic Jack-O'-Lantern face, with its triangular eyes, jagged teeth, and menacing grin, is a Halloween staple for a reason. It's instantly recognizable, easy to carve, and undeniably spooky. Do not underestimate the power of this iconic design. It's a blank canvas for your own twisted imagination. Think about exaggerating the features. Make the eyes wider, the teeth sharper, and the grin more sinister. Play with asymmetry to create a truly unsettling effect. After all, who says scary has to be complicated?
I remember one year, I was running short on time, but I still wanted to create a memorable pumpkin. So, I went back to basics and carved a classic Jack-O'-Lantern face. However, I added a few unexpected details, like a crooked smile and mismatched eyes. The result was surprisingly terrifying! It proved that you don't need elaborate designs to create a truly scary pumpkin. Sometimes, the simplest ideas are the most effective.
Leveling Up Your Classic Scare
So, you've mastered the basic Jack-O'-Lantern face, but you're craving something a little more…evil? It's time to amp up the terror! Consider adding depth and dimension to your design. Carve deeper into certain areas to create shadows and highlights that accentuate the features. Use different carving tools to create varying textures, like rough, jagged edges for the teeth and smooth, rounded surfaces for the eyes. You should experiment with stencils to achieve more intricate designs, or freehand your own terrifying creations. The possibilities are endless!
One technique I love is using a small gouging tool to create a "rotting" effect on the pumpkin's surface. By carving away small sections of the skin, you can expose the flesh underneath and create a gruesome, decaying appearance. This adds a whole new level of creepiness to your classic Jack-O'-Lantern. Another fun trick is to use battery-operated flickering candles instead of traditional tea lights. The erratic, unsteady flame creates a more unsettling and unpredictable glow, enhancing the overall scary effect.
Feature | Classic | Scary Upgrade |
|---|---|---|
Eyes | Triangular | Asymmetrical, Deep-set |
Mouth | Jagged Teeth | Exaggerated, Crooked Smile |
Surface | Smooth | Textured, "Rotting" Effect |
Lighting | Tea Light | Flickering Candle |
Beyond the Basic Boo: Unique Scary Pumpkin Designs for 2021
Beyond the Basic Boo: Unique Scary Pumpkin Designs for 2021
Monster Mash-Up: Hybrid Horrors
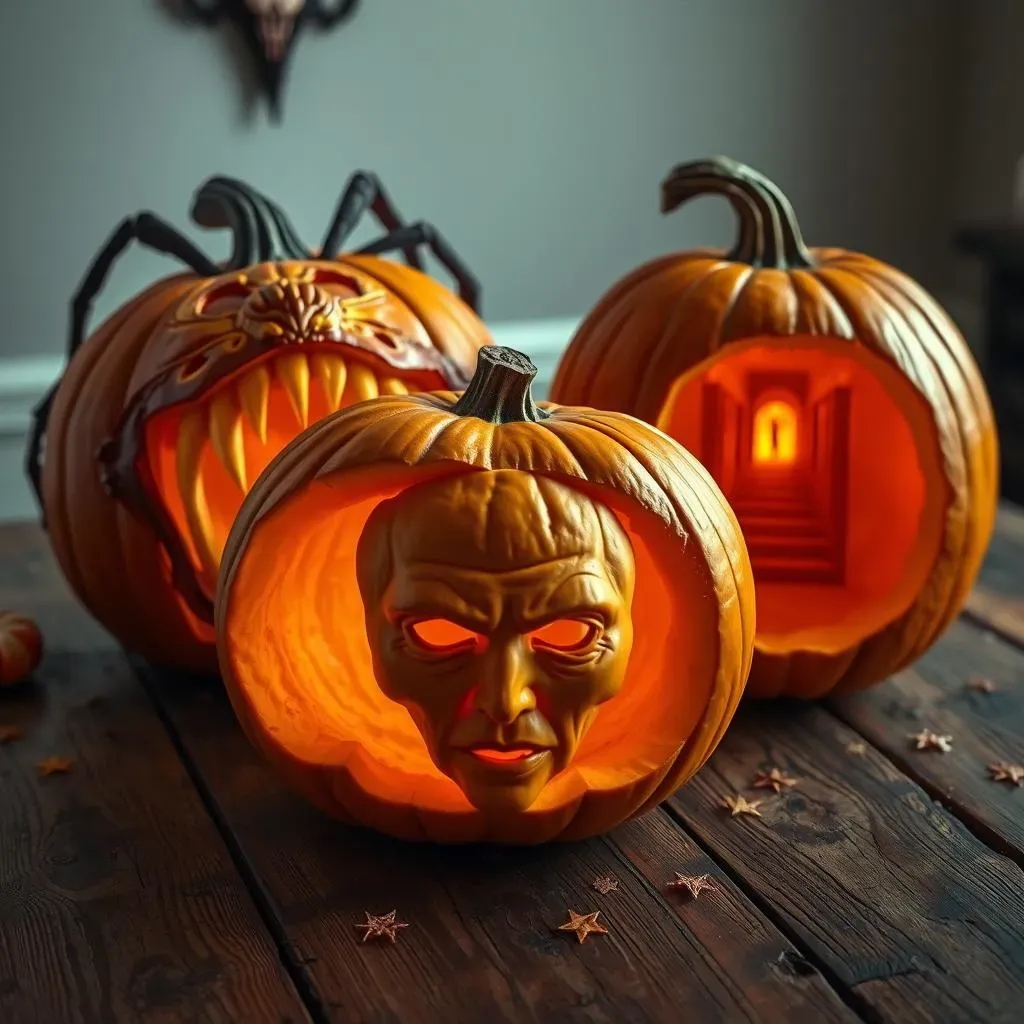
Tired of the same old monster tropes? Why not Frankenstein them together? Combine elements of different creatures to create something truly original and unsettling. Imagine a pumpkin with the head of a spider, the fangs of a vampire, and the claws of a werewolf. Or perhaps a zombie pirate with glowing red eyes and a treasure chest full of severed fingers. The key is to let your imagination run wild and create a monster that no one has ever seen before.
I once carved a pumpkin that was half-zombie, half-clown. It was the stuff of nightmares! The zombie side was all decaying flesh and exposed bone, while the clown side had a grotesque, painted smile and crazy, bloodshot eyes. It was definitely a conversation starter (and a few kids actually cried when they saw it!). The best part about monster mash-ups is that there are no rules. You can combine any elements you want to create something truly unique and terrifying.
Pop Culture Nightmares: Iconic Villains
Bring your favorite horror movie villains to life on your pumpkin! From Freddy Krueger's razor-sharp glove to Pennywise's sinister grin, the possibilities are endless. Think about recreating iconic scenes from your favorite horror films. A pumpkin depicting Norman Bates' house from "Psycho," or a recreation of the chest-burster scene from "Alien" would be sure to impress (and terrify) your neighbors.
One year, I carved a pumpkin with the face of Hannibal Lecter from "The Silence of the Lambs." I even added a little Clarice Starling silhouette in the background. It was a huge hit! People immediately recognized the character, and they were impressed by the level of detail. Just remember to choose villains that are truly iconic and recognizable. You want people to instantly understand the reference and appreciate the artistry of your carving.
Pop Culture Villain | Iconic Feature | Pumpkin Carving Idea |
|---|---|---|
Freddy Krueger | Razor Glove | Carve the glove slashing through the pumpkin. |
Pennywise | Sinister Grin | Exaggerate the grin with sharp, jagged teeth. |
Hannibal Lecter | Muzzle | Recreate the muzzle with intricate carving details. |
Ghostface | Scream Mask | Focus on the mask's elongated, ghostly features. |
Optical Illusions: Mind-Bending Scares
Want to really mess with people's heads? Try carving a pumpkin with an optical illusion design. Create the illusion of depth, movement, or hidden faces. There are tons of tutorials online that can teach you how to achieve these effects. One popular technique is to carve a swirling vortex that appears to suck the viewer into the pumpkin. Another trick is to create a 3D image that seems to pop out of the pumpkin's surface.
I attempted an optical illusion pumpkin once, and it was definitely a challenge! I tried to create the illusion of a never-ending hallway inside the pumpkin. It took a lot of patience and precision, but the result was pretty cool. People were amazed by the depth and complexity of the design. If you're looking for a truly unique and mind-bending scary pumpkin idea, optical illusions are the way to go. Just be prepared to spend some time and effort to get it right!
Tools of Terror: Essential Pumpkin Carving Techniques
Tools of Terror: Essential Pumpkin Carving Techniques
The Arsenal of Awesome: Gathering Your Gear
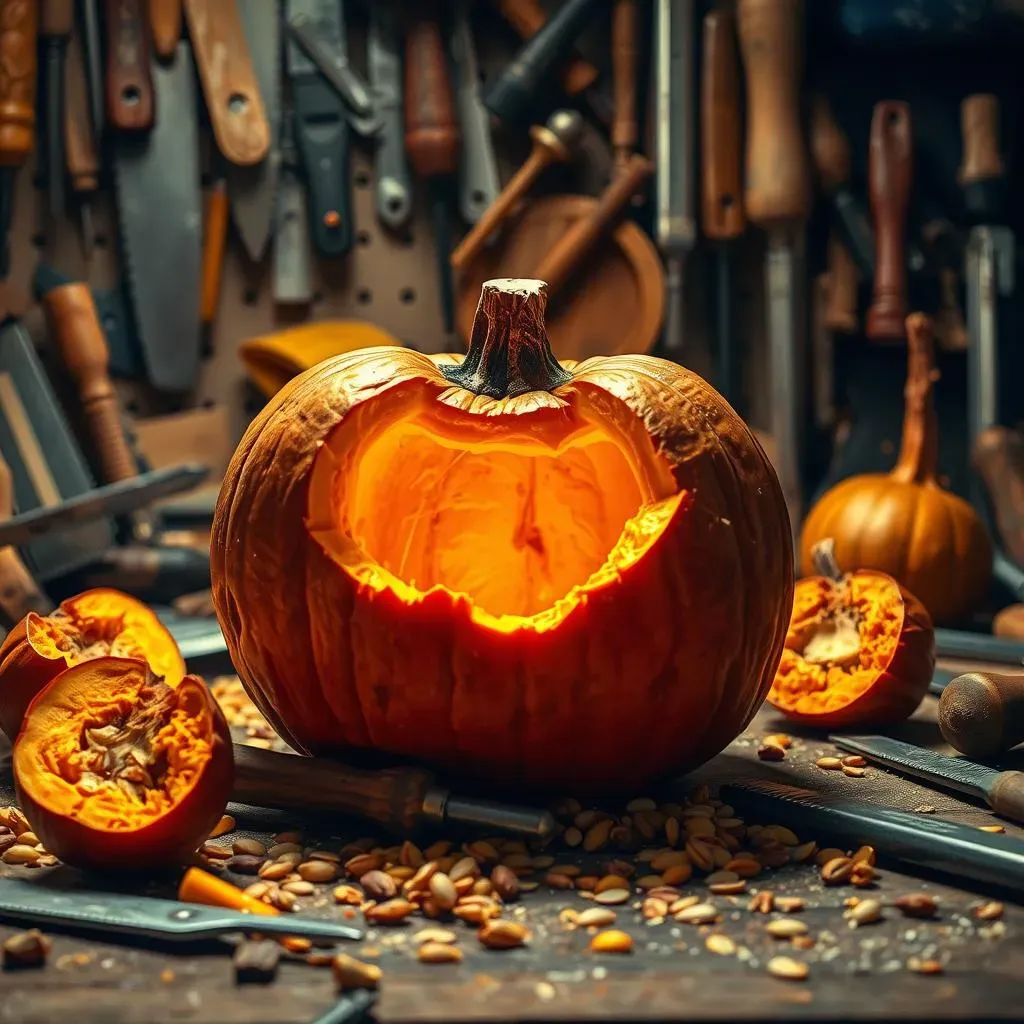
Before you even think about plunging a blade into your unsuspecting gourd, you need the right tools for the job. Forget those flimsy plastic carving kits you find at the drugstore. We're talking serious implements of destruction! A good pumpkin carving kit should include a variety of saws, gouges, and scrapers in different sizes and shapes. You'll also want a sturdy spoon or scoop for gutting the pumpkin, and a sharp paring knife for detail work. And don't forget a power drill with various drill bits. It will allow you to make some cool designs.
I remember the first time I tried to carve a pumpkin with a dull butter knife. It was a disaster! The pumpkin was bruised and battered, and my design looked like it had been attacked by a rabid badger. That's when I learned the importance of having the right tools. Invest in a good carving kit, and your pumpkins (and your hands) will thank you for it.
From Guts to Glory: Mastering the Carving Process
So, you've got your tools, now what? The first step is to gut the pumpkin. Remove all the seeds and stringy pulp until the inside is clean and smooth. Next, transfer your design to the pumpkin's surface. You can use a stencil, draw it freehand, or even print out a picture and tape it to the pumpkin. Once your design is in place, it's time to start carving. Begin by outlining the design with a small saw or paring knife. Then, carefully remove the pieces of pumpkin that you want to cut away. Remember to take your time and work in small sections. It's always better to be precise and controlled than to rush and make mistakes.
One trick I learned is to use a damp cloth to wipe away any pumpkin shavings that accumulate on the surface. This will help you see your design more clearly and prevent you from accidentally carving in the wrong place. Also, don't be afraid to experiment with different carving techniques. Try using a gouge to create texture, or a scraper to thin out the pumpkin's skin and let more light shine through.
Step | Description | Tips |
|---|---|---|
Gutting | Remove seeds and pulp. | Use a sturdy scoop. Scrape the walls smooth. |
Design Transfer | Apply your design to the pumpkin. | Use stencils or draw freehand. |
Outlining | Trace the design with a small saw. | Be precise and controlled. |
Carving | Remove unwanted pumpkin pieces. | Work in small sections. Wipe away shavings. |
Beyond the Blade: Advanced Carving Techniques
Ready to take your pumpkin carving skills to the next level? It's time to explore some advanced techniques! Consider using power tools, like a rotary tool or a jigsaw, to create more intricate and detailed designs. Try carving in three dimensions, creating layers of depth and texture. Experiment with different lighting effects, using colored lights or strobe lights to enhance the spooky atmosphere. The only limit is your imagination!
I once saw a pumpkin carved with a miniature cityscape inside. It was mind-blowing! The artist had used a combination of hand tools and power tools to create tiny buildings, streets, and even little people. It was a true work of art. While I haven't quite reached that level of skill yet, I'm always striving to push my own boundaries and try new things. After all, that's what pumpkin carving is all about: having fun and expressing your creativity.
Light Up the Night: Displaying Your Scary Pumpkin Masterpieces
Light Up the Night: Displaying Your Scary Pumpkin Masterpieces
Setting the Stage: Location, Location, Location
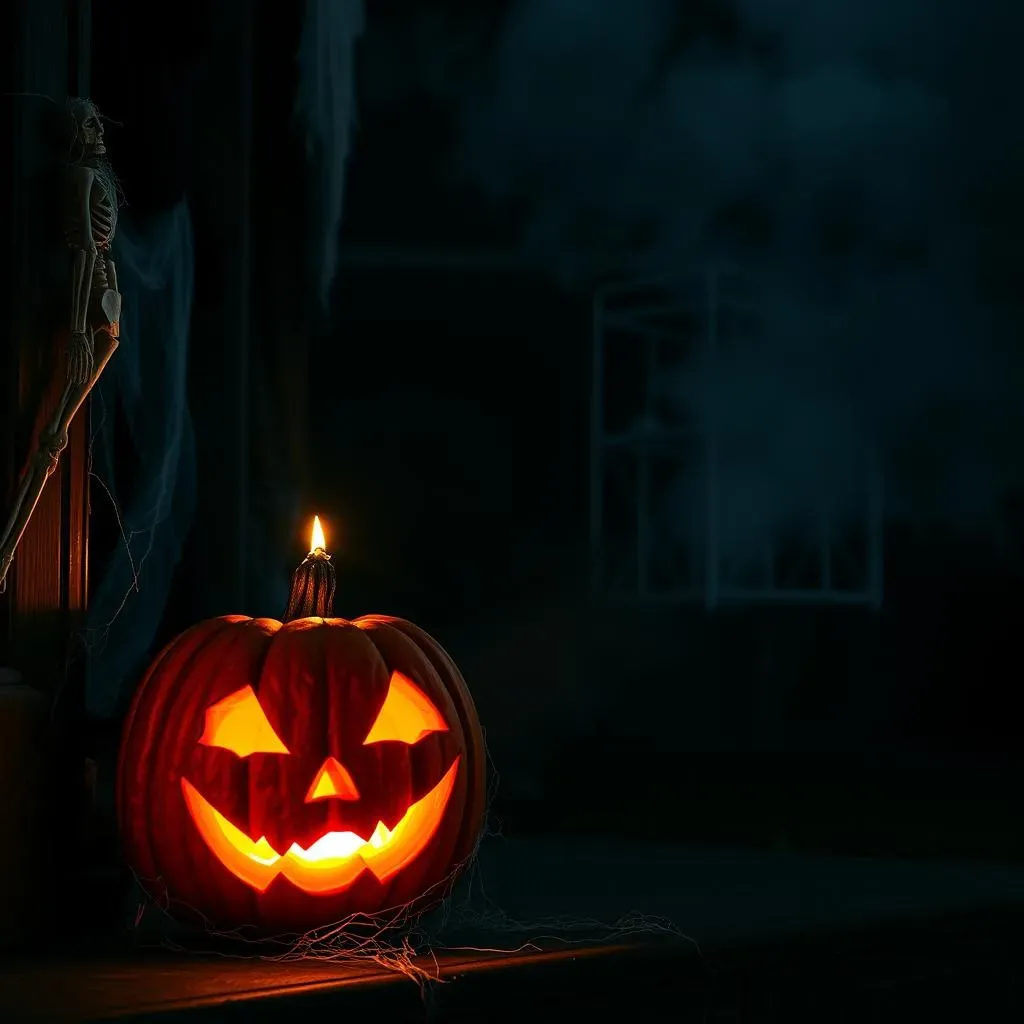
You've poured your heart and soul (and a whole lot of pumpkin guts) into creating the perfect scary masterpiece. Do not let it languish in the shadows! Think strategically about where you place your Jack-O'-Lantern to maximize its impact. A prominent spot on your porch, steps, or even in a window can instantly transform your home into a haunted haven. Consider the backdrop. A dark, uncluttered space will allow your pumpkin's ghoulish glow to truly shine. Avoid placing it near bright lights or distracting decorations that will detract from its scariness.
I once made the mistake of placing my prize-winning pumpkin next to a string of colorful Christmas lights. It completely ruined the effect! The pumpkin's subtle, eerie glow was drowned out by the garish colors, and it looked more silly than scary. That's when I learned the importance of creating the right atmosphere. Darkness is your friend when it comes to displaying scary pumpkins. Use it to your advantage!
Illuminating Ideas: Beyond the Basic Candle
While a traditional tea light candle is perfectly acceptable, there are so many other ways to illuminate your scary pumpkin and enhance its fright factor! Battery-operated flickering candles provide a safer and more realistic flame effect. Colored LED lights can cast an eerie glow, turning your pumpkin green, red, or even blue. Strobe lights can create a disorienting and unsettling effect. You can even use a small projector to cast spooky images or patterns onto your pumpkin's surface.
One year, I used a black light to illuminate my pumpkin, and it looked incredible! The black light made the white flesh of the pumpkin glow an otherworldly shade of purple, and it really accentuated the details of my carving. I also added some glow-in-the-dark paint to certain areas of the design, which made it even more eye-catching. Experiment with different lighting options to find what works best for your pumpkin and your overall Halloween theme.
Lighting Option | Effect | Pros | Cons |
|---|---|---|---|
Tea Light Candle | Traditional Warm Glow | Inexpensive, Easy to Find | Fire Hazard, Short Battery Life |
Flickering LED Candle | Realistic Flame Effect | Safer than Candles, Longer Battery Life | Can Look Artificial |
Colored LED Lights | Eerie Color Wash | Creates Unique Atmosphere, Energy Efficient | May Not Be as Bright as Other Options |
Strobe Light | Disorienting, Unsettling | Adds a Shock Factor, Creates a Dynamic Display | Can Be Annoying or Triggering for Some People |
Adding the Final Touches: Spooky Accoutrements
Your scary pumpkin is the star of the show, but the supporting cast can make all the difference! Surround your pumpkin with other spooky decorations to create a cohesive and terrifying display. Cobwebs, skeletons, tombstones, and fog machines can all add to the atmosphere. Consider adding sound effects, like eerie music or ghostly whispers, to further enhance the scare factor. And don't forget the power of scent! A few strategically placed pine needles or a cauldron of simmering potpourri can fill the air with the smells of autumn and decay.
I always like to add a few unexpected elements to my Halloween display to surprise and delight (or terrify) my guests. One year, I placed a realistic-looking severed hand next to my pumpkin. It definitely got some screams! The key is to be creative and have fun. Think about what scares you, and then try to incorporate those elements into your display. The more personal and unique your display is, the more memorable it will be.
Unleash the Nightmares: Your Scary Pumpkin Legacy
As the embers of Halloween night fade, your terrifyingly terrific pumpkin creation will stand as a testament to your carving prowess. You've not only mastered the art of the scare, but you've also contributed to the chilling tapestry of Halloween 2021. Remember, the most frightful pumpkins are born from imagination and a willingness to embrace the darkness. So, keep those carving tools sharp, your inspiration flowing, and let the screams of delight (and maybe a few genuine shrieks) echo through your haunted neighborhood for years to come. Until next Halloween, may your nights be filled with delightful frights and perfectly carved pumpkins!