Table of Contents
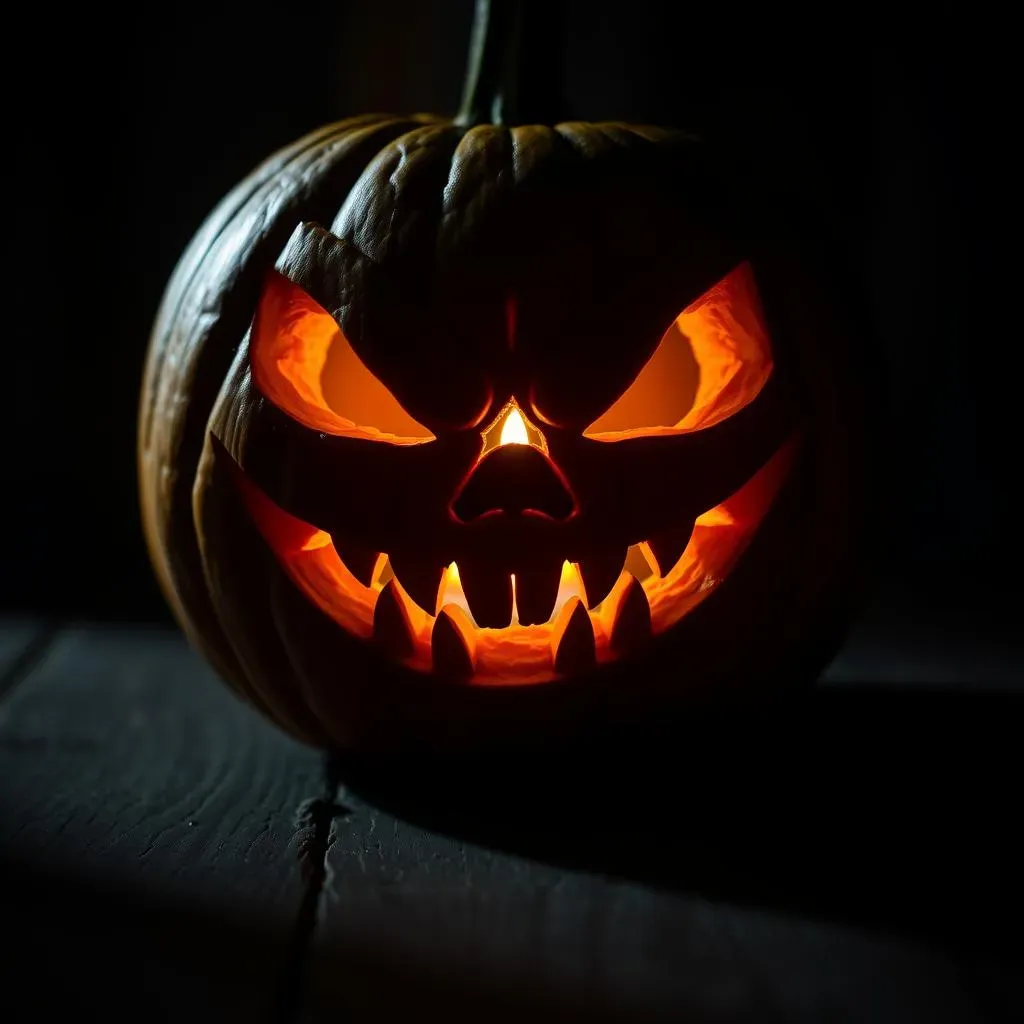
Halloween is creeping closer, and what better way to celebrate than with a Jack-O'-Lantern that'll send shivers down spines? Forget friendly grins; this year, it's all about the scare factor. If you're hunting for scary pumpkin carving face ideas, you've hit the jackpot. We're not just talking about basic triangles and squares here; we're diving deep into the realm of creepy, ghoulish, and downright terrifying designs that will transform your pumpkin into a true masterpiece of horror.
Level Up Your JackO'Lantern Game: Beyond Basic Scary Pumpkin Faces
Level Up Your JackO'Lantern Game: Beyond Basic Scary Pumpkin Faces
Ditch the Triangle Eyes: Embrace Character
so you've carved a pumpkin before. Two triangles for eyes, a jagged mouth – the usual drill. But this year, we're ditching the predictable. Think about iconic horror characters: Pennywise's menacing grin, Freddy Krueger's scarred visage, or even a zombie with rotting flesh details. The key is to choose a character that genuinely scares you and then translate their key features onto your pumpkin canvas.
Consider what makes them recognizable. Is it a specific hairstyle? A signature facial expression? A unique weapon? Incorporating these elements will instantly elevate your Jack-O'-Lantern from generic scary to a specific, spine-chilling character that everyone will recognize (and maybe fear a little!).
Adding Depth and Dimension: It's All About the Shadows
Flat, two-dimensional carvings are fine, but if you want to seriously level up your scary pumpkin game, you need to think about depth. This means using different carving depths to create shadows and highlights. For example, instead of cutting all the way through the pumpkin for the eyes, try shaving away the outer layer of skin in certain areas. This will allow light to shine through more subtly, creating a ghostly glow and adding dimension to your design.
You can also use this technique to create texture, like wrinkles on a monster's face or the ragged edges of a zombie's wounds. Experiment with different carving tools to achieve various effects – a small gouge can create a deep shadow, while a wider blade can create a smoother, more gradual transition.
Stencils Are Your Friend (But Don't Be Afraid to Go Rogue)
Stencils are a fantastic starting point, especially if you're new to intricate pumpkin carving. They provide a template to follow, ensuring that your design is symmetrical and proportional. You can find tons of free stencils online, ranging from classic horror icons to more modern and obscure creatures. However, don't feel limited by the stencil. Use it as a guide, but don't be afraid to add your own personal touches.
Maybe you want to exaggerate a certain feature, add a new detail, or even combine elements from different stencils to create a truly unique design. The goal is to make your Jack-O'-Lantern stand out from the crowd, so let your creativity flow! And if you're feeling really ambitious, try creating your own stencil from scratch. It's a challenging but rewarding experience that will take your pumpkin carving skills to the next level.
Stencil Type | Difficulty | Suitable For |
|---|---|---|
Classic Monster | Easy to Medium | Beginners |
Detailed Character | Medium to Hard | Intermediate Carvers |
Custom Design | Hard | Advanced Carvers |
Tools of Terror: Essential Gear for Carving Scary Pumpkin Faces
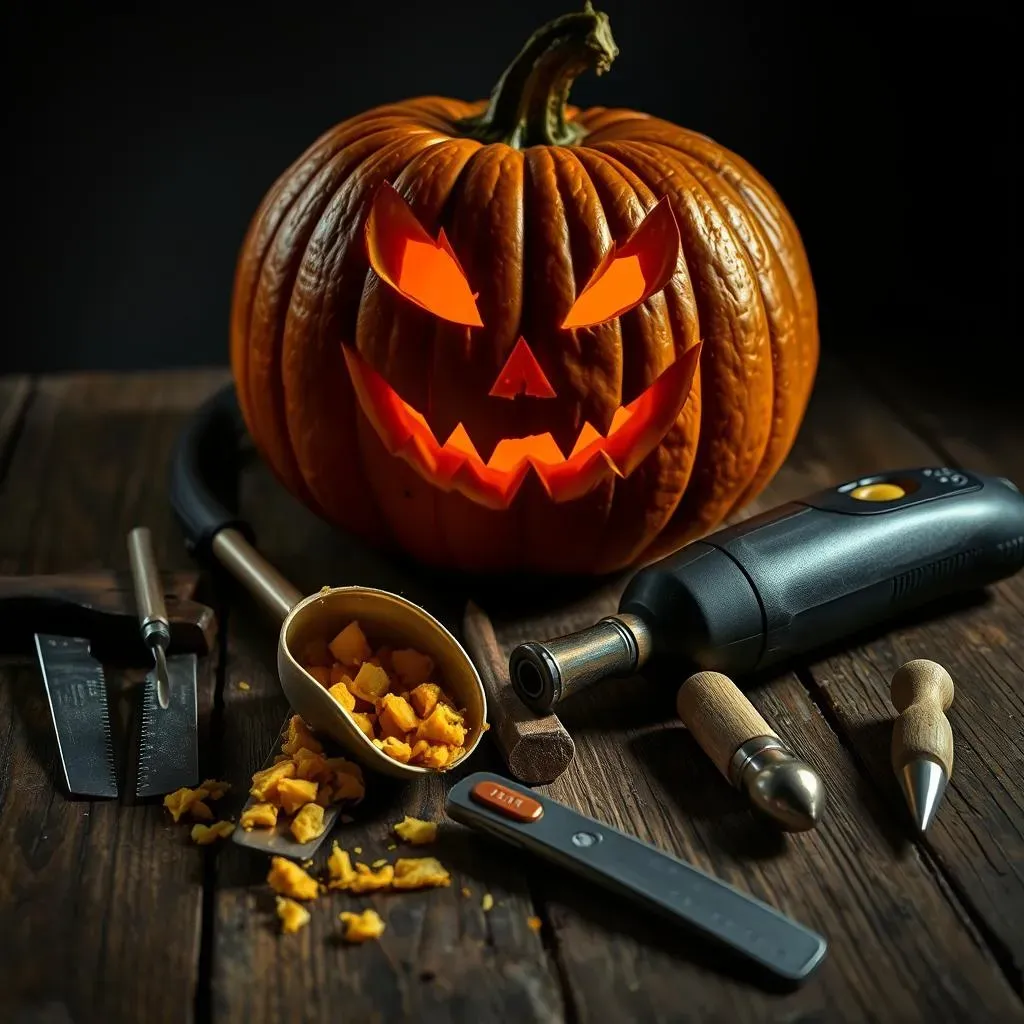
Tools of Terror: Essential Gear for Carving Scary Pumpkin Faces
The Basic Arsenal: Knives, Scoops, and Saws
Alright, so you've got your scary pumpkin carving face ideas brewing, but you can't carve a masterpiece with a butter knife! You need the right tools for the job. Start with a good pumpkin carving kit. These usually include a variety of small saws for cutting out larger shapes, and finer knives for detail work. A sturdy scoop is also essential for gutting the pumpkin – nobody wants to wrestle with stringy pulp all night!
Don't underestimate the power of a good poking tool, either. These are great for transferring stencils onto the pumpkin's surface, and for creating small details like teeth or wrinkles. And hey, safety first! Always carve on a stable surface, and consider wearing gloves to protect your hands from sharp edges and sticky pumpkin guts.
Beyond the Kit: Specialized Carving Implements
Once you've mastered the basics, you might want to explore some more specialized carving tools. Rotary tools, like Dremels, are fantastic for creating intricate details and textures. Wood carving gouges can be used to create deep, dramatic shadows. And for really fine work, consider investing in some clay sculpting tools – they're perfect for adding subtle details to your scary pumpkin faces.
Remember that depth we talked about earlier? These specialized tools are your best friend for creating those layers. Think about using a small gouge to carve out the area around the eyes, making them look sunken and menacing. Or use a rotary tool to add texture to a zombie's skin, giving it a truly rotting appearance.
Tool | Use | Skill Level |
|---|---|---|
Small Saw | Cutting large shapes | Beginner |
Detail Knife | Fine details, shading | Intermediate |
Rotary Tool (Dremel) | Intricate details, texture | Advanced |
Wood Carving Gouges | Deep shadows, sculpting | Advanced |
Don't Forget the Extras: Lighting and Protection
you've got your pumpkin carved, but you're not done yet! Lighting is crucial for bringing your scary pumpkin face to life. Candles are classic, but LED lights are a safer and more reliable option. You can even find flickering LED candles that mimic the look of a real flame.
And finally, consider protecting your masterpiece from the elements. A coat of petroleum jelly or pumpkin sealant can help prevent your pumpkin from drying out and rotting too quickly. You can also try storing your pumpkin in the refrigerator when it's not on display to extend its lifespan. With the right tools and techniques, your scary pumpkin carving face can be the talk of the town – or at least, the spookiest house on the block!
Scary Pumpkin Carving Face Ideas: From Classic to Creepy

Scary Pumpkin Carving Face Ideas: From Classic to Creepy
The Timeless Terrors: Classic Monster Faces
Let's kick things off with the OGs of Halloween fright: classic monster faces. We're talking Frankenstein's monster with his blocky head and neck bolts, Dracula with his sharp fangs and piercing gaze, and the Wolfman with his snarling snout and wild fur. These designs are iconic for a reason – they're instantly recognizable and genuinely scary.
The key to nailing these classic looks is attention to detail. Focus on capturing the monster's defining features. For Frankenstein, emphasize the squared-off head and the stitched-together scars. For Dracula, make sure those fangs are sharp and menacing. And for the Wolfman, create a sense of wildness with jagged fur and a fierce expression. These classic faces will be sure to give your neighbors a fright!
Creepy Creatures from the Deep: Aquatic Horrors
Want to take a plunge into the depths of terror? Consider carving inspiration from aquatic horrors. Think of a grotesque sea monster with bulging eyes, razor-sharp teeth, and slimy tentacles. Or perhaps a ghostly siren with long, flowing hair and a haunting expression. These designs can be incredibly striking, especially when illuminated with eerie blue or green lighting.
When carving aquatic creatures, play with texture to create a sense of wetness and sliminess. Use shallow cuts to create the impression of scales or barnacles, and use deeper cuts to create the jagged edges of fins and tentacles. You can even add some extra flair by attaching seaweed or other natural elements to your pumpkin to enhance the aquatic theme.
Modern Nightmares: Pop Culture Scares
If you're looking for something a little more contemporary, why not draw inspiration from modern horror movies and video games? Pennywise from "It," the Xenomorph from "Alien," or even a Clicker from "The Last of Us" can all make for incredibly terrifying pumpkin carvings. The key is to choose a character that resonates with your audience and that you can realistically translate onto a pumpkin.
These modern designs often require more intricate carving techniques, but the results can be truly spectacular. Consider using stencils or reference images to help you capture the character's likeness accurately. And don't be afraid to experiment with different lighting effects to create a sense of atmosphere and suspense. A well-lit Pennywise pumpkin, for example, can be absolutely bone-chilling!
Horror Character | Key Features | Difficulty |
|---|---|---|
Pennywise (It) | Grin, red hair, white makeup | Medium |
Xenomorph (Alien) | Elongated head, sharp teeth, inner jaw | Hard |
Clicker (The Last of Us) | Fungal growth, grotesque features | Hard |
Pro Tips for a Killer Carving: Making Your Scary Pumpkin Face Last
Pro Tips for a Killer Carving: Making Your Scary Pumpkin Face Last
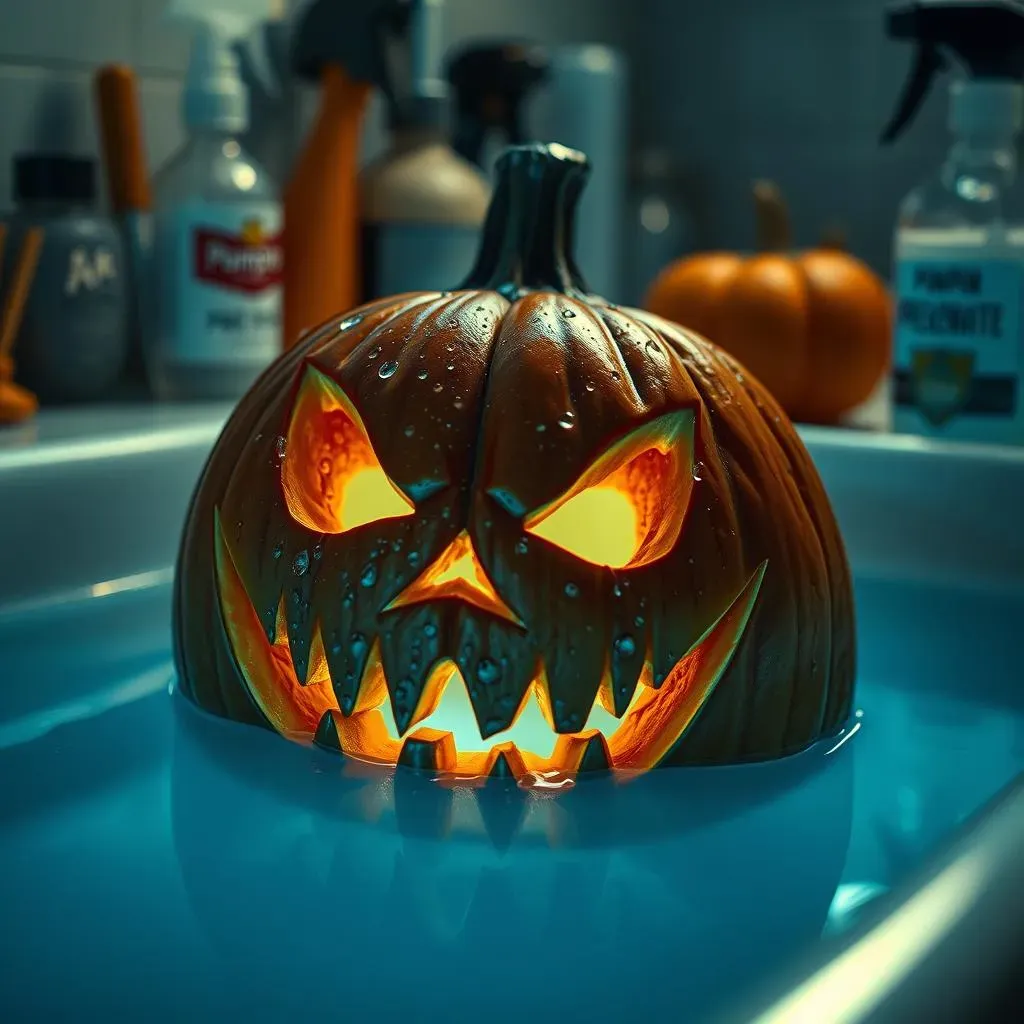
The Pumpkin Spa Treatment: Hydration is Key
Alright, so you've poured your heart and soul into carving the scariest pumpkin face the world has ever seen. Now, the last thing you want is for it to shrivel up and rot before Halloween even arrives! The secret to longevity? Hydration, my friend. Think of your pumpkin as a giant, orange sponge – it needs to stay moist to stay fresh. After carving, give your masterpiece a bath! Submerge it in a tub of cold water for a few hours, or even overnight. This will help rehydrate the pumpkin's flesh and prevent it from drying out too quickly.
Once you've given it a good soak, pat it dry and apply a thin layer of petroleum jelly or vegetable oil to all the exposed surfaces. This will act as a sealant, locking in moisture and preventing the pumpkin from becoming dehydrated. Reapply the sealant every few days to keep your scary creation looking its best. Also, consider a diluted bleach bath (a tablespoon of bleach per gallon of water) to kill mold spores and bacteria that cause decay.
Combatting the Rot: Ventilation and Preservation Techniques
Hydration is only half the battle. You also need to combat the forces of rot and decay. One of the biggest culprits is poor ventilation. Trapped moisture can create a breeding ground for mold and bacteria, so make sure your pumpkin has plenty of air circulation. If you're displaying your pumpkin indoors, place it in a cool, dry location away from direct sunlight and heat sources. If it's outdoors, try to protect it from rain and excessive humidity.
There are also a number of commercial pumpkin preservatives available that can help extend the life of your carving. These products typically contain fungicides and antibacterial agents that inhibit the growth of microorganisms. Follow the instructions carefully, and apply the preservative evenly to all exposed surfaces of the pumpkin. And remember, even with the best preservation techniques, your pumpkin won't last forever. But with a little TLC, you can keep your scary creation looking its best for as long as possible.
Preservation Method | Description | Effectiveness |
|---|---|---|
Water Soak | Submerge in cold water | Moderate |
Petroleum Jelly/Oil | Sealant to lock in moisture | Moderate |
Bleach Bath | Kills mold and bacteria | High |
Pumpkin Preservative | Commercial fungicide/antibacterial | High |
Temperature Control: The Fridge is Your Friend
Think of your carved pumpkin like leftovers: the fridge is your friend! When you're not showing off your scary masterpiece, give it a little vacation in the refrigerator. The cool temperature slows down the decaying process significantly. Just make sure it's dry before you put it in, and maybe pop it in a plastic bag to prevent it from drying out too much. This is especially useful overnight or if you're expecting some particularly nasty weather that could damage your design.
Remember those LED lights we talked about? They're not just safer than candles, they also produce less heat, which is another bonus for preserving your pumpkin. Heat accelerates decay, so ditching the open flame is a smart move for keeping your scary face looking fresher for longer. With these tips, you'll be the envy of the neighborhood with the longest-lasting, most terrifying Jack-O'-Lantern on the block!
Light Up the Night: Displaying Your Scary Pumpkin Carving Face
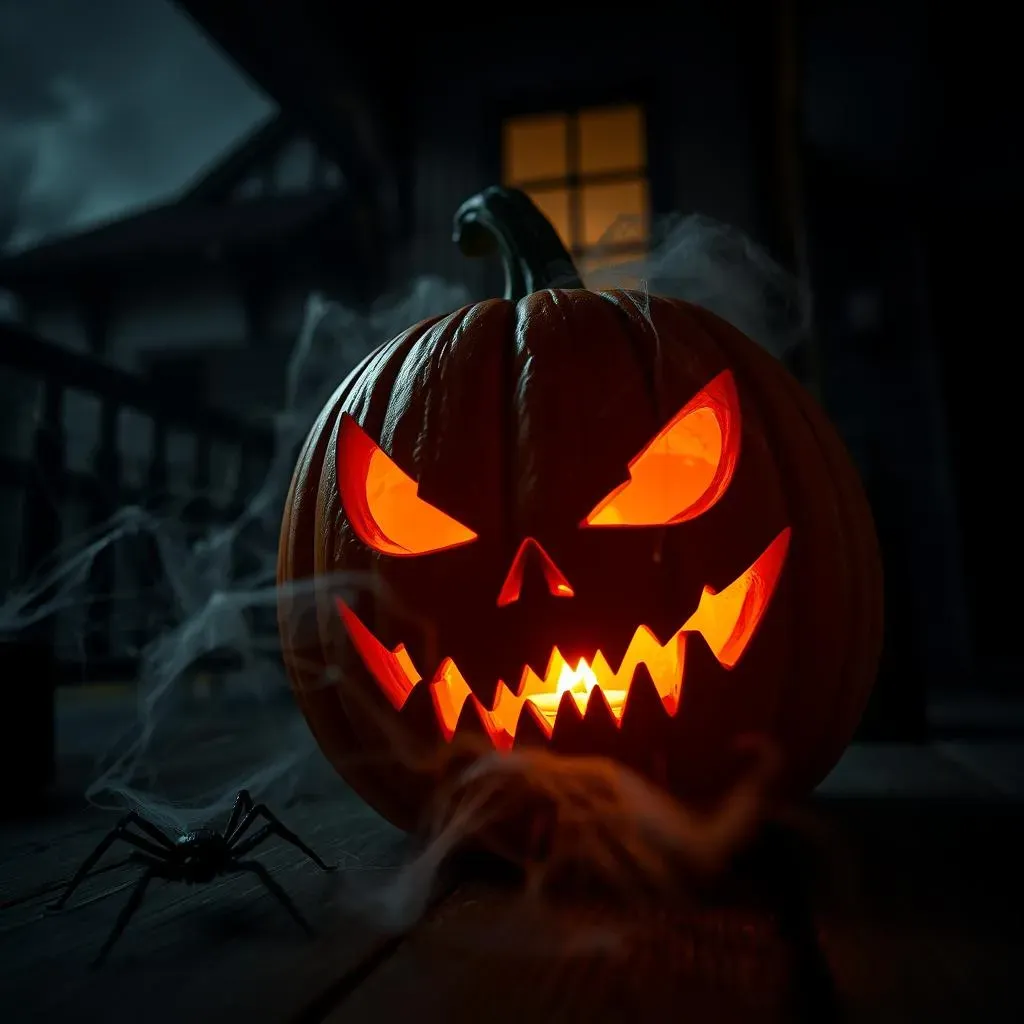
Light Up the Night: Displaying Your Scary Pumpkin Carving Face
Setting the Stage: Location, Location, Location
So, you've got your scary pumpkin carving face looking its absolute best. Now, where are you going to put this masterpiece? Location is key! Think about visibility. Do you want it to be the first thing trick-or-treaters see as they approach your house? Or do you want to create a more subtle, spooky vibe by placing it in a darkened corner of your porch? Consider the backdrop as well. A plain wall will make your pumpkin stand out, while a cluttered background might detract from its impact.
Also, think about weather protection. If you live in an area with frequent rain or wind, you might want to place your pumpkin under a covered porch or awning. You don't want all your hard work to be ruined by a sudden downpour! And if you're planning on using real candles, make sure the location is safe and away from flammable materials.
Illumination Inspiration: Beyond the Basic Candle
Candles are classic, but there's a whole world of lighting options out there to really make your scary pumpkin face pop. LED lights are a great alternative – they're safer, last longer, and come in a variety of colors. Try using a flickering LED candle to mimic the look of a real flame, or go for a vibrant color like green or purple to create an eerie glow. You can even find battery-operated spotlights that will highlight specific features of your carving.
Another fun idea is to use a string of fairy lights to illuminate your pumpkin from the inside. This will create a soft, ethereal glow that's perfect for creating a spooky atmosphere. And if you're feeling really adventurous, try using a small fog machine to create a mysterious, smoky effect around your pumpkin. Just be careful not to overdo it – you don't want to set off any smoke alarms!
Lighting Option | Pros | Cons |
|---|---|---|
Candles | Classic look, warm glow | Fire hazard, short lifespan |
LED Lights | Safe, long-lasting, various colors | Less authentic look |
Fairy Lights | Soft glow, ethereal effect | Can be difficult to arrange |
Spotlights | Highlights specific features | Can be too harsh |
Adding Ambiance: Sound Effects and Spooky Touches
you've got your pumpkin lit up and ready to go, consider adding some extra touches to enhance the spooky ambiance. A strategically placed speaker playing eerie sound effects can really set the mood. Think howling wind, creaking doors, or even a bloodcurdling scream! You can find tons of free Halloween sound effects online.
You could also surround your pumpkin with other Halloween decorations, such as cobwebs, plastic spiders, or even a fake tombstone. The goal is to create a cohesive and immersive spooky scene that will delight (and maybe frighten) your trick-or-treaters. Remember, it's all about creating an experience! With a little creativity and attention to detail, you can transform your front yard into a Halloween wonderland that everyone will remember.
Conclusion: Unleash Your Inner Pumpkin Picasso of Panic
So, there you have it – a treasure trove of scary pumpkin carving face ideas to ignite your Halloween creativity. From mastering the essential tools to perfecting your carving techniques and illuminating your chilling creation, you're now equipped to transform a simple pumpkin into a terrifying work of art. This Halloween, don't just carve a pumpkin; unleash a scream. Let your Jack-O'-Lantern be a beacon of fright, a testament to your dedication to all things spooky. Now go forth, carve boldly, and may your scary pumpkin carving face ideas bring delightful dread to all who dare to gaze upon them!