Table of Contents
Halloween is creeping closer, and what better way to celebrate than with a jack-o'-lantern that truly embodies the spirit of the season? Forget the friendly, toothy grins – this year, we're diving deep into the realm of fright with scary ideas for carving pumpkins. This isn't your grandma's pumpkin carving guide; we're talking about designs that will make trick-or-treaters think twice before ringing your doorbell. Are you ready to transform your porch into a haunted haven? Inside, we'll explore a collection of spine-chilling concepts, from classic monsters to disturbingly realistic creatures. We'll also delve into some unique carving techniques that go beyond simple triangle eyes and a crooked smile. So, grab your carving tools, unleash your inner artist (or mad scientist), and prepare to create a pumpkin masterpiece that's guaranteed to turn heads and send shivers down spines. This guide will give you the inspiration and know-how to craft a pumpkin that's the talk of the town, for all the scariest reasons. Let's get carving!
Elevate Your JackO'Lantern Game With Scary Pumpkin Carving Ideas
Elevate Your JackO'Lantern Game With Scary Pumpkin Carving Ideas
#1: Choose Your Canvas Wisely
Before you even think about carving, you've gotta pick the right pumpkin. Not all pumpkins are created equal when it comes to scary designs. Look for pumpkins with smooth, less ribbed surfaces – these are way easier to carve intricate details into. The color matters too; a deep orange will give your scary creation a more menacing glow. And give it a tap! You want a pumpkin that sounds hollow, but not *too* hollow, which could mean it's starting to dry out.
Consider the size as well. A massive pumpkin might seem impressive, but it's also a lot more work. Start with a medium-sized pumpkin if you're new to this whole scary carving thing. Remember, we're going for spooky, not stressed out!
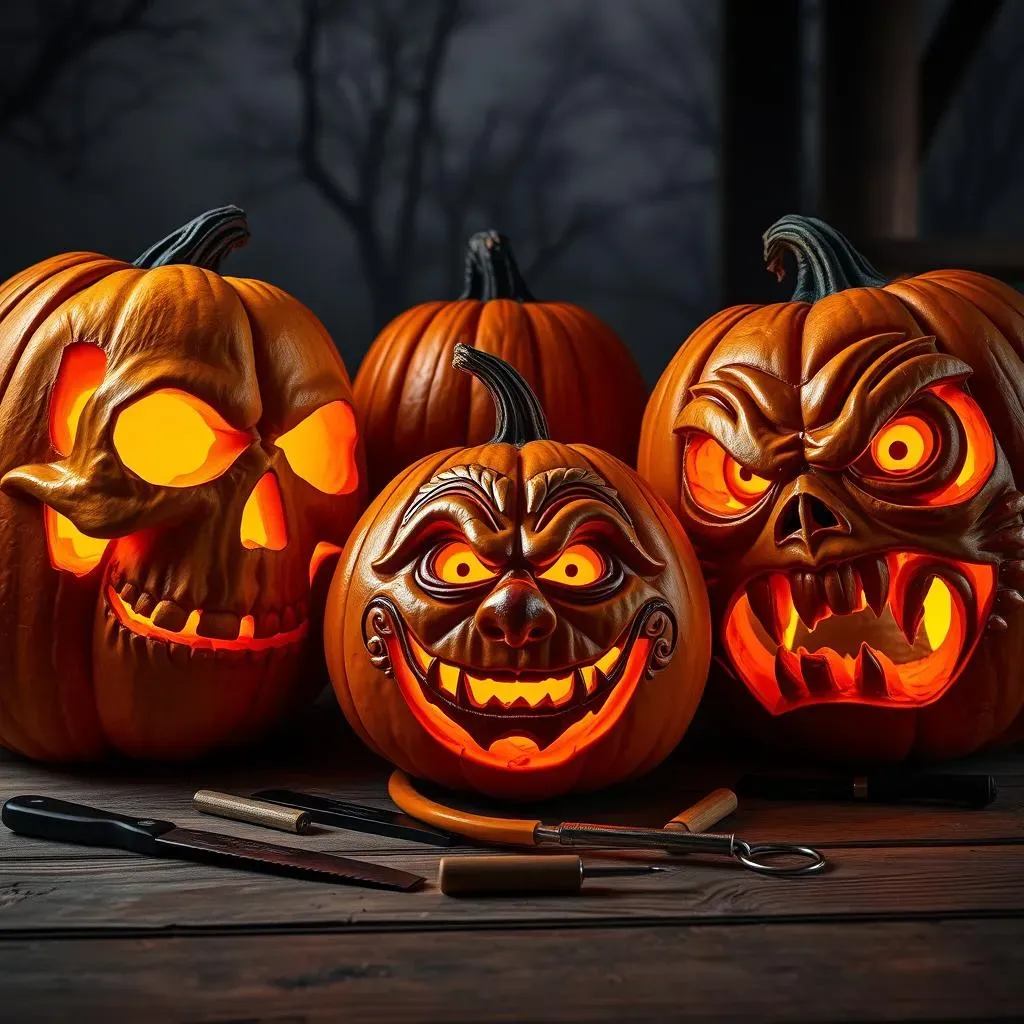
#2: Arm Yourself with the Right Tools
Forget that flimsy plastic carving kit you grabbed at the grocery store. If you're serious about taking your jack-o'-lantern game to the next level, you need some proper tools. A good serrated knife is essential for cutting open the pumpkin and thinning out the walls. A variety of carving tools, like gouges and loop tools, will allow you to create different textures and details.
Don't forget about detail work! Small saws and pokers are perfect for adding those fine lines and creepy details that will really make your scary design pop. And of course, you'll need a scoop to clean out the pumpkin guts. Trust me, having the right tools will make all the difference between a sloppy mess and a work of art.
- Serrated knife: For cutting the lid and thinning walls.
- Gouges and loop tools: For carving details and textures.
- Small saws and pokers: For fine lines and intricate details.
- Pumpkin scoop: For removing the guts.
- Stencils: For patterns.
#3: Stencils or Freehand? Embrace the Fear!
Alright, so you've got your pumpkin and your tools – now it's time to decide on a design. Are you a stencil kinda person, or do you prefer to go freehand? Stencils are great if you're just starting out or if you want a super precise design. You can find tons of free scary pumpkin carving stencils online, from classic horror movie characters to creepy clowns and menacing monsters.
But if you're feeling adventurous, why not try carving freehand? This gives you complete creative freedom and allows you to create a truly unique and terrifying jack-o'-lantern. Sketch out your design on paper first, then transfer it to the pumpkin with a marker. Or, if you're feeling really brave, just go for it! Either way, don't be afraid to experiment and have fun with it. After all, it's Halloween – a time for embracing the spooky and letting your imagination run wild.
Pro Tip:
Thin out the pumpkin wall where you'll be carving. This makes it easier to create intricate designs and allows the light to shine through more brightly.
Dare to Carve: Creepy Creature Features for Your Pumpkins
Dare to Carve: Creepy Creature Features for Your Pumpkins
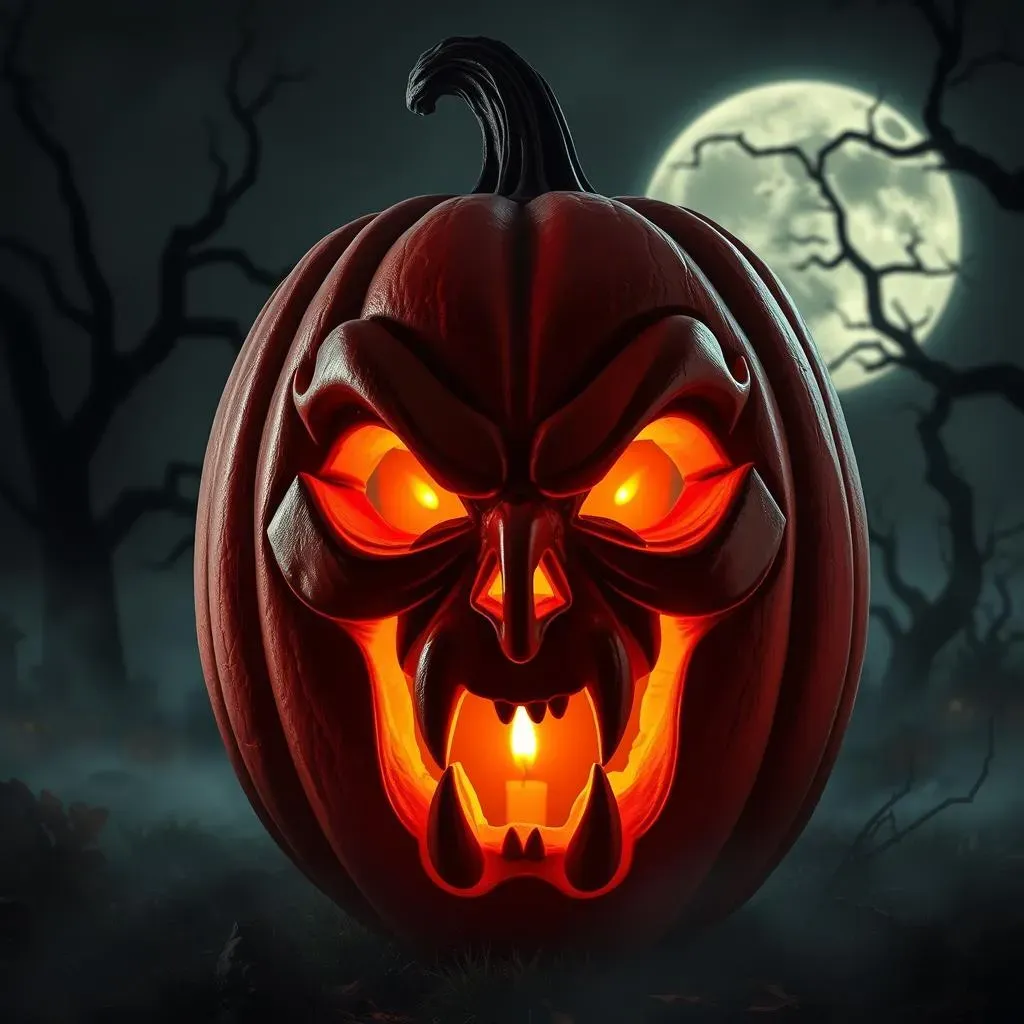
#1: Classic Monsters Never Go Out of Style
Let's be real, you can't go wrong with the classics. Think Dracula, Frankenstein's monster, or a menacing werewolf. These iconic creatures are instantly recognizable and relatively easy to translate into pumpkin form. For Dracula, focus on sharp, angular features – a widow's peak, piercing eyes, and of course, those signature fangs. Frankenstein's monster is all about the blocky head, the bolts, and that iconic scar. And for a werewolf, think wild, untamed fur, a snarling mouth, and glowing eyes.
The key here is exaggeration. Emphasize the features that make each monster unique and recognizable. Don't be afraid to go over the top – the scarier, the better! And remember, lighting is your friend. Use a flickering candle or a strategically placed LED to create shadows and bring your monster to life.
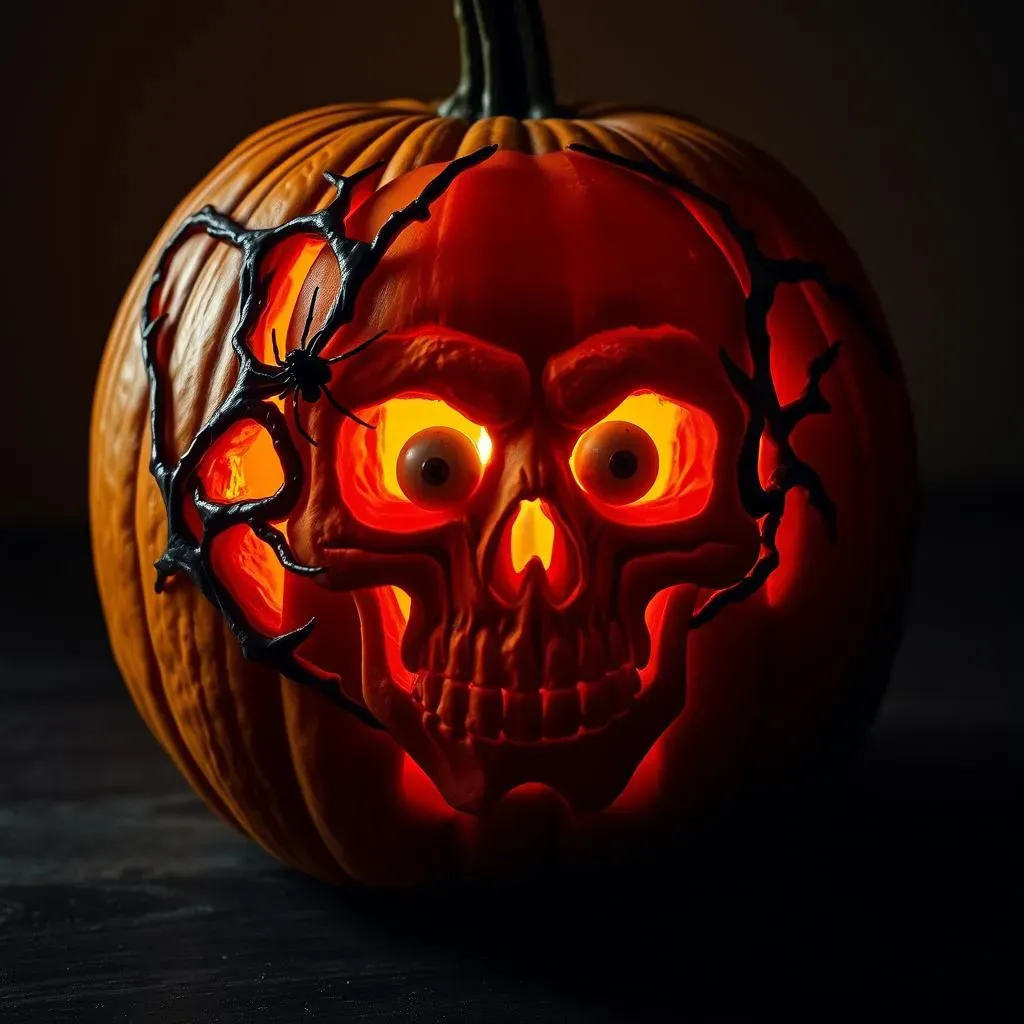
#2: Embrace the Undead: Zombies and Ghouls
Want to take things up a notch on the creepiness scale? Then delve into the realm of the undead. Zombies and ghouls are perfect for creating truly terrifying jack-o'-lanterns. With zombies, think decaying flesh, vacant eyes, and a gaping, toothy maw. Carve in some cracks and crevices to simulate rotting skin, and use different depths to create a sense of depth and texture. Ghouls, on the other hand, are often depicted as more skeletal and gaunt. Focus on sharp bones, sunken eyes, and a generally emaciated appearance.
A great way to make your undead pumpkin even scarier is to add some gore. Drip some fake blood down the sides, or use red paint to simulate bloody tears. You can even stick some plastic bones or teeth into the pumpkin for an extra touch of gruesome realism. Just remember, when it comes to zombies and ghouls, the more disgusting, the better!
Beyond the Basic Boo: Unique Scary Pumpkin Carving Techniques

Beyond the Basic Boo: Unique Scary Pumpkin Carving Techniques
#1: The Power of the Silhouette
Forget carving all the details – sometimes, less is more. Silhouette carving is all about creating a striking outline against the pumpkin's glow. Think of a creepy old tree with gnarled branches reaching towards the sky, or a menacing figure lurking in the shadows. The key is to carve away everything around your subject, leaving a solid shape that stands out dramatically when lit from within. This technique is surprisingly easy but delivers a huge impact, especially when you choose a truly unsettling subject. Imagine a flock of bats taking flight against a full moon, all captured in stark silhouette – instant Halloween chills!
#2: 3D Carving: Adding Depth to the Horror
Ready to take your carving skills to the next dimension? 3D carving is where it's at. This technique involves carving at different depths to create a sculpted, three-dimensional effect. Instead of just cutting all the way through the pumpkin, you'll be carefully shaving away layers of the skin to create highlights and shadows. Think of carving a realistic-looking skull, with deep-set eyes and a menacing grin that seems to leap off the pumpkin's surface. It takes practice, but the results are absolutely terrifying (in the best way possible).
Start by sketching your design on the pumpkin, then use a variety of carving tools to carefully remove layers of the skin. Remember to work slowly and patiently, and don't be afraid to experiment. The more you practice, the better you'll get at creating depth and dimension in your carvings.
#3: The Etching Effect: Scratching the Surface of Fear
Want a subtler, yet equally creepy effect? Try etching! Instead of carving all the way through the pumpkin, etching involves using specialized tools to scratch away the surface, creating intricate designs and textures. This is perfect for adding fine details, like wrinkles, scales, or the delicate webbing of a spiderweb. You can use etching to create a ghostly portrait, a swarm of insects crawling across the pumpkin's surface, or even a disturbing message scrawled in blood (fake blood, of course!).
The key to successful etching is to use the right tools and to apply consistent pressure. Experiment with different etching tools to see what works best for you. And remember, less is often more. A few well-placed scratches can be just as effective as a more elaborate carving.
Technique | Description | Scare Factor |
|---|---|---|
Silhouette | Carving around a solid shape for dramatic effect. | High |
3D Carving | Carving at different depths to create a sculpted look. | Very High |
Etching | Scratching the surface to create intricate details. | Medium |
From Ghoul to Glam: Mastering Advanced Scary Pumpkin Carving
From Ghoul to Glam: Mastering Advanced Scary Pumpkin Carving
#1: The Art of the Overlay: Layering Fear
Alright, you've dabbled in the basics, now let's talk overlays. This is where you carve multiple designs on top of each other to create a complex and visually stunning effect. Imagine carving a skull with intricate filigree patterns overlaid on top, or a creepy face with thorny vines snaking across it. The key is to plan your design carefully and to use different carving depths to create a sense of depth and dimension. Start with your main design, then add the overlay details, working slowly and patiently. It's like creating a spooky stained-glass window on your pumpkin!
#2: The Importance of Light and Shadow
Advanced carving isn't just about the carving itself, it's about how you use light to enhance your design. Experiment with different light sources to create different effects. A flickering candle will cast eerie shadows, while a bright LED will highlight the details of your carving. You can also use colored lights to add a splash of drama. Imagine a zombie pumpkin illuminated with green light, or a vampire pumpkin bathed in red. The possibilities are endless!
Consider the placement of your light source as well. Placing the light behind the pumpkin will create a silhouette effect, while placing it inside will illuminate the carving from within. You can even use multiple light sources to create a more complex lighting scheme. Just remember, light is your friend – use it wisely to bring your scary pumpkin carving to life.
#3: Incorporating Props and Accessories
Want to take your pumpkin carving to the next level? Then consider incorporating props and accessories. Add some plastic spiders crawling out of the pumpkin's mouth, or stick some fake eyeballs into the eye sockets. You can even use wire to create creepy appendages or to suspend the pumpkin in mid-air. Think of adding a witch's hat to your pumpkin, or draping it with cobwebs.
The key is to use props that enhance your design and add to the overall scare factor. Don't be afraid to get creative and to experiment with different materials. You can use anything from twigs and leaves to fabric and paint. Just remember to keep it safe and to avoid using anything that could be a fire hazard. With a little imagination, you can transform your pumpkin carving into a truly terrifying work of art.
Technique | Description | Effect |
|---|---|---|
Overlays | Carving multiple designs on top of each other. | Complex and visually stunning. |
Lighting | Using different light sources to enhance the design. | Eerie and dramatic. |
Props | Incorporating accessories to add to the scare factor. | Terrifying and creative. |
Light Up the Night: Presenting Your Scary Carved Pumpkins
Light Up the Night: Presenting Your Scary Carved Pumpkins
#1: Choosing the Perfect Lighting
you've poured your heart and soul into carving the scariest pumpkin on the block. Now, don't ruin it with a bad lighting choice! The classic candle is always a solid option, providing a flickering, eerie glow that's perfect for Halloween night. But be careful! Make sure the candle is secure and won't tip over, and never leave it unattended.
For a safer and more versatile option, consider using LED lights. You can find battery-operated LED candles that mimic the flickering effect of a real candle, or you can use colored LEDs to create a more dramatic look. White LEDs will showcase the details of your carving, while colored LEDs can add a spooky ambiance. Green for a zombie pumpkin, red for a vampire – you get the idea!
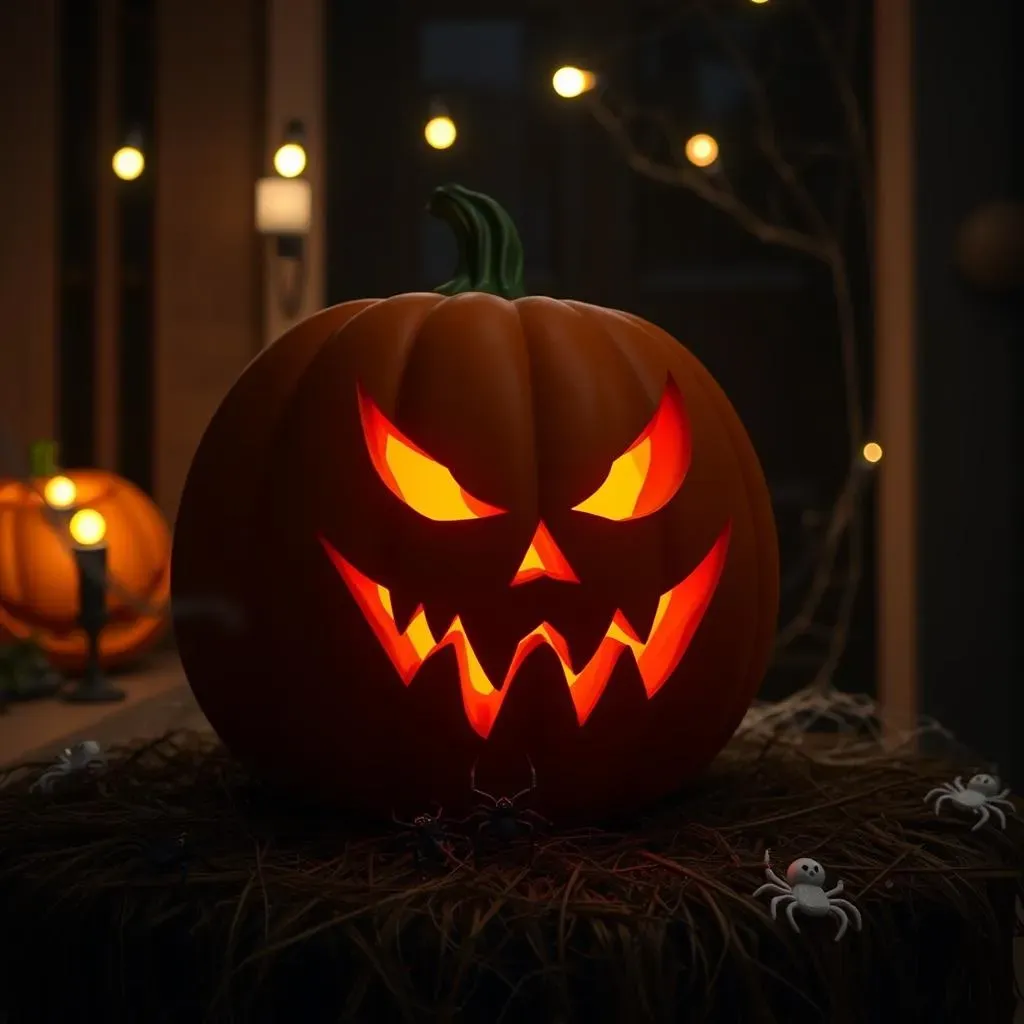
#2: The Art of the Display
Now that your pumpkin is glowing, it's time to think about presentation. Don't just plop it down on your porch and call it a day! Take some time to create a spooky display that will enhance the overall effect. Consider placing your pumpkin on a hay bale or a stack of old books. Surround it with cobwebs, plastic spiders, and other creepy decorations.
You can also use lighting to create a more dramatic scene. Shine a spotlight on your pumpkin to make it stand out, or use string lights to create a spooky backdrop. And don't forget about sound! Play some eerie music or sound effects to complete the atmosphere. With a little creativity, you can transform your porch into a haunted haven that will scare and delight trick-or-treaters of all ages.
Lighting Option | Pros | Cons |
|---|---|---|
Candle | Classic, eerie glow | Fire hazard, needs supervision |
LED Candle | Safe, reusable, flickering effect | Less authentic look |
Colored LEDs | Dramatic, customizable | Can look artificial |
Embrace the Fright: Your Scary Pumpkin Masterpiece Awaits
So, there you have it – a cauldron full of scary ideas for carving pumpkins to ignite your Halloween creativity. Whether you choose to unleash a horde of creepy crawlies, meticulously sculpt a nightmarish monster, or experiment with eerie lighting techniques, remember that the goal is to have fun and push your carving boundaries. With a little patience, a dash of daring, and these tips in your arsenal, you're well on your way to creating a jack-o'-lantern that's not just a decoration, but a true work of Halloween art. Now go forth, carve bravely, and let the spooky season begin!