Table of Contents
Halloween is creeping closer, and what's a spooktacular celebration without a glowing jack-o'-lantern grinning from your porch? But hold on, before you resign yourself to the same old triangle eyes and toothy grin, let's crank up the creativity! Forget complicated techniques and frustrating fails. This year, we're diving headfirst into a cauldron of scary easy pumpkin carving ideas that will transform your gourd game from ghastly to gasp-worthy. Whether you're a pumpkin-carving pro or a first-time frightster, we've got a design to ignite your imagination. From classic creepy faces with a modern twist to kid-friendly spooky characters, this guide is packed with inspiration and simple techniques to make your Halloween pumpkin the envy of the neighborhood. So, grab your carving tools (or that trusty kitchen knife!), and let's unearth some fantastically frightening and, most importantly, easy pumpkin carving ideas!
Unleash Your Inner Artist: Simple Tools for Scary Pumpkin Carving Ideas
Unleash Your Inner Artist: Simple Tools for Scary Pumpkin Carving Ideas
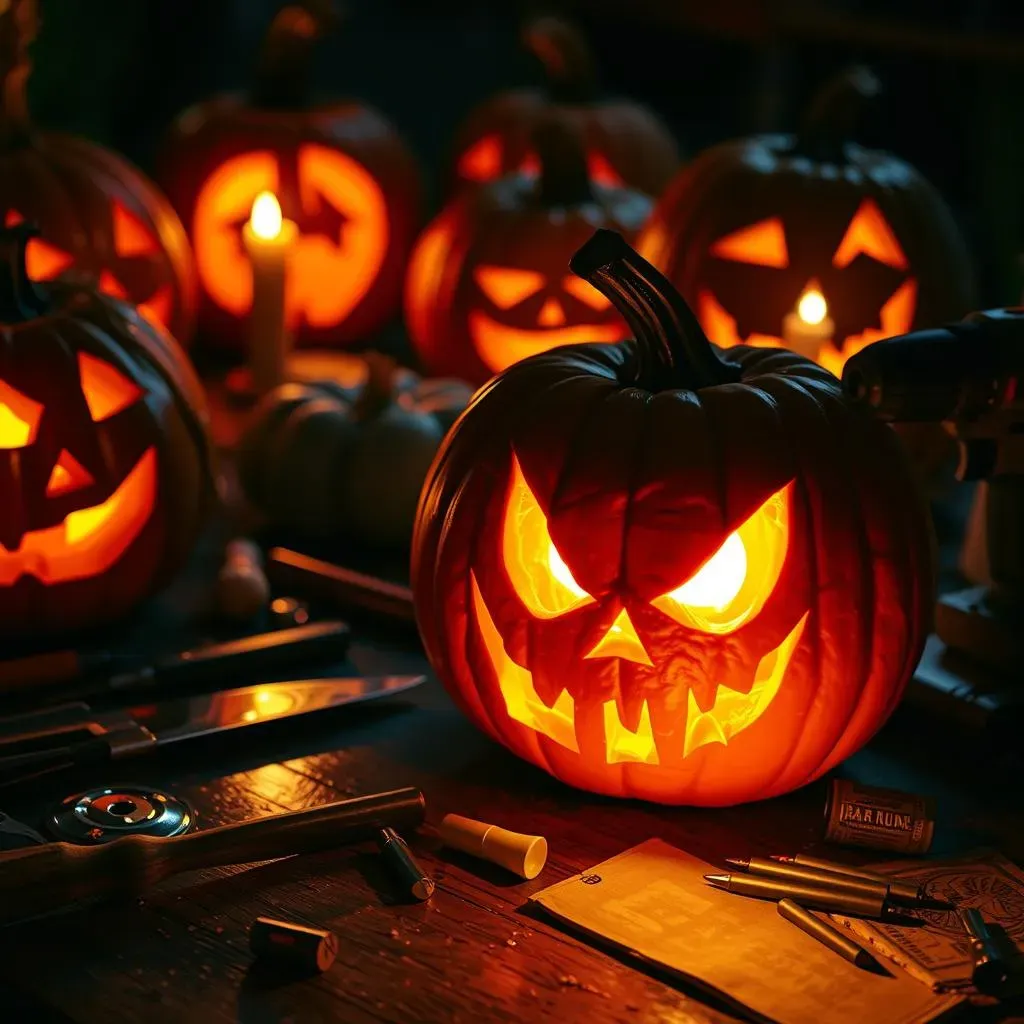
Alright, future pumpkin Picasso, let's talk tools! You don't need a fancy sculpting kit to create a masterpiece. In fact, some of the best scary pumpkin carving ideas come to life with surprisingly simple implements. Think beyond that flimsy plastic knife that comes with the pumpkin carving kit. While it might be tempting to grab the biggest knife in your kitchen, remember that safety and control are key. A smaller, serrated knife, like a paring knife, offers better maneuverability for intricate details. And for scooping out the pumpkin guts? An ice cream scoop or a sturdy metal spoon works wonders!
But here's where the fun really begins. Consider adding some unexpected items to your carving arsenal. A linoleum cutter, found at most craft stores, is fantastic for creating clean, precise lines. A simple clay sculpting tool can help you refine edges and add texture. And for creating those eerie, glowing eyes? A drill with various sized bits can punch out perfect holes for a truly haunting effect. The goal is to find tools that feel comfortable in your hand and allow you to express your creative vision with confidence.
Tool | Use | Why It's Awesome |
|---|---|---|
Paring Knife | Detailed carving, fine lines | Easy to control, sharp for clean cuts |
Linoleum Cutter | Precise lines, geometric shapes | Creates clean, professional-looking cuts |
Clay Sculpting Tools | Refining edges, adding texture | Versatile for adding depth and detail |
Drill with Bits | Creating perfect holes for light | Adds a unique, modern touch |
Don't be afraid to experiment and find what works best for you. I remember one year, I used a small saw to cut out a silhouette of a haunted house – it was surprisingly effective! The key is to prioritize safety, take your time, and most importantly, have fun. With the right tools and a little imagination, you'll be amazed at the scary and easy pumpkin carving ideas you can bring to life.
From Classic to Creepy: Easy JackO'Lantern Faces with a Twist
From Classic to Creepy: Easy JackO'Lantern Faces with a Twist
The Timeless Triangle Trio: Eyes, Nose, Mouth
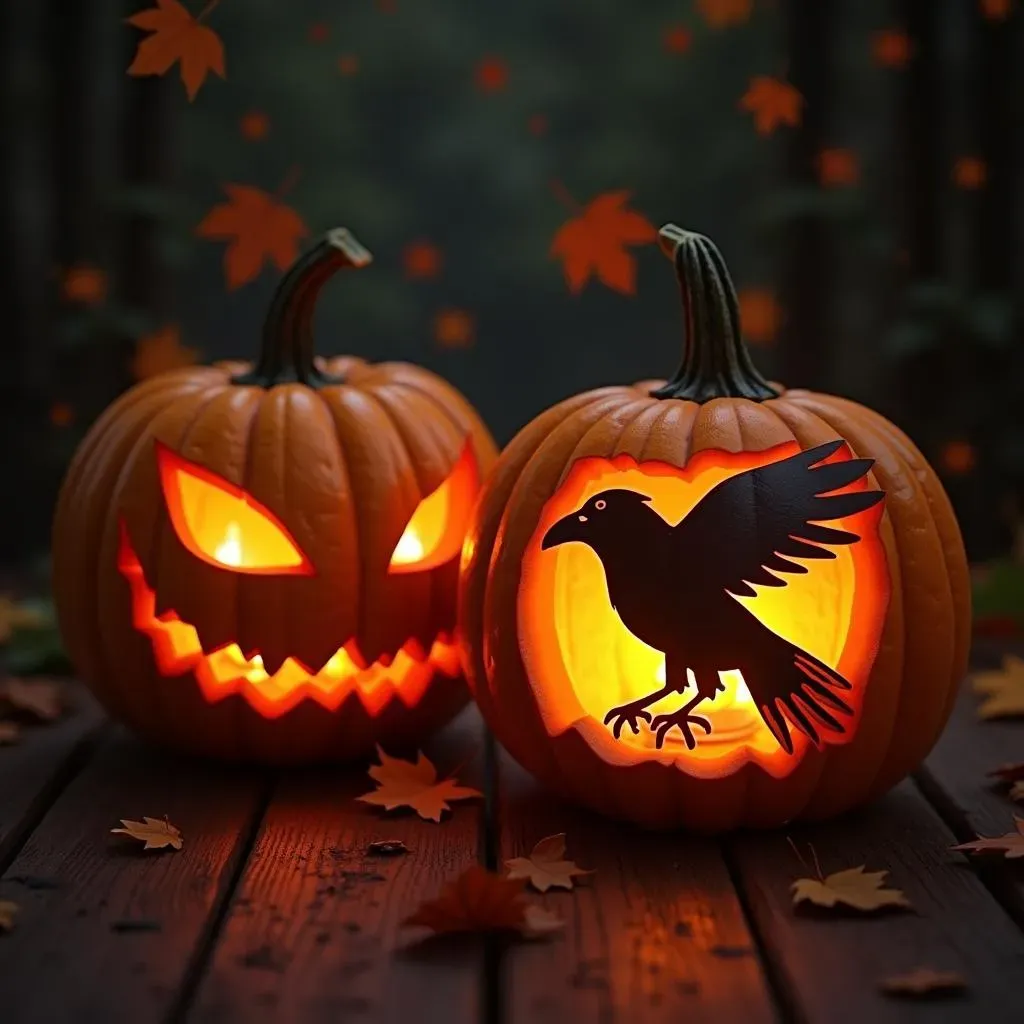
Let's be honest, the classic triangle-eyed jack-o'-lantern is a Halloween staple for a reason. It's simple, recognizable, and, well, kinda cute! But what if we could take that familiar face and inject a little bit of spooky personality? The secret lies in the details. Instead of perfect triangles, try slightly jagged edges for a more menacing look. Angling the eyes inward can create a sense of intensity, while tilting them outward gives off a goofy, surprised vibe. And that mouth? Forget the simple rectangle. Experiment with different shapes – a wide, toothy grin, a sinister smirk, or a gaping scream – to completely transform the pumpkin's expression.
Think about adding subtle details that tell a story. A small, off-center nose can give your pumpkin a quirky, asymmetrical charm. Carving small cracks around the eyes can suggest age and wisdom (or, you know, zombie vibes!). And don't underestimate the power of the eyebrow! Angled sharply, they convey anger; curved gently, they suggest curiosity. Even the simplest adjustments can elevate your classic jack-o'-lantern from ordinary to extraordinary. I always find inspiration from old horror movie posters – the exaggerated expressions are perfect for translating onto a pumpkin canvas!
Stencils to the Rescue: When Precision Matters
Alright, so maybe freehand carving isn't your jam. No worries! That's where stencils come in. But before you reach for that generic ghost stencil, let's talk about how to use them to create something truly unique. The key is to think of the stencil as a starting point, not the final destination. Trace the basic outline onto your pumpkin, but then feel free to embellish and personalize. Add extra details, change the shapes, or combine elements from multiple stencils to create a custom design that reflects your own spooky style.
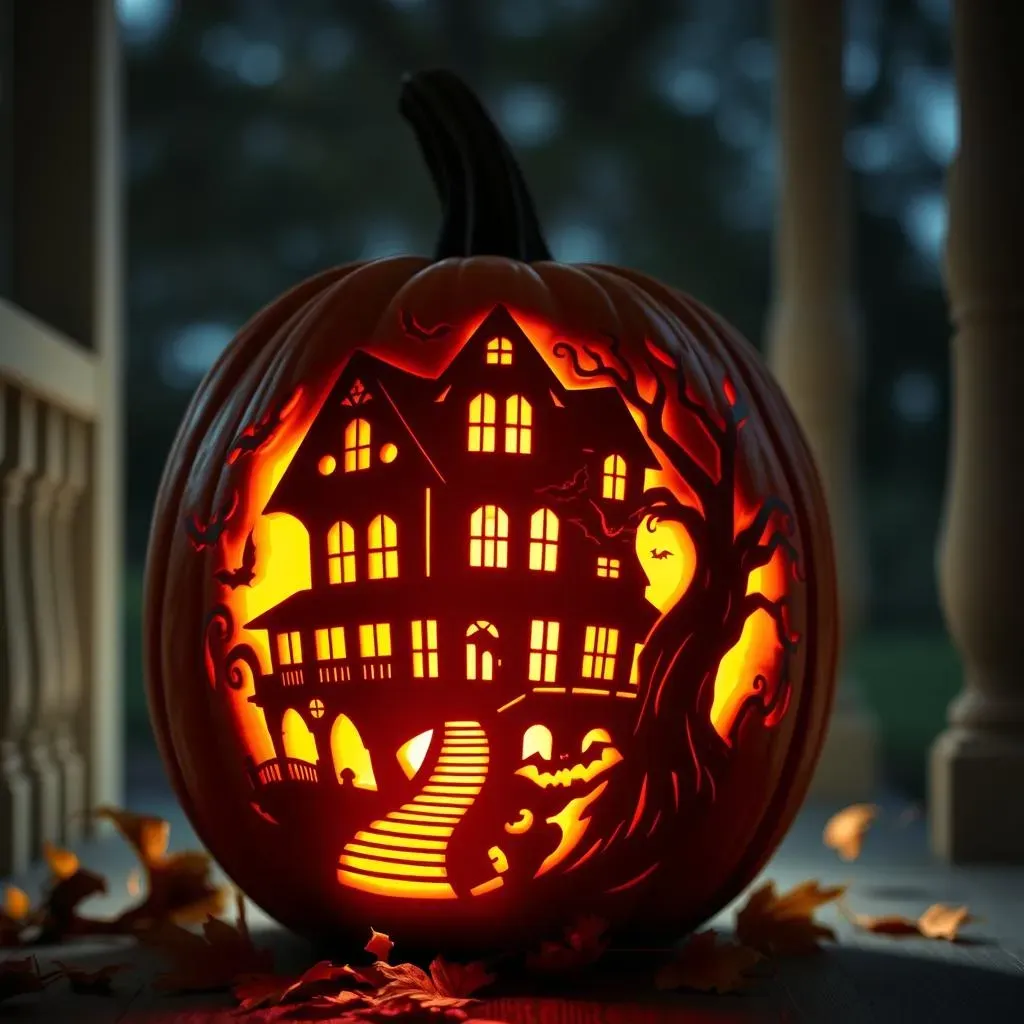
Consider using stencils to create more intricate and detailed designs than you might attempt freehand. A detailed skull, a spooky spiderweb, or even a portrait of your favorite horror movie villain can all be achieved with the help of a well-chosen stencil. Just remember to take your time, use a sharp tool, and don't be afraid to get creative with the details. I once saw someone use a stencil of a raven and then added tiny, individual feathers to the design – it was absolutely stunning! The possibilities are endless, so unleash your inner artist and let those stencils guide you to pumpkin-carving greatness.
Beyond the Smile: Adding Texture and Dimension
Want to take your jack-o'-lantern to the next level? It's all about texture and dimension. Instead of just cutting straight through the pumpkin skin, experiment with different carving depths to create shadows and highlights. Shave away thin layers of the pumpkin to let more light shine through, creating a subtle, glowing effect. Use a clay sculpting tool to create texture on the surface of the pumpkin, adding wrinkles, scars, or other details that enhance the spooky realism of your design.
Think about using different tools to achieve different textures. A rasp or a grater can create a rough, uneven surface, perfect for adding a weathered look to your pumpkin. A small saw can be used to create deep grooves and crevices, adding dramatic shadows and depth. And don't forget about the inside of the pumpkin! Carving patterns on the inner surface can create a unique, glowing effect that is sure to impress. Remember, the goal is to create a pumpkin that is not just visually appealing, but also tactile and engaging. So, get your hands dirty, experiment with different techniques, and let your creativity shine!
Beyond the Basics: Elevate Your Scary Pumpkin Carving Ideas with Stencils
Beyond the Basics: Elevate Your Scary Pumpkin Carving Ideas with Stencils
Choosing the Right Stencil: From Basic to Bold
So, you're ready to ditch the doodles and dive into the world of stencils, huh? Awesome! But before you grab the first scary face you see, let's talk strategy. Not all stencils are created equal, especially when it comes to scary pumpkin carving ideas. Think about the overall vibe you're going for. Do you want a classic, spooky look, or something a little more modern and edgy? Are you aiming for intricate details, or a bold, graphic design? The stencil you choose will set the tone for your entire pumpkin, so choose wisely!
Consider the size and complexity of the stencil in relation to your pumpkin. A tiny, intricate design on a massive pumpkin might get lost, while a large, bold stencil on a small pumpkin could look overwhelming. Also, think about your skill level. If you're a beginner, start with a simpler stencil with fewer details. As you gain confidence, you can move on to more complex designs. Remember, the goal is to have fun and create something you're proud of, so don't bite off more than you can chew (or carve!).
Transferring the Stencil: Precision is Key
Alright, you've got your perfect stencil, now it's time to get it onto your pumpkin. This is where precision is key! There are a few different methods you can use, but my personal favorite is the poke-and-trace method. Simply tape the stencil to your pumpkin and use a pushpin or needle tool to poke holes along the stencil lines. The closer the holes, the more accurate your transfer will be. Once you've poked all the holes, remove the stencil and use a marker to connect the dots, creating a clear outline on your pumpkin.
Another option is to use transfer paper. Simply place the transfer paper between the stencil and the pumpkin, trace the stencil lines, and the design will be transferred onto the pumpkin. This method is great for more intricate designs, as it allows you to see the entire design as you're tracing. No matter which method you choose, take your time and be careful not to smudge or distort the stencil. A clean, accurate transfer will make the carving process much easier and ensure a more professional-looking result.
KidFriendly Frights: Spooky and Easy Pumpkin Designs for All Ages

KidFriendly Frights: Spooky and Easy Pumpkin Designs for All Ages
Googly-Eyed Goblins: Silly Spooks for Little Carvers
Let's face it, not every kid wants a blood-soaked zombie on their pumpkin. Sometimes, silly and spooky is the way to go! Googly eyes are your secret weapon here. Pick up a bag of assorted sizes at any craft store and let your imagination run wild. Carve simple round holes for the eyes and glue googly eyes of different sizes inside. Add a goofy grin and maybe some wacky hair made from pipe cleaners, and you've got a friendly goblin that's more giggle-inducing than terrifying. One year, my niece made a pumpkin with a giant googly eye that kept falling off – it was hilarious!
Another great idea is to create a pumpkin monster with mismatched features. Carve a wonky mouth with crooked teeth, add a single, oversized eye, and maybe even a pair of antennae made from skewers. The key is to embrace the imperfections and let the kids' creativity shine. These silly spooks are not only easy to carve but also a fantastic way to get the little ones involved in the Halloween fun. Plus, they're guaranteed to bring a smile to everyone's face!
Design Idea | Difficulty | Materials |
|---|---|---|
Googly-Eyed Goblin | Easy | Pumpkin, googly eyes, glue, pipe cleaners |
Mismatched Monster | Easy | Pumpkin, carving tools, skewers |
Pumpkin Pet | Medium | Pumpkin, carving tools, felt, glue |
Pumpkin Pets: Cute Critters with Carved Features
Who says pumpkins have to be scary? Transform your gourd into a cuddly creature with a few simple carvings and some creative embellishments. Carve a simple cat face with triangular ears and add whiskers made from pipe cleaners. Create a puppy pumpkin with floppy ears made from felt and a wagging tail made from yarn. Or, go wild and invent your own fantastical creature with scales made from painted pumpkin seeds and wings made from cardboard.
The possibilities are endless! The key is to focus on creating cute and friendly features that appeal to kids. Think big, round eyes, a small, button nose, and a happy, smiling mouth. And don't be afraid to add some extra details to bring your pumpkin pet to life. A little bit of paint, some felt scraps, and a whole lot of imagination can transform a plain pumpkin into a beloved Halloween friend. I remember one year, my son made a pumpkin penguin – it was so adorable, we kept it on display long after Halloween was over!
Light Up the Night: Displaying Your Scary Easy Pumpkin Carvings with Flair
Light Up the Night: Displaying Your Scary Easy Pumpkin Carvings with Flair
The Classic Candle Glow: Timeless and Terrifying
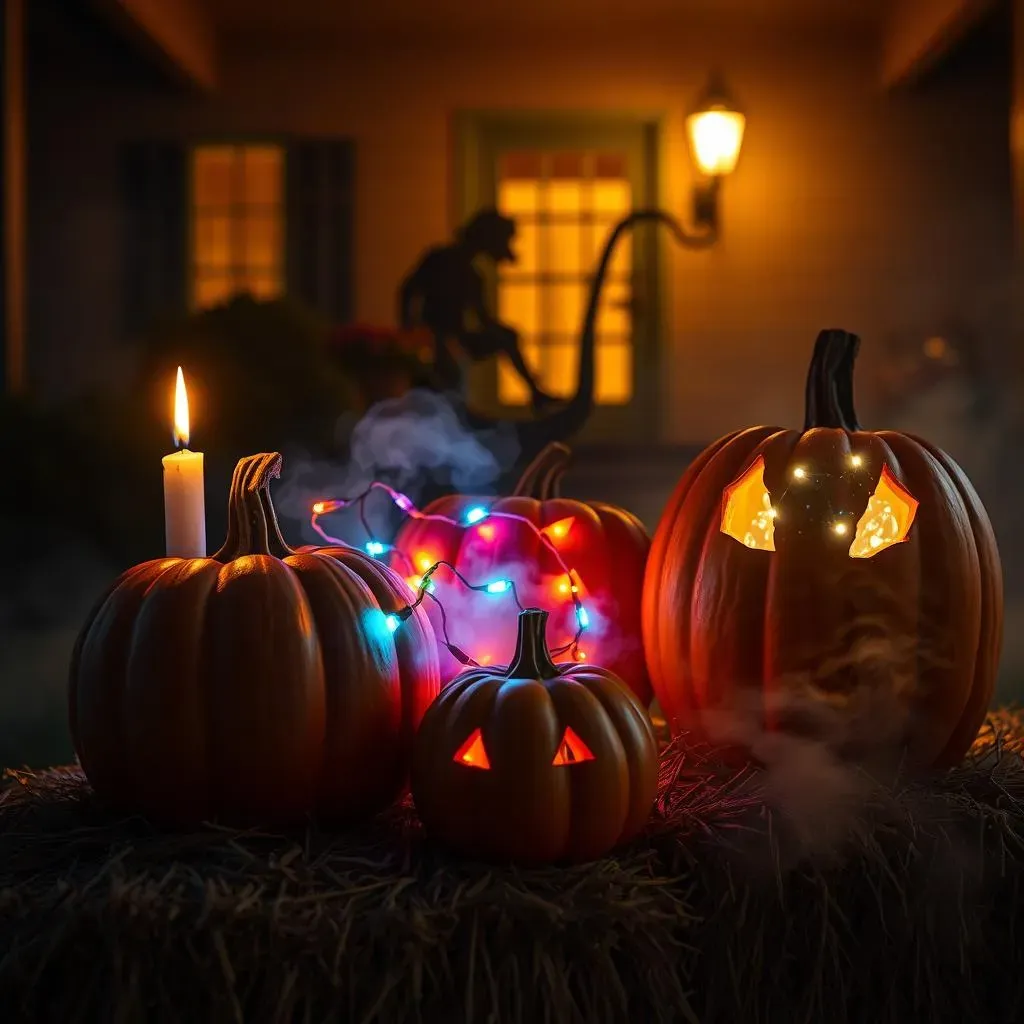
let's start with the OG of pumpkin illumination: the candle. There's just something undeniably spooky about that flickering flame dancing inside a carved pumpkin. It's classic, it's simple, and it instantly evokes the spirit of Halloween. But before you just plop a tea light inside and call it a day, let's talk about how to maximize that candle glow for maximum fright factor. First, make sure your pumpkin is dry inside – moisture can extinguish the flame. Use a sturdy candle holder to keep the flame stable and prevent it from tipping over. And for extra safety, consider using battery-operated LED candles. They provide the same warm glow without the risk of fire, especially important if you have little ones running around.
To really enhance the candle's effect, think about the placement of your pumpkin. A dimly lit porch or entryway is the perfect setting for a candlelit jack-o'-lantern. The shadows created by the flickering flame will add depth and dimension to your carving, making it even more eerie and captivating. I remember one year, I placed a candlelit pumpkin in front of a window, and the silhouette it cast on the curtains was absolutely terrifying! It's all about creating the right atmosphere to amplify the spooky effect of your carving.
Beyond the Candle: Modern Lighting Magic
Alright, so maybe you're looking for something a little more…extra. Fear not, my friends, because the world of pumpkin lighting has evolved far beyond the humble candle! Battery-operated string lights are a fantastic way to add a whimsical touch to your scary easy pumpkin carving ideas. Simply stuff a string of colorful lights inside your pumpkin for a vibrant, glowing effect. You can even find string lights with different settings, like flashing or fading, to create a truly dynamic display. Another option is to use a spotlight to illuminate your pumpkin from the outside. This is a great way to highlight intricate details and create dramatic shadows.
For a truly modern and mesmerizing effect, consider using submersible LED lights. These waterproof lights can be placed inside a water-filled container within your pumpkin, creating a stunning, shimmering glow. You can even add food coloring to the water for a spooky, otherworldly effect. And if you're feeling particularly ambitious, you can even incorporate a small fog machine into your pumpkin display for a truly haunting atmosphere. Just be sure to follow all safety precautions and keep the fog machine away from any flammable materials. With a little creativity and some modern lighting magic, you can transform your pumpkin into a truly unforgettable Halloween spectacle.
Lighting Option | Pros | Cons |
|---|---|---|
Candles | Classic, spooky, inexpensive | Fire hazard, requires supervision |
LED String Lights | Safe, versatile, colorful | Requires batteries, can be less dramatic |
Spotlight | Highlights details, creates shadows | Requires external power source, can be harsh |
Submersible LED Lights | Unique, mesmerizing, waterproof | Requires water, can be more complex |
Embrace the Spooky Season with Your Own Scary Easy Pumpkin Carving Masterpiece
So, there you have it – a treasure trove of scary easy pumpkin carving ideas to unleash your inner Halloween artist. Whether you opted for a classic creepy grin, a stencil-assisted masterpiece, or a kid-friendly spooky character, the most important thing is to have fun and let your creativity shine. Light up your carved creation, place it proudly on your porch, and prepare to welcome trick-or-treaters with a delightfully frightful spectacle. Happy carving, and Happy Halloween!