Table of Contents
Halloween's not complete without a glowing jack-o'-lantern grinning from your porch, right? But forget the same old triangle eyes and toothy grin. This year, it's time to unleash your inner artist and dive headfirst into a world of really cool pumpkin carving ideas. Whether you're a seasoned pro with a full arsenal of carving tools or a newbie armed with nothing but a spoon and a dream, we've got inspiration galore.
Essential Tools and Prep for Really Cool Pumpkin Carving
Essential Tools and Prep for Really Cool Pumpkin Carving
Choosing Your Pumpkin Wisely
So, you're ready to dive into some really cool pumpkin carving? First things first, you gotta pick the right pumpkin! Don't just grab the first orange orb you see. Look for a pumpkin that's got a sturdy stem (your handle!), a smooth, relatively flat surface for easy carving, and feels solid for its size. Give it a little thump – you want to hear a hollow sound, not a dull thud. Avoid pumpkins with soft spots, bruises, or any signs of rot. Those are just asking for trouble (and a prematurely collapsing jack-o'-lantern). Think of it like picking out a melon – you want the perfect balance of ripeness and sturdiness.
Also, consider the size and shape. A taller pumpkin might be perfect for a vertical design, while a wider one lends itself to a more sprawling scene. Let the pumpkin's natural form inspire your really cool pumpkin carving!
Setting Up Your Carving Station
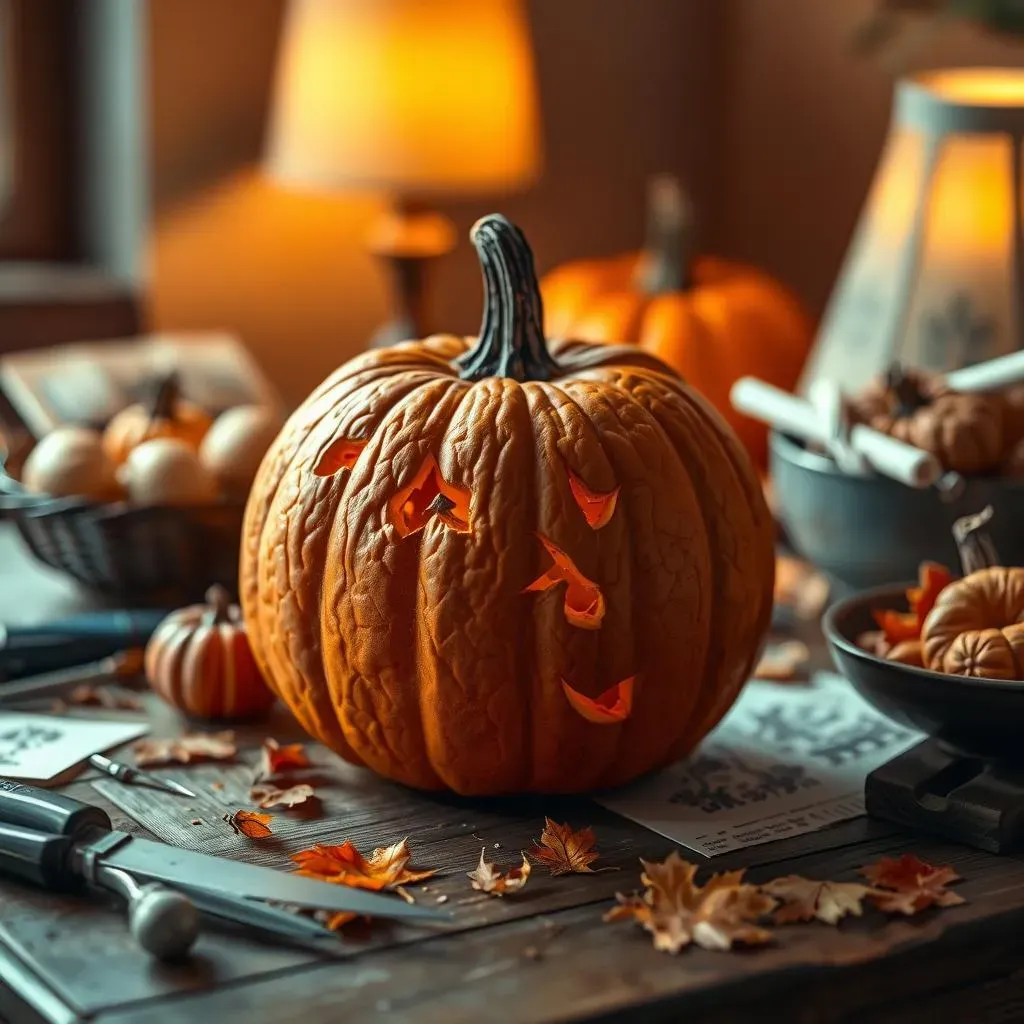
Alright, pumpkin acquired! Now, let's talk workspace. Carving can get messy, so protect your surfaces. Newspaper, a plastic tablecloth, or even an old sheet will do the trick. Good lighting is crucial – you want to see what you're doing! A bright overhead light and maybe even a desk lamp focused on your pumpkin will make a huge difference.
Next, gather your tools. We'll get into specifics in a bit, but at a minimum, you'll need a carving knife (or a specialized pumpkin carving kit), a scoop or scraper for gutting the pumpkin, and some stencils or markers for sketching out your design. A bowl for the pumpkin guts is a must, and don't forget a damp cloth or paper towels for wiping your hands and tools.
The Right Tools for the Job
Now, about those tools… While you *can* technically carve a pumpkin with a kitchen knife, trust me, you'll have a much easier (and safer!) time with the right equipment. Pumpkin carving kits are readily available and usually include a variety of saws, gouges, and scrapers designed specifically for pumpkin flesh. A serrated knife is great for cutting out large sections, while smaller tools are perfect for detail work.
Don't underestimate the power of a good scoop! A sturdy ice cream scoop or a dedicated pumpkin scraper will make quick work of those stringy innards. And speaking of innards, save those seeds! Roasted pumpkin seeds are a delicious and healthy snack. Finally, consider investing in some clay sculpting tools – they're surprisingly useful for creating intricate details and textures in your really cool pumpkin carving.
Tool | Purpose |
|---|---|
Serrated Knife | Cutting large sections, removing the lid |
Small Carving Saw | Detailed carving, intricate designs |
Pumpkin Scoop | Removing seeds and pulp |
Clay Sculpting Tools | Adding texture, fine details |
Classic & Spooky: Traditional Halloween Pumpkin Carving Ideas
Classic & Spooky: Traditional Halloween Pumpkin Carving Ideas
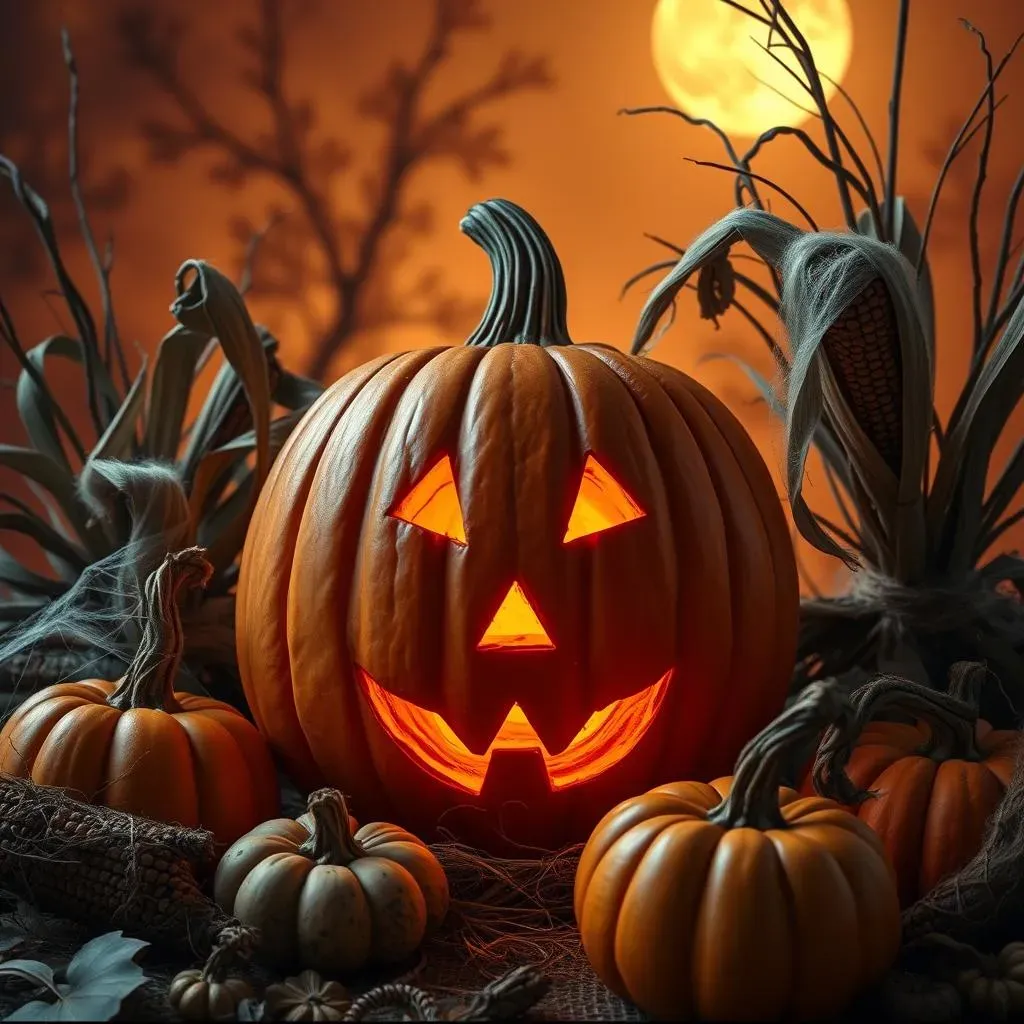
The Timeless Jack-o'-Lantern Face
Let's be honest, you can't go wrong with the classics. The traditional jack-o'-lantern face is a Halloween staple for a reason. It's simple, recognizable, and instantly spooky. Think big, triangular eyes, a jagged, toothy grin, and maybe a menacing brow. The beauty of this design is that it's endlessly customizable. You can make the eyes wider or narrower, the grin more sinister or silly, and add extra details like scars, warts, or even a monocle for a touch of class (or should I say, *ghoul-ass*?). Don't be afraid to experiment with different shapes and sizes for the features – that's what makes each jack-o'-lantern unique!
For a truly classic look, stick to simple cuts and avoid overly intricate details. The goal is to create a bold, easily visible design that will cast a spooky glow on Halloween night. Pro tip: Use a template or stencil if you're feeling unsure about your freehand skills. There's no shame in a little help from our friends!
Scary Silhouettes and Spooky Shapes
Beyond the basic face, there's a whole world of spooky silhouettes and shapes you can carve into your pumpkin. Think bats, black cats, ghosts, spiders, and haunted houses. These designs are relatively easy to execute, especially if you use stencils. Simply trace the outline onto your pumpkin and carefully carve away the surrounding areas to create a striking silhouette.
To add depth and dimension, consider layering different shapes and sizes. For example, you could carve a large bat silhouette with smaller bats flying around it. Or, create a haunted house scene with multiple windows and doors, each revealing a glimpse of something spooky inside. Remember, the key to a successful silhouette is clean lines and clear definition. Take your time, use sharp tools, and don't be afraid to get creative with your spooky shapes!
Beyond the Basics: Unique and Really Cool Pumpkin Carving Designs

Beyond the Basics: Unique and Really Cool Pumpkin Carving Designs
Embrace Negative Space
Alright, you've mastered the spooky face and the classic silhouette. Now, let's crank up the creativity! One of the most effective ways to achieve really cool pumpkin carving is by embracing negative space. Instead of carving *out* the design, carve *around* it. Think of it like a stencil in reverse. This technique allows you to create incredibly intricate and detailed designs that would be impossible with traditional carving methods. For example, you could carve a delicate lace pattern around a solid pumpkin surface, or create a stunning portrait by carefully removing the background to reveal the subject's face. The key is to plan your design carefully and use precise cuts to achieve clean, crisp lines. It's like creating a work of art with light and shadow!
Want to try it? Imagine carving a silhouette of a tree, but instead of carving the tree itself, you carve away all the space *around* the tree. When you light it up, the tree will appear as a solid, glowing shape against a dark background. Boom! Instant sophistication.
Drill, Baby, Drill!
Forget the knife for a minute. Grab a drill! (Yes, you read that right.) Drilling holes into your pumpkin opens up a whole new world of design possibilities. You can create intricate patterns, delicate textures, and even simulate the look of pointillism. Experiment with different drill bit sizes to achieve varying levels of detail. For example, use a small drill bit to create tiny pinpricks of light, or a larger bit to create bolder, more dramatic holes. This technique is especially effective for creating abstract designs, geometric patterns, or even replicating constellations.
Safety first, though! Always wear safety glasses when drilling, and be careful not to apply too much pressure. You don't want to crack your pumpkin! Start with a low speed and gradually increase it as needed. And remember, a little goes a long way. Don't overdo it with the drilling – sometimes, less is more when it comes to really cool pumpkin carving.
Drill Bit Size | Effect |
|---|---|
Small (1/16 inch) | Tiny pinpricks of light, subtle details |
Medium (1/8 inch) | Geometric patterns, textures |
Large (1/4 inch) | Bold holes, dramatic effects |
Pop Culture Pumpkins: Carving Your Favorite Characters
Pop Culture Pumpkins: Carving Your Favorite Characters
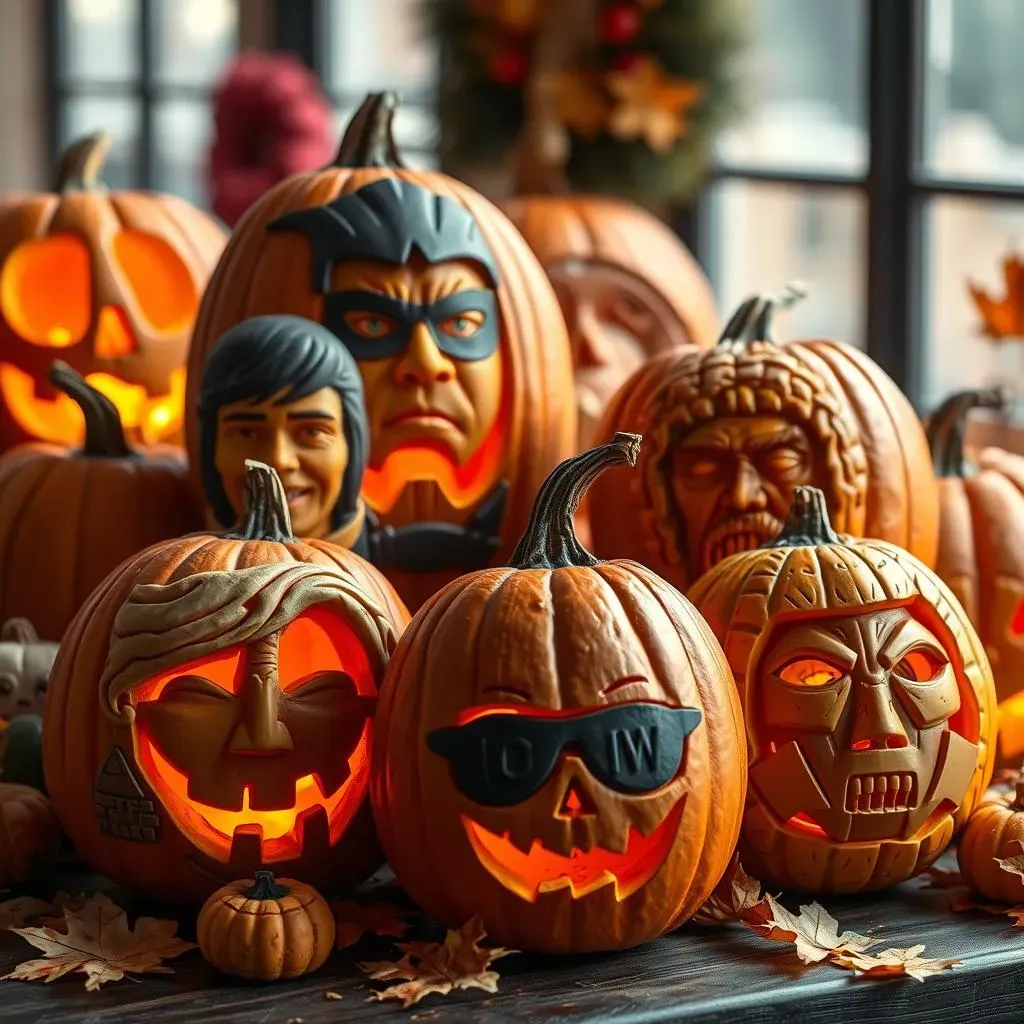
From Screen to Seed: Pop Culture Icons on Pumpkins
let's get to the *really* fun stuff: bringing your favorite characters to life on a pumpkin! This is where your Pop Culture Pumpkins: Carving Your Favorite Characters skills can truly shine. Think beyond the typical ghosts and goblins and imagine carving Harry Potter's glasses, Baby Yoda's adorable face, or even the iconic Batman logo. The possibilities are endless! The key is to choose a design that you're passionate about and that translates well to the pumpkin medium. Complex designs with lots of fine details can be challenging, so start with something relatively simple and work your way up.
Consider using stencils or printable templates to guide your carving. You can find tons of free resources online, or even create your own using image editing software. Trace the design onto your pumpkin using a marker or transfer paper, and then carefully carve away the excess. Remember, patience is key! Take your time, use sharp tools, and don't be afraid to make mistakes. Even a slightly wonky Baby Yoda is still pretty darn cute!
Level Up: Advanced Character Carving Techniques
So, you've mastered the basics of character carving and you're ready to take things to the next level? Awesome! Now it's time to explore some advanced techniques that will make your Pop Culture Pumpkins: Carving Your Favorite Characters stand out from the crowd. Consider using different carving depths to create shading and dimension. For example, you could carve deeper around the eyes and mouth to create a more dramatic effect, or use shallow cuts to add subtle details like wrinkles or fur.
Another trick is to use different tools to achieve different textures. A small gouge can be used to create a rough, textured surface, while a clay sculpting tool can be used to smooth out edges and create fine details. And don't forget about lighting! Experiment with different colored lights to enhance the mood and atmosphere of your character carving. A green light can make your zombie pumpkin extra spooky, while a blue light can give your Elsa pumpkin a magical glow.
Character | Carving Tip |
|---|---|
Baby Yoda | Focus on the big eyes and ears! |
Batman | Sharp, clean lines for the logo are key. |
Harry Potter | Don't forget the lightning bolt scar! |
Elsa | Use a blue light for an icy effect. |
Advanced Techniques for ShowStopping, Really Cool Pumpkin Carvings
Advanced Techniques for ShowStopping, Really Cool Pumpkin Carvings
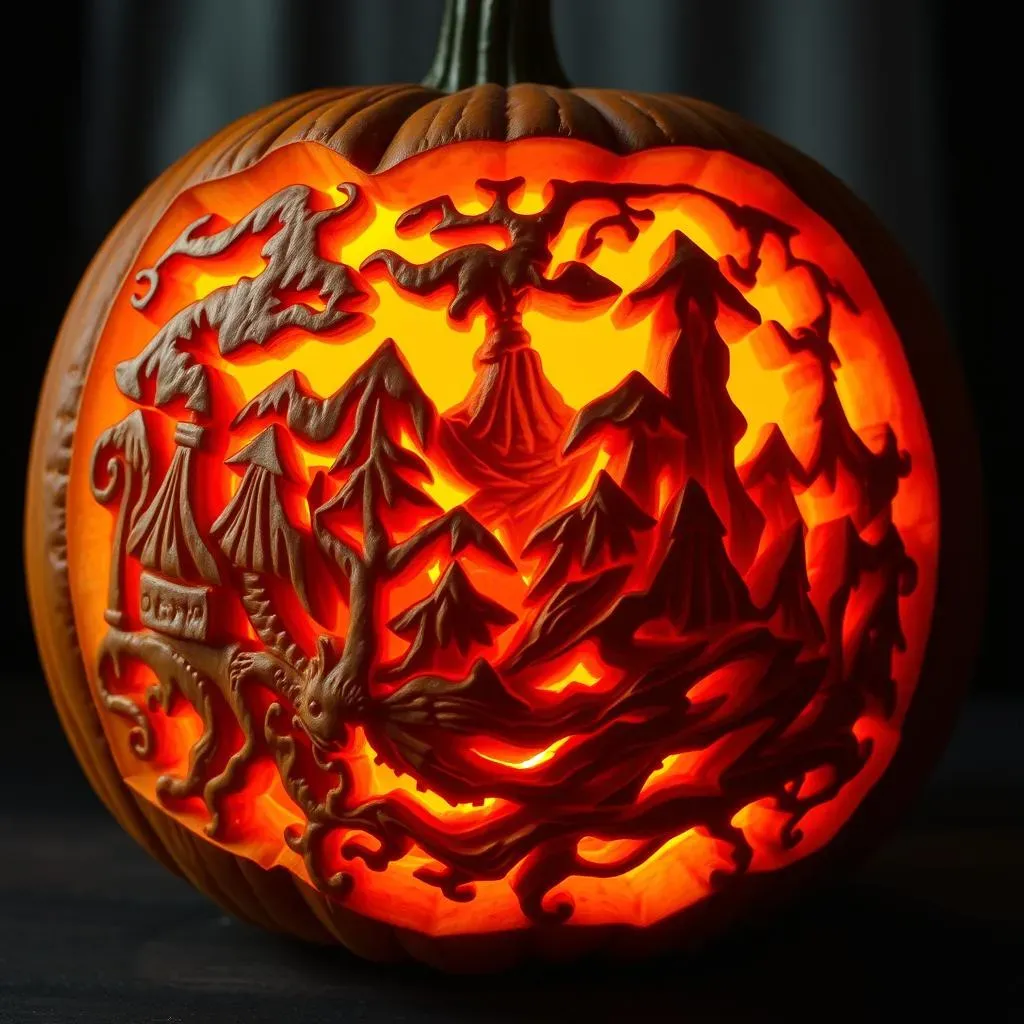
Layered Carving: Depth and Dimension
Want to take your pumpkin carving from flat to fantastic? Layered carving is the secret weapon! This technique involves carving at different depths to create shadows and highlights, adding a 3D effect that will make your jack-o'-lantern truly pop. Start by sketching out your design, then identify areas that should be recessed (carved deeper) and areas that should be raised (left closer to the surface). Use a variety of carving tools to achieve different depths, and don't be afraid to experiment. The key is to create a subtle gradient between the layers, so the transitions look smooth and natural.
For example, if you're carving a face, you might carve deeper around the eyes and mouth to create shadows that emphasize those features. Or, if you're carving a landscape scene, you could carve the foreground elements closer to the surface and the background elements deeper to create a sense of perspective. With layered carving, the possibilities are endless!
Pro-Level Tools: Beyond the Basic Kit
so you've mastered the basics. Time to ditch the plastic pumpkin carving kit and upgrade to some serious tools! We're talking about professional-grade carving knives, wood carving gouges, and even power tools like rotary tools (think Dremel). These tools offer unparalleled precision and control, allowing you to create incredibly intricate and detailed designs. But be warned: they also require a bit of practice and skill to use safely. Start with smaller, less expensive tools and gradually work your way up as you become more comfortable.
Also, consider investing in a good sharpening stone. Sharp tools are essential for clean cuts and precise details. A dull knife is not only frustrating to use, but it's also more dangerous, as it requires more force to cut through the pumpkin flesh. Keep your tools sharp, and they'll reward you with stunning results. And always, *always* wear safety glasses when using power tools!
Tool | Benefit |
|---|---|
Wood Carving Gouges | Precise shaping, creating curves |
Rotary Tool (Dremel) | Detailed carving, engraving |
Sharpening Stone | Maintains tool sharpness, safety |
Stencils and Projectors: Cheating (But in a Good Way!)
Let's face it, not everyone is a natural-born artist. And that's okay! There's no shame in using stencils or projectors to help you create Advanced Techniques for ShowStopping, Really Cool Pumpkin Carvings. Stencils are a great way to transfer complex designs onto your pumpkin, ensuring accurate proportions and clean lines. You can find tons of free stencils online, or even create your own using image editing software. Simply print out the stencil, tape it to your pumpkin, and trace the design using a marker or transfer paper. Then, carefully carve away the excess.
For even more precision, consider using a projector. Projectors allow you to project any image onto your pumpkin, making it incredibly easy to trace even the most intricate designs. This is especially useful for creating portraits or replicating complex patterns. Just be sure to work in a dark room and position the projector at the correct angle to avoid distortion. With stencils and projectors, anyone can create a show-stopping pumpkin carving, regardless of their artistic skill. It's all about working smarter, not harder!
Happy Carving! From Inspiration to Illumination
So, there you have it – 110 ways to transform a simple pumpkin into a Halloween masterpiece! Hopefully, this collection of really cool pumpkin carving ideas has sparked your imagination and given you the confidence to try something new. Remember, the most important thing is to have fun and let your creativity shine. Don't be afraid to experiment, make mistakes, and learn along the way. And when your masterpiece is complete, don't forget to share it with the world! Happy Halloween, and happy carving!