Table of Contents
October rolls around, and suddenly every porch is sporting a grinning gourd. Maybe you love the idea but figure carving a pumpkin is a messy, complicated affair that takes hours and requires some sort of artistic genius you definitely don't possess. Or perhaps you're just short on time but still want that classic Halloween vibe. You've seen those intricate, gallery-worthy pumpkins and thought, "Yeah, right, not happening." Well, let's pump the brakes on that thought. Getting a cool jack-o'-lantern doesn't need to be an all-day project ending in frustration and pumpkin guts everywhere. This article is all about quick and easy pumpkin carving ideas that deliver maximum spooky style with minimal effort. We're talking simple designs, smart tools, and tricks to keep your creation looking fresh. We’ll walk through picking your pumpkin, the right (simple!) tools to use, some genuinely achievable designs, and how to make your masterpiece glow safely. Ready to ditch the stress and get straight to the fun? Let's dive into some quick and easy pumpkin carving ideas that will have your porch looking Halloween-ready in no time.
Getting Started with Quick and Easy Pumpkin Carving
Getting Started with Quick and Easy Pumpkin Carving
Picking Your Perfect Pumpkin and Tools
Alright, so you're ready to tackle a pumpkin but you're aiming for speed and minimal fuss. The first step in getting started with quick and easy pumpkin carving is picking the right gourd. Don't grab the biggest, heaviest one on the pile unless you want an arm workout and hours of scraping. Look for a medium-sized pumpkin, maybe 8-12 inches across. It should feel firm all over – no soft spots or mushy bits. Check the stem; a sturdy, green stem usually means it's fresh. The skin should be relatively smooth because bumps and ridges make simple designs tricky. Think of it like picking a canvas; a smooth surface is just easier to work with when you're trying to be quick.
Essential Kit for a Speedy Carve
Forget those fancy, expensive carving kits with a million tiny tools you'll never use. For quick and easy pumpkin carving, you really only need a few things. A sturdy, sharp knife (a small serrated one works well) is crucial for cutting the lid. An ice cream scoop or a large metal spoon is your best friend for gutting the pumpkin – it's way more efficient than those flimsy plastic scrapers in kid kits. Maybe a smaller paring knife for details, but honestly, with simple designs, you might not even need it. Having a marker to draw your design helps, and a bowl for the seeds (to roast later, obviously) and another for the stringy bits keeps the mess somewhat contained. That's it. No need for a whole toolkit.
Quick Tool Checklist
- Medium-sized, firm pumpkin
- Sharp, sturdy knife (serrated kitchen knife works)
- Ice cream scoop or large metal spoon
- Marker
- Bowls for guts and seeds
Simple Designs for Quick and Easy Pumpkin Carving
Simple Designs for Quick and Easy Pumpkin Carving
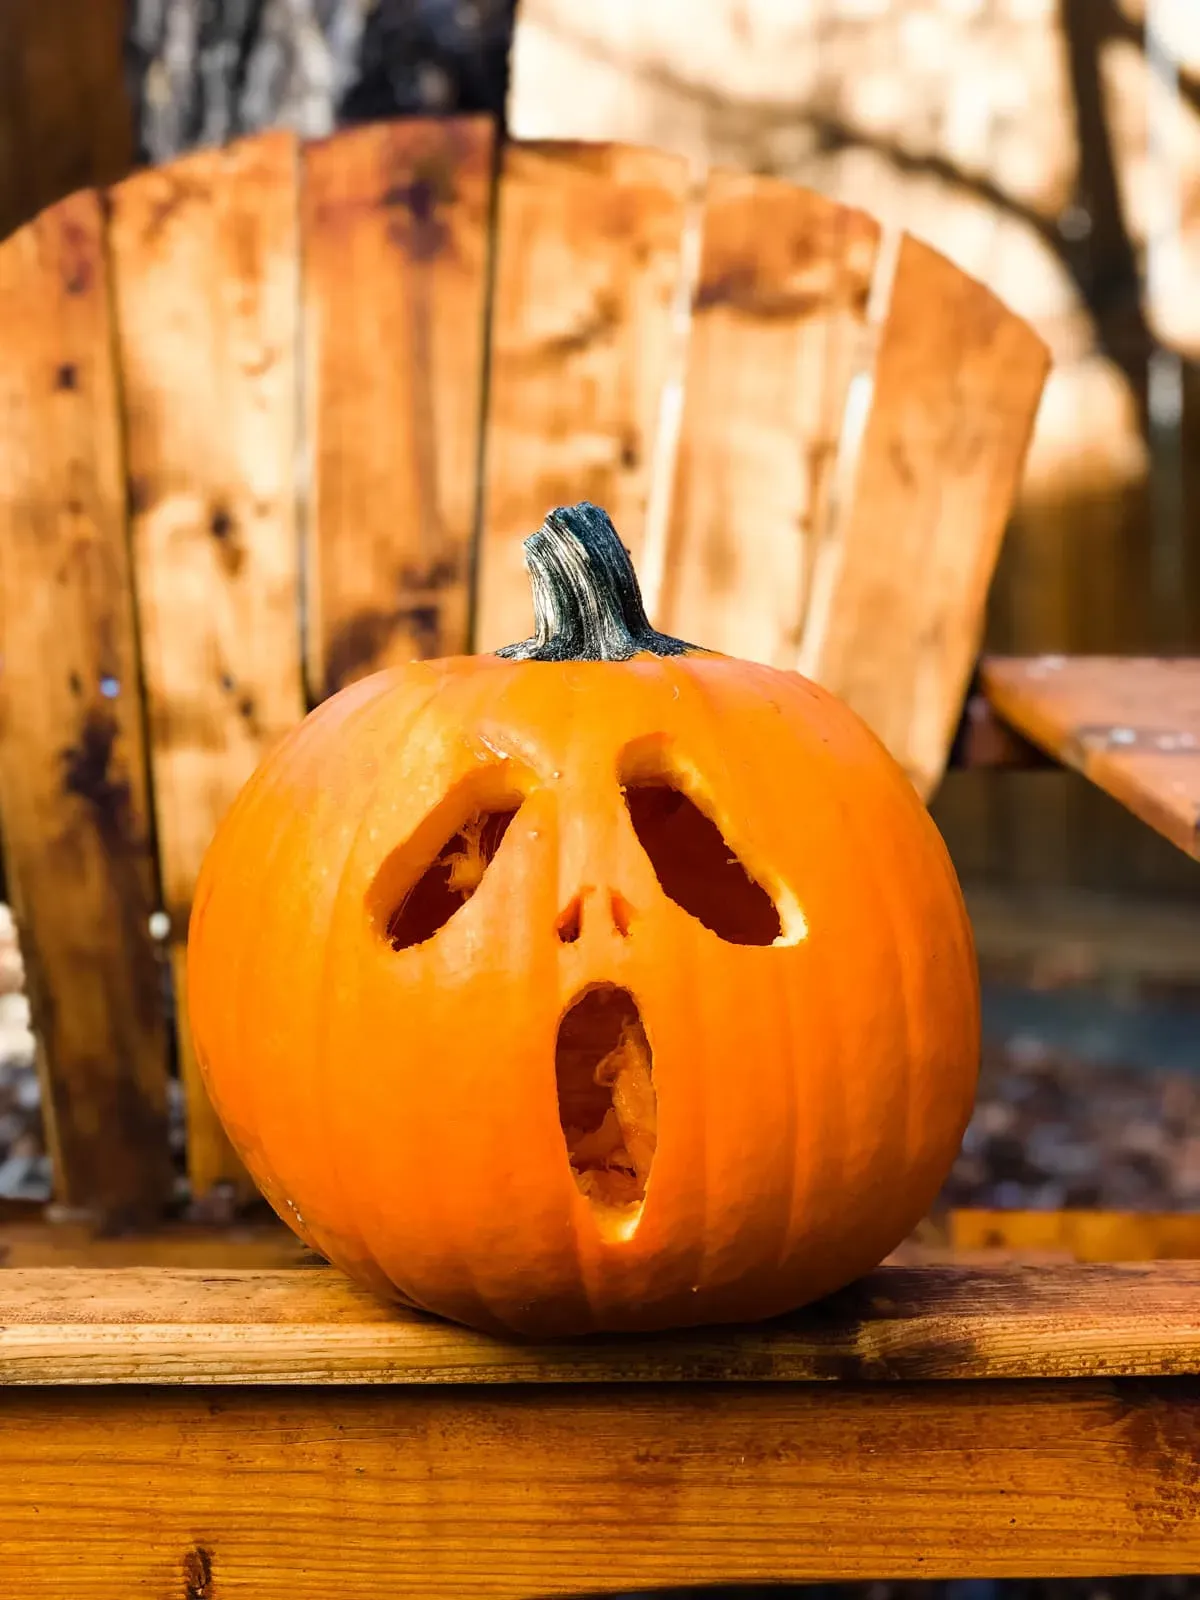
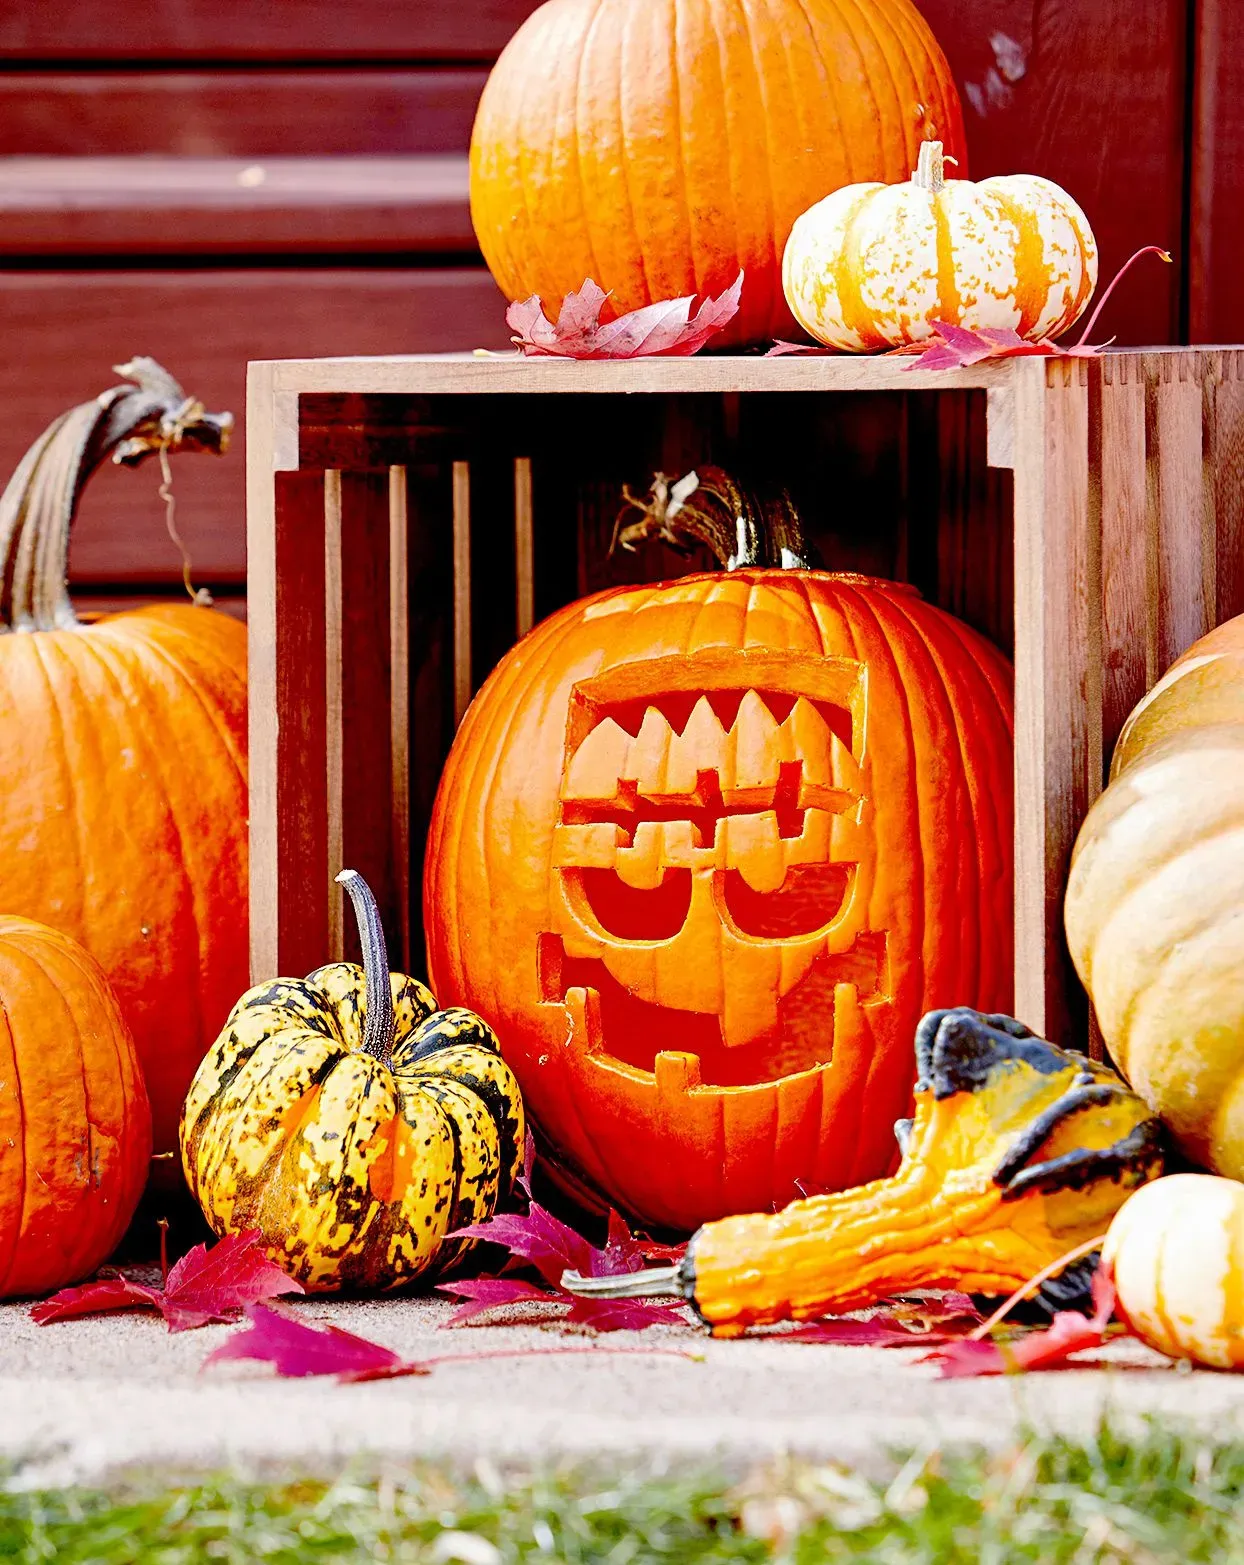
now for the fun part: what to actually carve when you're aiming for quick and easy pumpkin carving ideas. Forget etching intricate spiderwebs or replicating famous faces. We're talking about designs you can nail in under 30 minutes. The classic jack-o'-lantern face is your best friend here – simple triangles for eyes and a jagged smile. Maybe mix it up with square eyes and a wonky tooth or two. Ghost shapes are also incredibly forgiving; just a wobbly outline and maybe a couple of oval eyes. Cat shapes, too, are surprisingly simple: pointed ears on top, round eyes, and a little triangle nose. These designs rely on basic geometric shapes and minimal cuts, which is exactly what you want when speed is the goal. Don't overthink it; sometimes the slightly imperfect, slightly lopsided ones have the most personality anyway.
More Quick and Easy Pumpkin Carving Ideas
More Quick and Easy Pumpkin Carving Ideas
Beyond the Knife: Etching and Stencils
so maybe wielding a sharp knife isn't your idea of "easy," or you've got little hands helping out. This is where etching comes in, and it’s a fantastic avenue for quick and easy pumpkin carving ideas that skip the full cut-through. Instead of slicing all the way through the pumpkin wall, you just scrape away the top layer of skin. This removes the orange surface and exposes the lighter flesh underneath. It’s much faster, less messy, and frankly, less likely to result in a trip to the emergency room. You can use simple tools like linoleum cutters, wood carving tools, or even just a sturdy spoon or screwdriver to scrape designs. Think stars, dots, squiggles, or simple words like "Boo!" or "Spooky." When lit from inside, these etched areas glow beautifully. It's carving-adjacent, low stress, high reward.
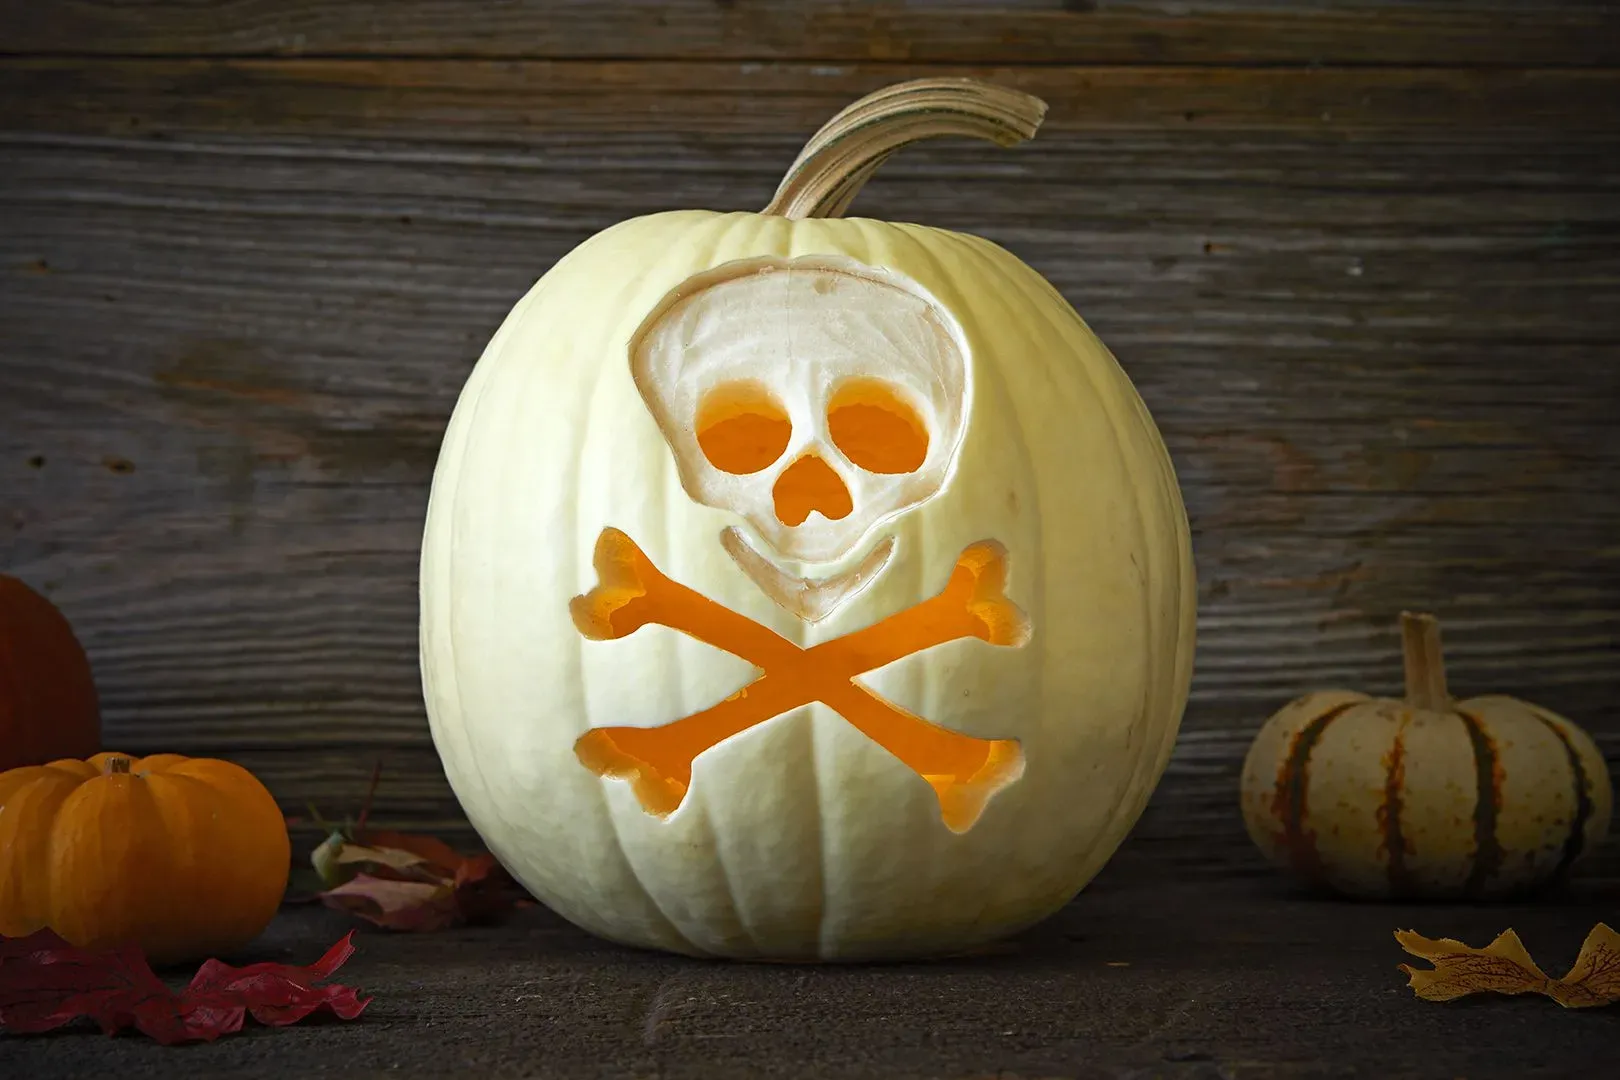
Templates and Cookie Cutters for Speed
If freehand drawing feels daunting even for a simple face, don't reinvent the wheel. Using templates or even cookie cutters can seriously speed up your quick and easy pumpkin carving efforts. You can print out simple shapes online – think basic circles, squares, stars, or even letter stencils. Tape the template onto the pumpkin and use a poking tool (like a skewer or toothpick) to trace the outline by making small holes through the paper and into the pumpkin skin. Once the outline is poked, you just connect the dots with your knife or etching tool. For ultimate speed, metal cookie cutters are brilliant. Just press a sturdy metal cutter firmly into the pumpkin skin until it makes an impression, or even tap it with a mallet to push it partway through. Then you can either fully cut out the shape or just etch around the impression. Instant, perfectly shaped designs without any artistic skill required.
Quick Techniques to Try:
- Etching simple shapes or words
- Using metal cookie cutters (stars, circles, bats)
- Poking patterns (dots, lines, spirals)
- Tracing simple stencils with a poking tool
- Using a drill for perfect holes
Lighting Up Your Carved Pumpkins
Lighting Up Your Carved Pumpkins
The Classic Glow: Real Candles
So you’ve followed the quick and easy pumpkin carving ideas and now you’ve got your grinning (or maybe slightly lopsided) creation ready for prime time. How do you make it actually glow? The old-school way is with a real candle. There's something undeniably classic about the flickering light inside a jack-o'-lantern. You just need a small votive or tea light. Make sure you cut a decent-sized hole in the top (or bottom, some people swear by cutting the bottom) so heat can escape and the candle gets enough air. Place the candle securely in the center, light it carefully, and pop the lid back on. Just be mindful of where you put it – away from anything flammable, obviously. A porch step is fine; a dry patch of leaves, maybe not the best call.
Safer & Easier: Fake Lights
If the thought of an open flame sitting inside a drying piece of fruit makes you a little nervous (and fair enough, it's basically a fire hazard waiting to happen, especially if you've got pets or kids running around), there are much safer alternatives for lighting up your quick and easy pumpkin carving ideas. Battery-operated LED tea lights are everywhere these days, and they're perfect. They don't get hot, they won't blow out in the wind, and they last for ages. You can just drop one or two inside your pumpkin and forget about it. They give off a surprisingly convincing flicker. Some people even use small strings of battery-powered fairy lights to really brighten things up, especially in bigger pumpkins or those etched designs.
Lighting Options for Your Gourd:
- Traditional Tea Lights (Real Flame)
- Votive Candles (Real Flame)
- Battery-Operated LED Tea Lights
- Small Battery-Powered LED String Lights
- LED Color-Changing Lights (if you're feeling fancy)
Placement for Maximum Spookiness
Where you put your lit pumpkin matters. A single jack-o'-lantern on a dark porch step does the job, but grouping a few together at different heights can look really effective. If you’ve used etching techniques from our quick and easy pumpkin carving ideas section, placing the light source closer to the etched side will make that design pop. Consider the background too; against a dark wall, the light will stand out more. And if you’re using real candles, protect them from the wind if you can, maybe by tucking the pumpkin slightly into a corner. The goal is to cast those spooky shadows and make your simple design look its absolute best.
Tips to Make Your Easy Pumpkin Carving Last
Tips to Make Your Easy Pumpkin Carving Last
Keep Your Gourd Hydrated
You spent maybe 30 minutes on your quick and easy pumpkin carving ideas, and now you want that effort to last longer than a single chilly night. The enemy here is dehydration. Once you cut into a pumpkin, you expose the flesh, and it starts to dry out faster than a bad stand-up comedian's material. To slow this down, you need to keep it moist. Some folks swear by rubbing a thin layer of petroleum jelly (like Vaseline) on all the cut edges. It creates a barrier that traps moisture inside. Others give their carved pumpkin a quick dunk in a bath of cold water for a few hours each day, especially if it's starting to look a bit shriveled. Think of it as moisturizer for your pumpkin.
Moisture-Saving Moves:
- Apply petroleum jelly (Vaseline) to cut edges.
- Mist the inside and cut areas daily with water.
- Give the pumpkin a cold water bath for a few hours if it looks dry.
Mind the Elements and Critters
Where you place your beautifully executed quick and easy pumpkin carving ideas makes a difference in its lifespan. Direct sunlight is basically a death sentence; it'll cook and shrivel your pumpkin faster than you can say "trick or treat." Rain can also cause it to get mushy and moldy. Find a sheltered spot, like a covered porch or entryway. Also, critters are a real problem. Squirrels, rabbits, and even some birds find pumpkin flesh quite tasty. There aren't foolproof methods short of putting it in a cage, but sometimes a sprinkle of cayenne pepper or a store-bought animal repellent around the base *might* deter them. Or just accept that nature might reclaim its prize sooner than you'd like.
Things to Avoid for Longevity:
- Direct sunlight (major drying agent).
- Heavy rain (promotes rot).
- Warm, humid conditions.
- Placement within easy reach of hungry wildlife.
Wrapping Up Your Pumpkin Project
So there you have it. Turns out, getting a cool-looking carved pumpkin doesn't require a fine arts degree or days of dedicated labor. With the right approach – picking a decent pumpkin, using simple tools, and sticking to achievable designs – you can whip up something spooky or fun pretty quickly. Whether you went with a classic face, a simple shape, or a stencil, you've added a bit of Halloween spirit to your space. Keep it lit safely and maybe give it a little Vaseline edge treatment if you want it to hang around for a few extra nights. The point is, you got it done without the headache. Now, go enjoy the glow.