Table of Contents
Alright, let's be honest. Every October, you grab a pumpkin, a cheap carving kit, and aim for something truly terrifying. More often than not, you end up with a lopsided grin and wonky eyes that look more bewildered than bone-chilling. If you're tired of your jack-o'-lanterns looking less like creatures of the night and more like they just heard a dad joke, you're in the right place.
Getting Started: Picking the Right Pumpkin for Scary Carving Ideas
Getting Started: Picking the Right Pumpkin for Scary Carving Ideas
Eyeballing Your Potential Monster Canvas
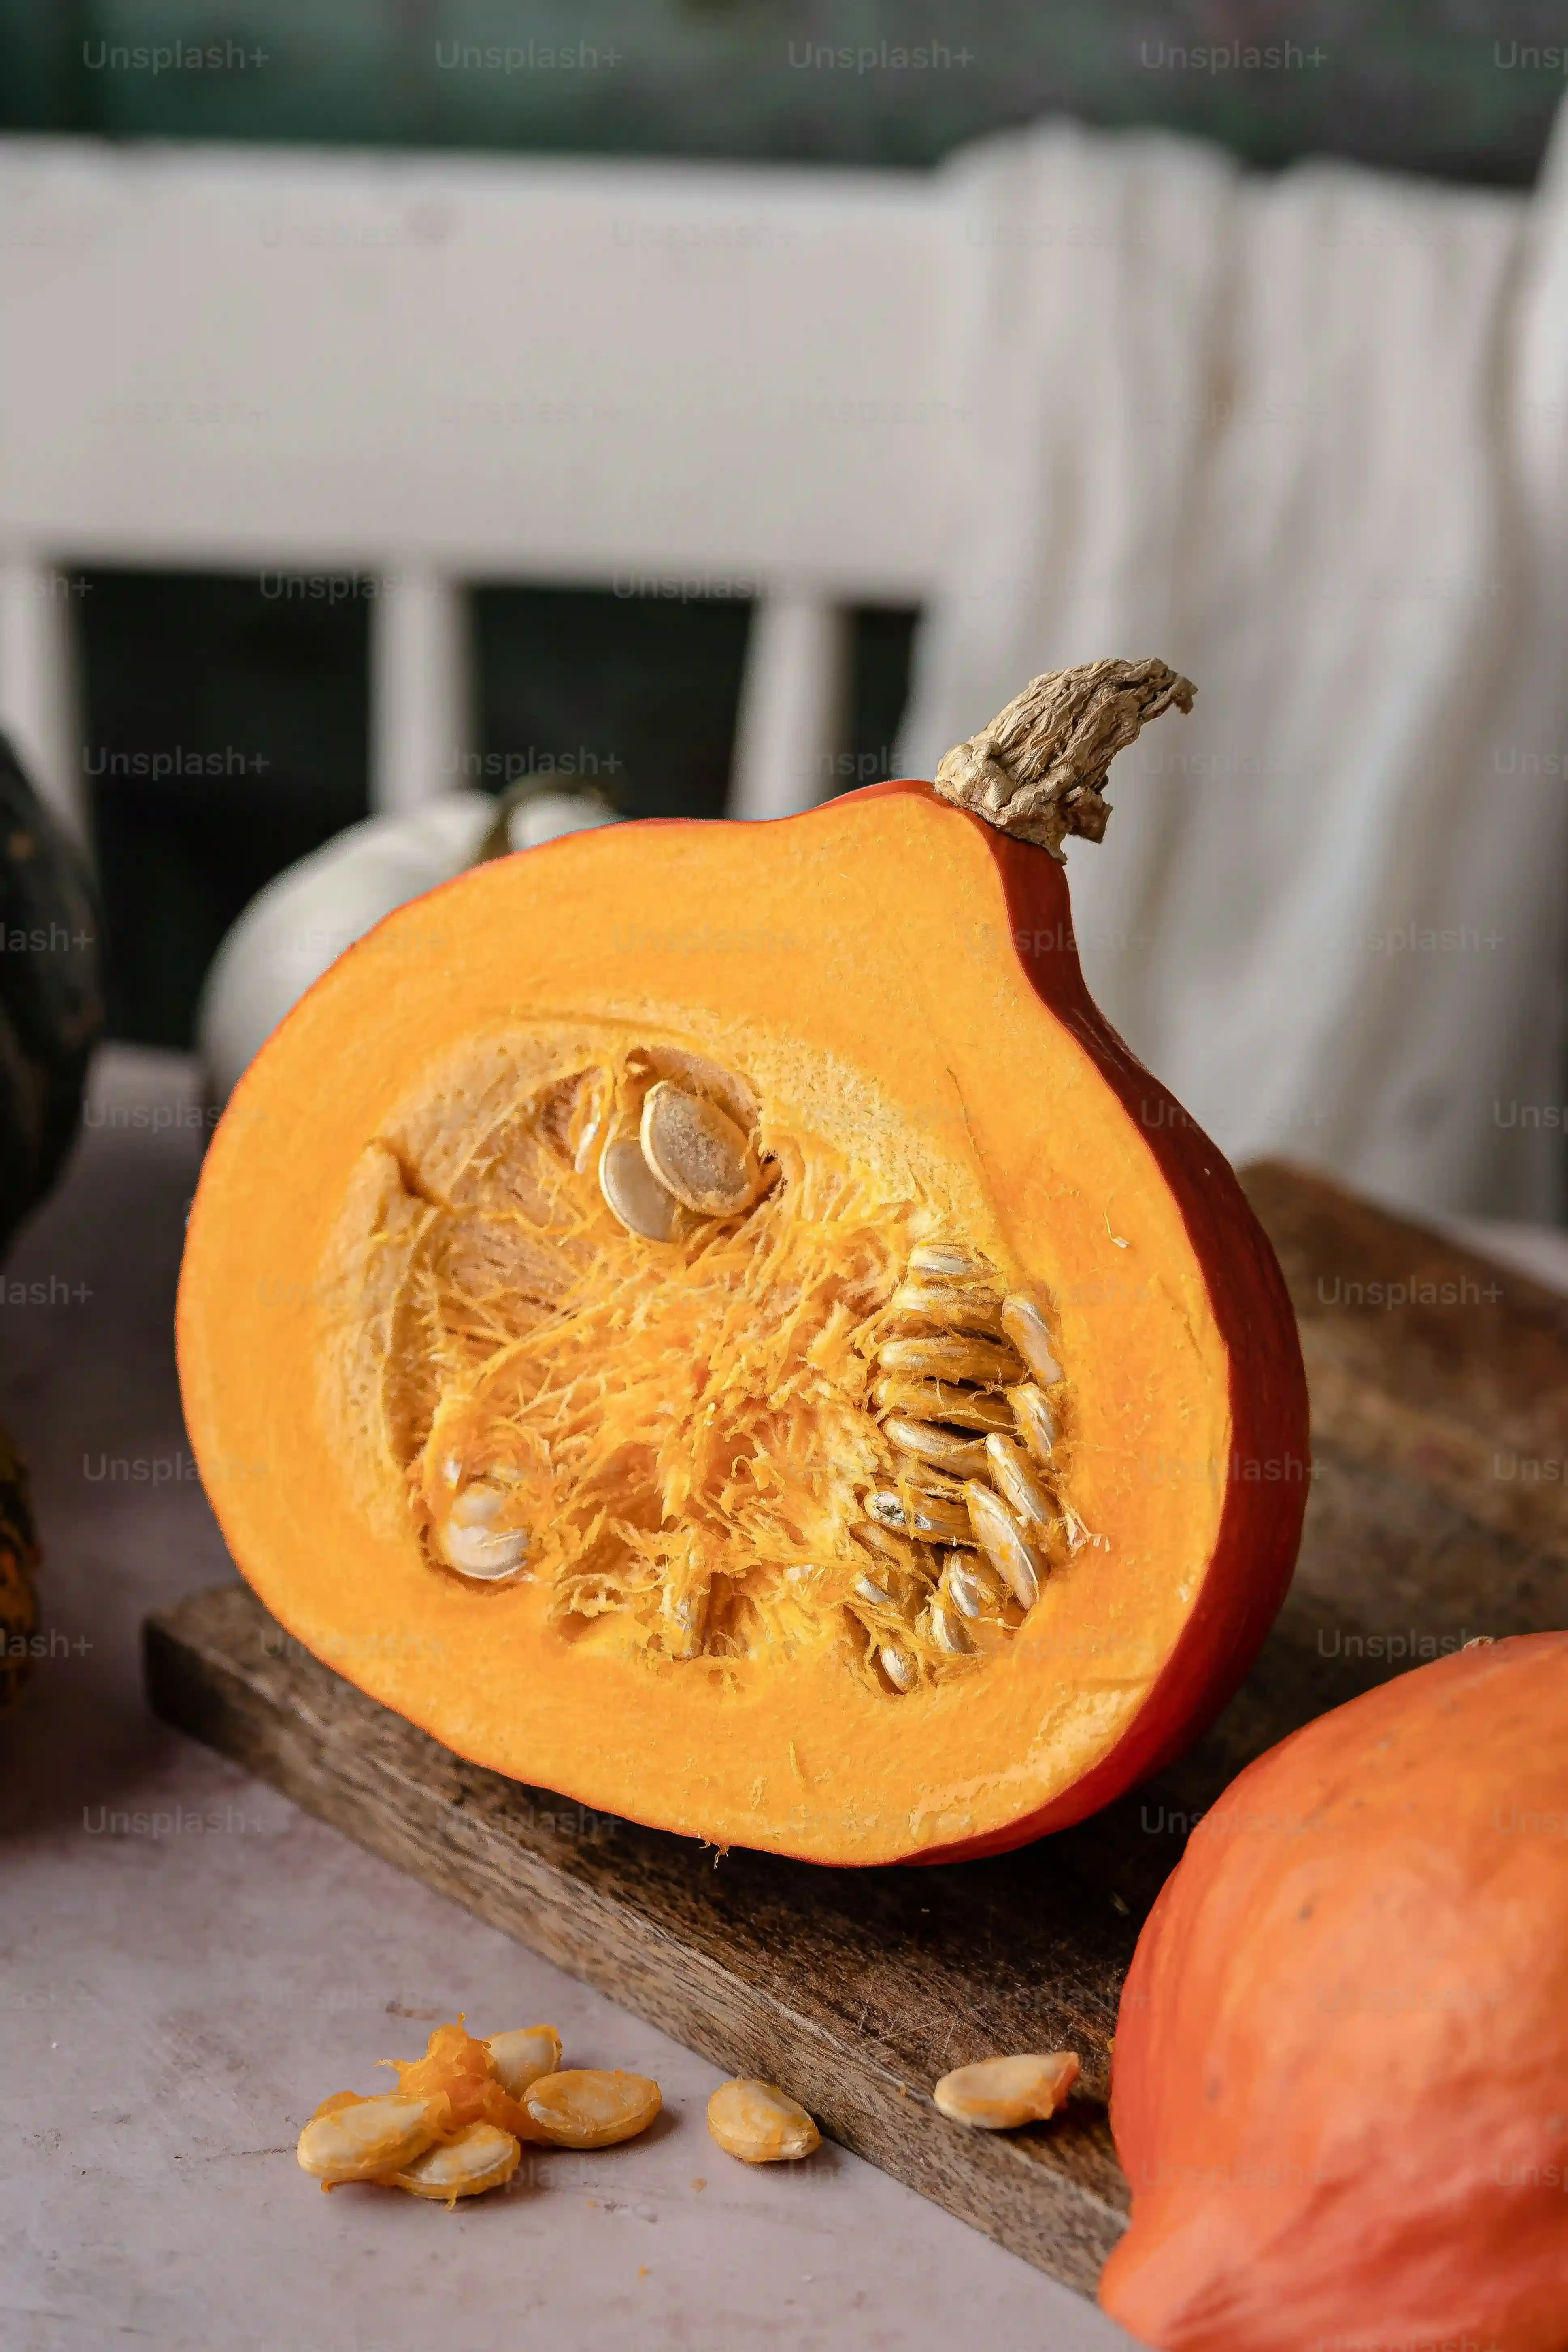
first things first when you're ready to dive into pumpkin ideas carving scary stuff: you need the right pumpkin. This isn't just grabbing the biggest orange thing you see. Think of it like casting a lead actor for a horror movie – not just anyone will do. You want a pumpkin that's firm all over. Give it a good tap; it should sound hollow, not squishy. Check the skin; you want it relatively smooth without major blemishes or soft spots. Those little imperfections might look "natural," but they can make carving intricate, terrifying details a real pain. Look for a stable base so your future masterpiece doesn't wobble or tip over the second you set it down. The shape matters too – a slightly elongated or oddly shaped pumpkin can actually lend itself well to certain ghoulish faces or designs, adding character right from the start.
Size, Stem, and Avoiding Early Decay
Now, consider the size. While a giant pumpkin seems impressive, sometimes a medium-sized one offers a better surface-to-manageability ratio for detailed scary carving ideas. You don't want to be wrestling a behemoth while trying to carve tiny vampire fangs. Pay attention to the stem; a dry, firm stem is a good sign the pumpkin is healthy and was harvested correctly. Avoid pumpkins with soft or black stems, as that's often an indicator of rot setting in prematurely. Also, flip it over and check the bottom – no major dark spots or soft patches there either. You're looking for structural integrity that will last at least through Halloween night, not collapse into a sad, moldy mess by the 28th.
- Look for firm, blemish-free skin.
- Tap it for a hollow sound.
- Ensure it has a stable, flat base.
- Choose a size that's manageable for your design.
- Check for a dry, firm stem.
- Inspect the bottom for soft spots.
Essential Tools and Techniques for Seriously Scary Pumpkin Carving
Essential Tools and Techniques for Seriously Scary Pumpkin Carving
Beyond the Crappy Kit: What You Actually Need
ditch that flimsy plastic saw and the tiny scoop that came in the five-dollar kit. If you're serious about pumpkin ideas carving scary designs that don't look like a toddler attacked them, you need better gear. Think precision, not brute force. A good, sturdy pumpkin saw with fine teeth is essential for cutting the lid and larger shapes. You'll also want a serrated scraping tool – trust me, scooping out guts with a spoon takes forever and leaves a messy surface. For the actual carving, a set of linoleum or wood carving tools works wonders. They come in different shapes and sizes, allowing you to create varying line widths, gouges, and textures. A small, sharp paring knife is also handy for details and trimming edges. Don't forget a drill with various bit sizes for perfect holes for eyes or patterns, and maybe some clay sculpting tools for smoothing or adding surface details. Having the right tools makes the difference between a sad, lumpy mess and a genuinely terrifying creation.
Getting Fancy: Detail Tools and Safety First
Once you've got the basics down, you might want to explore tools that allow for more intricate, layered pumpkin ideas carving scary details. Ribbon tools, often used in pottery, are fantastic for scooping out layers of rind without cutting all the way through, allowing light to glow through different thicknesses for cool effects. A Dremel tool with various bits can be a game-changer for fine lines, cross-hatching, or grinding away sections for shading. Just be careful – these are power tools, after all. Speaking of caution, safety isn't the most thrilling topic, but slicing your finger open before Halloween is a buzzkill. Always carve away from yourself. Keep your work surface stable. And if you're using sharp tools, consider a pair of cut-resistant gloves. Your masterpiece isn't worth a trip to the emergency room.
Which tools are non-negotiable for serious scary carving?
- Sturdy pumpkin saw
- Serrated scraping tool
- Set of linoleum/wood carving tools
- Small, sharp paring knife
- Drill and bits (optional but highly recommended)
- Cut-resistant gloves (seriously, get them)
Techniques for Terrifying Textures and Shapes
Carving a truly scary pumpkin isn't just about cutting holes. It's about creating depth, shadow, and texture. Start by transferring your design carefully – special pumpkin tracing paper or even just poking holes through a printed design works. When carving, don't rush. Use smooth, controlled strokes. For eyes, think beyond simple circles or triangles; try almond shapes, jagged edges, or even empty sockets. Mouths are where you can really play – snarling teeth, gaping maws, or stitched-up grimaces. Experiment with removing different depths of rind. Cutting all the way through creates sharp contrast, while scraping away just the outer layer allows light to filter through, creating a creepy glow and adding dimension. Undercutting edges can make features pop. Practice on a smaller, less important gourd first if you're trying a new technique. Remember, sometimes the scariest effects come from subtle details and textures, not just giant gaping holes.
Classic and Creepy Pumpkin Ideas Carving Scary Faces That Terrify
Classic and Creepy Pumpkin Ideas Carving Scary Faces That Terrify
Classic and Creepy Pumpkin Ideas Carving Scary Faces That Terrify
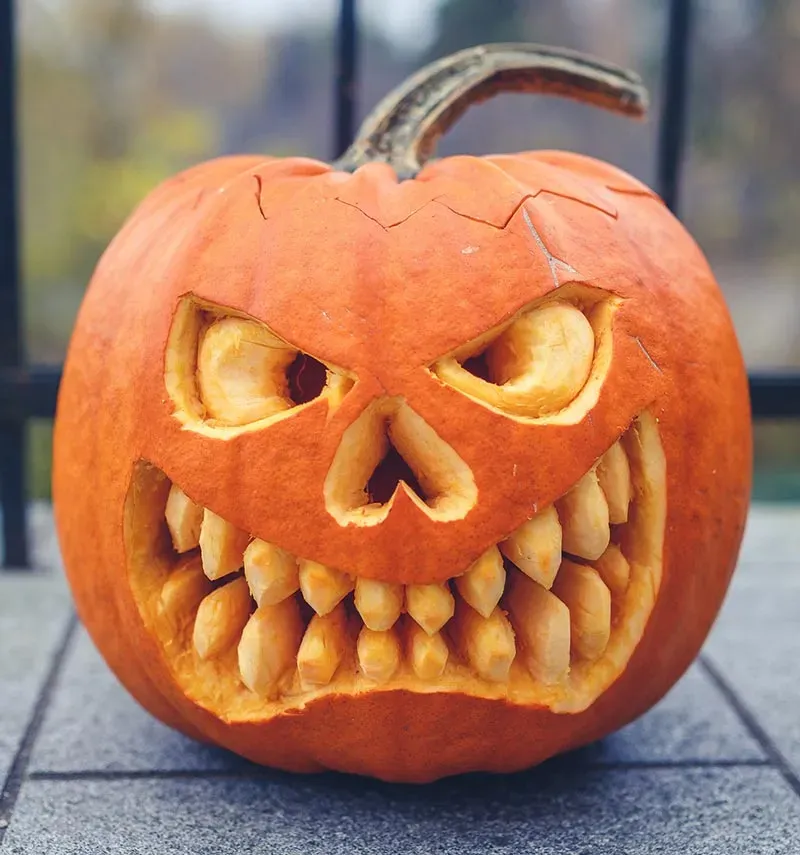
let's get down to the bread and butter of Halloween spookiness: the classic scary face. You might think this is basic, but there's a huge difference between a bland smiley face with jagged teeth and a truly menacing grimace that looks like it's seen things. We're talking about eyes that bore into your soul, mouths that look ready to devour small children, and brows furrowed in pure malice. To achieve this level of dread, focus on exaggerating features. Make the eyes narrow and angled downwards in the center for an angry look, or wide and uneven for a look of insane terror. Give teeth irregular shapes and sizes; some long and pointy, others broken or missing. Don't just cut triangles for a nose; try carving deep, shadowed nostrils or a twisted, skeletal structure. These pumpkin ideas carving scary faces rely on getting the angles and proportions just wrong enough to be unsettling.
What makes a pumpkin face truly terrifying?
- Narrow, angled eyes
- Jagged, uneven teeth
- Deep, shadowed nostrils
- Asymmetrical features
- Furrowed or twisted brow lines
Beyond the Face: Advanced Scary Pumpkin Carving Ideas and Designs
Beyond the Face: Advanced Scary Pumpkin Carving Ideas and Designs
Layered Terror: Sculpting and Shading
so you've mastered the basic gruesome grin. You want to push your pumpkin ideas carving scary creations to the next level. This is where you move beyond just cutting holes. Think of the pumpkin rind as layers you can peel back. Using those ribbon tools or even a Dremel, you can scrape away the outer orange skin without going all the way through to the interior. This technique allows light to filter through the remaining flesh, creating eerie glows and gradients. You can sculpt features – wrinkles, scars, bulging veins – directly onto the surface. Imagine a face where the skin is peeling back to reveal muscle fibers underneath, achieved by varying the depth of your cuts and scrapes. It takes patience and a steady hand, but the result is a far more realistic and disturbing effect than simple cutouts.
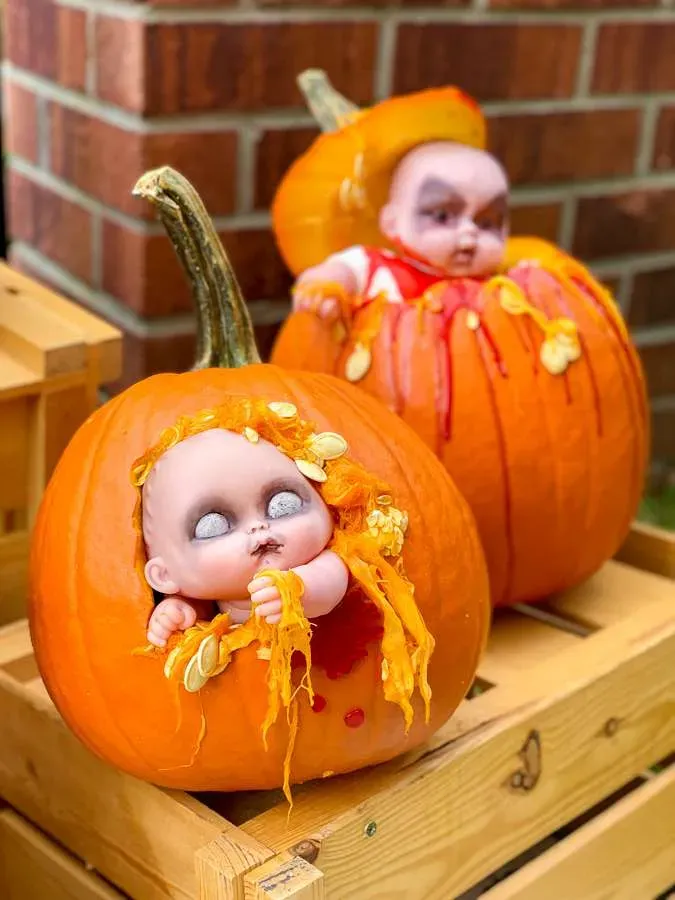
Beyond the Grimace: Full Scenes and Creatures
Why stop at a single face? Advanced pumpkin ideas carving scary potential expands exponentially when you use the entire gourd as your canvas. Picture a pumpkin carved into a snarling werewolf head, complete with textured fur and snapping jaws. Or maybe a scene etched into the side: a haunted house silhouette with tiny, glowing windows, or skeletal hands reaching out from the darkness. You can incorporate multiple pumpkins to create a larger display – perhaps a pile of skulls, or a monstrous creature rising from the ground. This requires planning and often involves complex cuts and structural considerations, sometimes even using internal supports or external elements. It's less about a quick carve and more about creating a sculptural piece that tells a miniature horror story.
Ready to tackle advanced scary pumpkin carving ideas?
- Experiment with scraping layers for shading effects.
- Sculpt surface details like wrinkles, scars, or textures.
- Attempt full creature busts or animalistic features.
- Carve detailed scenes onto the pumpkin surface.
- Combine multiple pumpkins for larger, complex displays.
- Consider structural support for ambitious designs.
Lighting Your Fright: Making Your Scary Carved Pumpkin Ideas Shine

Lighting Your Fright: Making Your Scary Carved Pumpkin Ideas Shine
Choosing Your Illumination of Doom
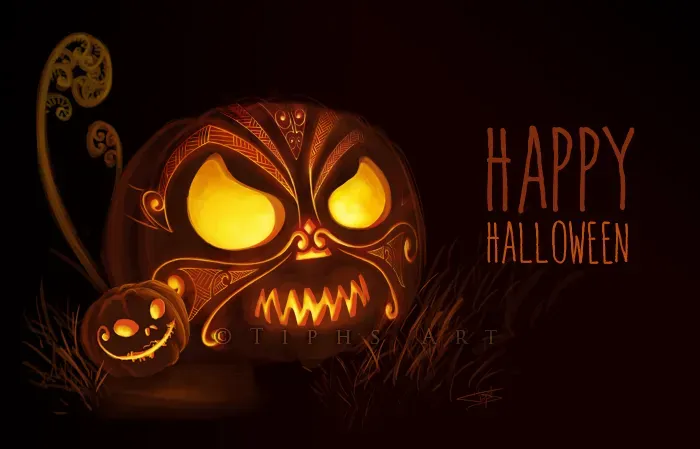
Alright, you've spent hours carving a truly nightmare-inducing face or scene. Now comes the moment of truth: bringing it to life in the dark. Shoving a cheap tealight inside is like putting a flickering match in a haunted mansion – it just doesn't do your hard work justice. For serious pumpkin ideas carving scary impact, you need a better light source. Real candles are classic, sure, but they're a fire hazard, they soot up the inside, and they can blow out. Plus, the light is often weak. I lean towards LED lights. You can get battery-powered LEDs in various colors – a flickering orange or red can add a demonic glow, while a stark white can highlight skeletal features. Some even have remote controls or timers. Make sure whatever you choose is bright enough to cut through the pumpkin flesh and cast those terrifying shadows you worked so hard to create.
Strategic Placement for Maximum Terror
It's not just about *what* light you use, but *how* you use it. The placement of the light inside your scary carved pumpkin ideas makes a massive difference. Don't just plop it in the middle. If your design has deep shadows around the eyes or mouth, position the light source slightly off-center or towards the back to emphasize them. For designs where you've scraped away layers for shading, make sure the light is close enough to that area to shine through effectively, but not so close it creates a hot spot. If you're using multiple light sources in a larger pumpkin or display, experiment with different colors or intensities to add depth and creepiness. Think about where the light will escape – is it just the eyes and mouth, or are there other vents or details that will glow?
- Use LED lights for safety and versatility.
- Consider colored LEDs (red, orange, white) for different effects.
- Test the brightness to ensure it's sufficient.
- Position the light to enhance shadows and scraped areas.
- Experiment with multiple lights in larger pumpkins.
- Ensure light escapes through intended openings.
Powering the Fear: Battery Life and Safety
You've got the perfect light, positioned just right. Now, how long will it last? There's nothing sadder than a terrifying pumpkin that goes dark by 8 PM on Halloween night. Check the battery life on your chosen LED lights. Some cheap ones might only last a few hours. Invest in something that can run for at least 12-24 hours continuously, especially if you plan to display it for more than just one evening. If you *insist* on using real candles despite the warnings, place the pumpkin on a non-flammable surface and keep it away from anything that could catch fire – curtains, dry leaves, wandering trick-or-treater costumes. Always supervise a lit candle. Seriously, don't burn your house down for a pumpkin, no matter how scary it looks. A reliable battery-powered LED is generally the smartest way to keep your pumpkin ideas carving scary creations glowing and genuinely frightening all night long.
Finishing Your Frightful Creation
So there you have it. Moving beyond the basic triangle eyes and jagged mouth takes a bit more effort, sure, but the payoff is a pumpkin that genuinely earns its place on your porch as a harbinger of Halloween. You've got the knowledge to pick the right gourd, the tools to make precise (or terrifyingly ragged) cuts, and a few solid starting points for truly scary designs. Don't expect perfection on your first try – unless your intended look is "mangled and decaying," which, frankly, also works for scary. The goal is to create something that stops people in their tracks, even if it's just for a second of delightful dread. Now go forth, select your unsuspecting pumpkin, and carve something that nightmares are made of.