Table of Contents
Halloween's just around the corner, and you know what that means: it's time to get your carve on! Forget those boring triangle eyes and jagged smiles; we're diving headfirst into a world of amazing pumpkin halloween carving ideas. Whether you're a total newbie wielding a flimsy plastic knife or a seasoned pro with a whole arsenal of tools, this article is your guide to creating the most eye-catching jack-o'-lanterns on the block. We'll start with some super simple designs that even a zombie could manage, then move on to more intricate and creative options that'll make your neighbors do a double-take. From spooky ghouls to funny faces, and even some seriously impressive art, we've got all the inspiration you need. So grab your pumpkins, your tools, and maybe a snack or two, and let's get carving! Get ready to transform your ordinary pumpkins into extraordinary works of art this Halloween.
Spooky & Fun: Easy Pumpkin Carving Ideas
Spooky & Fun: Easy Pumpkin Carving Ideas
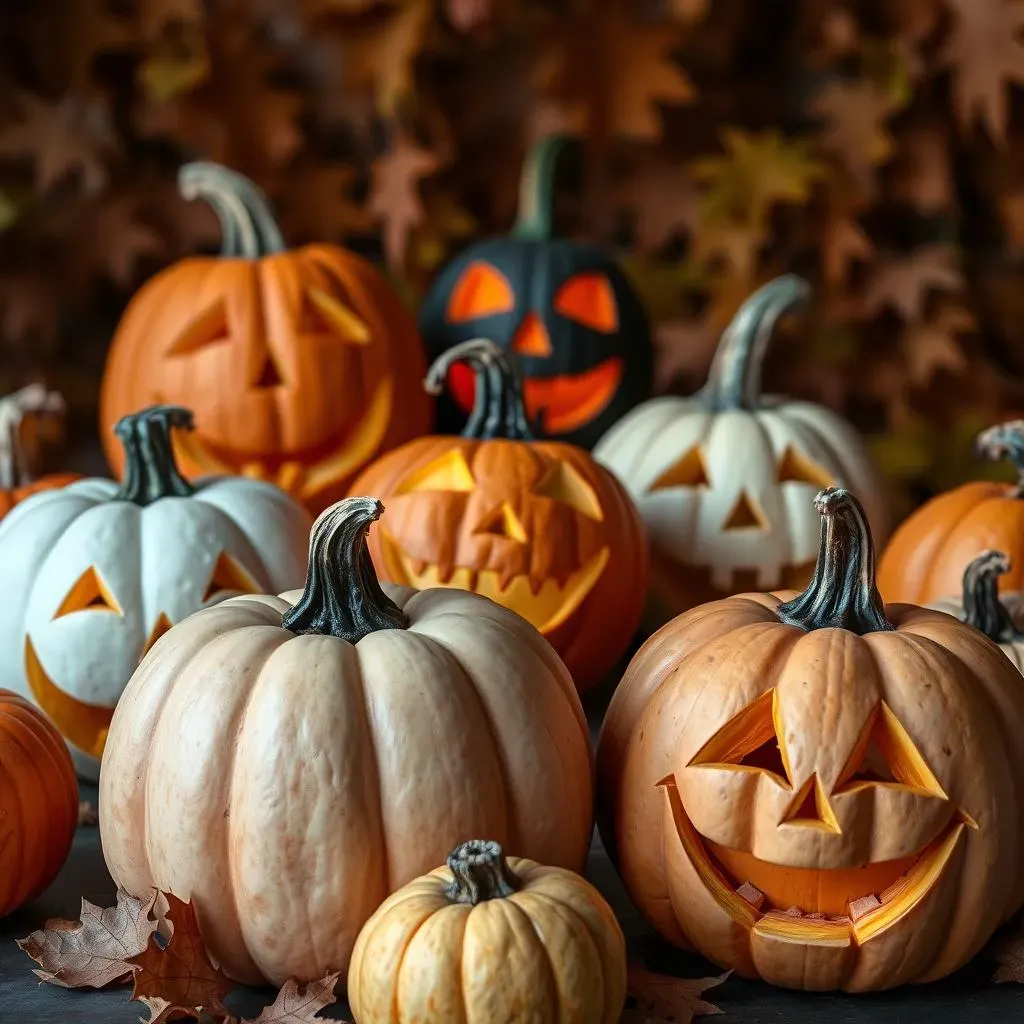
Classic Spooky Faces
Okay, let's be real, you can't go wrong with the classics. Think big, toothy grins and those slightly off-kilter triangle eyes. They're super easy, and they scream Halloween. I remember one year, I was so short on time, I just did a bunch of different sized triangles for the eyes and a wonky zig-zag for the mouth. It looked like a monster that was having a bad day, and it was perfect. The key here is not to overthink it. Just grab your carving tool, and let your inner monster guide you.
Don't worry about making it perfect. Part of the charm of these easy spooky faces is their imperfections. A slightly crooked smile? Awesome! An eye that's a little bigger than the other? Even better! These minor flaws give your pumpkin some character. Use a template if you want, but honestly, just freehand it! It's more fun that way, and you might be surprised at what you can create. The goal is to have some spooky fun without any stress, so embrace the chaos and let your pumpkin tell its own spooky story.
Friendly Faces & Fun Shapes
Not every pumpkin has to be scary! Sometimes, a friendly face is just what the doctor ordered. Think goofy smiles, big round eyes, or even a cute little nose. You can create a pumpkin that looks like a happy ghost, a silly monster, or even a cartoon character. I once saw someone carve a pumpkin to look like a surprised emoji, and it was hilarious! Don't limit yourself to just faces though. Why not try some simple shapes like stars, moons, or even bats?
Simple shapes are not only easy to carve, but they also look great when you light up your pumpkin at night. Try using cookie cutters to trace shapes onto your pumpkin and then carefully carve them out. You can also use a drill to make some cool patterns like polka dots or swirls. Remember, the goal is to have fun and create a pumpkin that makes you smile, so don't be afraid to get a little creative and try something new. Who says Halloween has to be all about scary? Let's add some happy pumpkins to the mix!
Shape | Description | Difficulty |
|---|---|---|
Triangle Eyes | Classic spooky look | Easy |
Circle Eyes | Friendly, goofy look | Easy |
Zig-Zag Mouth | Simple, monster-like | Easy |
Star Shapes | Simple, fun | Easy |
Creative Pumpkin Carving Ideas for All Skill Levels
Creative Pumpkin Carving Ideas for All Skill Levels
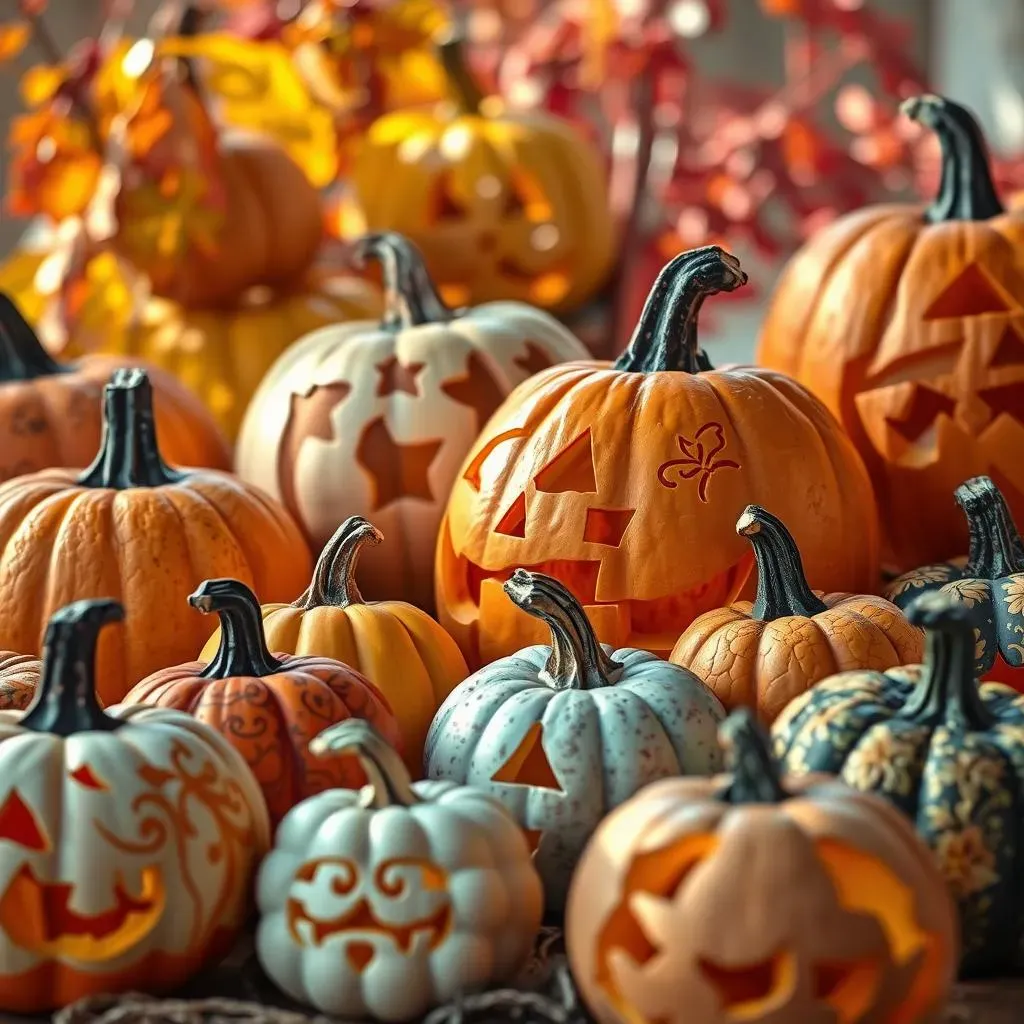
Stencils & Patterns: Level Up Your Carving
Okay, so you've mastered the basic spooky faces, now what? Time to break out the stencils! Seriously, stencils are like cheat codes for pumpkin carving. You can find tons of free designs online, from cute cartoon characters to intricate spooky scenes. I remember the first time I used a stencil; I felt like a real artist! It's amazing how much detail you can add with just a little bit of guidance. Just tape the stencil to your pumpkin, poke holes along the lines, and then carve along the dots. It's like connect-the-dots, but with a knife and a pumpkin!
Don't think stencils are just for beginners though. Even seasoned carvers use stencils to get precise designs. The key is to find stencils that match your skill level. Start with simpler patterns if you're new to stencils, then slowly work your way up to more complex ones. You can also customize your stencils by adding your own little touches. Maybe add some extra zig-zags or change the shape of an eye. The point is to have fun with it and make the design your own. Remember, even with a stencil, your pumpkin is still unique.
Tools & Techniques: Getting the Right Gear
Alright, let's talk tools. You don't need a fancy set of carving tools to make amazing pumpkins, but having the right gear can make the process way easier. A small serrated knife is great for making those initial cuts. A scoop for getting all the gunk out is a must. And those little pokey tools are perfect for transferring stencils and adding fine details. I remember trying to use a regular kitchen knife one year, and it was a disaster! The right tools make all the difference, trust me.
Beyond the basic tools, think about using things like linoleum cutters for detail work, or even a drill for making cool patterns. You can also experiment with different carving techniques. Instead of just cutting all the way through, try carving shallow lines to add texture. Or use a paring knife to carefully shave away the pumpkin skin for a shaded effect. It's all about experimentation. Don't be afraid to try new things and see what works for you. You might discover a new favorite technique!
Tool | Use | Skill Level |
|---|---|---|
Serrated Knife | Basic cuts | Beginner |
Scoop | Removing pumpkin guts | All |
Poking Tool | Stencil transfer, detail work | All |
Linoleum Cutter | Fine details | Intermediate/Advanced |
Drill | Patterns | Intermediate |
Beyond the Basics: Advanced Pumpkin Halloween Carving Ideas
Beyond the Basics: Advanced Pumpkin Halloween Carving Ideas
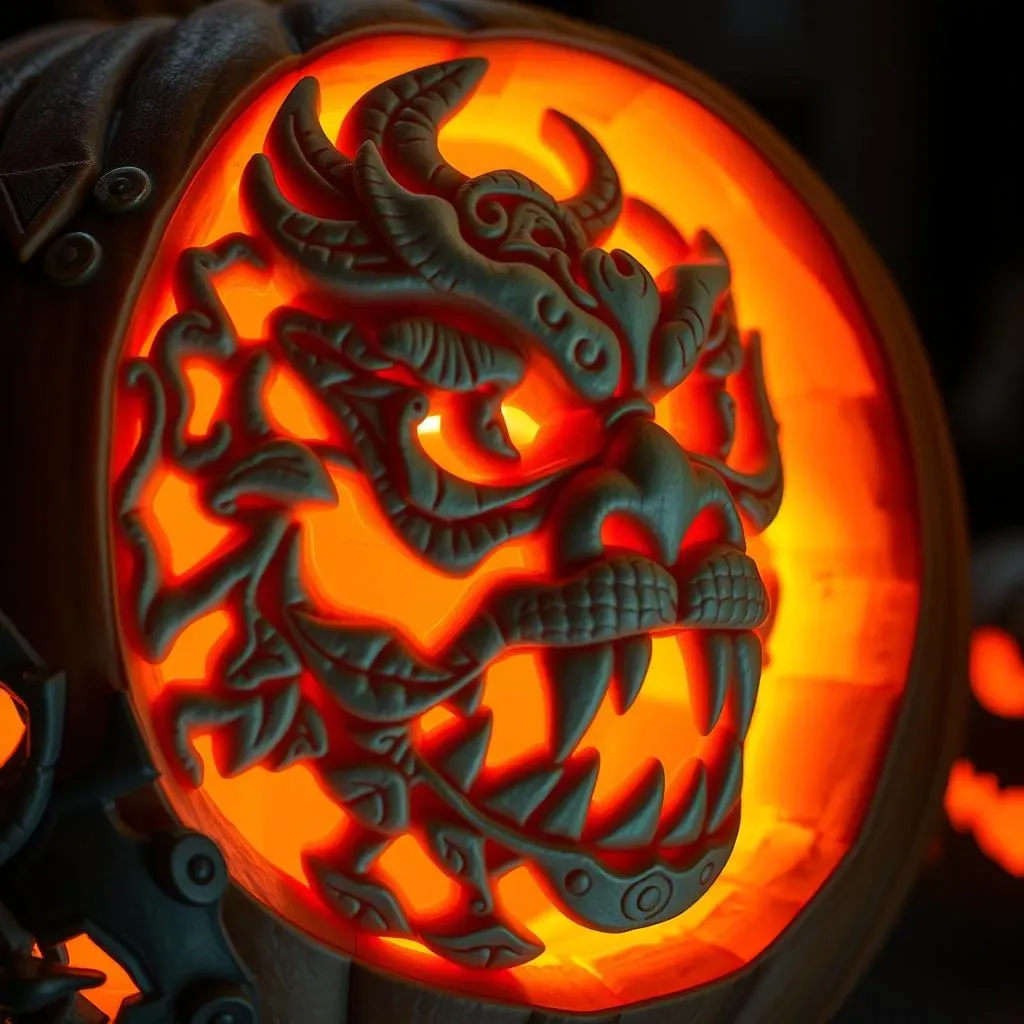
3D Carving & Sculpting: Bringing Your Pumpkin to Life
Okay, so you're ready to ditch the flat designs and go three-dimensional, huh? This is where pumpkin carving gets seriously cool. We're talking about sculpting, layering, and creating depth. Think about carving away at the pumpkin flesh to create different levels, giving your design a raised, almost lifelike effect. I once saw a pumpkin carved to look like a dragon, with scales that popped out and a head that seemed to be bursting from the pumpkin itself. It was amazing! This isn't your average jack-o'-lantern; this is pumpkin art.
To get started with 3D carving, you need to think about your design in layers. Start by carving away the background areas, then move to the more prominent features. Use a variety of tools to create different textures and depths. Don't be afraid to experiment with different techniques like shaving, gouging, and etching. You can even use clay sculpting tools to help you refine your shapes. Remember, it's all about playing with light and shadow to create a truly stunning piece of art. It's a challenge, but the results are totally worth it.
Intricate Designs & Patterns: The Devil is in the Details
If you're a fan of detail, then intricate designs are your jam. These aren't your basic shapes; we're talking about complex patterns, delicate lines, and tiny little details that make your pumpkin truly unique. Think about creating lace-like patterns, geometric designs, or even portraits of your favorite spooky characters. I've seen pumpkins carved with such amazing detail that they look like they've been printed on, not carved. It's all about patience and a steady hand.
To pull off intricate designs, you'll need to use a variety of fine tools, like linoleum cutters and small carving knives. Start by sketching your design on the pumpkin, then carefully carve away the areas you don't want. Take your time, and don't rush the process. It's also helpful to work in small sections, so you don't get overwhelmed. Remember, the key to a great intricate design is precision and patience. The more time you spend on the details, the more amazing your pumpkin will look.
Technique | Description | Skill Level |
|---|---|---|
Layered Carving | Creating depth | Advanced |
Shaving | Removing skin for shading | Intermediate/Advanced |
Etching | Creating fine lines | Intermediate/Advanced |
Gouging | Removing chunks of pumpkin | Intermediate |