Table of Contents
Halloween's just around the corner, and what better way to celebrate than with some spooktacular pumpkin carving projects for kids? This year, ditch the boring jack-o'-lanterns and unleash your little ones' creativity with our guide to fun, easy, and increasingly challenging pumpkin carving projects. Whether your kids are carving newbies or seasoned pumpkin pros, we've got something for everyone. We'll start with super-simple designs perfect for tiny hands and work our way up to more intricate carvings that will impress even the most seasoned Halloween enthusiast. Get ready for some messy, gooey, and downright delightful pumpkin carving fun! This article is your one-stop shop for all things pumpkin carving this Halloween. We’ll walk you through everything from selecting the perfect pumpkin to mastering the carving tools, ensuring a safe and enjoyable experience for everyone. Prepare to be amazed by the incredible creations your kids will conjure up! So grab your carving tools, gather your little pumpkins, and let's get carving!
Easy Pumpkin Carving Projects for Kids: Simple Designs for Little Hands
Easy Pumpkin Carving Projects for Kids: Simple Designs for Little Hands
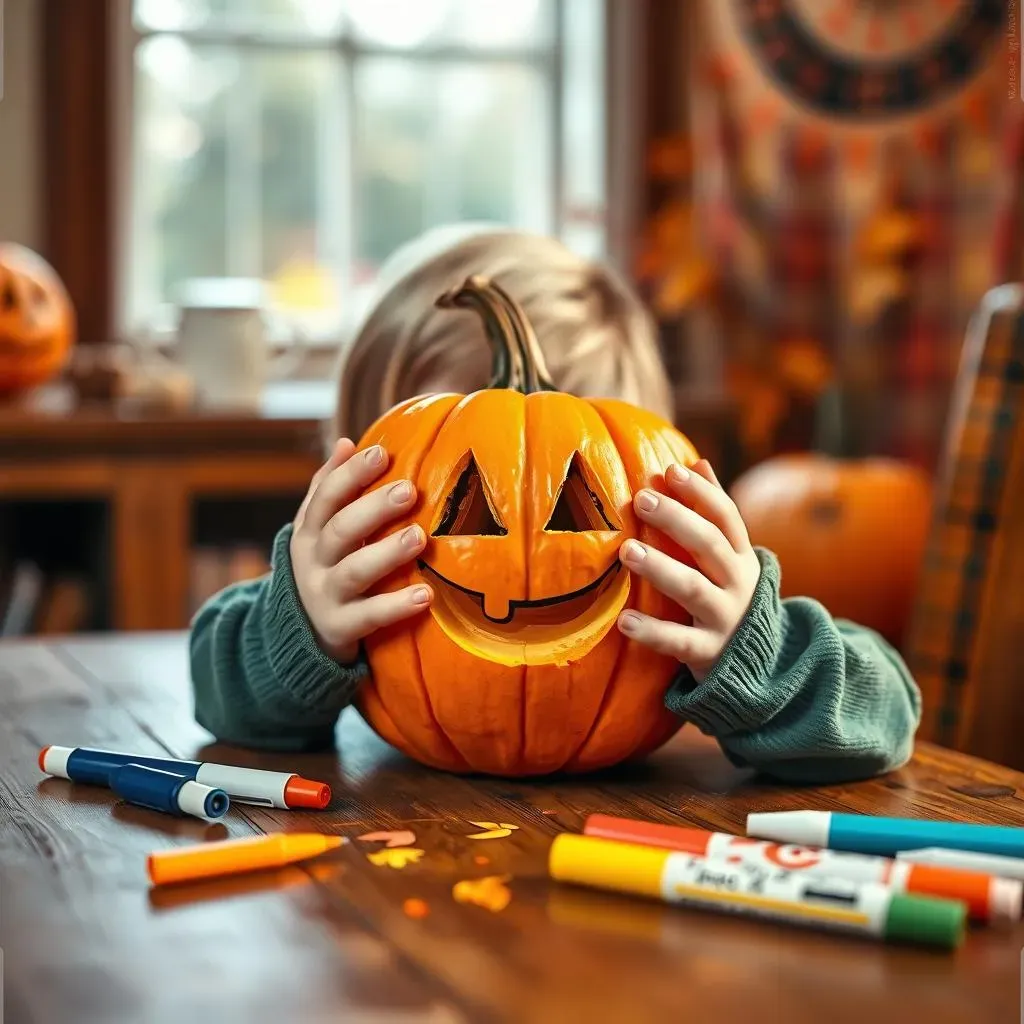
Let's kick things off with some seriously simple pumpkin carving ideas, perfect for even the littlest Halloween enthusiasts! Think less "scary monster" and more "adorable critter." We're talking about designs that are easy to trace, easy to cut, and most importantly, easy to clean up afterwards (because let's face it, pumpkin guts are NOT fun to clean). For these projects, you'll want to select smaller pumpkins, making them easier for little hands to manage. A good rule of thumb is to pick pumpkins that are roughly the size of a child's head. This makes them easier to handle and less likely to roll away mid-carving. Remember safety first! Always supervise young children during any carving activity.
Design Idea | Tools Needed | Tips |
|---|---|---|
Simple Triangle Eyes and a Smiling Mouth | Small Pumpkin, Marker, Small Carving Tool | Use a toothpick to poke small holes for eyes before carving. |
Cute Cat Face (Simple Circles for Eyes and Nose, Triangle Ears) | Small Pumpkin, Marker, Small Carving Tool | Practice your design on paper first! |
Friendly Ghost (Simple Oval Shape for the Body and Two Small Circles for Eyes) | Small Pumpkin, Marker, Small Carving Tool | Consider painting the pumpkin white beforehand! |
Once you've chosen your design, gently trace it onto your pumpkin with a marker. This helps keep things neat and prevents little hands from straying outside the lines. Next, using a small, blunt carving tool (safety first!), carefully cut along the lines you've traced. Don't worry about making it perfect – the charm of these designs lies in their simplicity and kid-friendly charm. Remember, it's all about having fun! Plus, you can always add some extra flair with paint, glitter, or stickers once you're done carving.
- Use stencils for extra help with tracing.
- Let kids choose their own design and colors.
- Embrace the imperfections – that's part of the fun!
Intermediate Pumpkin Carving Projects for Kids: Stepping Up the Spook Factor
Intermediate Pumpkin Carving Projects for Kids: Stepping Up the Spook Factor
More Complex Carvings: Adding Detail and Depth
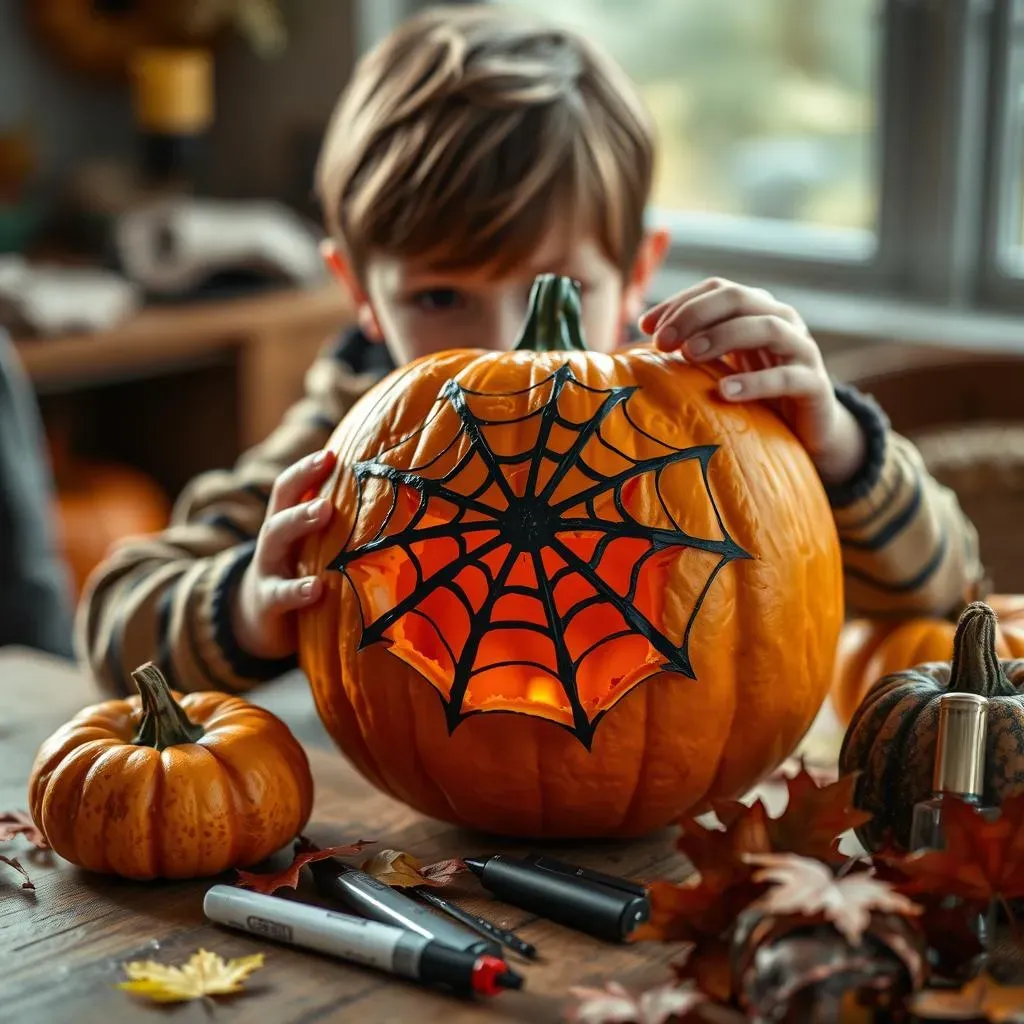
Okay, so your little ones have mastered the simple designs and are ready for a challenge? Time to step up the spook factor! For intermediate pumpkin carving projects, we're talking about adding more intricate details and depth to the carvings. Think about incorporating multiple shapes and sizes, perhaps creating a spooky scene or a more elaborate character. We're still keeping it kid-friendly, but we're adding a little more oomph to the designs. This is where a bit more precision is needed, so having a variety of carving tools on hand will be super helpful. Consider using different sized tools to create varied lines and textures. A good tip is to use a smaller tool for finer details, and a larger tool to get the initial shapes carved out.
Design Idea | Tools Needed | Tips |
|---|---|---|
Spooky Spiderweb | Medium Pumpkin, Marker, Variety of Carving Tools | Start with the outer circle, then work your way inwards. |
Grinning Pumpkin with Jagged Teeth | Medium Pumpkin, Marker, Small and Medium Carving Tools | Use the small tool for the finer details in the teeth. |
Simple Haunted House | Medium Pumpkin, Marker, Variety of Carving Tools | Sketch the house on paper first to plan it out. |
Adding Texture and Dimension
To really elevate your intermediate pumpkin carving projects, think about adding texture and dimension. Instead of just simple outlines, try carving different depths to create shadows and highlights. For instance, you could carve a deeper line around the edges of a design to make it stand out, or carve a series of shallow lines to create a textured effect. You can also experiment with different shapes and sizes of carving tools to achieve different textures. A small, pointed tool can create fine lines and details, while a larger, scoop-shaped tool can carve out wider areas and create a more dramatic effect. Remember to always supervise children when using sharp tools and encourage them to take breaks if their hands get tired.
- Use a variety of carving tools for different effects.
- Experiment with different depths of carving to add dimension.
- Don’t be afraid to get creative and experiment!
Safety First: Tips for Safe Carving
Before you dive into the more complex designs, let's talk about safety. Always supervise children while they're carving pumpkins. Ensure they're using age-appropriate tools and taking breaks when needed. It's a good idea to have a designated carving area with plenty of light and a stable surface. Remember, even with intermediate designs, sharp tools are involved, so safety should always be your top priority. Consider using a pumpkin carving kit that includes safety tools designed specifically for kids. These kits often include blunt tools, making them safer for little hands. And finally, after the carving is done, always dispose of the pumpkin guts responsibly. It's also a great opportunity to teach the kids about composting or other environmentally friendly disposal methods.
Advanced Pumpkin Carving Projects for Kids: Creative Carving Challenges

Advanced Pumpkin Carving Projects for Kids: Creative Carving Challenges
Intricate Designs and 3D Carvings
Now we're talking serious pumpkin artistry! For advanced pumpkin carving projects, we're diving into intricate designs and even 3D carvings. Think detailed scenes, complex characters, or even geometric patterns that play with light and shadow. This level requires more planning, precision, and a wider range of tools. You might need tools like small saws, gouges, and even drills (always with adult supervision!). Before you start, sketch out your design on paper, paying close attention to the details. Consider the pumpkin's shape and how your design will fit best. Think about using different carving techniques – maybe a combination of outlining, etching, and removing sections to create depth.
Design Idea | Tools Needed | Tips |
|---|---|---|
Detailed Portrait (e.g., a favorite cartoon character) | Large Pumpkin, Variety of Carving Tools, Stencil (optional) | Use transfer paper to accurately transfer your design. |
3D Pumpkin Diorama (e.g., a spooky haunted house scene) | Large Pumpkin, Variety of Carving Tools, Small Figurines (optional) | Plan the scene carefully before carving. |
Intricate Geometric Pattern | Large Pumpkin, Variety of Carving Tools, Ruler and Pencil | Use precise measurements to create a symmetrical design. |
Illuminating Your Creations: Lighting and Effects
Once you've mastered the intricate carving, it's time to think about lighting and special effects! The way you illuminate your pumpkin can drastically change the overall look and feel of your creation. Instead of a simple candle, consider using LED lights or tea lights to create different lighting effects. You can also experiment with colored cellophane or filters to change the color of the light. For advanced projects, you can even carve out small openings to create unique light patterns or shadows. This adds another layer of creativity and complexity to your pumpkin carving project. Think about using different sizes and shapes of lights to create a more dramatic effect. You can even add battery-operated lights to create a truly magical glow.
- Experiment with different light sources (LEDs, tea lights, etc.).
- Use colored cellophane or filters to change the light color.
- Carve small openings to create unique light patterns.