Table of Contents
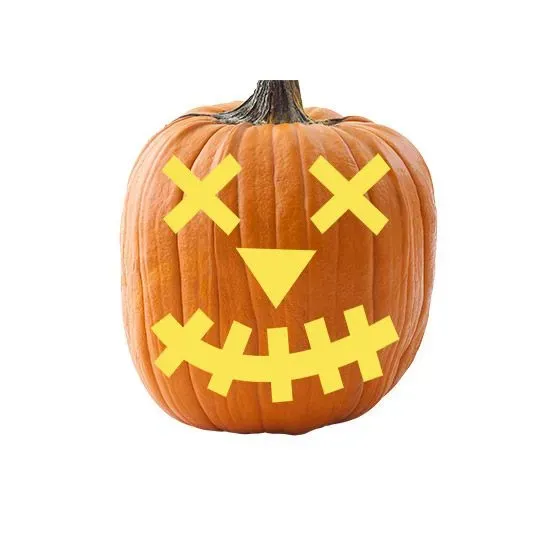
Let's be honest, the classic triangle eyes on a carved pumpkin are fine. They get the job done. But if you're looking to make your jack-o'-lantern stand out from the suburban crowd, it's time to think beyond the basics. This year, we're focusing on a simple shape that offers surprising versatility and character: the "X". When you explore **pumpkin carving ideas x eyes**, you unlock a whole new level of spooky, funny, or downright unsettling expressions with minimal effort.
Beyond the Triangle: Why "X" Eyes Work for Pumpkin Carving
Beyond the Triangle: Why "X" Eyes Work for Pumpkin Carving
The Tired Triangle Trap
Look, we've all done it. Grabbed a pumpkin, a cheap carving kit, and defaulted to the classic two triangles for eyes and a jagged smile. It's the default setting of pumpkin carving, the beige of Halloween decorations. It's not bad, per se, it's just... expected. It says "I carved a pumpkin," not "Look at this *character* I brought to life." Moving beyond that geometric rut opens up a world of expression, and surprisingly, one of the simplest shapes offers some of the most potent results when exploring pumpkin carving ideas x eyes.
Simple Shape, Complex Emotion
An "X" seems basic, right? Just two intersecting lines. Yet, on the rounded canvas of a pumpkin, this simple form can convey a surprising range of feelings. Think about it: wide, bold "X"s can look shocked or bewildered. Thinner, slightly angled "X"s might appear vacant or even a little creepy. Off-center or asymmetrical "X"s suggest chaos or injury. It’s a minimalist approach that forces the viewer to project meaning, often with a more unsettling effect than a standard cutout. Forget trying to perfectly render detailed pupils; the power here is in suggestion and stark contrast.
What emotions can "X" eyes convey?
- Shock or surprise
- Confusion or bewilderment
- Death or vacancy (classic spooky)
- Cartoonish injury or dizziness
- Playful silliness
- Possession or otherworldly gaze
Visual Punch and Easy Execution
One of the best arguments for adopting pumpkin carving ideas x eyes is the visual clarity, especially from a distance. Triangles can sometimes look small or get lost depending on the pumpkin's size and the light. An "X", particularly a well-proportioned one, reads clearly. It's a strong graphic element that holds its own. Plus, let's be honest, carving straight lines is often easier and less prone to breaking delicate sections than trying to scoop out perfect circles or intricate shapes. It's a high-impact look with a relatively low degree of difficulty, which is a win in my book after wrestling with a dull saw for an hour.
Getting Started: Simple Techniques for Pumpkin Carving Ideas X Eyes

Getting Started: Simple Techniques for Pumpkin Carving Ideas X Eyes
Tools of the Trade (Beyond Your Mom's Kitchen Knife)
Alright, let's get down to the actual carving. While you *could* technically hack away with a steak knife, your results for **pumpkin carving ideas x eyes** will look significantly better, and you'll reduce the risk of losing a finger, if you use proper tools. A basic pumpkin carving kit is your friend here. You'll want a small, serrated saw for making the initial cuts and a scraping tool to thin the pumpkin wall where you plan to carve. A drill with different sized bits can also be a surprisingly effective shortcut for creating clean intersections or varying line thickness – just don't drill through your hand. Safety goggles? Probably a good idea, unless you enjoy pumpkin guts in your eye.
Making the Cut: Simple "X" Eye Technique
Start by drawing your "X" directly onto the pumpkin with a dry-erase marker. This lets you adjust placement and size before committing. Don't overthink it – two intersecting lines. Simple. Use your small saw to carefully follow your lines. Go slow, especially at the intersection; this is where cracks happen. If you're using a drill, you can drill pilot holes at the ends of your lines and the center intersection, then connect them with the saw. Once cut, gently push the pieces out from the inside. If they're stuck, use the scraping tool to thin the wall behind them. Clean edges are key to making that "X" pop.
What tools are essential for cleaner "X" eyes?
- Small serrated pumpkin saw
- Pumpkin scraping tool
- Dry-erase marker for drawing
- Optional: Drill with various bits
Giving Them Soul: Variations on Pumpkin Carving Ideas X Eyes

Giving Them Soul: Variations on Pumpkin Carving Ideas X Eyes
Beyond the Basic Cross: Adding Character to Your "X"
you've mastered the basic "X" cutout. Now, how do you inject some personality into those simple lines? This is where **pumpkin carving ideas x eyes** really get interesting. Don't just carve two identical crosses. Think about the *quality* of the lines and their placement. A thin, jagged "X" feels different from a thick, clean one. Angling the "X"s inward or outward can change the perceived gaze. Making one "X" slightly larger or higher than the other suggests asymmetry, perhaps implying injury or a lopsided, goofy look. You can also partially carve the lines, leaving bridges of pumpkin flesh, which creates a more textured, less stark appearance, hinting at something behind the eyes rather than just a void.
Consider these simple variations to elevate your "X" eyes:
- Varying line thickness (thick and bold vs. thin and sharp)
- Tilting the "X"s (angled inward, outward, or asymmetrical)
- Making the "X"s different sizes
- Placing the "X"s at different heights
- Using partial cuts or etching instead of full cutouts
Pairing "X" Eyes with Other Spooky Details
Mouths That Complement the "X" Gaze
you've got your killer "X" eyes locked in. Now, what do you do with the rest of the face? The mouth is your next crucial element when playing with **pumpkin carving ideas x eyes**. A standard jagged grin can work, sure, but it often feels disconnected from the vacant or shocked look the "X"s might convey. Consider mouths that lean into the unsettling vibe. A simple horizontal slit can look surprisingly creepy, suggesting a stitched-up or unnatural expression. A small, downturned curve can add a touch of pathetic sadness to the mix. Or, go for something completely different – no mouth at all. The absence of a mouth can amplify the intensity of the eyes, leaving the viewer wondering what unspeakable thing has rendered the pumpkin speechless.
Adding Texture and Surface Scares
Don't limit yourself to just cutouts. The surface of the pumpkin is ripe for adding details that enhance your **pumpkin carving ideas x eyes**. Think about etching or scraping away just the skin to create scars, wrinkles, or veins around the eyes. This adds depth and a layer of gruesome realism. You could scrape away patches to make the pumpkin look diseased or aged, making those stark "X" marks seem even more pronounced against the decaying texture. Small holes drilled around the face can simulate pores or insect damage. These subtle surface details can transform a simple design into something genuinely disturbing.
How can surface details enhance "X" eyes?
- Scraping skin for scars or wrinkles
- Etching patterns or veins
- Creating patches of textured skin
- Drilling small holes for pores or damage
Noses, Brows, and Other Facial Flourishes
Beyond the eyes and mouth, other carved elements can solidify the character of your "X"-eyed pumpkin. A simple upside-down triangle nose is a classic, but try a narrow, pointed one to make the face look more gaunt, or skip the nose entirely for a smoother, more alien appearance. Brows, even if just etched lines, can dramatically change the expression; angled brows above "X" eyes can suggest anger or pain, while curved brows might imply confusion. Small, strategically placed holes or dots can act as moles or stitches. Remember, every element you add should ideally work *with* the "X" eyes, not against them, contributing to a cohesive, unsettling, or unique look.
Taking it Further: Advanced Pumpkin Carving Ideas X Eyes

Taking it Further: Advanced Pumpkin Carving Ideas X Eyes
Integrating "X" Eyes into Full Scenes
so you've moved past the simple face and want to tell a story with your pumpkin. How do those stark "X" eyes fit into a more complex narrative carved onto a gourd? Think of the "X" as a focal point, a powerful symbol within a larger picture. Maybe your pumpkin depicts a haunted house, and a tiny figure in a window has "X" eyes, suggesting a trapped spirit. Or perhaps you're carving a scene of woodland creatures, and one unlucky critter has encountered something nasty, its fate sealed with those simple crosses. It's about using the "X" not just as eyes on a face, but as a visual shorthand for something specific within your carved tableau – death, shock, emptiness, or maybe just cartoonish dizziness after running into a tree. It requires planning the whole composition, treating the pumpkin surface like a canvas for a low-relief sculpture.
Layering and Depth with "X" Marks
Pushing **pumpkin carving ideas x eyes** further means thinking in layers. Instead of just cutting through, consider scraping away different depths of the pumpkin flesh to create variations in light and shadow around the "X". You could carve the "X" through the skin, but then scrape away the flesh *behind* it to thin the wall and make the light brighter, creating a glowing effect. Or, carve a larger shape around the "X" and then etch the "X" *into* that shape, giving the eyes a recessed look. Using linoleum cutters or specialized detail tools allows for carving thin, delicate "X"s or adding texture right up to the edge of the cutouts. It’s about adding dimension beyond a flat hole, making the "X" feel like part of the pumpkin's form, not just a punch-out.
Advanced techniques for layered "X" eyes:
- Scraping the interior wall behind the "X" for brighter light
- Recessing the "X" within a larger carved area
- Using detail tools for fine lines and textures
- Creating partial cuts or etching for varied light transmission
- Combining cut-through "X"s with scraped or etched surrounding details
Lighting and External Enhancements for "X" Effects
The right light can make or break any pumpkin carving, and this is doubly true for sophisticated **pumpkin carving ideas x eyes**. A single candle might be traditional, but inconsistent. For a steady, strong glow that really highlights those "X" marks, consider using LED lights. White or yellow LEDs give a classic look, but colored lights can add a whole new dimension – red for a demonic stare, green for something sickly, blue for an icy, dead look. Think about placing lights strategically inside to maximize the impact of your carved layers and depths. You can also use external elements. Maybe position a small spotlight to cast sharp shadows that emphasize the "X" shape, or place the pumpkin near a wall to create a giant, distorted shadow of the "X" eyes. It’s not just about the carving; it's about the presentation.
Putting the "X" Factor in Your Pumpkin
So there you have it. Moving beyond the predictable triangle eye doesn't require a master's degree in pumpkin surgery. Embracing **pumpkin carving ideas x eyes** offers a straightforward path to more expressive and memorable jack-o'-lanterns. It's a simple shape, sure, but its impact is anything but basic. Whether you're aiming for vacant stares, cartoonish confusion, or something just plain unsettling, the "X" delivers. Give it a shot this year; your porch display might just thank you.