Table of Contents
Alright, let's be honest. Every fall, the same old pumpkin faces pop up on doorsteps. Triangle eyes, jagged grin, maybe a square nose if you're feeling wild. It's fine, classic even, but doesn't it get a little… predictable?
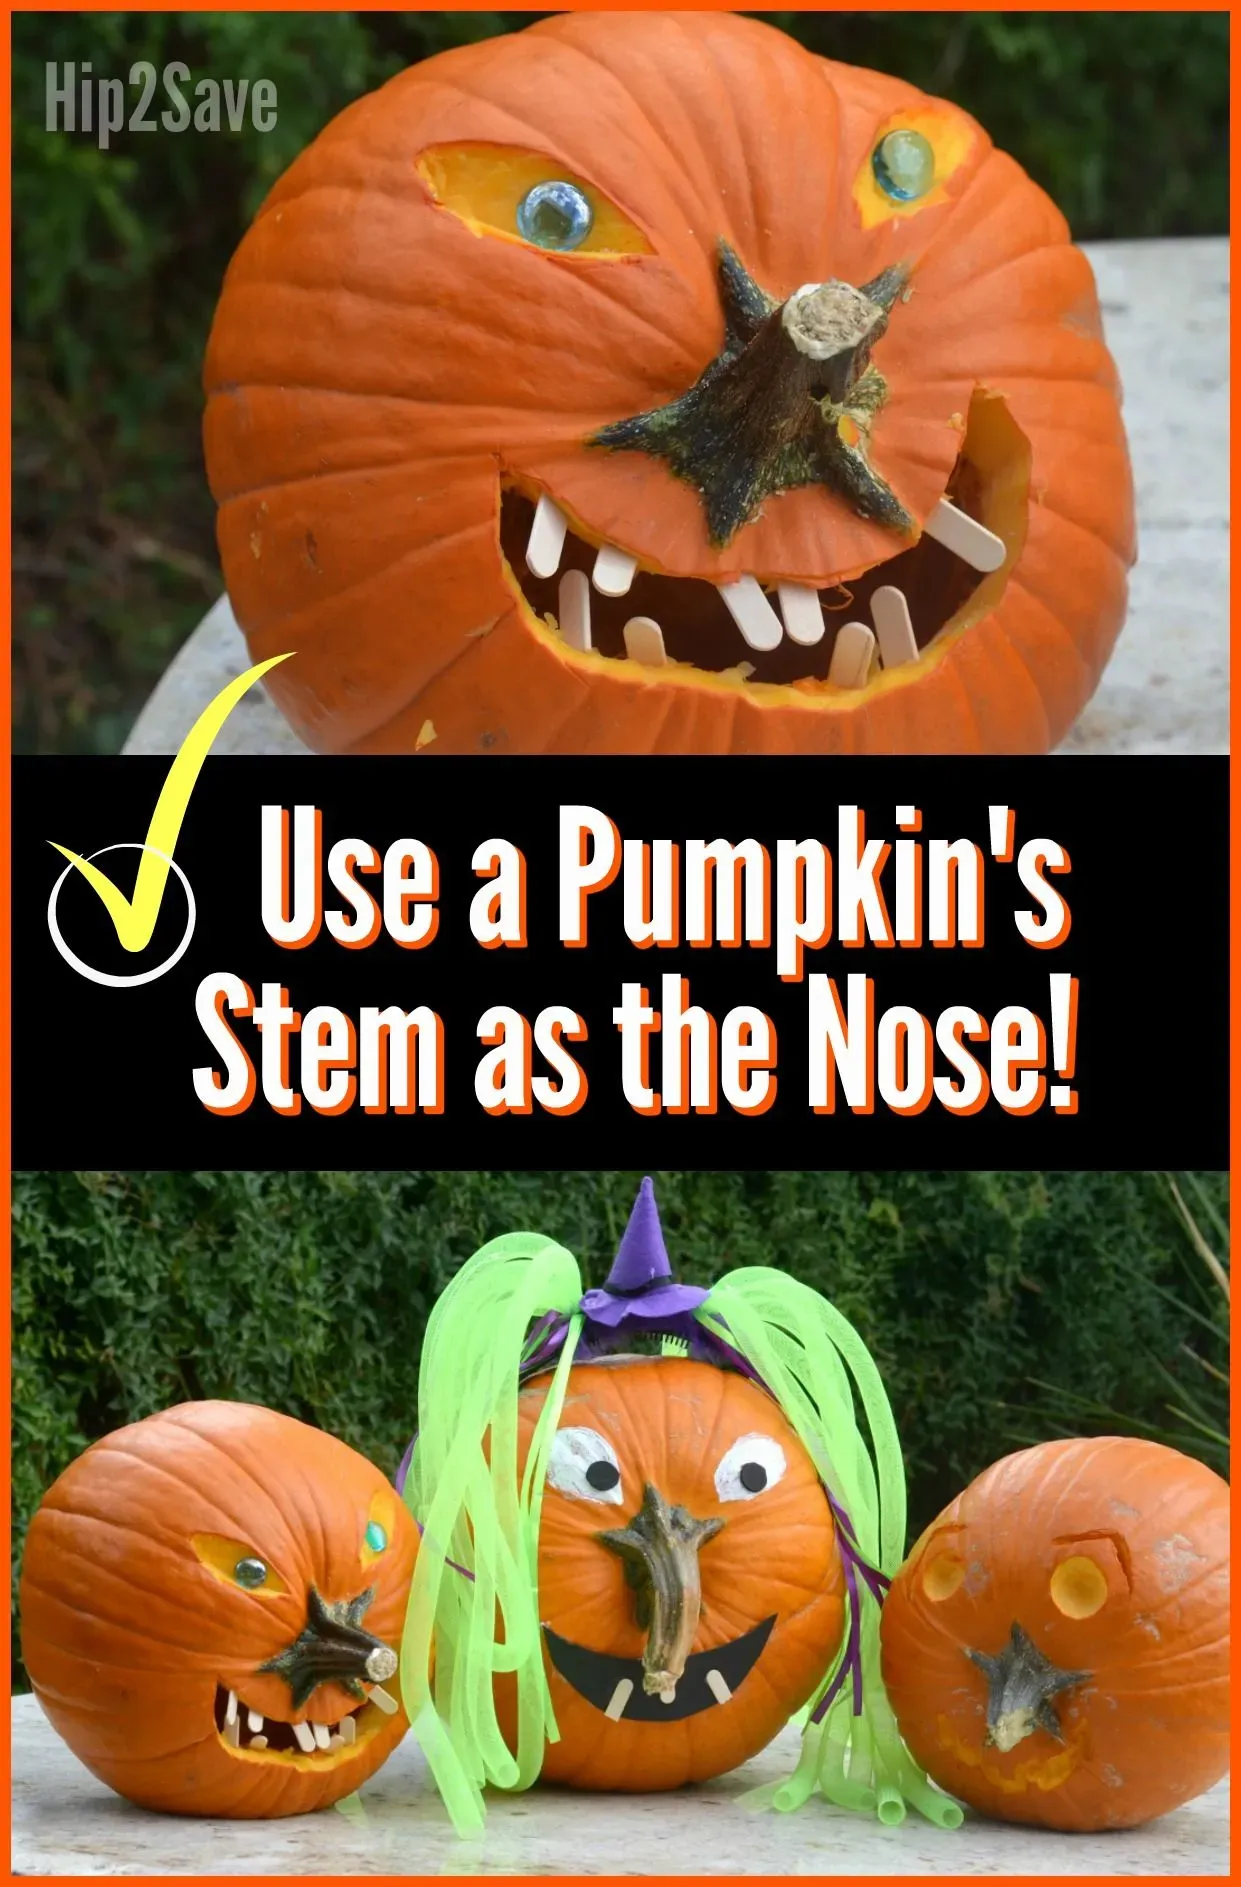
Pumpkin Carving Ideas Using the Stem: More Than Just a Nose
Pumpkin Carving Ideas Using the Stem: More Than Just a Nose
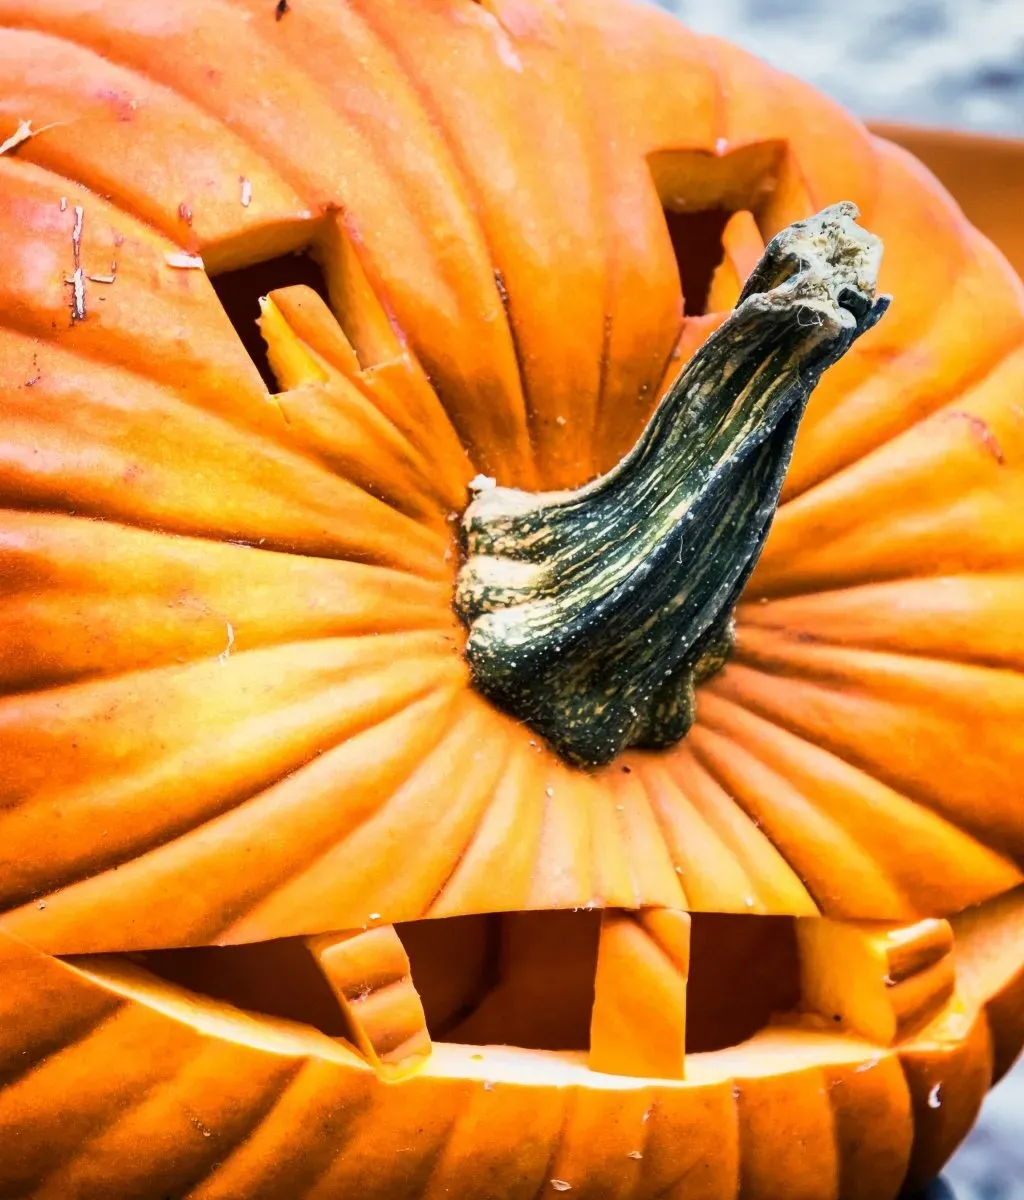
so you've got your pumpkin on the kitchen counter. Big, round, maybe a little lopsided. And there it is, that woody, often-ignored stem sticking out the top. For years, the go-to move for using the stem was simple: turn the pumpkin sideways and make it a nose. It's a classic for a reason, sure, especially if you get one of those wonderfully crooked stems that looks like it survived a bar fight. But let's be real, that's just scratching the surface of pumpkin carving ideas using the stem.
Thinking of the stem solely as a proboscis feels limiting, like using a Swiss Army knife just to open a bottle. That stem has texture, shape, sometimes even little tendrils. It can be a focal point, a character element, or even structural support for something wilder. Ignoring its potential is like leaving half your art supplies in the box. We're talking about transforming the entire perspective of your pumpkin, not just sticking a funny bump on its face.
So, if not just a nose, what else can that stem become? Consider the possibilities:
- Hair or a wild, windswept mane
- Antlers or horns for a creature
- A tree branch or part of a miniature landscape
- A witch's hat peak or a wizard's staff tip
- The neck of a strange, long-necked beast
- A chimney on a tiny pumpkin house
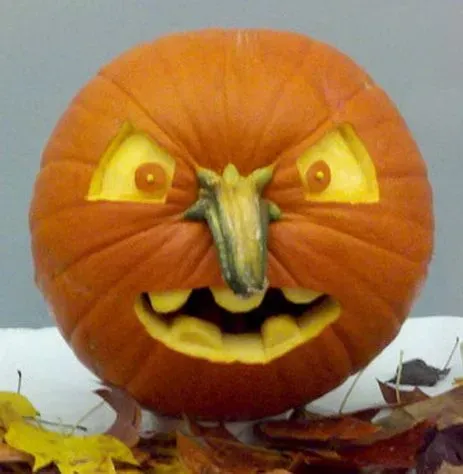
Each stem is unique, which is what makes this approach interesting. You have to look at the pumpkin and its stem together and see what story they tell. Does the stem curve sharply? Maybe it's a hooked nose for a pirate or the start of a question mark for a puzzled character. Is it thick and straight? It could be a sturdy mast for a carved ship or a powerful horn.
The goal here isn't just to carve a pumpkin; it's to collaborate with the pumpkin itself. The stem isn't just an appendage; it's a design element that dictates, or at least strongly suggests, the direction your creative energy should take. It forces you to think outside the conventional face-on approach and explore new angles and narratives.
Turning Your Pumpkin Sideways: Creative Stem Placement Ideas

Turning Your Pumpkin Sideways: Creative Stem Placement Ideas
so the classic "stem as a nose" trick involves turning the pumpkin on its side. It's the gateway drug to thinking differently about your gourd. But flipping it sideways isn't just for making a Pinocchio-esque snoz. It fundamentally shifts the canvas you're working with. That stem, which was pointing up to the sky, is now jutting out horizontally or even pointing down. This changes everything about how you perceive the pumpkin's potential face or form. Suddenly, the natural curve of the pumpkin's side becomes a forehead, a chin, or the slope of a creature's back, with the stem becoming an appendage, a feature, or part of a larger scene.
Pumpkin Carving Ideas Using the Stem: Adding Personality and Character
Pumpkin Carving Ideas Using the Stem: Adding Personality and Character
so you've turned the pumpkin. The stem is doing something unexpected. Now comes the fun part: letting that stem inject some serious personality into your creation. This is where pumpkin carving ideas using the stem really shine. It's not just about making a shape; it's about giving your pumpkin a story, a mood, a vibe. Does that twisty stem look like a grumpy old man's nose? Carve some deep-set eyes and a scowl. Is it long and elegant? Maybe it's the neck of a graceful swan or a slightly snooty creature looking down its... well, its stem.
Advanced Techniques for Pumpkin Carving Ideas Using the Stem
Advanced Techniques for Pumpkin Carving Ideas Using the Stem
Going Beyond the Surface: Carving Into and Around the Stem
so you've mastered the basic stem-as-a-nose or stem-as-hair trick. Ready to step it up? Advanced pumpkin carving ideas using the stem involve treating the stem itself as a canvas or integrating it more deeply into the overall structure. This isn't just about what the stem *is*, but what you can *do* to it and with it. Think etching patterns directly onto the woody surface of the stem, carefully shaving layers to create texture, or even carving small details *into* the base of the stem where it meets the pumpkin. You can also use the stem as an anchor point. Ever thought about attaching wire to the stem to make it look like a spiderweb is trailing from it? Or maybe securing small, carved foam pieces to extend the stem's shape and make it look like elaborate antlers or a twisted, thorny vine? It requires a bit more precision and perhaps some non-traditional tools, but the results can be genuinely striking and move beyond simple surface carving.
Combining Stem Use with Other Advanced Techniques
Taking pumpkin carving ideas using the stem to the next level means blending that stem focus with other carving methods. If you're etching details onto the pumpkin's skin, extend those patterns onto the stem itself to create visual continuity. Consider using 3D carving techniques where the stem becomes a projection from a sculpted face or creature. For instance, carve a monster face directly into the pumpkin's side, then sculpt the area around the stem so it looks like a horn bursting from its forehead or a grotesque growth. Lighting is another area to explore. If the stem is part of a larger scene, strategically placed internal light sources can cast dramatic shadows or highlight the stem's unique texture, drawing the eye and adding depth. This isn't just carving; it's sculpting and design, using every part of the pumpkin, including that often-overlooked stem, to build a complete visual story.
- Use a Dremel or small rotary tool for etching fine details on the stem.
- Experiment with wood carving tools for shaping thicker stems.
- Consider wire or toothpicks to attach lightweight elements to the stem.
- Practice on scraps of pumpkin or gourd stems first.
- Think about how light will interact with the stem's texture and shape.
Showcasing Your StemCentric Pumpkin Carving Ideas
Showcasing Your StemCentric Pumpkin Carving Ideas
Getting Your Twisted Creation Seen
So you've done the work. You wrestled with a stubborn gourd, maybe nicked a finger, and somehow convinced that awkward stem to become a masterpiece of character and form. Now what? Leaving your stem-centric creation on the porch is fine, but in the age of digital bragging rights, you want the world (or at least your corner of the internet) to see it. Showcasing your pumpkin carving ideas using the stem isn't just about validation; it's about inspiring others to look beyond the obvious. Get good photos in decent light – natural daylight is usually best, maybe with a subtle light inside if you carved through the skin. Capture the stem from different angles. Highlight the details you worked so hard on. Don't just plop it on the grass; put it on a pedestal, next to a creepy prop, or in a spot that complements its newfound personality.
Sharing the Story Behind the Gourd
A picture might be worth a thousand words, but a little context goes a long way, especially with these more unconventional designs. When you share your unique pumpkin carving ideas using the stem, talk about the process. Did the stem's shape dictate the entire design? Did you struggle with a particular cut around the base? People connect with the journey, the unexpected challenges, and the moments of inspiration. Was it supposed to be a dragon but the stem screamed "grumpy old wizard nose"? Share that pivot. It makes the finished product more relatable and less like it magically appeared fully formed. Plus, it gives others ideas for tackling their own weirdly-stemmed pumpkins. Don't be afraid to admit the cuts that didn't go perfectly or the tool you wished you had. Authenticity beats polished perfection any day.
- Post photos on Instagram, TikTok, or Facebook using relevant hashtags (#stempumpkin, #pumpkincarvingideas, #halloweenart, #creativecarving).
- Enter local pumpkin carving contests – many have unique categories.
- Share your process in a blog post or a series of social media stories.
- Ask for feedback and share tips with other carvers online.
- Consider a time-lapse video of your carving process, focusing on how you used the stem.
So, What Are You Waiting For? Grab a Pumpkin
We've talked about using that stem for more than just carrying your pumpkin. From turning the whole thing sideways to building entire characters around that woody knob, there are plenty of ways to break the mold. It takes a little looking at things differently, maybe a bit of trial and error (pumpkins aren't perfect, after all). But honestly, isn't that better than just carving the same three triangles year after year? Get a pumpkin, grab a tool, and see what that stem tells you to create.