Table of Contents
Alright, let's talk pumpkins. Every fall, the same cast of characters appears on doorsteps: the classic triangle-eyed, jagged-mouthed jack-o'-lantern. It's fine, it's traditional, but honestly, it gets a little predictable. If you're tired of the usual suspects and want to give your gourd some real personality this year, maybe it's time to look at things from a different angle. Literally. Forget carving *into* the stem; let's talk about using the stem itself.
Beyond the Classic Jacko'Lantern: Rethinking Pumpkin Faces
Beyond the Classic Jacko'Lantern: Rethinking Pumpkin Faces
Enough with the Same Old Grin
Let's be honest. Walk down any street in October, and you see them. Row after row of the same toothy smile, triangular eyes, maybe a nose cut out. It's the default setting for pumpkin carving, the beige of Halloween decor. It serves a purpose, sure, it says "I participated," but does it say "I had fun" or "I was creative"? Often, it feels like we're stuck on repeat, carving the same face our parents carved, and their parents before them. It's time to break the mold, to look at that round orange canvas and think, "What else?"
Why Stick to the Script?
The beauty of a pumpkin isn't just its carvable flesh; it's the unique shape, the bumps, the varying textures, and yes, that often-overlooked stem. Relying solely on cutting standard shapes limits the potential. It's like getting a perfectly good piece of clay and only ever making a simple sphere. There's so much more character waiting to be found and enhanced. Moving beyond the classic requires a different mindset, a willingness to see the pumpkin not just as a surface to cut into, but as an object with its own inherent form.
Think about it: every pumpkin is different. Some are tall and skinny, others squat and wide. Some have deep ridges, others are smooth. The stems vary wildly – short and stubby, long and curved, thick and gnarly. Ignoring these natural features feels like a missed opportunity. Why force a generic face onto a pumpkin that's begging to be something else entirely?
- Break out of triangle eyes.
- Experiment with different mouth shapes.
- Use carving tools creatively, not just for cutting.
- Consider the pumpkin's natural shape in your design.
- Don't feel obligated to carve through the pumpkin wall.
Finding Inspiration in Imperfection
This is where the real fun begins. Instead of fighting the pumpkin's natural form, you start working with it. That weird bump? Maybe it's a wart. That long, curved stem? It could be a fantastic, exaggerated feature. This approach leads to truly unique creations that stand out from the sea of identical jack-o'-lanterns. It encourages improvisation and turns potential flaws into design elements. It’s about seeing the pumpkin as a character waiting to emerge, guided by its own peculiarities.
Mastering Pumpkin Carving Ideas Using Stem as Nose
Mastering Pumpkin Carving Ideas Using Stem as Nose
Flipping the Script: The Stem-Nose Revelation
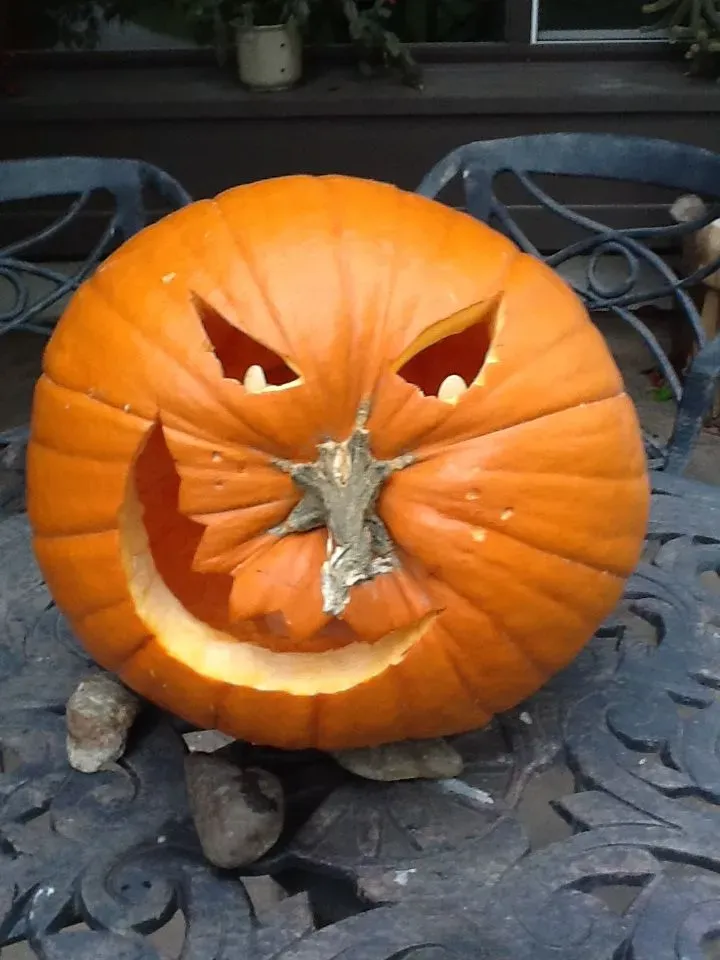
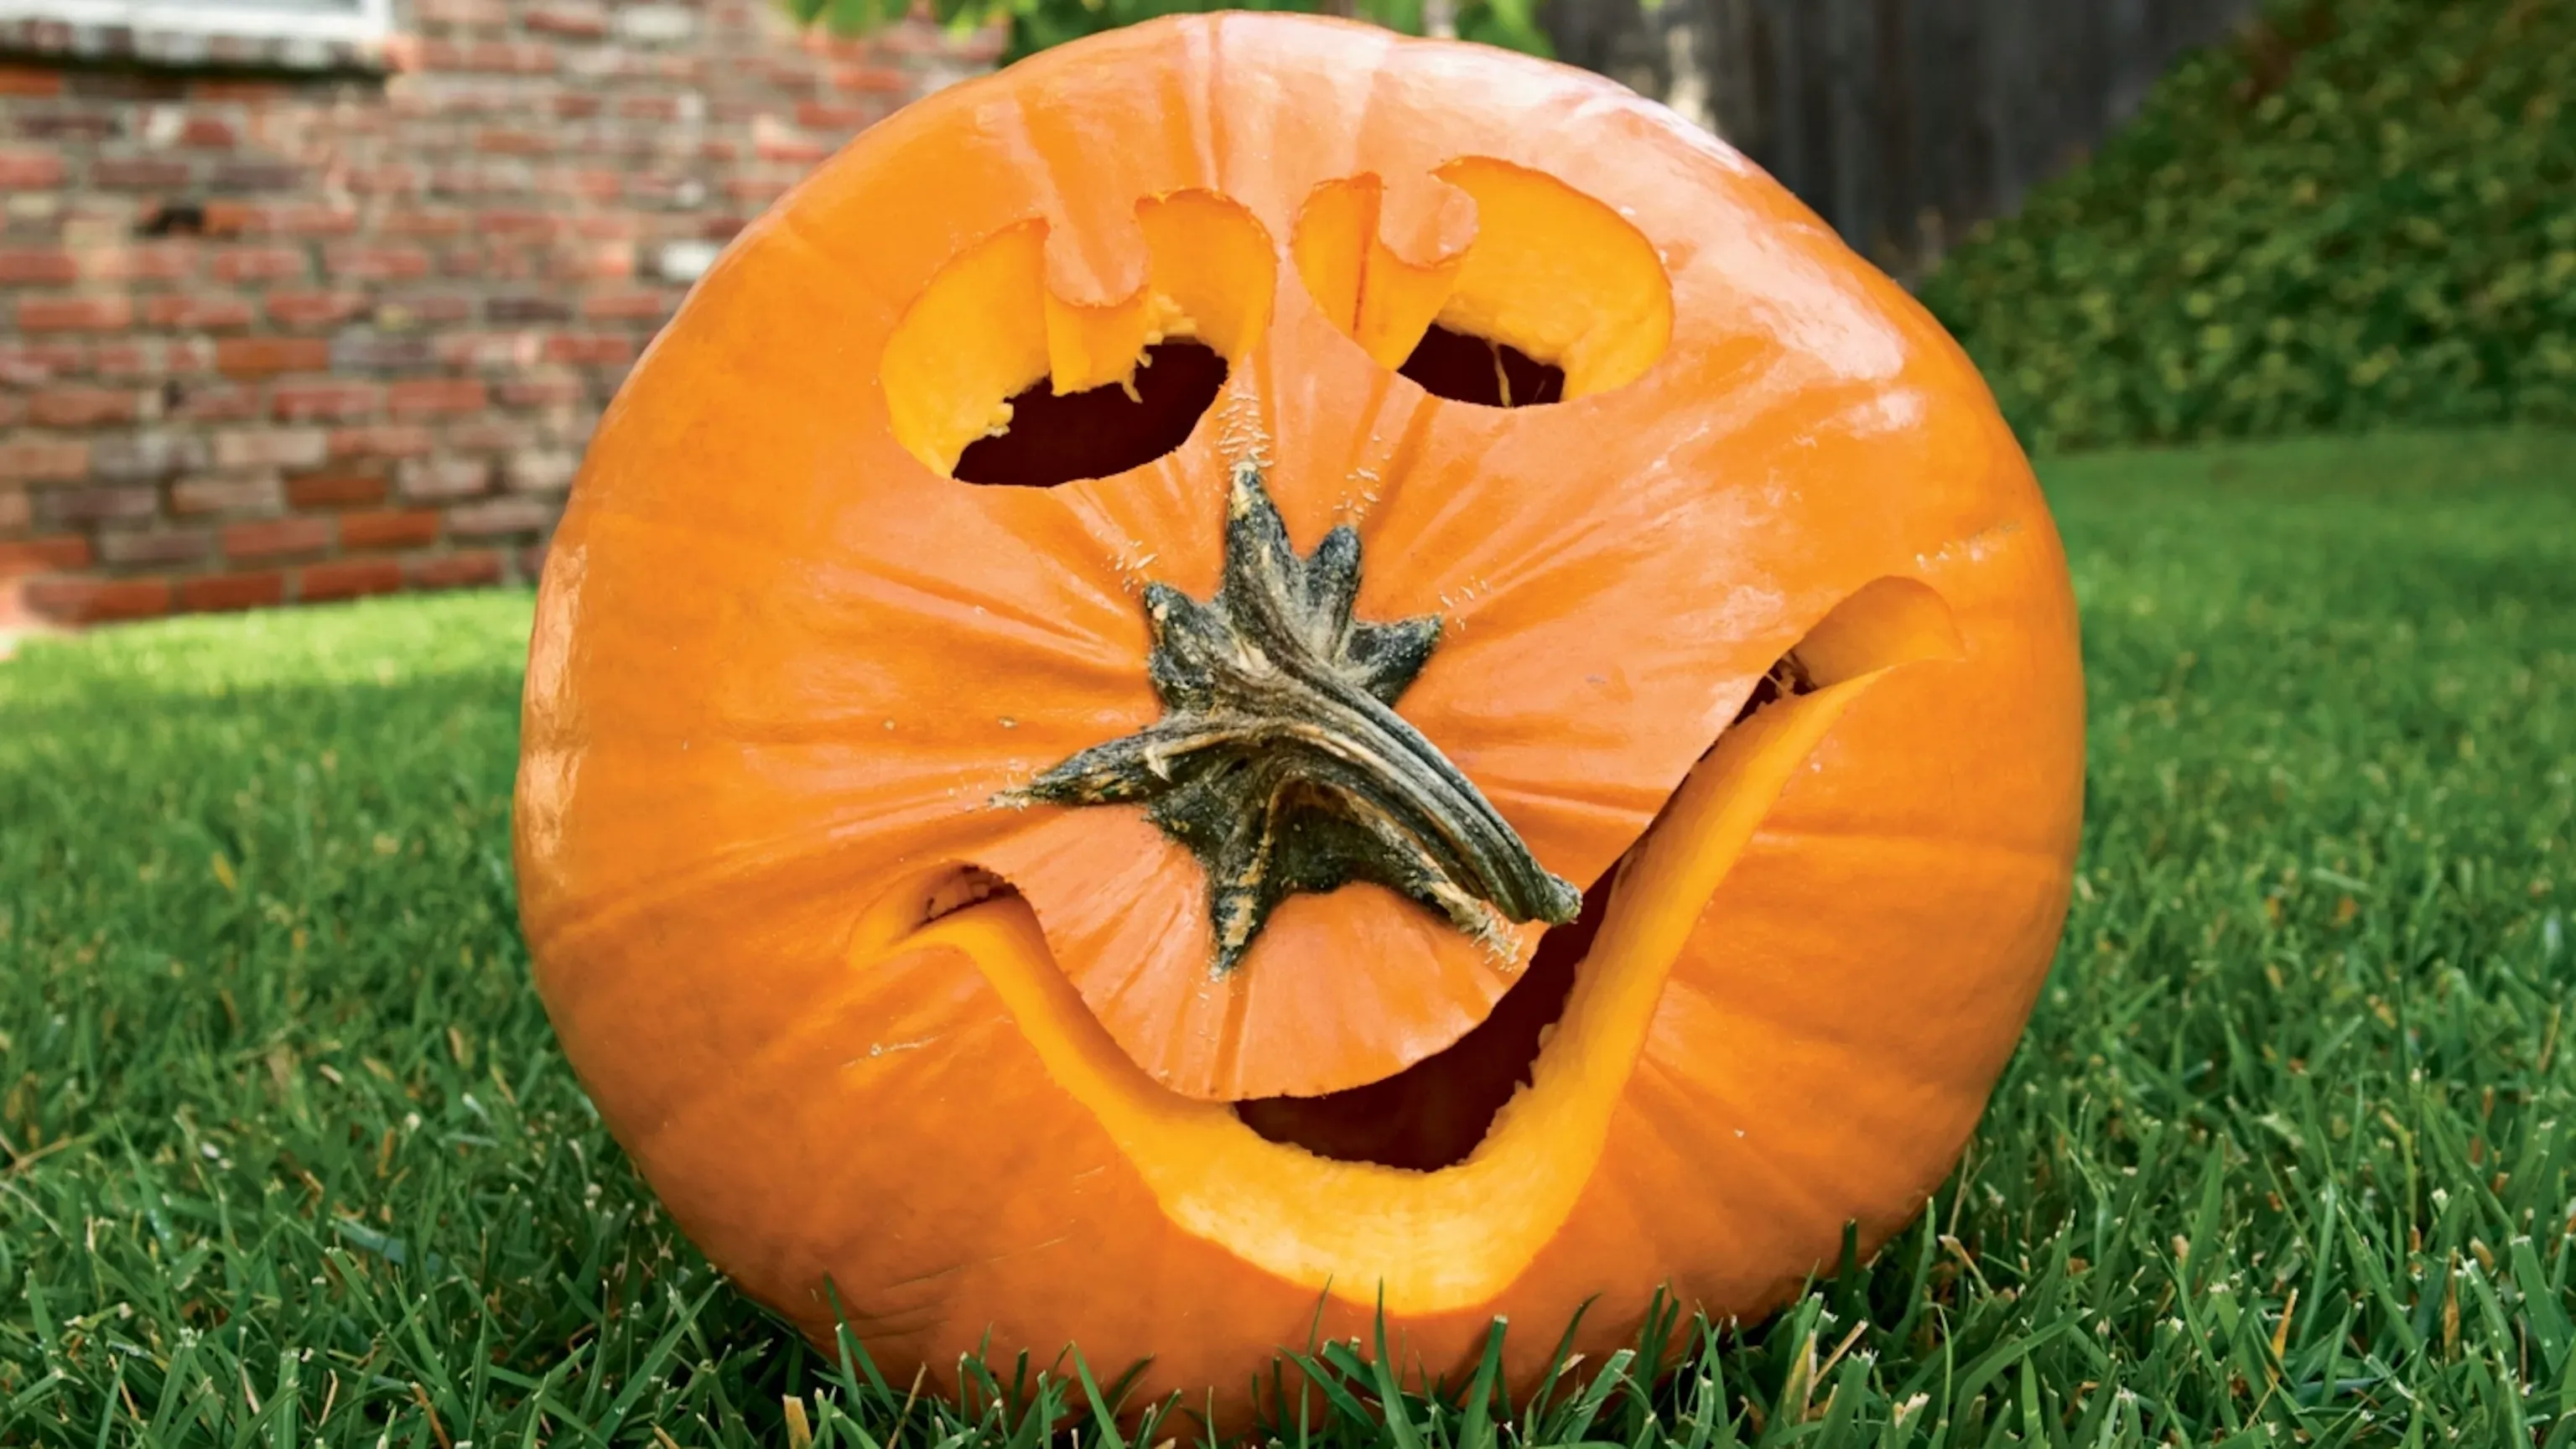
So, you've got your pumpkin, maybe it's got a particularly gnarly or long stem. Instead of seeing that as a handle to lug it around, see it as the main event. The core idea behindpumpkin carving ideas using stem as noseis simple: turn the pumpkin on its side so the stem points outwards. This immediately gives you a ready-made, three-dimensional nose that no amount of carving can replicate. It's a shortcut to character, leveraging what the pumpkin already offers.
Think of it like finding a perfect piece of driftwood for a sculpture; you build around its natural form. Once the pumpkin is oriented with the stem as the nose, the rest of the face falls into place around it. The eyes and mouth will now be on what was previously the side of the pumpkin. This shift in perspective is key. It forces you to think differently about placement and proportion. Suddenly, those bumps and ridges on the pumpkin's side become cheeks or eyebrows. It's less about imposing a design and more about discovering one.
Different Stems, Different Faces: Working with What You've Got
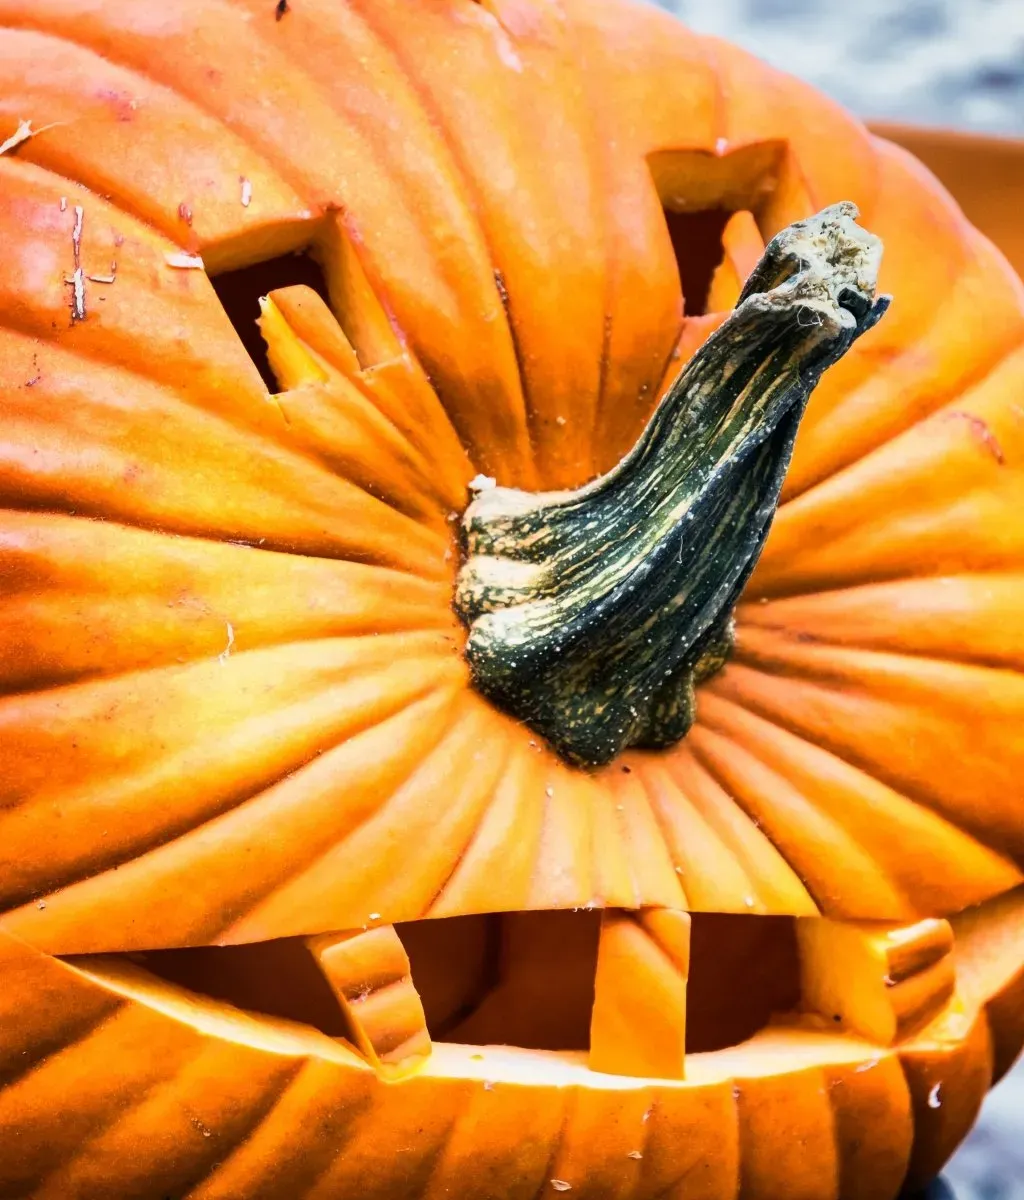
Not all stems are created equal, and that's a good thing forpumpkin carving ideas using stem as nose. A short, stubby stem might make a cute button nose on a round pumpkin. A long, crooked stem could be a witch's nose or a comical, exaggerated feature on a more oval gourd. The shape and size of the stem dictate the potential character. Don't try to make a tiny stem into a giant honker; work with its natural scale.
Once you've embraced the stem-as-nose concept, you can start adding other features. Simple carved or painted eyes and mouths work well. You can also use found objects. Acorn caps for eyes, corn kernels for teeth, even small gourds attached with toothpicks for ears. The stem provides the central anchor, and you build the rest of the face outwards. It's a less invasive carving technique too, often requiring fewer deep cuts, which can help your pumpkin last longer.
More Clever Ways to Use Pumpkin Stems and Other Parts
More Clever Ways to Use Pumpkin Stems and Other Parts
Beyond the Nose: Stems as Hair, Ears, or Whatever Works
Alright, we've nailed the stem-as-nose concept. But why stop there? That stem isn't just for proboscis duty. Depending on its shape and how you orient the pumpkin, a long, curved stem could become a fantastic, sweeping hairstyle for a witch or a wild-haired monster. A couple of smaller stems from mini-pumpkins or gourds attached with toothpicks could serve as ears for a creature. Think abstractly. A gnarled, twisted stem might be the perfect spooky hand reaching out, or perhaps a tail if you position the pumpkin vertically.
The key is observation. Look at the stem, really look at it. Does it have a natural curve? Is it thick and imposing or thin and delicate? Let its form suggest its function in your design. You might need to use a bit of glue or sturdy toothpicks to secure it if you're attaching it rather than using the main stem. Don't be afraid to break off part of a stem if only a section is needed. It's about seeing that woody bit not as waste, but as potential.
Incorporating Seeds, Guts, and Other Found Objects
Carving creates waste, right? All those messy seeds and stringy guts. Most people toss them, maybe save the seeds for roasting. But those parts can be design elements too. Dried seeds can be glued on to create textured patterns, like fur or scales. The stringy pulp, once dried a bit, can look surprisingly creepy as monstrous hair or dripping slime around a mouth. It adds a layer of organic, slightly gross detail that carved lines just can't replicate. It's a great way to use the whole pumpkin, zero waste style.
And don't limit yourself to pumpkin bits. Think about other natural elements or craft supplies. Acorns, small twigs, dried corn husks, even bottle caps or old buttons can become eyes, teeth, or decorative accents. Attaching them securely is crucial – hot glue works well for many things, toothpicks for others. The goal is to create a mixed-media masterpiece that goes beyond simple carving. It’s about building a character, not just cutting a face.
- Use dried seeds for texture (fur, scales).
- Employ stringy guts for hair or slime effect.
- Attach acorn caps or buttons for eyes.
- Use small twigs for eyebrows or limbs.
- Consider corn kernels for teeth.
- Secure additions with hot glue or toothpicks.
Putting It All Together for a Cohesive Look
Simply sticking random things onto a pumpkin can look… well, like you stuck random things onto a pumpkin. The trick to making theseMore Clever Ways to Use Pumpkin Stems and Other Partswork is integration. Ensure the added elements feel like part of the design, not just afterthoughts. If you're using a stem as a nose, make sure the eyes and mouth you carve or add are scaled appropriately and positioned to complement it. If you're adding seed texture, think about where fur or scales would naturally be.
Sometimes this means carving less, not more. The natural surface of the pumpkin provides a great base. Adding features on top or using shallow carving to define areas can be more effective than cutting holes. Step back periodically as you work to see if the elements are balanced. Does the stem-nose look like it belongs with those button eyes? Does the seed texture flow naturally? It's an iterative process, building the character layer by layer, using every part of the pumpkin and maybe a few bits from your junk drawer.
Displaying Your Unique Pumpkin Creations and Troubleshooting Tips
Displaying Your Unique Pumpkin Creations and Troubleshooting Tips
Finding the Perfect Spot for Your Gourd Masterpiece
you've put in the work. You've wrestled with the stem, maybe glued on some seeds, and now you have a pumpkin that doesn't look like every other one on the block. Where do you put it? Shoving it on the front step among a dozen identical faces is a disservice to your creation. Your uniquepumpkin carving ideas using stem as nosedeserve a spotlight. Consider elevation – on a hay bale, a sturdy crate, or even hanging (if your design allows and is secured properly). Think about lighting. A simple LED candle inside (safer than real flames, obviously) highlights carved features, but consider external spotlights or string lights to emphasize the stem-nose and any added textures. Grouping multiple pumpkins with different expressions can create a narrative; maybe they're a quirky family or a collection of strange creatures. Don't just plop it down; curate its environment.
Keeping Your Creation Looking Fresh (or Dealing with the Inevitable Sag)
Let's get real: pumpkins are organic. They don't last forever, especially after you've started poking holes in them. Rot is the enemy, and it's relentless. To slow the decay, consider washing the pumpkin thoroughly before carving. After carving, a thin layer of petroleum jelly or vegetable oil around the cut edges can help retain moisture. Some folks swear by a bleach solution dip (a capful in a gallon of water), but results vary and it can sometimes affect the color. If your stem-nose or other added features start looking droopy, sometimes a strategically placed toothpick or a bit more glue can prop them up temporarily. Accept that decay is part of the process; your masterpiece is temporary, like a sandcastle, but that doesn't make the creation any less satisfying.
- Wash pumpkin before carving.
- Apply petroleum jelly/oil to cut edges.
- Consider a dilute bleach solution dip (use caution).
- Use toothpicks or glue for sagging features.
- Keep pumpkins out of direct sun and extreme temperatures if possible.
Stemming the Tide of Sameness: Final Thoughts
So there you have it. Moving past the usual pumpkin face and embracing the stem as a nose isn't just a neat trick; it's a way to unlock a whole new level of pumpkin personality. Whether you craft a grumpy old man, a whimsical creature, or something wonderfully weird, using that natural protrusion gives your gourd an instant dose of character you just can't get by carving a triangle. It forces you to think differently, work with the pumpkin's natural form, and frankly, results in some pretty memorable displays. Give it a shot this year and see what kind of unique mugs you can bring to life on your porch.