Table of Contents
Let's be honest, traditional pumpkin carving can be a real pain. Scooping out slimy guts, wrestling with dull knives, the constant threat of losing a finger – it's not exactly a relaxing autumn afternoon activity for everyone. Maybe you've tried it and decided it's not for you, or perhaps you're just looking for a faster, cleaner way to get a cool design onto that big orange squash. If that sounds like you, you're in the right place. We're diving into the world of **pumpkin carving ideas using a drill**.
Why Ditch the Knife? Quick & Easy Pumpkin Carving Ideas Using a Drill

Why Ditch the Knife? Quick & Easy Pumpkin Carving Ideas Using a Drill
The Knife Struggle is Real
Let's face it, the classic pumpkin carving knife is often more frustrating than fun. You spend ages sawing away at thick pumpkin walls, the small, flimsy blade slips constantly, and intricate designs? Forget about it unless you possess the steady hand of a brain surgeon. Then there's the mess. Guts everywhere, sticky seeds clinging to everything, and that distinct pumpkin smell that lingers for days. It's enough to make you question why you even bothered. Traditional carving feels like a chore sometimes, especially when you just want a cool-looking pumpkin without the hassle. This is precisely where **pumpkin carving ideas using a drill** come into play, offering a refreshing alternative to the usual carving chaos.
Faster, Cleaner, More Creative
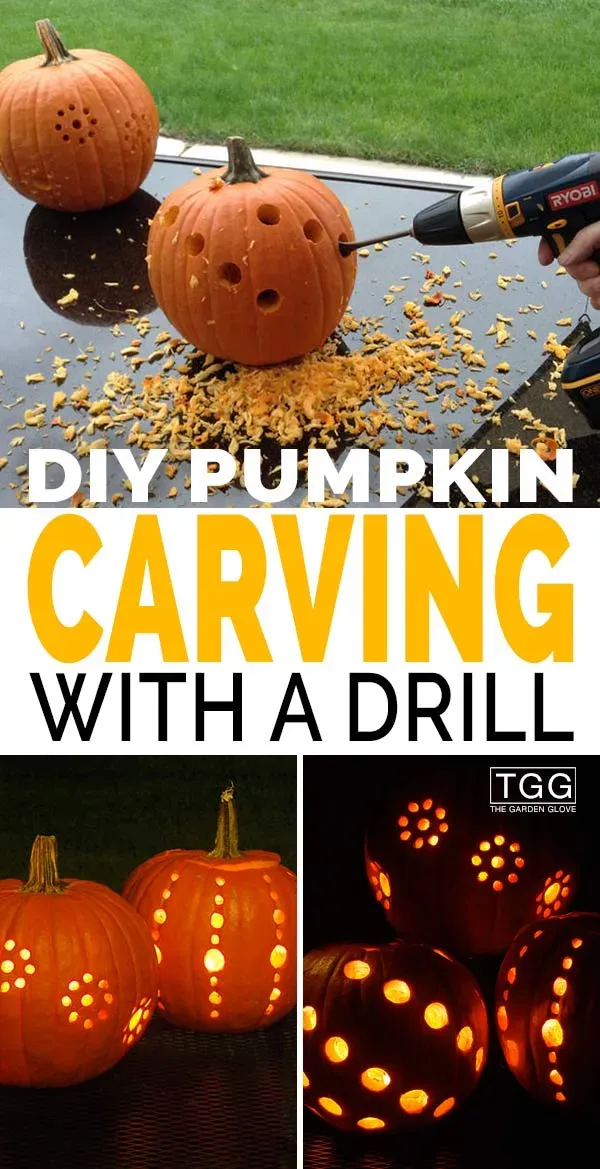
Swapping your carving knife for a power drill fundamentally changes the game. Instead of laboriously cutting lines, you're quickly drilling holes. This is significantly faster, drastically reduces the mess, and opens up a whole new world of design possibilities. Think patterns made of dots, varying sizes of holes for cool light effects, or even using specialized bits for unique textures. It’s less about precision cutting and more about creative perforation. It makes **quick & easy pumpkin carving ideas using a drill** a reality for anyone, regardless of their artistic talent or patience level.
- Knife: Slow, messy, requires skill for detail.
- Drill: Fast, cleaner, easy to create patterns.
- Knife: Limited to cut-out shapes.
- Drill: Allows for varied hole sizes and textures.
Gather Your Gear: Setting Up for DrillPowered Pumpkin Fun
Gather Your Gear: Setting Up for DrillPowered Pumpkin Fun
Alright, so you're sold on the idea of ditching the knife and embracing the drill. Excellent choice. Before you go full power-tool-happy on an unsuspecting pumpkin, you need to get your ducks in a row. **Gather Your Gear: Setting Up for DrillPowered Pumpkin Fun** isn't complicated, but skipping steps can lead to frustration (or worse, a trip to the urgent care). You'll obviously need a drill – cordless is easiest, but corded works too. Then come the bits. A set of standard drill bits in various sizes is key for creating different sized holes. Consider spade bits or even hole saws for larger openings, though start small if you're new to this. Safety glasses are non-negotiable; pumpkin bits fly. Gloves are a good idea to keep your hands clean and offer a bit of grip. And, of course, you need the pumpkin itself. Pick one with a relatively smooth surface if you're planning intricate patterns, but any pumpkin will do for simple hole designs. Make sure your workspace is stable and easy to clean, like a garage floor or an old drop cloth outside.
- Cordless or corded drill
- Assorted standard drill bits
- Safety glasses (seriously!)
- Gloves (optional but recommended)
- A sturdy pumpkin
- A clean, stable workspace
Simple Holes to Intricate Designs: More Pumpkin Carving Ideas Using a Drill
Simple Holes to Intricate Designs: More Pumpkin Carving Ideas Using a Drill
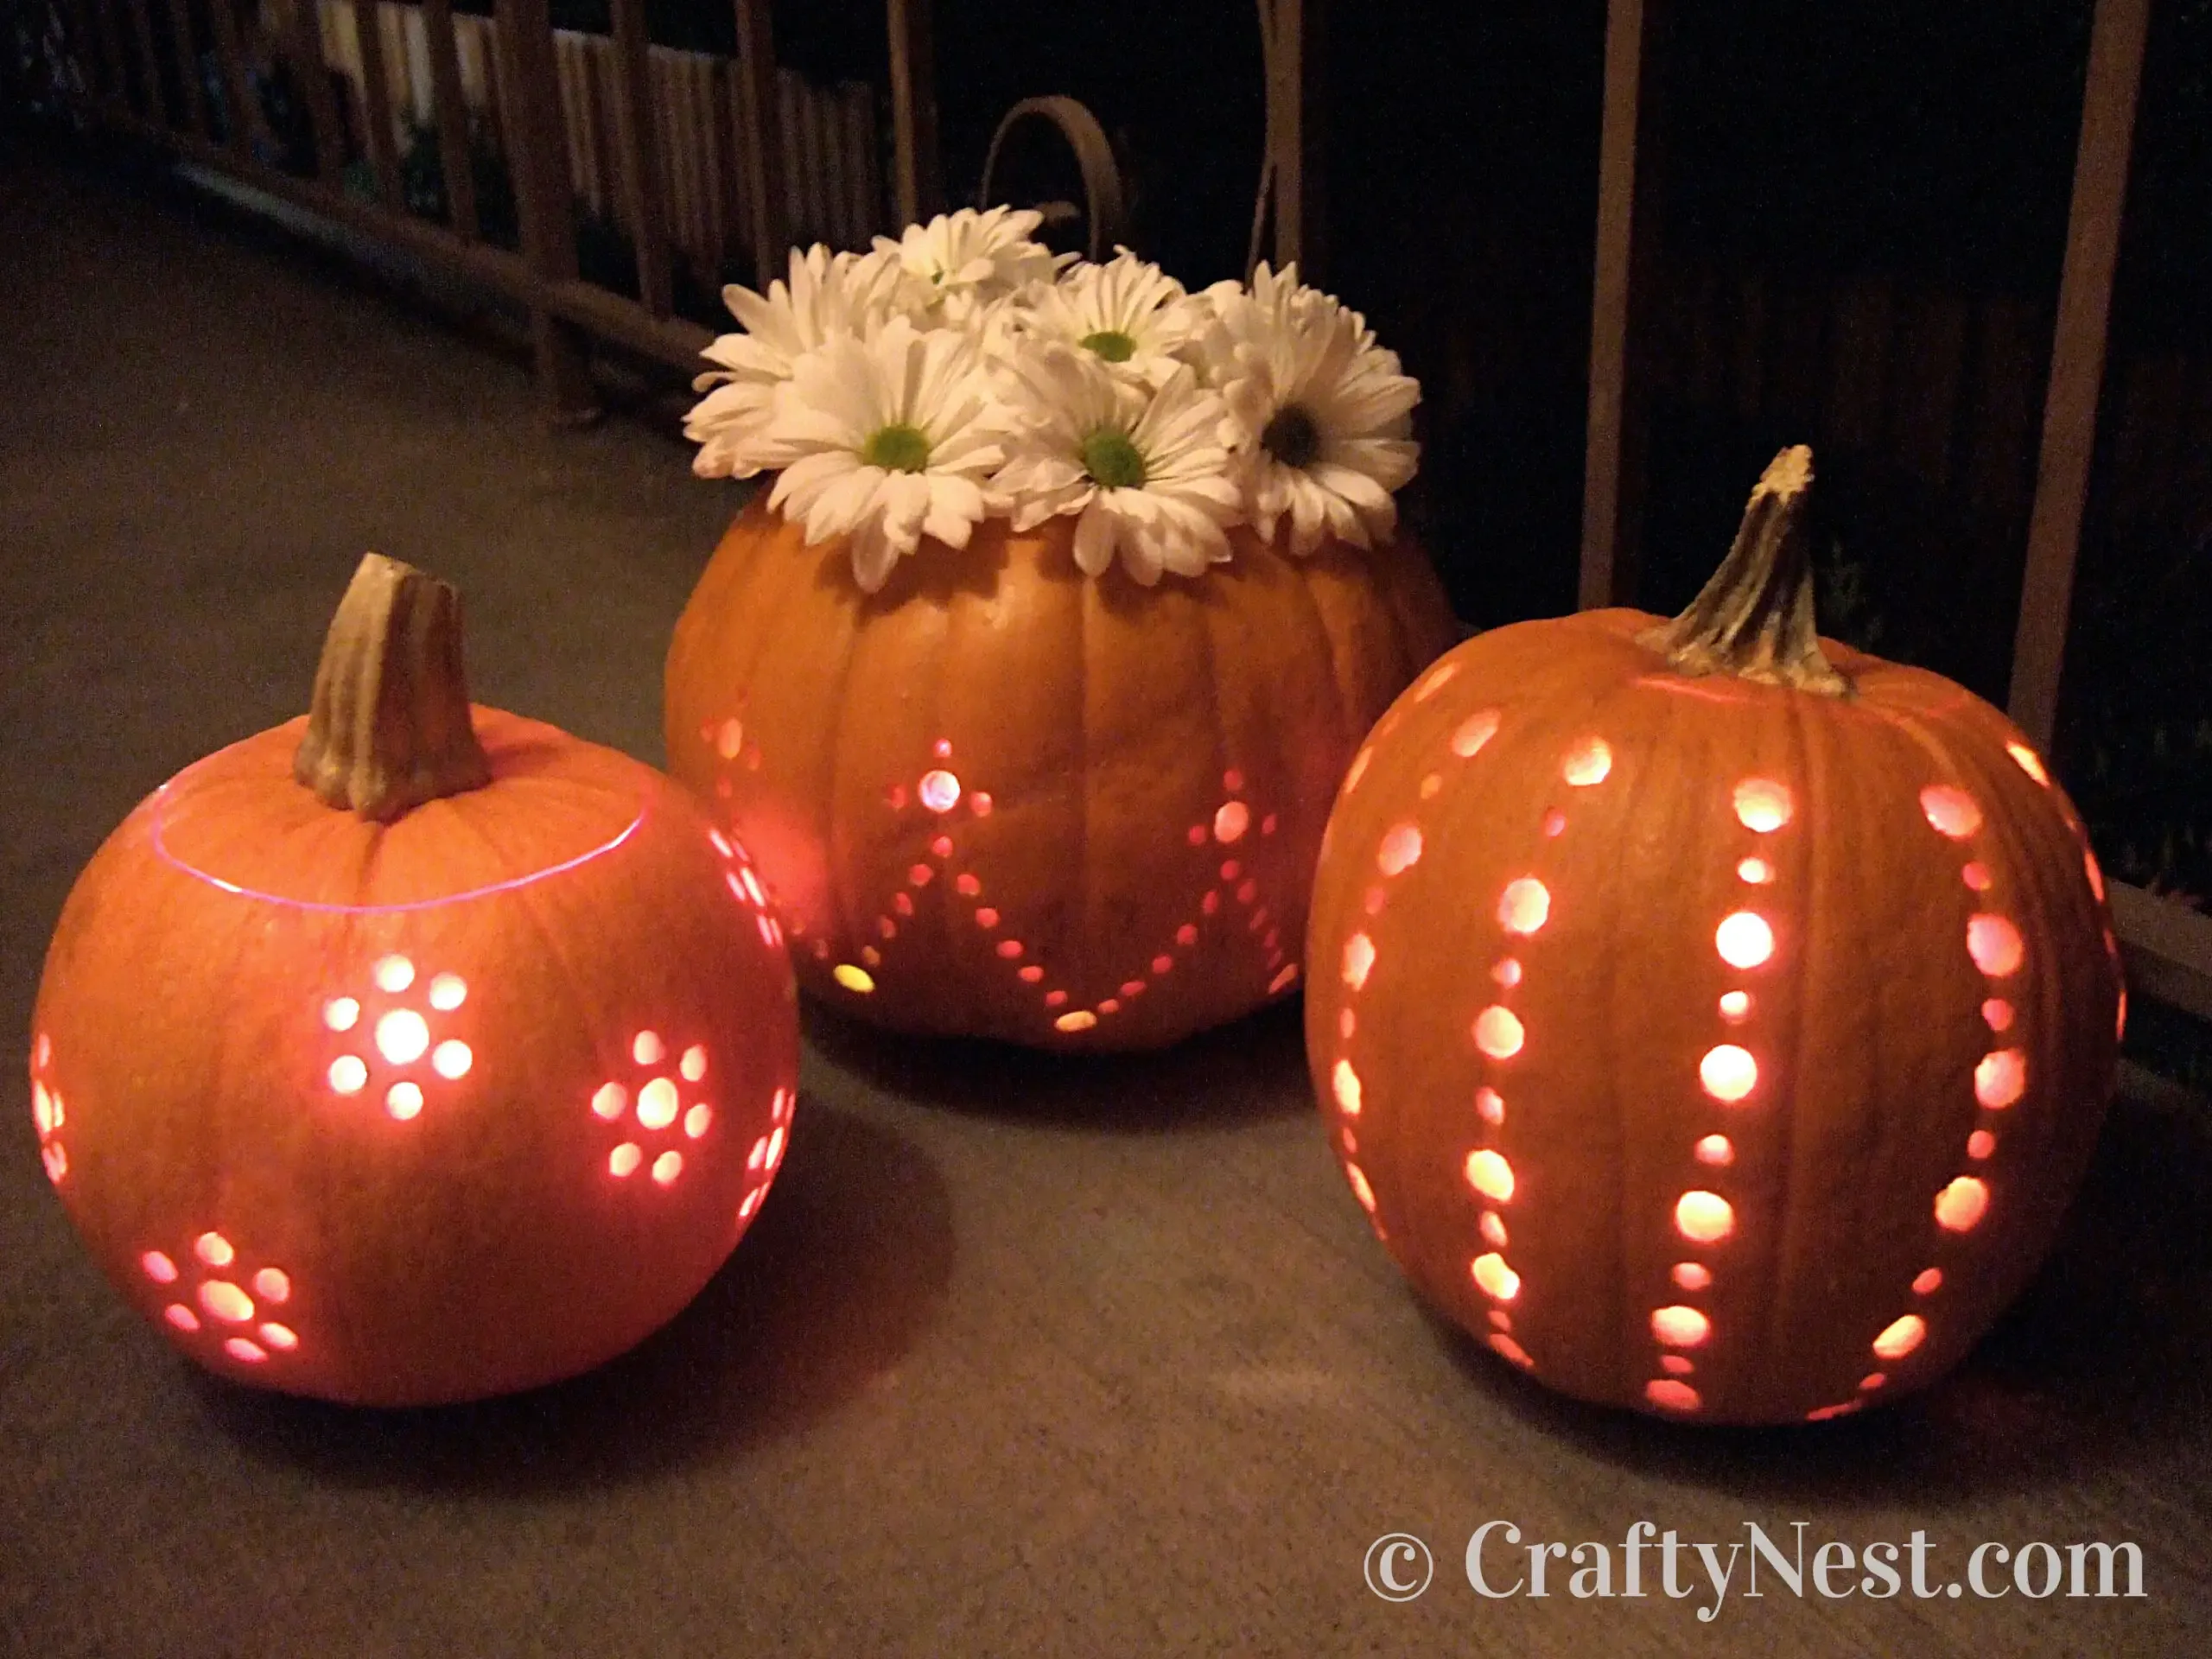
you've got the gear and the basic idea. Now let's talk about the fun part: what can you actually *do* with a drill and a pumpkin? The simplest starting point for **pumpkin carving ideas using a drill** is creating patterns purely out of holes. Think polka dots, spirals, random clusters, or even mimicking constellations by drilling holes of different sizes. You don't need artistic talent for this; just decide on a pattern and start drilling. Varying the drill bit size adds depth and visual interest, especially when lit from within. It's a low-stress way to get a cool effect without trying to carve a perfect spooky face that inevitably ends up looking more goofy than ghoulish.
Beyond the Basics: Taking Your Drill Carving to the Next Level
Beyond the Basics: Taking Your Drill Carving to the Next Level
Playing with Different Bits and Depths
So you've mastered the simple hole patterns with your standard drill bits. Feeling a bit too... basic? Good. Time to level up your **Beyond the Basics: Taking Your Drill Carving to the Next Level** game. Standard bits are great for light, but they aren't the only players. Spade bits, for example, can bore larger, flatter holes, perfect for creating circular design elements or even carving out larger areas more quickly than a standard bit. You can also use grinding bits or rotary tool attachments in your drill chuck to create textured surfaces, carve shallow lines, or even sand away pumpkin skin for a different effect. It's about thinking outside the simple circle.
Combining Techniques for Complex Looks
Real magic happens when you start combining these drill techniques. Don't just drill holes; use a small bit to outline a shape, then switch to a larger bit or even a spade bit to remove the material inside the outline. Imagine outlining a spooky tree or a geometric pattern with tiny holes, creating a delicate silhouette, then using larger holes or textured areas within or around it for contrast. You can also use a scoring bit (like a V-groove router bit, used very carefully and shallowly) to etch lines into the pumpkin surface without going all the way through. This gives you definition for things like spiderwebs or brick patterns that still let light filter through the thinner parts of the wall.
Drill Bit Type | Best Use | Result |
|---|---|---|
Standard Twist Bits | Basic holes, outlines | Clean circular holes |
Spade Bits | Larger circular areas | Wider, flatter holes |
Grinding/Rotary Bits | Surface texture, shallow carving | Etched lines, rough surfaces |
Hole Saws | Very large circles | Perfectly round large openings (use with caution!) |
Safety First, Always (Even When Leveling Up)
As you get fancier with your **Beyond the Basics: Taking Your Drill Carving to the Next Level**, the risk factor creeps up slightly. You're dealing with sharper, larger, or faster-spinning bits. Your safety glasses aren't optional; they're essential. Bits can grab and twist, especially larger ones or when hitting tough spots in the pumpkin wall. Hold the pumpkin firmly or secure it somehow. Don't force the drill; let the bit do the work. If it feels like it's fighting you, back off. And for the love of all things spooky, keep your fingers well clear of the spinning bit. A little caution goes a long way in preventing a trip to the ER that puts a damper on your Halloween spirit.
Your Drill, Your Masterpiece (Probably)
So there you have it. Stepping away from the traditional carving kit and grabbing your drill can open up a whole new world of pumpkin possibilities. It's faster, often less messy, and lets you create designs that are genuinely different from the usual toothy grin. Whether you stick to simple starry patterns or get ambitious with varying bit sizes and depths, using a drill puts a literal new spin on Halloween decorating. Give it a shot this year. Worst case, you learn that maybe your drill is just for actual drilling. Best case? You've got the coolest, most efficiently carved pumpkin on the block.