Table of Contents
Halloween's creeping closer, and you're probably thinking about jack-o'-lanterns. But forget those cheesy grins – this year, we're diving headfirst into the world of pumpkin carving ideas skull! Whether you're a newbie with a butter knife or a seasoned pro with a Dremel, we've got skull designs that'll make your porch the envy (or terror) of the neighborhood.
Skull Pumpkin Carving: Essential Tools and Prep Work
Skull Pumpkin Carving: Essential Tools and Prep Work
Gather Your Arsenal: Skull Pumpkin Carving Toolkit
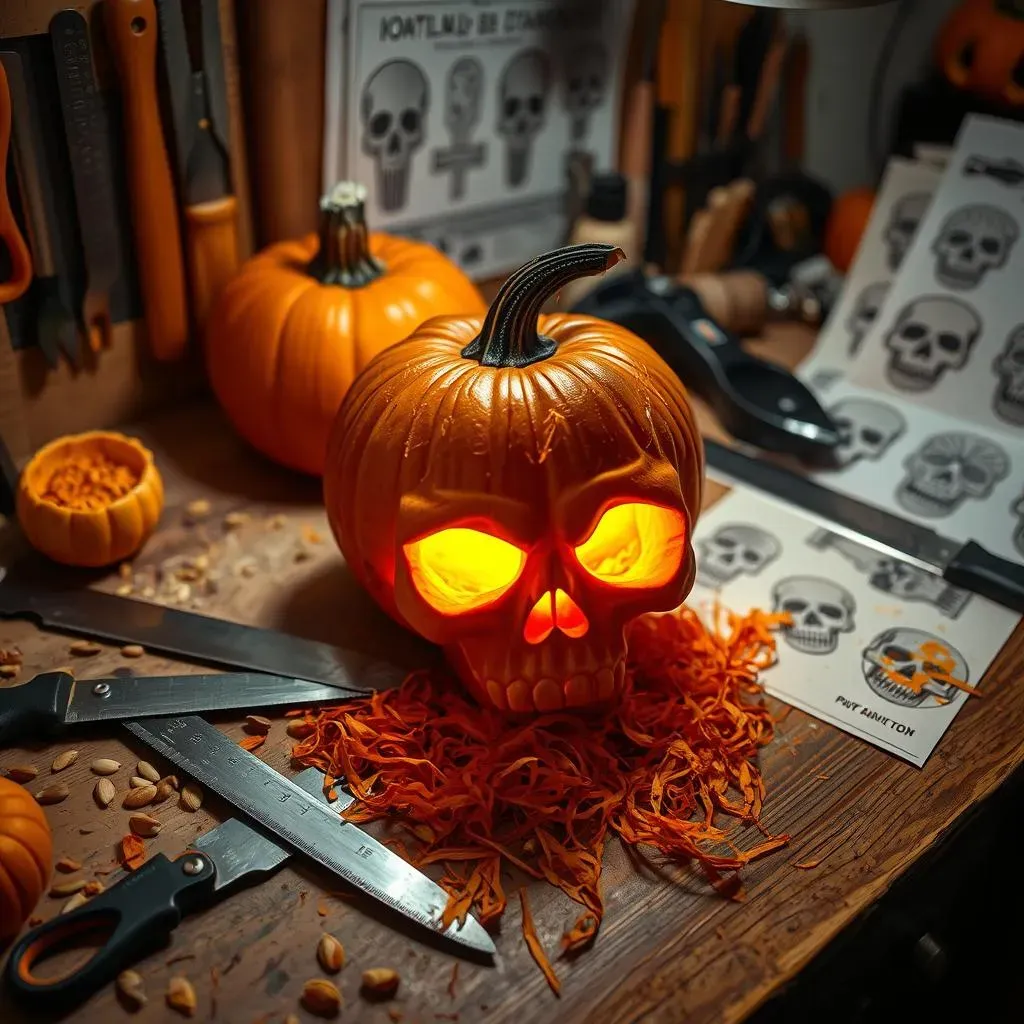
Alright, before you even think about plunging a knife into that pumpkin, let's talk tools. You wouldn't go into battle without your sword and shield, right? Same goes for skull pumpkin carving. A basic knife just won't cut it (pun intended!). You'll need a proper carving kit. These kits usually come with a variety of saws, scoops, and pokers designed specifically for pumpkin guts and flesh. Trust me, it's worth the investment. Think of it as an investment in your Halloween spirit.
Beyond the kit, grab a sturdy spoon or ice cream scoop for gutting. And don't forget a bowl for the, uh, pumpkin caviar (we'll roast those seeds later!). A damp cloth is your best friend for wiping down sticky hands and surfaces. Finally, good lighting is key. A well-lit workspace will prevent accidents and help you see those intricate skull details.
Prepping Your Canvas: Choosing and Cleaning Your Pumpkin
Not all pumpkins are created equal. You want a pumpkin that's relatively smooth, with a flat bottom so it won't roll around while you're working. Give it a good once-over for any soft spots or bruises. Those are signs of decay, and nobody wants a rotting skull on their porch. As for size, that depends on the complexity of your design. A simple skull can work on a smaller pumpkin, but for those elaborate sugar skulls, you'll want some serious surface area.
Once you've selected your pumpkin, it's time to clean house. Cut a circle in the top or bottom (bottom is better – more on that later!). Scrape out all the seeds and stringy bits. Get it nice and clean. The cleaner the pumpkin, the easier it will be to carve. I like to thin the wall of the pumpkin where I am carving to about 1 inch thick, this makes carving easier.
Transferring the Design: From Paper to Pumpkin
Unless you're some kind of freehand carving savant, you'll probably want to use a stencil. There are tons of free skull pumpkin carving patterns online (and we'll share some of our favorites later!). Print out your chosen design and tape it to your pumpkin. Now, grab a poking tool (those kits come in handy again!) and carefully poke holes along the stencil lines. This transfers the design onto the pumpkin's surface.
Alternatively, you can trace the design with a marker, but be careful not to smudge it. Once the design is transferred, remove the paper stencil. You should now have a dotted or lined outline of your skull on the pumpkin. Time to bring that skull to life!
Tool | Purpose | Why You Need It |
|---|---|---|
Pumpkin Carving Kit | Cutting, sawing, detail work | Precision and safety |
Sturdy Spoon/Scoop | Gutting the pumpkin | Efficient seed removal |
Damp Cloth | Cleaning hands and surfaces | Keeps things tidy |
Poking Tool | Transferring stencil design | Accurate outline |
Easy Skull Pumpkin Carving Patterns for Beginners
Easy Skull Pumpkin Carving Patterns for Beginners
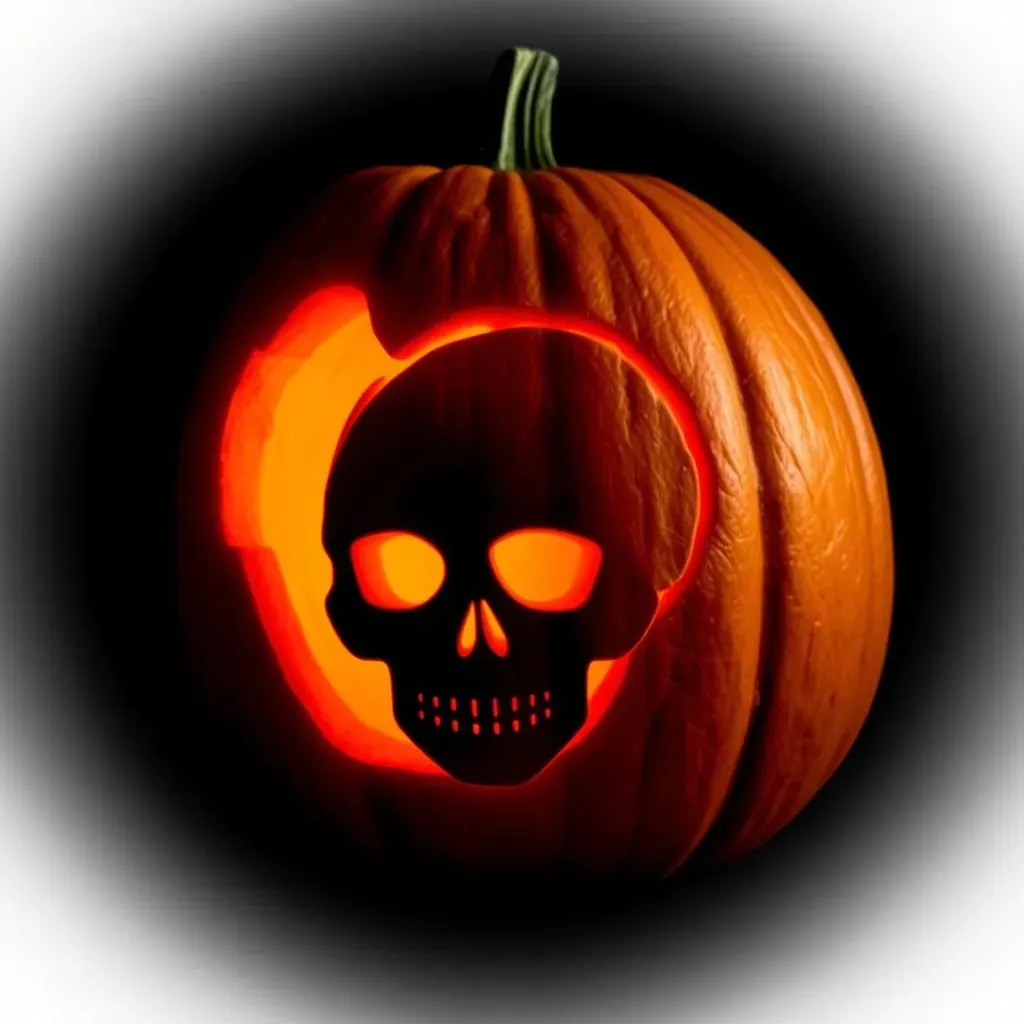
Simple Skull Silhouettes: The Gateway to Greatness
so you're new to this skull pumpkin carving thing? No sweat! We're not going to throw you into the deep end with some hyper-realistic zombie skull right off the bat. Let's start with the basics: simple skull silhouettes. These are your classic, cartoony skulls – think big eye sockets, a triangular nose hole, and a toothy grin (or grimace, depending on your mood). The beauty of these designs is that they require minimal cuts and are very forgiving. A slightly wobbly line here or there? No problem! It just adds to the spooky charm.
You can find tons of free printable skull silhouettes online. Just search "easy skull pumpkin stencil" and you'll be swimming in options. Pick one that speaks to you, print it out, and follow the transfer instructions from the previous section. Remember, the goal here is to have fun and get comfortable with the carving process. Don't stress about perfection. Embrace the imperfections!
Geometric Skull Designs: Sharp Looks, Simple Cuts
Want to add a little edge to your skull pumpkin carving without getting too complicated? Geometric skull designs are the answer. These patterns use simple shapes – triangles, squares, diamonds – to create a stylized skull image. Think of it as a low-poly skull, perfect for the modern Halloween enthusiast. The straight lines are easy to cut, and the overall effect is surprisingly striking. Plus, geometric designs are great for practicing your knife skills and getting a feel for how the pumpkin flesh responds to different cutting angles.
Look for stencils that feature bold, clean lines and minimal curves. The fewer curves, the easier it will be to carve. You can even create your own geometric skull design by breaking down a traditional skull image into its basic shapes. Get creative! Experiment with different arrangements and see what you come up with. Who knows, you might invent the next big skull carving trend.
Pattern Type | Difficulty | Best For |
|---|---|---|
Simple Silhouettes | Easy | First-timers, kids |
Geometric Skulls | Easy | Clean lines, modern look |
Basic Skull Faces | Medium | Classic skull vibe |
Basic Skull Faces: Adding a Touch of Detail
Ready to take your skull pumpkin carving to the next level? Let's try some basic skull faces. These designs incorporate a few more details than the silhouettes, such as cheekbones, teeth outlines, and more defined eye sockets. However, they still avoid overly intricate shading or complex cuts. The key here is to focus on the essential features that make a skull recognizable. Think of it as drawing a skull with as few lines as possible.
When carving these designs, pay attention to the depth of your cuts. You can create a sense of dimension by carving some areas deeper than others. For example, carving the eye sockets deeper will make them appear more sunken and spooky. Just be careful not to cut all the way through the pumpkin wall in these areas. You want to create shadows, not holes. With a little practice, you'll be amazed at how much detail you can achieve with just a few well-placed cuts.
Intricate Skull Pumpkin Designs: Level Up Your Carving Game

Intricate Skull Pumpkin Designs: Level Up Your Carving Game
Shading and Depth: Adding Dimension to Your Skulls
Alright, you've mastered the basics. Now it's time to get serious about your skull pumpkin carving. We're talking about adding depth and dimension through shading. This isn't just about cutting lines; it's about sculpting with light and shadow. The key is to use different carving depths to create varying levels of brightness. Areas you want to appear darker should be carved shallower, while areas you want to pop should be carved deeper, allowing more light to shine through. Think of it like grayscale painting, but with a knife and a pumpkin.
To achieve this, you'll need to practice what's called "surface carving." Instead of cutting all the way through the pumpkin wall, you'll carefully shave away layers of the flesh to create subtle gradations of light. This takes patience and a steady hand, but the results are well worth the effort. Start with a light touch and gradually remove more material until you achieve the desired effect. Remember, you can always take more off, but you can't put it back on!
Sugar Skull Extravaganza: Celebrating Día de Muertos
If you really want to impress the neighbors with your skull pumpkin carving skills, try a sugar skull design. These vibrant and intricate skulls are inspired by the Día de Muertos (Day of the Dead) celebrations in Mexico. They're characterized by elaborate floral patterns, swirling designs, and bright colors (although, on a pumpkin, you'll have to simulate the colors with varying carving depths). Sugar skull pumpkins are a fantastic way to showcase your artistic talent and pay homage to a beautiful cultural tradition.
Finding a good sugar skull stencil is key. Look for designs that feature a variety of shapes and patterns, from delicate flowers to bold geometric elements. Don't be afraid to get creative and add your own personal touches. Maybe add some extra swirls, or incorporate a hidden message into the design. Remember, the goal is to create a pumpkin that's both visually stunning and deeply meaningful. And who knows, you might even inspire your neighbors to learn more about Día de Muertos!
Technique | Description | Difficulty |
|---|---|---|
Surface Carving | Shaving layers for shading | Advanced |
Intricate Stencils | Detailed patterns require precision | Advanced |
Color Simulation | Using depth to mimic color | Advanced |
Beyond the Basic Skull: Creative Twists on Pumpkin Carving Ideas

Beyond the Basic Skull: Creative Twists on Pumpkin Carving Ideas
Punk Rock Skulls: Adding Some Attitude
so you've mastered the traditional skull. Now, let's crank up the volume and add some serious attitude! I'm talking about punk rock skulls. Think mohawks made of pumpkin stems, safety pin piercings, and maybe even a little anarchy symbol etched in for good measure. This is your chance to really let your personality shine through and create a skull that's as unique and rebellious as you are.
To achieve the punk rock look, don't be afraid to break the rules. Use different tools to create jagged edges and asymmetrical designs. Experiment with unconventional materials for the mohawk, like corn husks or even small twigs. And remember, a little bit of chaos is key. The more unconventional, the better! This is where skull pumpkin carving gets truly fun.
Skull and Nature Mashups: Floral Skulls and More
Who says skulls have to be scary? Let's soften things up a bit with a skull and nature mashup. Think floral skulls adorned with delicate blossoms, vines creeping across the eye sockets, or even a skull with a tiny bird perched on its head. This is a great way to add a touch of beauty and whimsy to your skull pumpkin carving. Plus, it's a fun challenge to blend the hard edges of a skull with the organic shapes of nature.
When creating these designs, consider using different carving techniques to differentiate the skull from the natural elements. For example, you could use deep cuts for the skull and shallow surface carving for the flowers and vines. This will create a sense of depth and make the natural elements appear to be growing out of the skull. You can even use real flowers and leaves to decorate your pumpkin for an extra touch of realism.
Twist | Description | Materials |
|---|---|---|
Punk Rock Skull | Rebellious, edgy design | Safety pins, corn husks |
Floral Skull | Delicate, nature-inspired | Real flowers, vines |
Glow-in-the-Dark Skull | Eerie, nighttime effect | Glow-in-the-dark paint |
Glow-in-the-Dark Skulls: Light Up the Night
Want to take your skull pumpkin carving to the next level of spooky? Try a glow-in-the-dark skull! This is a simple but effective way to create a truly eerie effect that will impress all your trick-or-treaters. All you need is some glow-in-the-dark paint (available at most craft stores) and a little bit of creativity. Paint the inside of the carved skull with the glow-in-the-dark paint, and when the lights go out, your skull will come to life with an eerie green glow.
For an extra creepy effect, try using different shades of glow-in-the-dark paint to create a sense of depth and dimension. You can also use stencils to create intricate patterns on the inside of the skull that will glow in the dark. Just be sure to let the paint dry completely before putting a candle inside the pumpkin. And remember, safety first! Always supervise children when working with glow-in-the-dark paint and candles.
Skull-pting Success: Your Pumpkin Masterpiece Awaits
So, you've journeyed through the realm of pumpkin carving ideas skull, armed with inspiration and stencils galore. Whether you opted for a beginner-friendly design or tackled a complex sugar skull, the most important thing is that you unleashed your creativity and had some spooky fun. Now, light up your skull-pted masterpiece, set it on your porch, and prepare to bask in the glow of your Halloween handiwork. Happy haunting!