Table of Contents
Halloween's creeping closer, and you know what that means: it's time to get your carve on! But forget those same-old triangle eyes and goofy grins. This year, we're diving headfirst into the world of pumpkin carving ideas scary and easy, transforming ordinary gourds into spine-chilling masterpieces. Whether you're a pumpkin-carving newbie or a seasoned pro looking for fresh inspiration, we've got you covered. From adorably spooky designs perfect for little hands to downright terrifying creations that will make your neighbors jump, this guide is your one-stop shop for Halloween pumpkin domination. We'll start with the essential tools and safety tips to keep your fingers intact, then move on to a treasure trove of easy carving ideas that anyone can master. Ready to crank up the scare factor? We'll unleash some seriously sinister designs that are surprisingly simple to pull off. And for those who crave a challenge, we'll explore advanced techniques and creative twists that will set your jack-o'-lantern apart from the patch. Get ready to unleash your inner artist and create the best Halloween pumpkin ever!
Gear Up for Ghoulish Gourds: Essential Tools and Safety Tips for Pumpkin Carving
Gear Up for Ghoulish Gourds: Essential Tools and Safety Tips for Pumpkin Carving
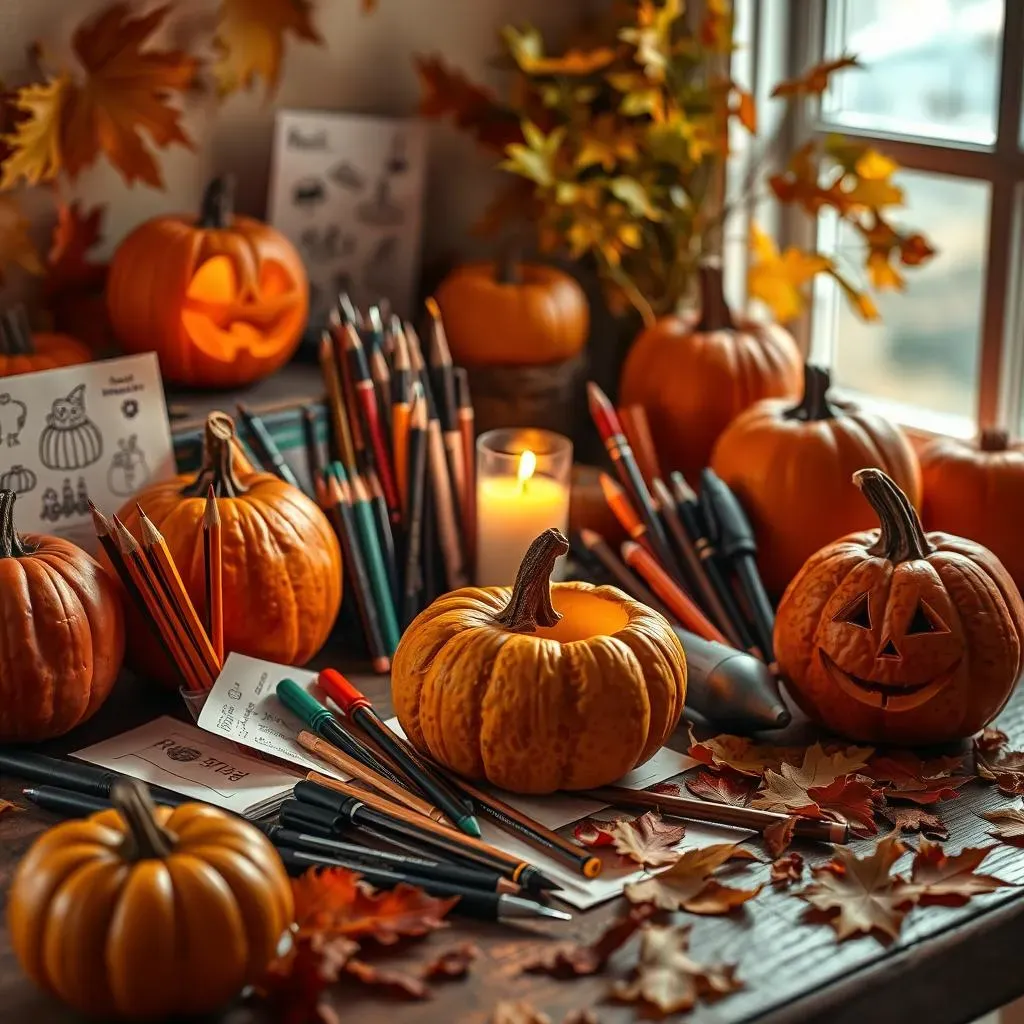
Alright, so you're ready to dive into some serious pumpkin artistry? Awesome! But before you start hacking away, let's talk about the right tools and how to avoid a trip to the ER. Trust me, a well-equipped carving station and a few safety precautions will make all the difference between a fun Halloween project and a pumpkin-carving disaster. It is important to note that you don't need to buy the most expensive gear, but having the right tools will make the job easier and safer.
- Carving Kit: A good carving kit will include various saws, gouges, and scoops designed specifically for pumpkin carving.
- Pencils or Markers: For sketching your design onto the pumpkin.
- Stencils: If you're not confident freehanding, stencils are your best friend.
- Battery-Operated Candle or LED Light: Safer and longer-lasting than traditional candles.
- Table Covering: Because pumpkin guts get messy!
When it comes to safety, remember that sharp tools and slippery gourds don't mix. Always carve in a well-lit area and use a sturdy surface. Never hold the pumpkin in your lap while carving – that's just asking for trouble. And most importantly, supervise children closely or, better yet, let them decorate the pumpkin with paint, markers, or stickers instead of carving. Let's keep those little fingers safe! Always cut away from yourself, and use a sawing motion rather than trying to force the tool through the pumpkin. Rushing is a recipe for slips and cuts.
From Simple to Sinister: Easy Pumpkin Carving Ideas for Beginners
From Simple to Sinister: Easy Pumpkin Carving Ideas for Beginners
Classic Creepy Faces: A Beginner's Best Friend
let's start with the basics. You can never go wrong with a classic scary face. Think jagged teeth, wide eyes, and a menacing grin. The beauty of this design is that it's super forgiving. Don't worry about perfect symmetry or clean lines – the more wonky, the better! It adds to the spooky charm. Start by sketching out your design with a marker. Big, simple shapes are key. Then, carefully cut along the lines with your carving tools. Remember to take it slow and steady. If you're using a stencil, tape it to the pumpkin and poke holes along the lines with a pin or skewer before carving. This will give you a clear guide to follow.
Want to take it up a notch? Try varying the depth of your cuts. Carve some areas all the way through for maximum light, and others only partially through to create shadows and dimension. This simple trick can add a lot of depth to your design. And don't be afraid to experiment with different shapes for the eyes and mouth. A triangular eye can look menacing, while a circular eye can look surprised or frightened. The possibilities are endless!
Design Element | Beginner Tip |
|---|---|
Eyes | Use simple shapes like triangles or circles. |
Mouth | Jagged teeth are easy to create and look scary. |
Nose | A simple triangle or diamond shape works well. |
Spooky Silhouettes: Easy Shapes for Maximum Impact
If you're looking for something a little different, try carving a spooky silhouette. This involves carving out the entire background around a simple shape, creating a striking contrast. Think bats, cats, ghosts, or even simple words like "BOO!" or "EEK!". The key is to choose a shape that's easy to recognize and doesn't have too many intricate details. Again, stencils are your friend here. Trace the shape onto the pumpkin, then carefully carve away the surrounding area. Be sure to leave enough space between the shape and the edge of the pumpkin to prevent it from breaking.
To add an extra touch of spookiness, try using different colored lights inside the pumpkin. A green or purple light can create an eerie glow that will really make your silhouette stand out. You could even try using a flickering LED candle to simulate the look of a real flame. Remember, the goal is to create a simple but effective design that's easy to carve and looks great on your porch. With a little creativity, you can transform a plain pumpkin into a spooky masterpiece in no time!
- Bat Silhouette: Classic and easy to carve.
- Ghost Silhouette: Simple and effective, especially with a white light.
- Cat Silhouette: A spooky feline is always a good choice.
- "BOO!" or "EEK!" Silhouette: Simple words with maximum impact.
NextLevel Nightmares: Scary Pumpkin Carving Ideas to Terrify
NextLevel Nightmares: Scary Pumpkin Carving Ideas to Terrify
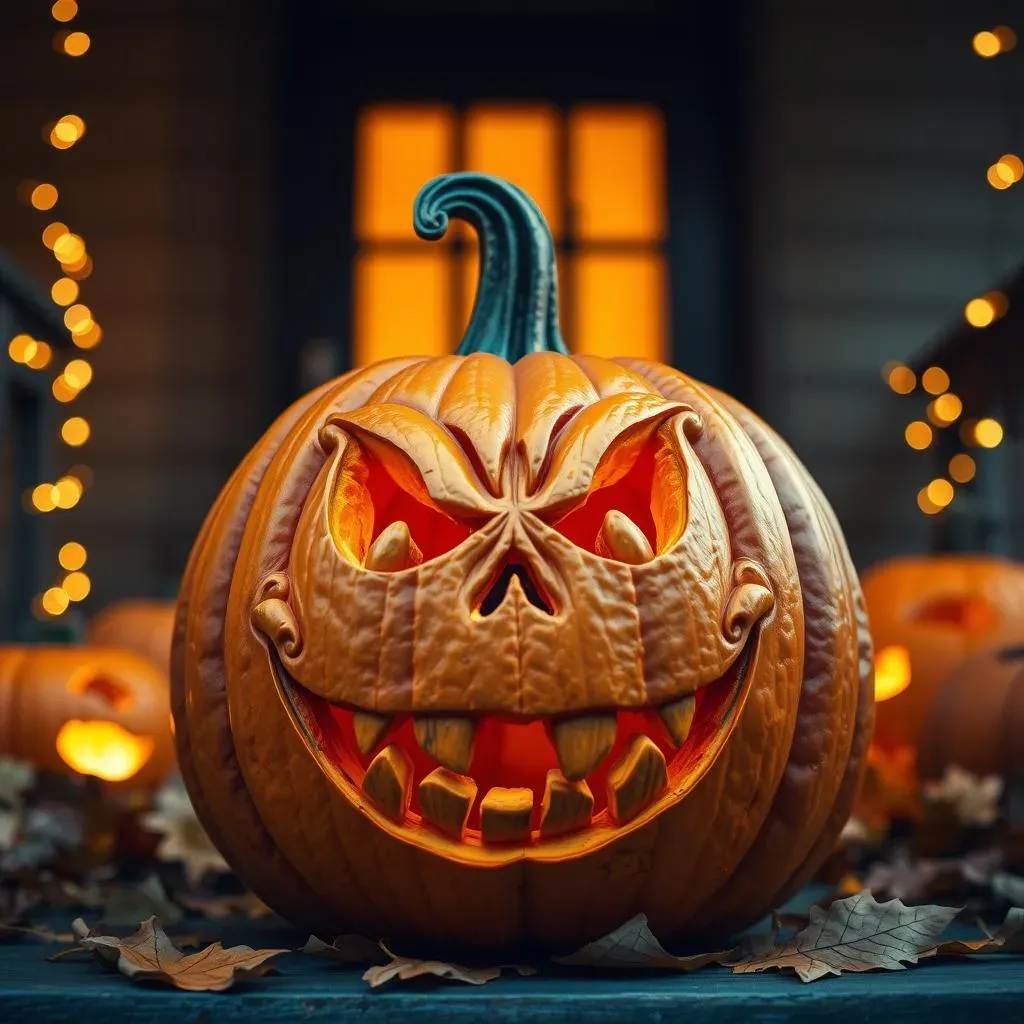
Terrifying Teeth and Gruesome Grins: Upping the Ante on Classic Faces
so you've mastered the basic scary face. Now it's time to crank up the terror! We're talking about designs that will make trick-or-treaters think twice before ringing your doorbell. Forget those cute little jagged teeth – we're going for full-on, menacing fangs. Think rows upon rows of sharp, pointy teeth, maybe even with a little blood dripping down (use red paint for a truly gruesome effect). And instead of a simple grin, try a twisted, contorted mouth that looks like it's screaming in agony. The key is to exaggerate the features and make them as unsettling as possible. Reference horror movie monsters for inspiration or your favorite creatures from scary stories.
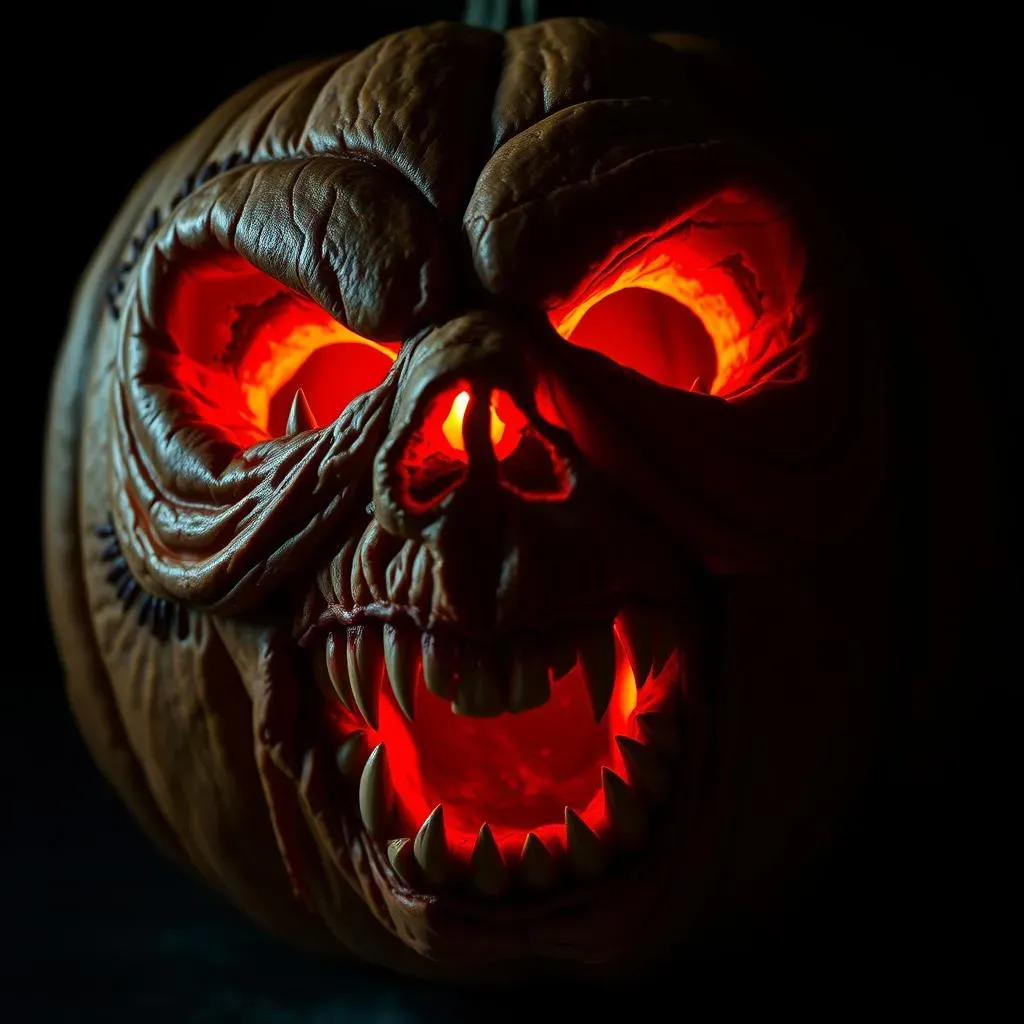
To really take your scary face to the next level, try adding some three-dimensional elements. Carve out deep sockets around the eyes to make them look sunken and hollow. Use a small gouge to create wrinkles and scars on the pumpkin's surface. You could even add some extra details like stitches or staples to make it look like your pumpkin has been pieced back together. And don't forget about the lighting! A flickering red or orange light can add a sinister glow that will really bring your terrifying creation to life. The small details will make all the difference in the final result.
Scary Element | How to Terrify |
|---|---|
Teeth | Make them jagged, pointy, and numerous. |
Mouth | Twist it into a scream or a sinister grin. |
Eyes | Carve deep sockets for a hollow, menacing look. |
Details | Add scars, wrinkles, stitches, or staples for extra gore. |
Creepy Creatures and Monstrous Mashups: Beyond the Human Face
Want to go beyond the classic scary face? Then it's time to unleash your inner monster! Think about your favorite horror movie creatures – zombies, vampires, werewolves, demons – and try to incorporate their features into your pumpkin design. A zombie pumpkin could have rotting flesh (carved with rough, uneven cuts), milky eyes (created with white paint or glow-in-the-dark material), and a gaping, decaying mouth. A vampire pumpkin could have sharp fangs, piercing eyes, and a sinister smirk. A werewolf pumpkin could have a snout, pointy ears, and a wild, snarling expression.
The possibilities are endless! You could even create a monstrous mashup by combining features from different creatures. How about a zombie-vampire pumpkin with rotting flesh and sharp fangs? Or a werewolf-demon pumpkin with a snout, horns, and glowing red eyes? The key is to let your imagination run wild and create something truly unique and terrifying. Reference horror movie monsters for inspiration or your favorite creatures from scary stories. It's important to use images as a guide and not be afraid to take creative liberties.
- Zombie Pumpkin: Rotting flesh, milky eyes, decaying mouth.
- Vampire Pumpkin: Sharp fangs, piercing eyes, sinister smirk.
- Werewolf Pumpkin: Snout, pointy ears, snarling expression.
- Demon Pumpkin: Horns, glowing red eyes, menacing grin.
Beyond the Basic JackO'Lantern: Creative Pumpkin Carving Ideas and Techniques

Beyond the Basic JackO'Lantern: Creative Pumpkin Carving Ideas and Techniques
3D Pumpkin Carving: Adding Depth and Dimension
Ready to ditch the flat, two-dimensional designs? Let's explore the world of 3D pumpkin carving! This technique involves carving away layers of the pumpkin's surface to create depth and dimension. Think of it like sculpting with light and shadow. Instead of just cutting all the way through the pumpkin, you'll be removing varying amounts of the outer layer to create highlights and shadows. This can be used to create incredibly realistic and detailed designs, from portraits to landscapes to intricate patterns. It does require a bit more patience and skill than traditional carving, but the results are well worth the effort. The secret is to work slowly and carefully, removing small amounts of pumpkin at a time.
To get started with 3D carving, you'll need a good set of carving tools, including gouges of various sizes and shapes. Start by sketching out your design on the pumpkin, then begin carving away the areas that you want to be in shadow. Use the gouges to create smooth, gradual transitions between the different levels of carving. Remember to keep the light source in mind as you carve – the areas that are closest to the light will be the brightest, while the areas that are furthest away will be the darkest. You can even use sandpaper to smooth out the carved areas and create a more polished look. By adding depth and dimension, you can create a pumpkin that looks like it's jumping right out at you.
Technique | Description | Tools |
|---|---|---|
Layered Carving | Removing different layers of the pumpkin's skin to create depth. | Gouges, loop tools, detail knives |
Contouring | Shaping the surface to create curves and highlights. | Ribbon tools, clay sculpting tools |
Under Cutting | Creating shadows and dramatic effects by carving underneath the surface. | Thin saws, detail knives |
Pumpkin Painting and Mixed Media: Adding Color and Texture
Who says you have to stick to carving? Pumpkin painting is a fantastic way to unleash your creativity and create a unique jack-o'-lantern without any sharp objects involved. Use acrylic paints, markers, or even spray paint to add color, patterns, and details to your pumpkin. You could paint a spooky scene, a whimsical design, or even a portrait of your favorite character. And don't be afraid to experiment with different textures! Glue on glitter, sequins, beads, or even fabric scraps to add a tactile element to your pumpkin. For example, you can use glow-in-the-dark paint for spooky accents that come alive at night.
For a truly unique look, try combining carving and painting. Carve out a basic design, then use paint to add details and highlights. You could even carve out a silhouette and then paint the background with a starry night sky. The possibilities are endless! Just be sure to use paints and glues that are safe for outdoor use and won't be damaged by moisture. And don't forget to seal your finished pumpkin with a clear coat of varnish to protect it from the elements. By adding color and texture, you can transform a simple pumpkin into a work of art that will impress everyone who sees it.
- Acrylic Paints: Versatile and easy to use for detailed designs.
- Glow-in-the-Dark Paint: Adds a spooky touch that shines at night.
- Glitter and Sequins: For a sparkly and eye-catching effect.
- Fabric Scraps: Adds texture and dimension to your pumpkin.
Conquer Halloween with Killer Carved Pumpkins
So, there you have it – a cauldron full of pumpkin carving ideas scary and easy to make this Halloween unforgettable. From mastering the basics to unleashing your inner horror artist, you're now armed with the knowledge and inspiration to create jack-o'-lanterns that will both delight and fright. Remember, safety first, creativity always! Now go forth, grab a pumpkin, and let the carving commence. Your spooktacular masterpiece awaits!