Table of Contents
Halloween is creeping closer, and what better way to celebrate than by combining two beloved passions: Pokémon and pumpkin carving? Forget the generic ghost faces – this year, transform your porch into a Poké-stop with some awesome pumpkin carving ideas pokemon! Whether you're a seasoned carving master or a total newbie, we've got the perfect plan to help you create a jack-o'-lantern that's sure to impress.
Essential Tools & Safety Tips for Pokémon Pumpkin Carving
Essential Tools & Safety Tips for Pokémon Pumpkin Carving
Gather Your Gear: The Pokémon Pumpkin Carving Toolkit
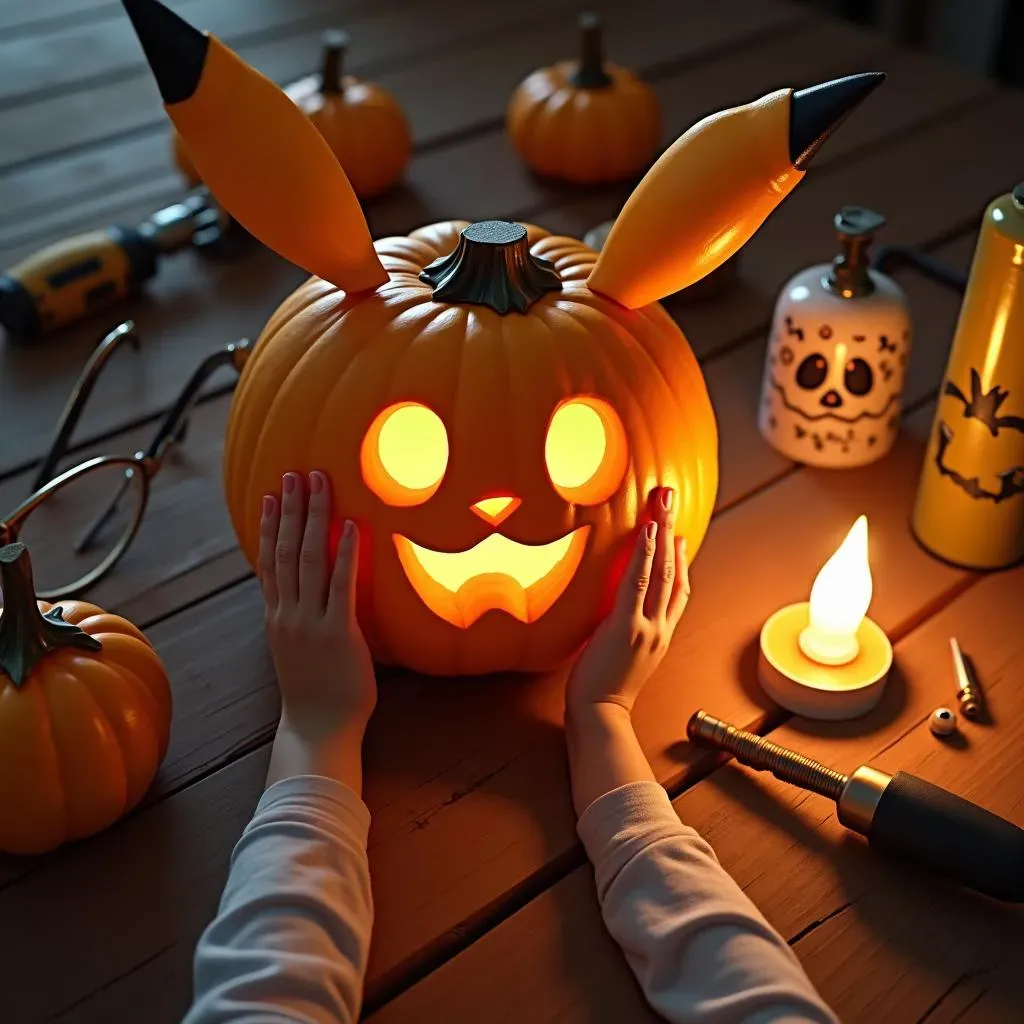
Before you dive into creating your Pokémon masterpiece, make sure you have all the right tools. A good pumpkin carving kit is essential. Look for one that includes various sizes of saws, scoops, and poking tools. A sturdy, serrated knife is great for cutting open the pumpkin and thinning out the walls, while smaller, more precise tools are perfect for carving intricate details like Pikachu's cheeks or Squirtle's shell. Don't forget a large spoon or ice cream scoop to remove all the pumpkin guts – that's half the fun (or the ick factor, depending on your perspective)!
Beyond the basics, consider these extras: a drill for making perfectly round eyes, stencils (more on those later!), and a good light source like an LED candle or flashlight. A damp cloth or paper towels will help keep your workspace clean. And most importantly, have a design in mind! Whether you're going for a classic Pikachu face or a more complex Charizard, having a clear vision will make the carving process smoother and more enjoyable.
Here's a quick checklist:
- Pumpkin carving kit (various saws, scoops, pokes)
- Serrated knife
- Large spoon or ice cream scoop
- Drill (optional)
- Pokémon stencils (printed)
- LED candle or flashlight
- Damp cloth or paper towels
- Your chosen Pokémon design
Safety First: Carving Like a Pro (Without Losing a Finger)
Carving pumpkins can be a blast, but safety should always be your top priority. Pumpkin carving tools can be sharp, so always supervise children closely. It's generally recommended that young children don't handle the knives themselves; instead, they can help with scooping out the insides or drawing the design on the pumpkin.
When using knives, always cut away from yourself and use a sawing motion rather than trying to force the blade through. Work in a well-lit area and on a stable surface. If you're using power tools like a drill, wear safety glasses to protect your eyes from flying debris. And if you're feeling tired or distracted, take a break! Rushing the carving process can lead to mistakes and injuries. Remember, a safe carver is a happy carver!
Here is a table for quick reference:
Safety Rule | Why It Matters |
|---|---|
Supervise children closely | Sharp tools can be dangerous. |
Cut away from yourself | Avoid accidental cuts. |
Use a sawing motion | Reduces the risk of forcing the blade. |
Work in a well-lit area | Improves visibility and precision. |
Wear safety glasses (if using power tools) | Protects eyes from debris. |
Take breaks when needed | Prevents fatigue and mistakes. |
Easy Pokémon Pumpkin Patterns for Beginners

Easy Pokémon Pumpkin Patterns for Beginners
Pikachu's Simple Smile: The Perfect First Carve
If you're new to pumpkin carving, starting with a simple design is the way to go. Pikachu's iconic smile is surprisingly easy to replicate! Look for a stencil online (there are tons of free ones available) or draw your own basic outline. Focus on the key features: the round cheeks, the small nose, and that wide, happy grin. Remember, it doesn't have to be perfect! Part of the charm of a hand-carved pumpkin is its unique character.
To make the process even easier, consider using a poking tool to create a dotted outline of the design before you start carving. This will give you a clear guide to follow and prevent any accidental slips. And don't be afraid to simplify the design even further if needed. A few well-placed triangles for the ears and some simple curves for the mouth can be just as effective as a more detailed carving.
Here's a tip: use a dry-erase marker to draw your stencil onto the pumpkin. If you make a mistake, you can easily wipe it off and start again!
Ghostly Gastly: A Spooktacular Beginner Option
Looking for something a little spookier but still beginner-friendly? Gastly, the gas Pokémon, is an excellent choice. Its round shape and simple, swirling gas clouds are easy to carve, and the result is a wonderfully eerie jack-o'-lantern. Again, start with a stencil or a basic outline. The key to carving Gastly is to focus on creating smooth, flowing lines for the gas clouds.
Use a small, thin carving tool to carefully remove the pumpkin flesh along the lines. For the eyes and mouth, you can either carve them out completely or simply poke holes to create a spooky, glowing effect. If you want to add some extra flair, consider using a black marker to outline the carved areas, making them stand out even more in the dark.
"The scarier, the better!" - A kid probably.
Poké Ball Basics: A Classic Design for All Skill Levels
No Pokémon pumpkin carving collection is complete without a classic Poké Ball! This design is incredibly simple and instantly recognizable. All you need is a round pumpkin, a stencil (or a steady hand), and some basic carving tools. Start by drawing a circle around the center of the pumpkin to create the dividing line between the red and white halves.
Then, carve out the top half of the circle, leaving the bottom half intact. Next, carve out a smaller circle in the center of the pumpkin to represent the button. Finally, add a thin line around the button to complete the design. For an extra touch, consider painting the top half of the pumpkin red after you've finished carving. This will make your Poké Ball even more vibrant and eye-catching.
Here are the steps:
- Draw a circle around the center of the pumpkin.
- Carve out the top half.
- Carve a smaller circle in the center.
- Add a thin line around the button.
- Paint the top half red (optional).
Advanced Pokémon Carving Ideas: Level Up Your Jacko'Lantern
Advanced Pokémon Carving Ideas: Level Up Your Jacko'Lantern
3D Pokémon: Carving Beyond the Surface
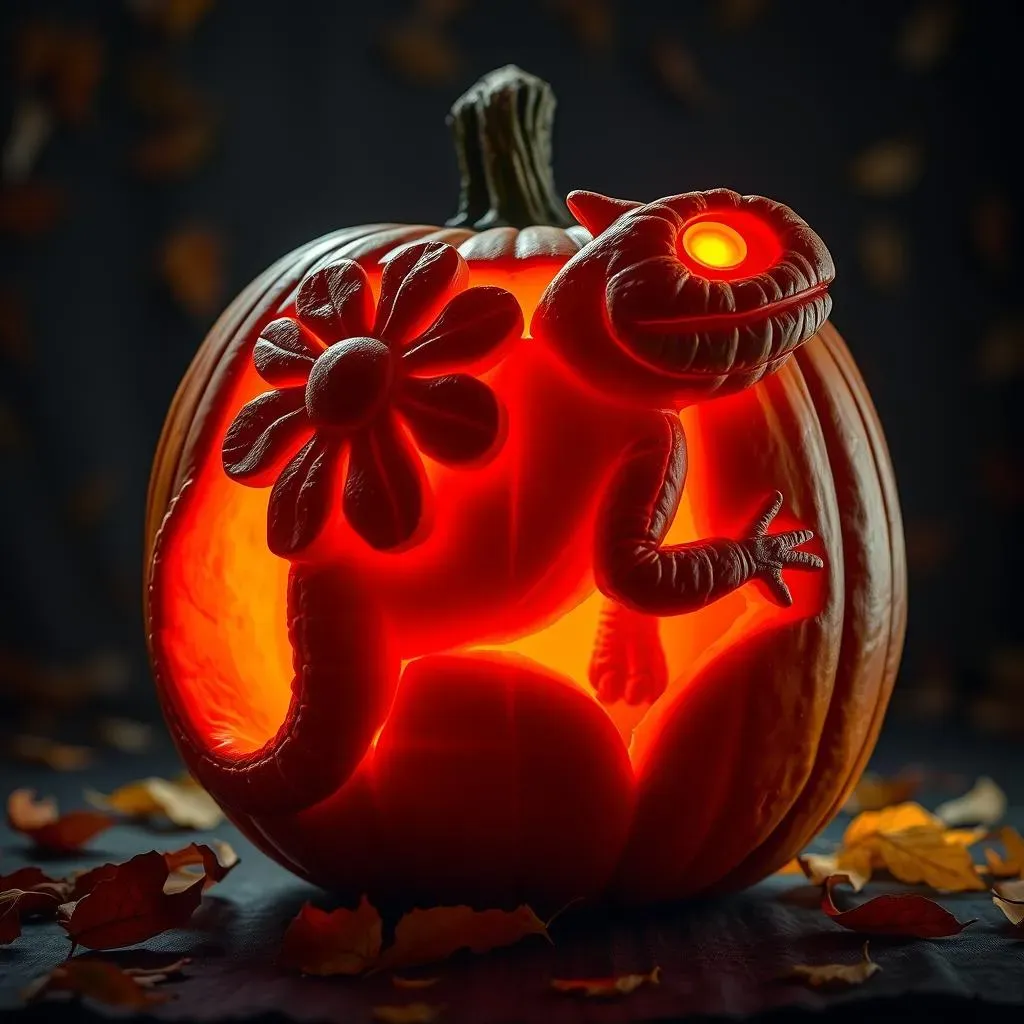
Ready to take your pumpkin carving to the next dimension? Forget flat designs – it's time to embrace 3D! This involves carving away multiple layers of the pumpkin's flesh to create depth and texture. Think about Pokémon with complex shapes, like Venusaur with its blossoming flower or Blastoise with its powerful cannons.
Start by sketching your design onto the pumpkin, paying close attention to the different layers of depth. Then, use a variety of carving tools to carefully remove the pumpkin flesh, working from the shallowest layers to the deepest. A rotary tool, like a Dremel, can be incredibly helpful for achieving smooth, rounded edges and intricate details. Remember to take your time and work in small sections to avoid mistakes. With patience and a steady hand, you can create a truly stunning 3D Pokémon pumpkin that will be the envy of the neighborhood!
Here's a list of Pokémon that would look awesome in 3D:
- Venusaur (for the flower)
- Blastoise (for the cannons)
- Charizard (for the wings and flames)
- Gengar (for the spooky, swirling shape)
Light and Shadow: Mastering the Art of Illumination
Once you've mastered the basics of carving, it's time to play with light and shadow! This involves strategically carving different thicknesses of pumpkin flesh to create varying levels of translucency. By carefully controlling the amount of light that shines through each area, you can create a stunning visual effect that adds depth and drama to your Pokémon pumpkin.
For example, you could carve a Gengar pumpkin with thin, wispy lines around its body to create a ghostly glow, or a Pikachu pumpkin with bright, glowing cheeks and darker shadows around its eyes. Experiment with different carving techniques and light sources to find the perfect combination. You can also use colored LED lights to add even more visual interest. With a little creativity, you can transform your pumpkin into a mesmerizing work of art that truly comes alive at night!
Remember, light is your friend! Experiment with different LED colors to create unique effects.
Displaying Your Pokémon Pumpkin: Show Off Your Carving Skills
Displaying Your Pokémon Pumpkin: Show Off Your Carving Skills
Light It Up: Choosing the Right Illumination
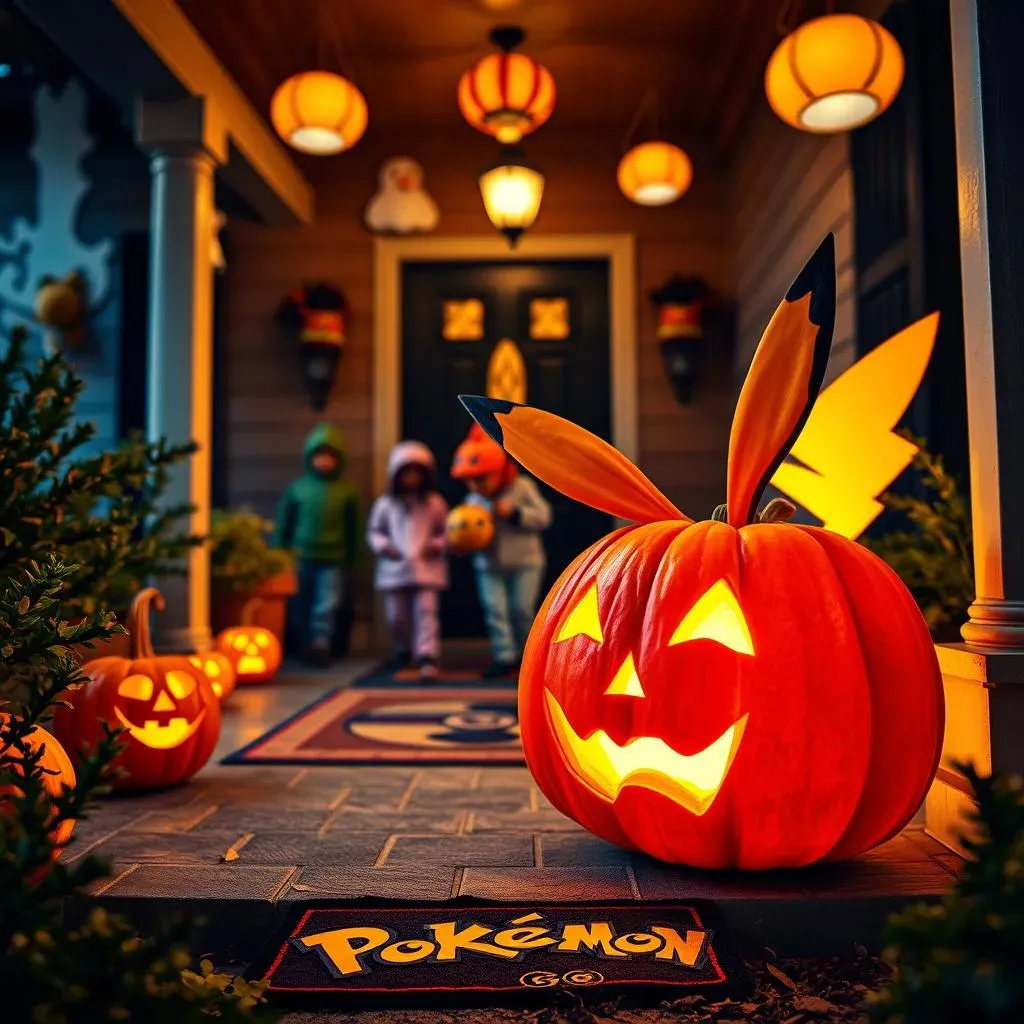
So, you've poured your heart and soul into carving the perfect Pokémon pumpkin. Now, it's time to make it shine! The right lighting can truly elevate your creation, transforming it from a simple gourd into a captivating work of art. Forget traditional candles – they're messy, potentially dangerous, and don't provide consistent light.
LED candles are the way to go. They're safe, long-lasting, and come in a variety of colors and brightness levels. You can even find flickering LED candles that mimic the ambiance of a real flame. For an extra touch, consider using a spotlight to highlight specific features of your carving, or string lights to create a whimsical, festive effect. Experiment with different lighting options to find the perfect look for your Pokémon pumpkin!
Here's a pro tip: place a mirror behind your pumpkin to reflect the light and create a more dramatic display.
Prime Real Estate: Finding the Perfect Spot
Location, location, location! Just like in real estate, the placement of your Pokémon pumpkin can make all the difference. Consider where it will be most visible to trick-or-treaters and passersby. The front porch is a classic choice, but don't be afraid to get creative! You could place your pumpkin on a pedestal, in a window, or even hanging from a tree.
Make sure the area is well-lit so your carving can be seen clearly at night. Also, consider the weather. If you live in an area with heavy rain or wind, you might want to protect your pumpkin with a clear plastic cover. And don't forget to clean up any pumpkin debris regularly to keep your display looking its best!
Here's a table of ideal locations and considerations:
Location | Pros | Cons |
|---|---|---|
Front Porch | High visibility, classic look | Exposure to weather |
Window | Protected from weather, visible from inside | Limited visibility from street |
Pedestal | Elevated display, draws attention | May be unstable |
Hanging from Tree | Unique and whimsical | Requires secure hanging method |
Beyond the Pumpkin: Creating a Pokémon-Themed Display
Why stop at just one pumpkin? Create a whole Pokémon-themed display to truly wow your neighbors! Incorporate other decorations like Poké Ball lanterns, Pokémon plushies, and even a DIY Pokémon Go gym. You could also create a spooky graveyard scene with ghost-type Pokémon emerging from the tombstones.
Don't be afraid to get crafty! Use cardboard boxes to create Pokémon-themed props, or paint your lawn ornaments to resemble your favorite characters. The possibilities are endless! Remember, the goal is to create a fun and immersive experience that celebrates your love of Pokémon and Halloween. So, let your imagination run wild and create a display that's sure to be a hit with trainers of all ages!
"Creativity is intelligence having fun." - Albert Einstein
Conclusion: Becoming a Pokémon Pumpkin Carving Master
So there you have it – everything you need to transform your humble pumpkin into a Pokémon-themed masterpiece! Whether you opted for a simple Pikachu grin or tackled a complex Gengar, remember that the most important thing is to have fun and let your creativity shine. Share your amazing pumpkin carving ideas pokemon creations with friends and family, and maybe even inspire others to join in on the Pokémon Halloween fun. Happy carving, and may your jack-o'-lanterns light up the night with Pokémon power!