Table of Contents
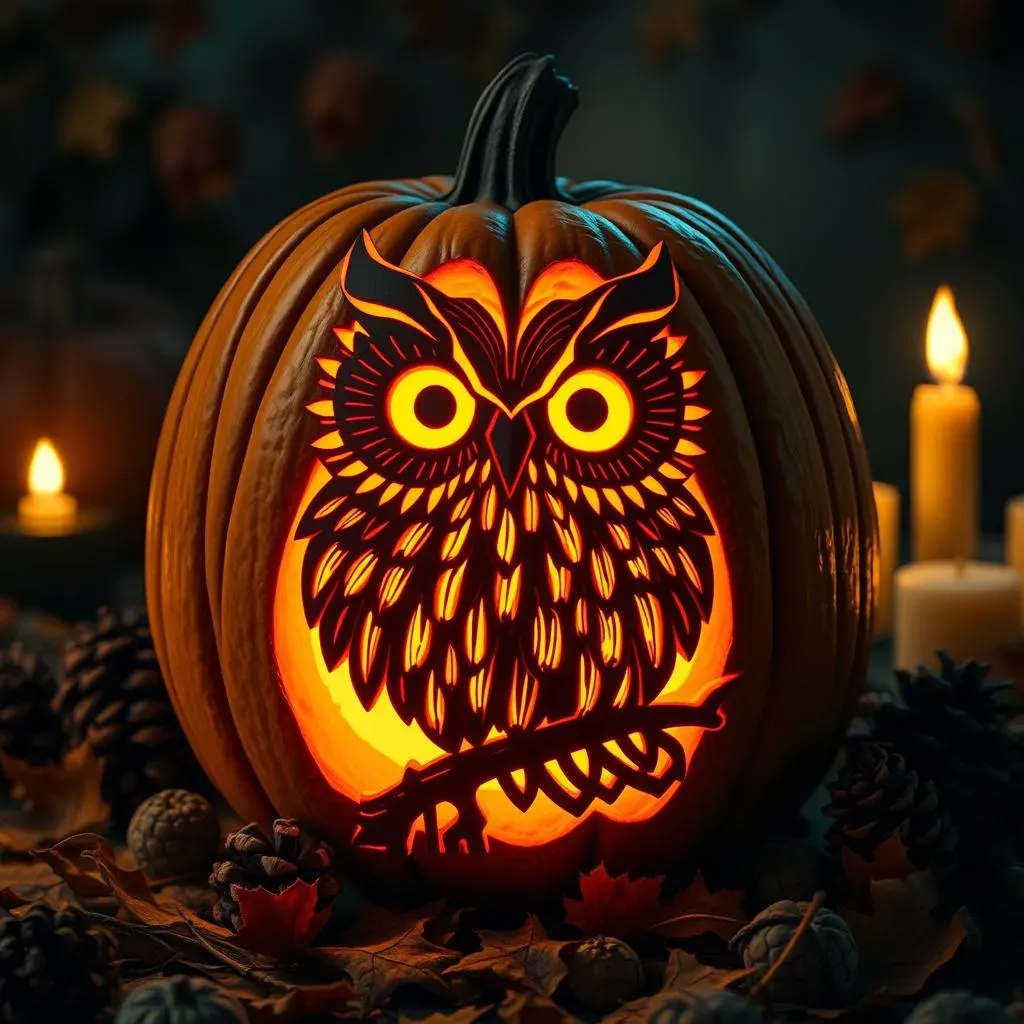
Halloween's creeping closer, and you're probably thinking about the centerpiece of your spooky decor: the pumpkin! But forget the same old toothy grin this year. Let's aim higher, or rather, let's aim for something a little more… wise. This year, we're diving headfirst into the world of pumpkin carving ideas owl. Why owls? Because they're mysterious, majestic, and frankly, a refreshing change from the usual ghouls and goblins.
Why Owl Pumpkin Carving Ideas Are a Hoot This Halloween
Why Owl Pumpkin Carving Ideas Are a Hoot This Halloween
A Touch of Whimsy and Wisdom
Let's be honest, how many generic, scary-faced pumpkins can one neighborhood handle? This Halloween, dare to be different! Owl pumpkin carving ideas offer a unique blend of whimsy and wisdom that sets your creation apart. Think about it: owls are associated with knowledge, mystery, and a touch of the nocturnal. Carving an owl into your pumpkin instantly elevates your Halloween game, adding a sophisticated and intriguing element to your spooky display.
Plus, owl designs can range from cute and cartoonish to incredibly detailed and realistic, making them perfect for carvers of all skill levels. Whether you're aiming for a simple, kid-friendly owl or a complex, lifelike carving, the possibilities are endless. It's a chance to showcase your creativity and artistic flair while embracing the Halloween spirit.
From Basic to Brilliant: Owl Designs for Every Carver
One of the best things about owl pumpkin carving ideas is their versatility. Are you a beginner? No problem! A simple owl silhouette with large, round eyes is easy to carve and instantly recognizable. Feeling more ambitious? Try adding intricate feather details, a wise-looking beak, or even a pair of spooky glowing eyes using LED lights.
The internet is overflowing with free owl pumpkin carving stencils and templates, making it easy to find a design that suits your skill level and personal style. Don't be afraid to experiment with different techniques, like etching or using specialized carving tools, to achieve the perfect owl-inspired look. Remember, the goal is to have fun and create something you're proud of!
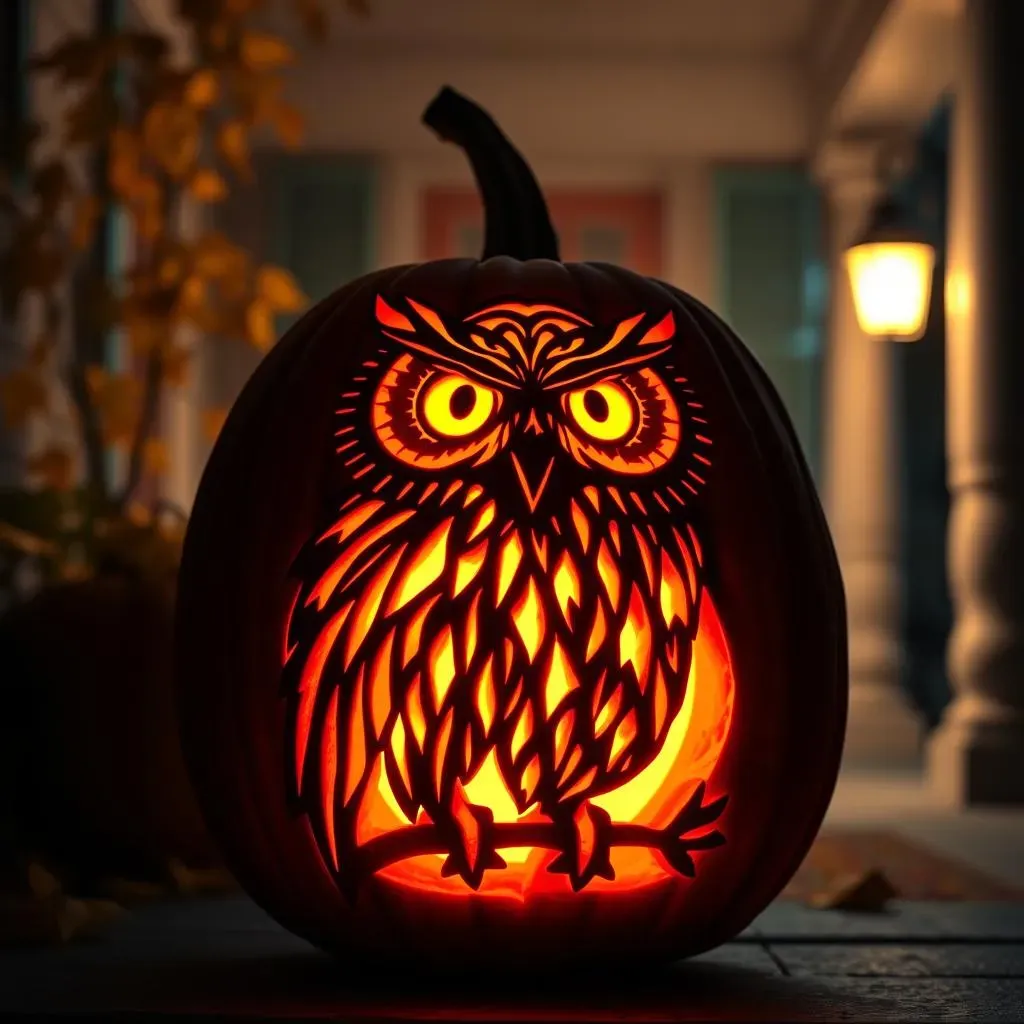
Hoot-Worthy Halloween Decor
Beyond the cool factor, owl pumpkins offer a unique decorating opportunity. They blend seamlessly with both traditional and modern Halloween themes, adding a touch of elegance and intrigue to your porch or entryway. Imagine a row of owl pumpkins perched on your steps, their glowing eyes watching over trick-or-treaters. Or picture a single, intricately carved owl pumpkin as the centerpiece of your Halloween party table.
Pair your owl pumpkins with other nature-inspired decorations, like branches, leaves, and pinecones, to create a rustic and enchanting Halloween scene. Add some spooky lighting, like flickering candles or string lights, to enhance the atmosphere and bring your owl creations to life. With a little creativity, your owl pumpkins will be the talk of the town this Halloween!
Owl Pumpkin Style | Skill Level | Decorating Theme |
|---|---|---|
Simple Silhouette | Beginner | Classic Halloween |
Detailed Feather Carving | Intermediate | Rustic, Natural |
Glowing-Eyed Owl | Advanced | Spooky, Modern |
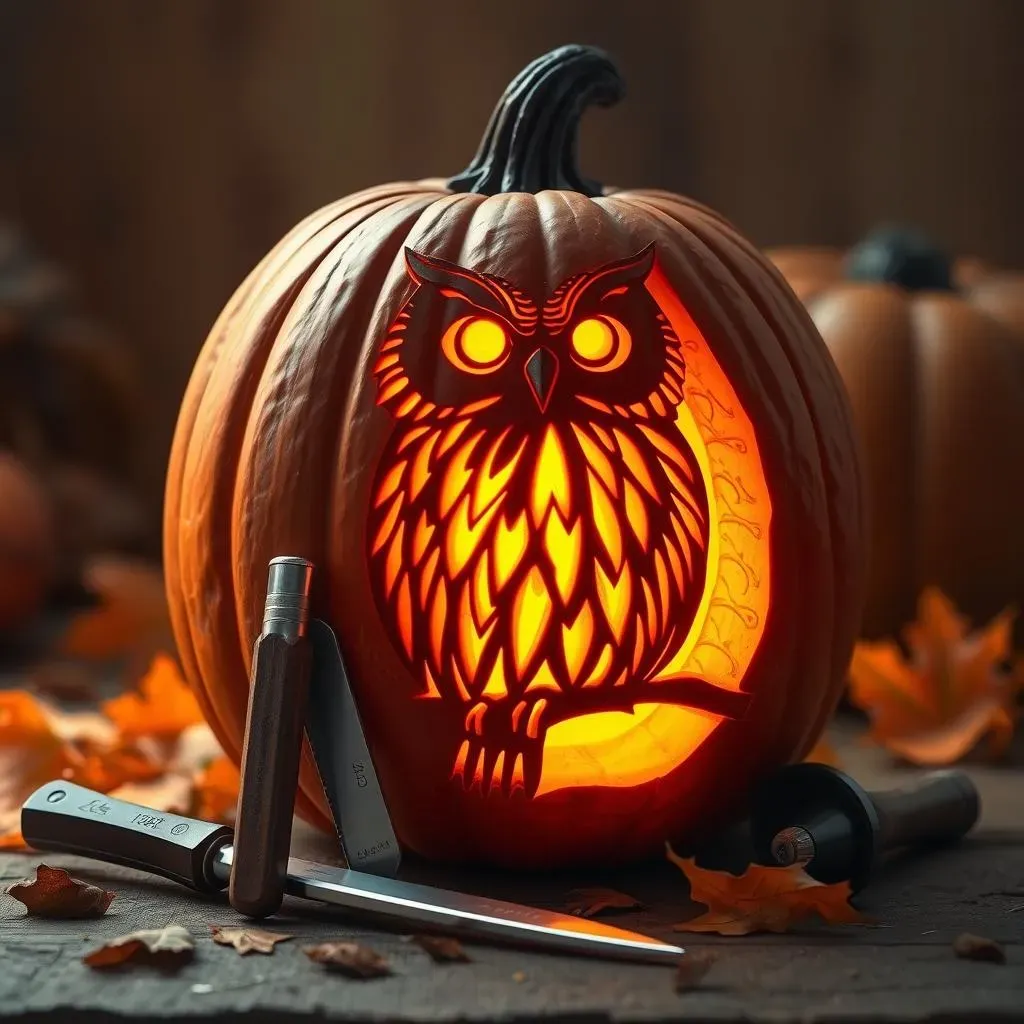
Essential Tools and Tips for Flawless Owl Pumpkin Carving
Essential Tools and Tips for Flawless Owl Pumpkin Carving
Gather Your Arsenal: The Must-Have Carving Tools
Alright, before you even think about touching that pumpkin, let's talk tools. You can't carve a masterpiece with a butter knife! First, you'll need a good carving kit. These kits usually include various saws, scoops, and etching tools specifically designed for pumpkin carving. A sturdy serrated knife is essential for cutting open the pumpkin and removing the guts. Speaking of guts, a good scoop is a must for cleaning out the inside. Trust me, you don't want to skip this step – a clean pumpkin is a happy pumpkin.
Beyond the basics, consider investing in some specialized tools. A detail knife is perfect for carving intricate details, like feathers and facial features. Etching tools are great for creating subtle shading and textures. And don't forget about stencils! They're a lifesaver for beginners and can help you achieve precise designs. Finally, a good light source is crucial. A well-lit workspace will make it easier to see what you're doing and prevent accidents.
Pumpkin Prep: Setting the Stage for Success
you've got your tools, now it's time to prep your pumpkin. Start by selecting a pumpkin that's the right size and shape for your owl design. Look for a pumpkin with a smooth, even surface and no blemishes or soft spots. Once you've found the perfect pumpkin, give it a good wash with soap and water. This will remove any dirt or debris that could interfere with your carving.
Next, cut a hole in the top or bottom of the pumpkin. The top is traditional, but cutting a hole in the bottom can make it easier to place the pumpkin over a light source later. Make sure the hole is large enough to fit your hand inside comfortably. Now comes the fun part: gutting the pumpkin! Use your scoop to remove all the seeds and pulp. Scrape the inside walls of the pumpkin until they're smooth and clean. The thinner the walls, the easier it will be to carve. Pro tip: save the seeds for roasting – they make a delicious Halloween snack!
Transferring Your Design: Stencils and Freehand Magic
Now that your pumpkin is prepped and ready to go, it's time to transfer your owl design. If you're using a stencil, tape it securely to the pumpkin's surface. Use a poking tool or a thin marker to trace the design onto the pumpkin. Be sure to press firmly enough to create a clear outline, but not so hard that you damage the pumpkin.
If you're feeling adventurous, you can try carving freehand. Sketch your owl design directly onto the pumpkin using a washable marker or pencil. Don't worry about making it perfect – you can always erase and adjust as you go. Remember, the key is to have fun and let your creativity flow. Whether you're using a stencil or carving freehand, take your time and pay attention to detail. A well-executed design will make all the difference in the final result.
Tool | Purpose | Why You Need It |
|---|---|---|
Serrated Knife | Cutting open the pumpkin | Essential for accessing the inside |
Scoop | Removing seeds and pulp | Creates a clean carving surface |
Detail Knife | Carving intricate details | Adds depth and realism to your design |
Etching Tools | Creating shading and textures | Enhances the overall look of your carving |
StepbyStep: Carving Your Own Majestic Owl Pumpkin
StepbyStep: Carving Your Own Majestic Owl Pumpkin
#1: Transferring the Design
Alright, you've got your pumpkin prepped and your design chosen. Now comes the moment of truth: transferring that design onto the pumpkin. If you're using a stencil (and honestly, for intricate owl designs, I highly recommend it!), tape it securely to the pumpkin's surface. Then, using a poking tool or a thin marker, carefully poke holes or trace the design onto the pumpkin. Make sure your marks are clear enough to see once you remove the stencil. If you're feeling brave and going freehand, sketch your design lightly with a washable marker. Don't worry about perfection – this is just a guideline!
Pro Tip: Place your stencil strategically to avoid any awkward bumps or curves on the pumpkin's surface. A smooth, even area will make carving much easier. And remember, it's always better to start with a lighter touch. You can always darken the lines later if needed.
#2: Carving with Precision
Now for the fun part: carving! Start with the smaller, more intricate details first. This will help you avoid accidentally damaging larger sections later on. Use a detail knife or a small saw to carefully cut along the lines of your design. Remember to take your time and use smooth, controlled motions. Don't try to force the knife – let it do the work.
For larger areas, use a larger saw or a serrated knife. Cut along the lines of your design, being careful not to cut too deep. You want to remove the pumpkin flesh completely, but you don't want to cut through the entire pumpkin wall. Once you've cut around the entire shape, gently push it out from the inside. If it's stuck, use your knife to carefully loosen it. Repeat this process for all the remaining sections of your design.
#3: Adding Depth and Dimension
Once you've carved out all the basic shapes, it's time to add some depth and dimension to your owl. Use etching tools to create subtle shading and textures on the feathers, face, and other details. You can also use a small knife to carefully carve away thin layers of pumpkin flesh, creating a more three-dimensional effect. Experiment with different techniques to see what works best for you.
Pro Tip: Use a spoon or a small scraper to thin out the pumpkin walls from the inside. This will allow more light to shine through and create a more dramatic effect. Be careful not to thin the walls too much, or your pumpkin could become fragile and collapse.
Step | Description | Tools Needed |
|---|---|---|
Transfer Design | Transfer owl design to pumpkin | Stencil, poking tool, marker |
Carve Details | Carve intricate details first | Detail knife, small saw |
Carve Larger Areas | Remove larger sections of pumpkin | Larger saw, serrated knife |
Add Depth | Use etching tools for shading | Etching tools, small knife |
Beyond the Carve: Creative Ways to Decorate Your Owl Pumpkin
Beyond the Carve: Creative Ways to Decorate Your Owl Pumpkin
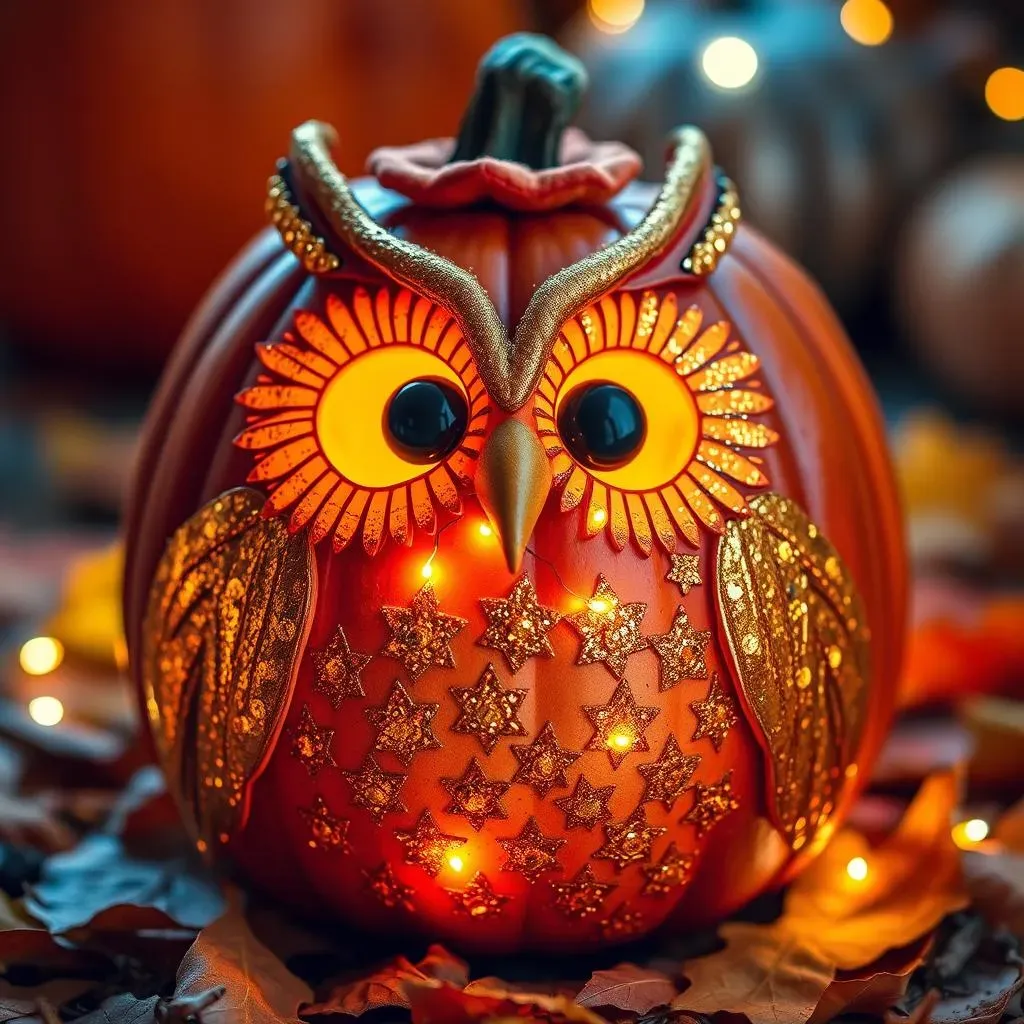
Embrace the Sparkle: Adding Glitter and Paint
So, you've carved your majestic owl pumpkin. Awesome! But why stop there? Let's amp up the wow factor with some sparkle and shine. Glitter is your best friend here. Apply a thin layer of craft glue to specific areas, like the feathers or around the eyes, and then sprinkle generously with glitter. Gold or silver glitter will give your owl a regal look, while iridescent glitter will add a touch of magic.
Paint is another fantastic way to add color and detail. Acrylic paints work best on pumpkins. Use a fine-tipped brush to paint intricate patterns on the feathers or to create a more realistic look for the eyes and beak. You can even use glow-in-the-dark paint for an extra spooky effect!
Pro Tip: Seal your painted and glittered pumpkin with a clear acrylic sealant to protect it from the elements and keep it looking its best throughout the Halloween season.
Light It Up: Illuminating Your Owl's Wisdom
Lighting is key to bringing your owl pumpkin to life. Forget those old-school candles – they're messy and a fire hazard! Instead, opt for battery-operated LED lights. You can find them in various colors and sizes, allowing you to customize the look of your owl. Place a string of fairy lights inside the pumpkin for a soft, magical glow. Or use a single, bright LED light to create a more dramatic effect.
Consider using colored lights to enhance the owl's features. Yellow or orange lights will give it a warm, inviting glow, while blue or green lights will create a spookier, more mysterious atmosphere. You can even use a flickering LED candle to mimic the look of a real flame without the risk.
Accessorize and Personalize: Giving Your Owl Character
Now for the final touch: accessories! This is where you can really let your creativity shine and give your owl pumpkin its own unique personality. Add some googly eyes for a whimsical touch. Glue on some faux feathers to create a more realistic look. Or craft a tiny hat out of felt or cardboard to give your owl a bit of character.
You can also use natural elements to accessorize your owl. Glue on some twigs to create a rustic nest around the base of the pumpkin. Or attach some dried leaves to the feathers for a more autumnal look. The possibilities are endless!
Pro Tip: Don't be afraid to mix and match different materials and techniques. The more creative you get, the more unique and eye-catching your owl pumpkin will be.
Decoration | Material | Effect |
|---|---|---|
Glitter | Craft glue, glitter | Sparkle and shine |
Paint | Acrylic paints, brushes | Color and detail |
Lights | LED lights, fairy lights | Illumination and mood |
Accessories | Googly eyes, feathers, hats | Personality and character |
Hoot-tastic Halloween: Your Owl Pumpkin Masterpiece Awaits!
So, there you have it! From understanding why pumpkin carving ideas owl are such a fantastic choice to mastering the carving techniques and adding those final decorative touches, you're now equipped to create a truly memorable Halloween display. Don't be afraid to experiment, let your creativity soar, and most importantly, have fun with it! Your owl pumpkin is sure to be a hoot, captivating trick-or-treaters and neighbors alike. Happy carving, and Happy Halloween!