Table of Contents
Halloween is creeping closer, and that means it's pumpkin carving season! But who says pumpkin carving has to be all about ghouls and gore? If you're looking for some **pumpkin carving ideas not scary**, you've come to the right place. Forget the menacing monsters and terrifying teeth; we're diving headfirst into a world of whimsical designs, adorable characters, and charming scenes that are perfect for families with young kids, or anyone who prefers a more lighthearted Halloween vibe. This isn't your average pumpkin carving guide. We're skipping the jump scares and focusing on fun, creative projects that are as enjoyable to make as they are to display. From cute animal faces to silly monster designs and everything in between, these carving ideas will spark your imagination and bring a smile to everyone's face. Ready to transform your pumpkins into works of art that are more sweet than spooky? We’ll explore kid-friendly carving options perfect for tiny hands, venture beyond traditional carving with alternative decorating methods, share essential tools and tips for carving success, and even provide creative ways to showcase your finished pumpkin masterpieces. Let's get carving!
Whimsical & Wonderful: Cute Pumpkin Carving Ideas Not Scary
Whimsical & Wonderful: Cute Pumpkin Carving Ideas Not Scary
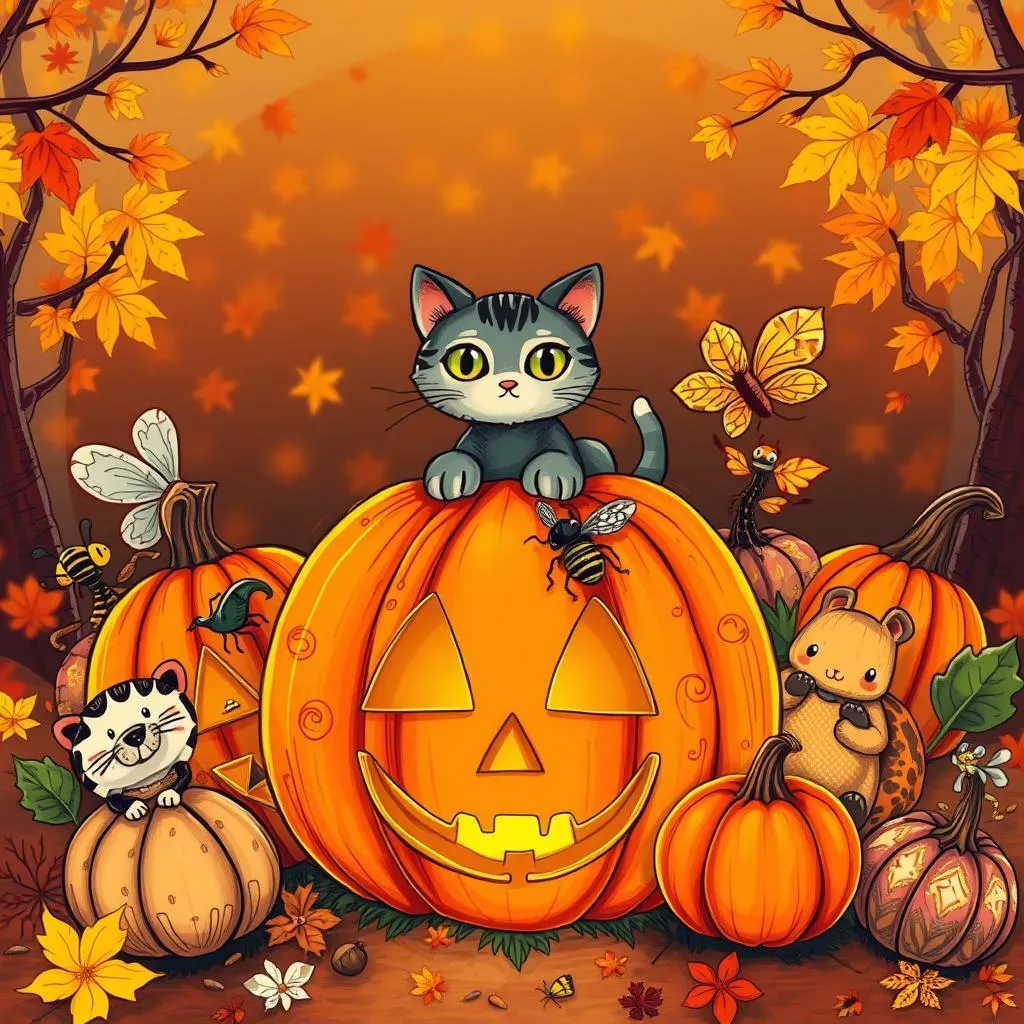
Purr-fectly Precious: Cat-Themed Pumpkins
Who can resist a cute kitty? Carving a cat face into your pumpkin is a surefire way to add some charm to your Halloween display. Think big, round eyes, a tiny button nose, and maybe even some adorable whiskers made from pipe cleaners or painted on. You could even carve out a silhouette of a cat sitting on a fence, gazing at the moon. For an extra touch of whimsy, add a little witch's hat to your feline friend!
Level up your cat pumpkin by adding different textures. Use a small gouge to create a fur-like texture around the face, or carve out paw prints around the base of the pumpkin. You can even paint the pumpkin in your favorite cat breed colors – a classic tabby, a sleek black cat, or a fluffy calico.
Bee-utiful Buzz: Insect-Inspired Designs
Insects can be cute too! Think beyond scary spiders and create a buzzing bee pumpkin, a graceful butterfly, or a friendly ladybug. For a bee pumpkin, carve out stripes and add wings made from craft foam or even dried leaves. A butterfly pumpkin can feature intricate wing patterns and antennae made from wire. A ladybug pumpkin is super simple – just paint the pumpkin red and add black spots!
To make your insect pumpkin even more appealing, consider adding some natural elements. Glue on small twigs for legs, or attach silk flowers around the base to create a mini garden. You could even add a tiny watering can or a miniature bee house to complete the scene.
Enchanting Forest Friends: Woodland Creature Pumpkins
Bring the magic of the forest to your front porch with woodland creature pumpkins. Think adorable foxes, wise owls, playful squirrels, and curious deer. A fox pumpkin can feature a bushy tail made from orange felt, while an owl pumpkin can have big, expressive eyes and feathery wings. A squirrel pumpkin can be holding an acorn made from clay, and a deer pumpkin can have elegant antlers made from twigs.
Want to make your forest pumpkin standout? Try using different shades of paint to add depth and dimension to your carvings. Use stencils to create intricate patterns, or try using a wood-burning tool to add texture and detail. Don't be afraid to experiment and have fun with it!
Creature | Design Idea | Extra Touch |
|---|---|---|
Fox | Bushy tail, pointed ears | Orange felt for tail |
Owl | Big eyes, feathery wings | Use different sized carving tools for feather texture |
Squirrel | Holding an acorn | Clay acorn accessory |
Deer | Elegant antlers | Attach real twigs for antlers |
KidFriendly Carving: Easy Pumpkin Carving Ideas Not Scary for Little Hands
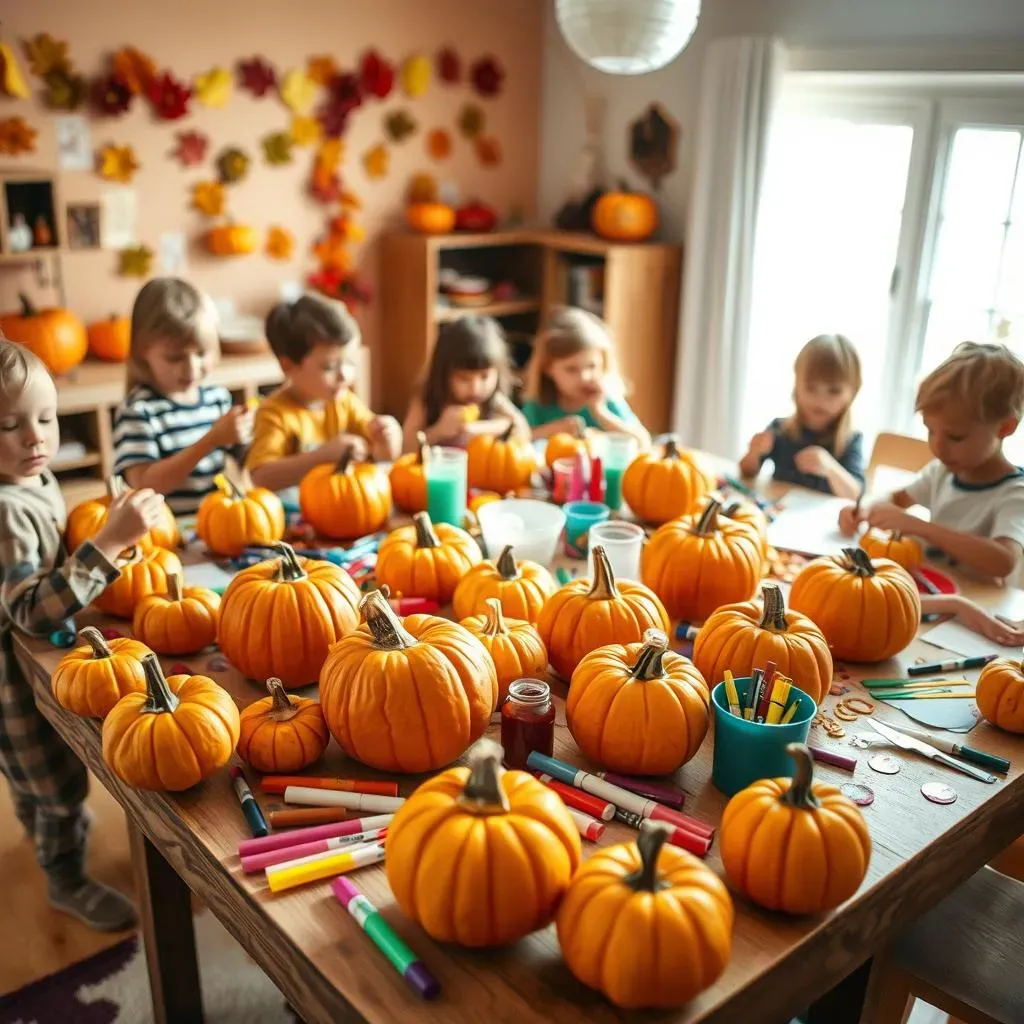
KidFriendly Carving: Easy Pumpkin Carving Ideas Not Scary for Little Hands
Trace & Decorate: No-Carve Pumpkin Fun
Let's be real, knives and little hands don't always mix. That's where no-carve pumpkins come to the rescue! Instead of carving, try decorating your pumpkins with paint, markers, stickers, glitter, or even googly eyes. You can trace simple shapes onto the pumpkin and then fill them in with paint or markers. Think polka dots, stripes, zigzags, or even their favorite cartoon characters. This is a great way to let kids express their creativity without any sharp objects involved.
To make no-carve pumpkins even more engaging, consider using different textures. Glue on cotton balls to create a fluffy sheep, or use felt to make a colorful monster. You could even use recycled materials like bottle caps or buttons to create a unique and eco-friendly design.
Punch-Out Pumpkins: Simple Shapes for Little Ones
If your kids are itching to do some actual pumpkin altering, punch-out pumpkins are a great compromise. Instead of carving intricate designs, use cookie cutters to punch out simple shapes from the pumpkin's surface. Stars, hearts, circles, and triangles are all easy to create and look adorable when illuminated from within. You can even let your kids arrange the shapes in different patterns to create their own unique designs.
For added safety, supervise your children closely while they're using the cookie cutters. Make sure they're pressing down firmly but gently, and that they're not trying to force the cutters through the pumpkin. You can also use a rubber mallet to help them punch out the shapes.
Shape | Tool | Safety Tip |
|---|---|---|
Star | Star-shaped cookie cutter | Ensure cutter edge is not too sharp |
Heart | Heart-shaped cookie cutter | Supervise use to prevent slips |
Circle | Round cookie cutter or pastry tip | Apply even pressure |
Triangle | Triangle cookie cutter | Use a mallet for easier cutting |
Sticker Power: Instant Pumpkin Makeovers
Sometimes, the simplest solutions are the best! Stickers are a fantastic way to decorate pumpkins quickly and easily, with zero mess. Buy a variety of Halloween-themed stickers – think friendly ghosts, smiling bats, cute pumpkins, and colorful leaves – and let your kids go wild. They can create their own scenes, tell stories, or simply cover the pumpkin in a collage of fun designs. This is a great option for younger children who might not have the dexterity for more complicated decorating techniques.
To make sticker pumpkins even more special, consider using glow-in-the-dark stickers. These will add a spooky touch to your Halloween display at night. You can also use puffy stickers or 3D stickers to add texture and dimension to your designs.
Beyond the Jacko'Lantern: Alternative Pumpkin Decorating Ideas
Beyond the Jacko'Lantern: Alternative Pumpkin Decorating Ideas
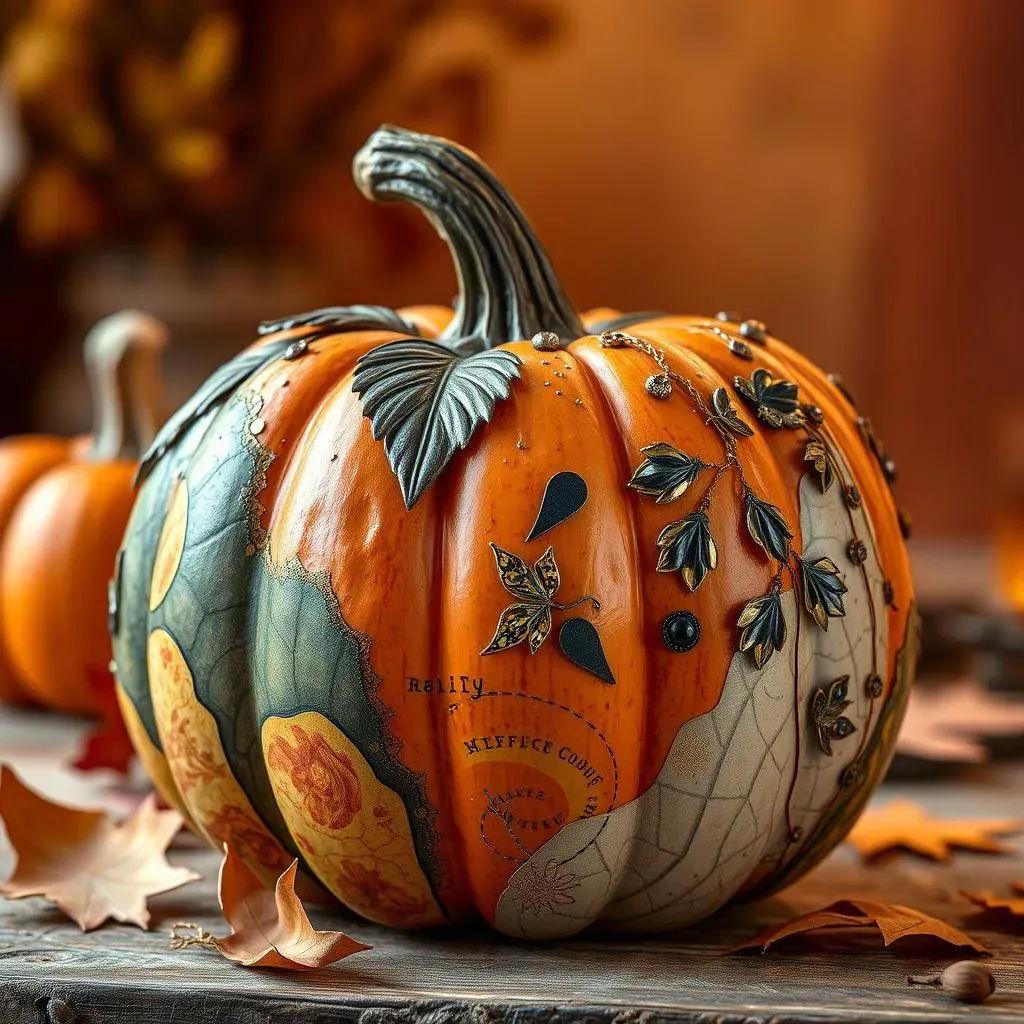
Gourd-geous Painting: Artistic Pumpkin Transformations
Who says pumpkins have to be carved? Unleash your inner artist and transform your pumpkins into stunning works of art with paint! From simple geometric patterns to intricate floral designs, the possibilities are endless. Use acrylic paints for vibrant colors and long-lasting results. You can even try using different painting techniques like stippling, sponging, or ombre to add depth and texture to your creations.
Want to take your painted pumpkins to the next level? Consider using metallic paints for a touch of glamour, or chalkboard paint so you can change your design every day. You can also add embellishments like sequins, beads, or glitter for extra sparkle. Don't be afraid to experiment and have fun with it!
Decoupage Dreams: Paper-Perfect Pumpkins
Decoupage is a fun and easy way to decorate pumpkins using paper cutouts. Simply glue your favorite images onto the pumpkin's surface using Mod Podge or another decoupage medium. You can use anything from vintage book pages to colorful scrapbook paper to create a unique and personalized design. This is a great way to upcycle old materials and create a one-of-a-kind Halloween decoration.
To make your decoupage pumpkin even more special, consider using different types of paper. Tissue paper can create a soft, ethereal effect, while patterned paper can add a pop of color and interest. You can also add embellishments like buttons, ribbons, or lace to complete the look. Seal the finished pumpkin with a layer of Mod Podge to protect the design and add a glossy finish.
Material | Effect | Tip |
|---|---|---|
Vintage Book Pages | Classic, antique look | Use tea to stain for an older feel |
Scrapbook Paper | Colorful, vibrant | Coordinate colors for a theme |
Tissue Paper | Soft, ethereal | Layer for depth |
Pressed Flowers | Natural, delicate | Dry flowers completely before use |
Tools & Tips: Making Your Not Scary Pumpkin Carving a Success
Tools & Tips: Making Your Not Scary Pumpkin Carving a Success
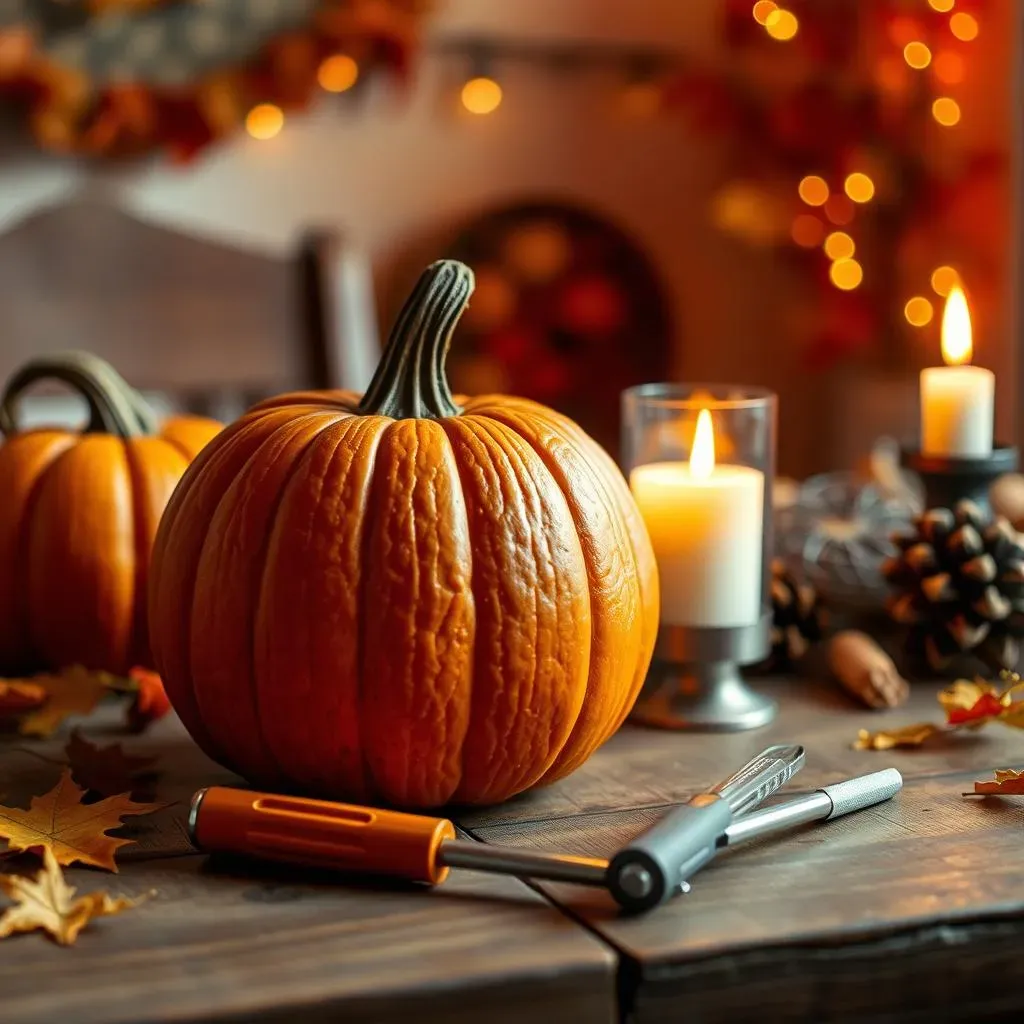
Gather Your Goodies: Essential Pumpkin Carving Tools
Alright, so you've got your pumpkin and your awesome not-so-scary design in mind. Now, let's talk tools! You don't need a fancy kit to create a masterpiece. A good serrated knife (the kind you use for bread works great!), a sturdy spoon for scooping out the guts, and some smaller carving tools are your best friends. Think about getting a detail knife for finer lines and shapes. Cookie cutters are fantastic for those easy punch-out designs we talked about earlier. And don't forget a good source of light – a battery-operated candle or LED light is much safer than a real flame, especially when kids are involved.
Beyond the basics, consider these handy helpers: a drill for making perfectly round holes (think constellation pumpkins!), stencils for transferring designs, and a poking tool or skewer to create dotted patterns. And for cleanup? A large trash bag, some paper towels, and maybe even a pair of gloves are lifesavers. Trust me, you'll thank me later!
Prep Like a Pro: Pumpkin Selection and Preservation
Choosing the right pumpkin is half the battle! Look for a pumpkin that's sturdy, has a smooth surface, and sits flat. Give it a gentle tap – it should sound hollow. Avoid pumpkins with soft spots or bruises, as these are signs of decay. Once you've got your perfect pumpkin, give it a good wash with soap and water to remove any dirt or debris. Now, before you even think about carving, make sure your design is ready to go. Draw it directly onto the pumpkin with a marker or use a stencil. This will help you stay on track and avoid any carving mishaps.
Now, for the million-dollar question: how do you make your carved pumpkin last longer? Here's a trick: after carving, give your pumpkin a bath in a bleach solution (1 tablespoon of bleach per gallon of water). This will kill any bacteria that can cause rot. You can also spray the inside of the pumpkin with a pumpkin preservative spray or even just petroleum jelly to keep it from drying out. And remember, keep your pumpkin out of direct sunlight and extreme temperatures. With a little TLC, your not-so-scary pumpkin can last for weeks!
Tip | Description |
|---|---|
Bleach Bath | Soak carved pumpkin in bleach solution to kill bacteria. |
Preservative Spray | Use commercial spray to prevent drying and mold. |
Petroleum Jelly | Coat exposed areas to seal in moisture. |
Cool Storage | Keep pumpkin out of direct sunlight and heat. |
Showcase Your Skills: Displaying Your Not So Scary Pumpkin Masterpieces
Showcase Your Skills: Displaying Your Not So Scary Pumpkin Masterpieces
Light 'Em Up: Creating a Warm and Welcoming Glow
you've poured your heart and soul into creating these adorable, not-so-scary pumpkins, so now it's time to show them off! Lighting is key to creating a warm and welcoming Halloween ambiance. Battery-operated candles or LED lights are your best bet for safety and convenience. Place them inside your pumpkins to illuminate those cute carvings and bring them to life. Consider using different colored lights to create different moods – a warm white light for a cozy feel, or a soft orange light for a traditional Halloween glow.
Beyond the inside, think about adding some external lighting to highlight your pumpkin display. String lights, spotlights, or even just a well-placed porch light can make a big difference. Experiment with different angles and intensities to create the perfect spooky (but not scary!) scene. Remember, the goal is to draw attention to your creations and make them look their best!
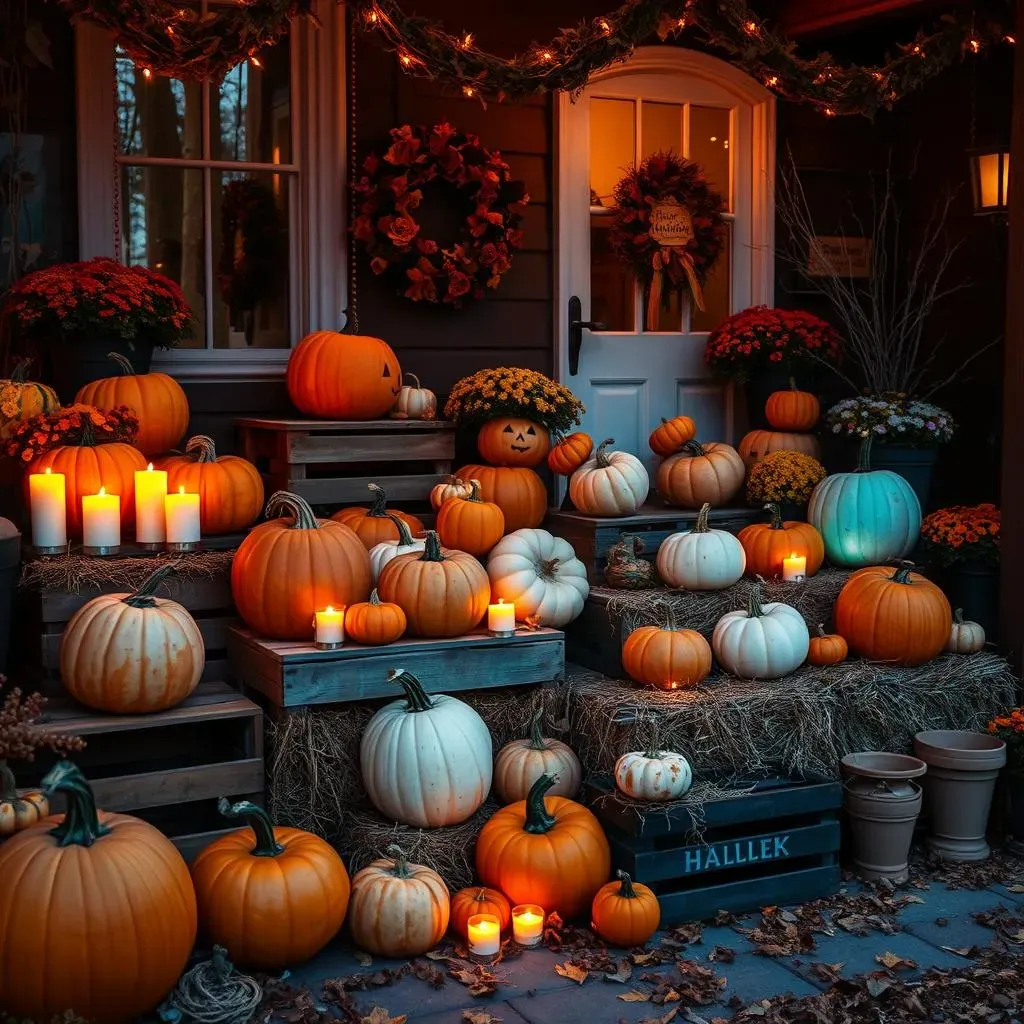
Pumpkin Placement: Creating Eye-Catching Displays
Where you put your pumpkins is just as important as how you carve them! Think about creating a visually appealing display that draws the eye and showcases your creations in the best possible light. Group pumpkins of different sizes and shapes together to create a sense of depth and dimension. Consider placing them on different levels – use hay bales, crates, or even just overturned flower pots to create a tiered effect. And don't forget about adding some complementary decorations to complete the scene.
Think about the overall theme of your Halloween decor. Are you going for a rustic, autumnal vibe? Or a more whimsical, colorful look? Choose a display style that complements your pumpkins and your home's aesthetic. And most importantly, have fun with it! Let your creativity shine and create a display that reflects your personality and style. After all, Halloween is all about celebrating and having a good time!
Display Idea | Description |
|---|---|
Porch Steps | Line pumpkins along porch steps for a welcoming display. |
Hay Bale Stack | Stack hay bales and arrange pumpkins on top for varying heights. |
Window Sill | Place smaller pumpkins on window sills for indoor/outdoor visibility. |
Themed Scene | Create a mini scene with pumpkins, fall foliage, and other decorations. |
Spreading Smiles, Not Scares: Your Not-So-Spooky Pumpkin Adventure
So there you have it – a treasure trove of **pumpkin carving ideas not scary** to light up your Halloween season! Remember, pumpkin carving is all about having fun and expressing your creativity. Whether you choose a simple smiley face or a more intricate character design, the most important thing is to enjoy the process and create something that brings joy to you and those around you. Now go forth, grab a pumpkin, and let the carving commence! May your Halloween be filled with delightful designs and not a single fright in sight.