Table of Contents
Halloween is just around the corner, and that means it's time to embrace the age-old tradition of pumpkin carving! Whether you're a seasoned pro or a first-time carver, transforming a humble gourd into a spooky masterpiece is a must. This year, let's move beyond the basic triangle eyes and explore a world of creative possibilities, focusing specifically on pumpkin carving ideas mouth. From classic grins to terrifying grimaces, the mouth is where your pumpkin's personality truly shines.
Classic Pumpkin Faces with a Twist: Spooky Mouth Carving Ideas
Classic Pumpkin Faces with a Twist: Spooky Mouth Carving Ideas
The Timeless Grin: Classic with a Creepy Edge
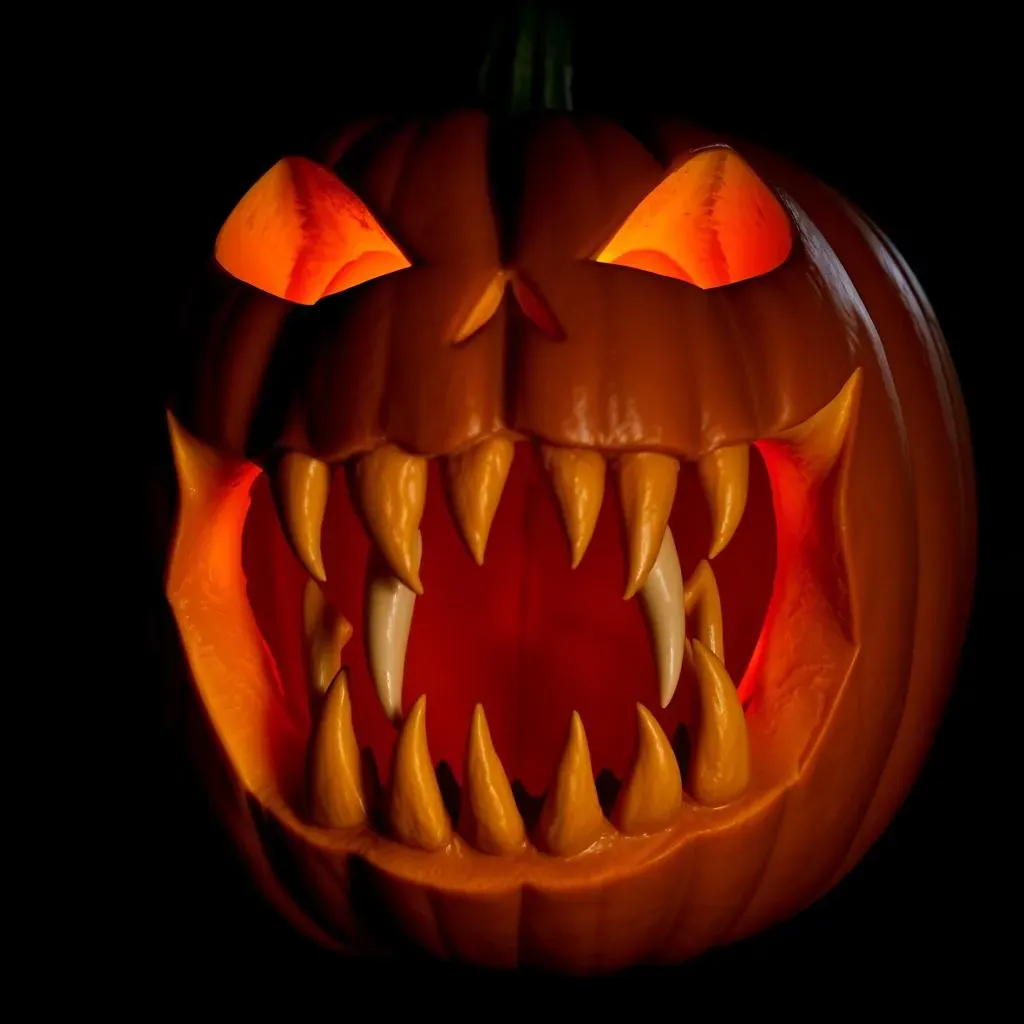
You can't go wrong with the classic jack-o'-lantern face, but why not amp up the spook factor this year? Think about exaggerating the features – make the eyes wider, the nose pointier, and, of course, the mouth extra ghoulish. Instead of a simple, toothless grin, try adding jagged teeth, a crooked smile, or even a gaping maw that seems to swallow the shadows whole. The key is to take the familiar and give it a chilling twist.
Consider using different carving depths to create a more dynamic and unsettling effect. Shave away the pumpkin's surface around the mouth to make it appear sunken and sinister. Experiment with different shapes for the teeth – long and sharp, short and stubby, or a mix of both. Remember, the goal is to evoke a sense of unease and maybe even a little bit of fear. After all, what's Halloween without a good scare?
Beyond the Smile: Expressing Emotion Through the Mouth
The mouth is a powerful tool for conveying emotion, and that applies to pumpkin carving too! Think beyond the standard smile and explore other expressions. A wide, toothy grin can be menacing, while a downturned mouth can create a look of sorrow or despair. Experiment with different shapes and angles to achieve the desired effect. A small, pursed mouth can suggest cunning or secrecy, while a large, open mouth can convey shock or terror.
Don't be afraid to get creative with the details. Add wrinkles around the mouth to suggest age or wisdom, or carve in scars or other imperfections to give your pumpkin character a more rugged and unsettling appearance. You could even try adding elements like a tongue sticking out or drool dripping from the corners of the mouth. These small details can make a big difference in the overall impact of your pumpkin carving.
Beyond the Grin: Creative Pumpkin Mouth Designs for Unique Characters
Beyond the Grin: Creative Pumpkin Mouth Designs for Unique Characters
Monster Mash: Fang-tastic and Fearsome Mouths
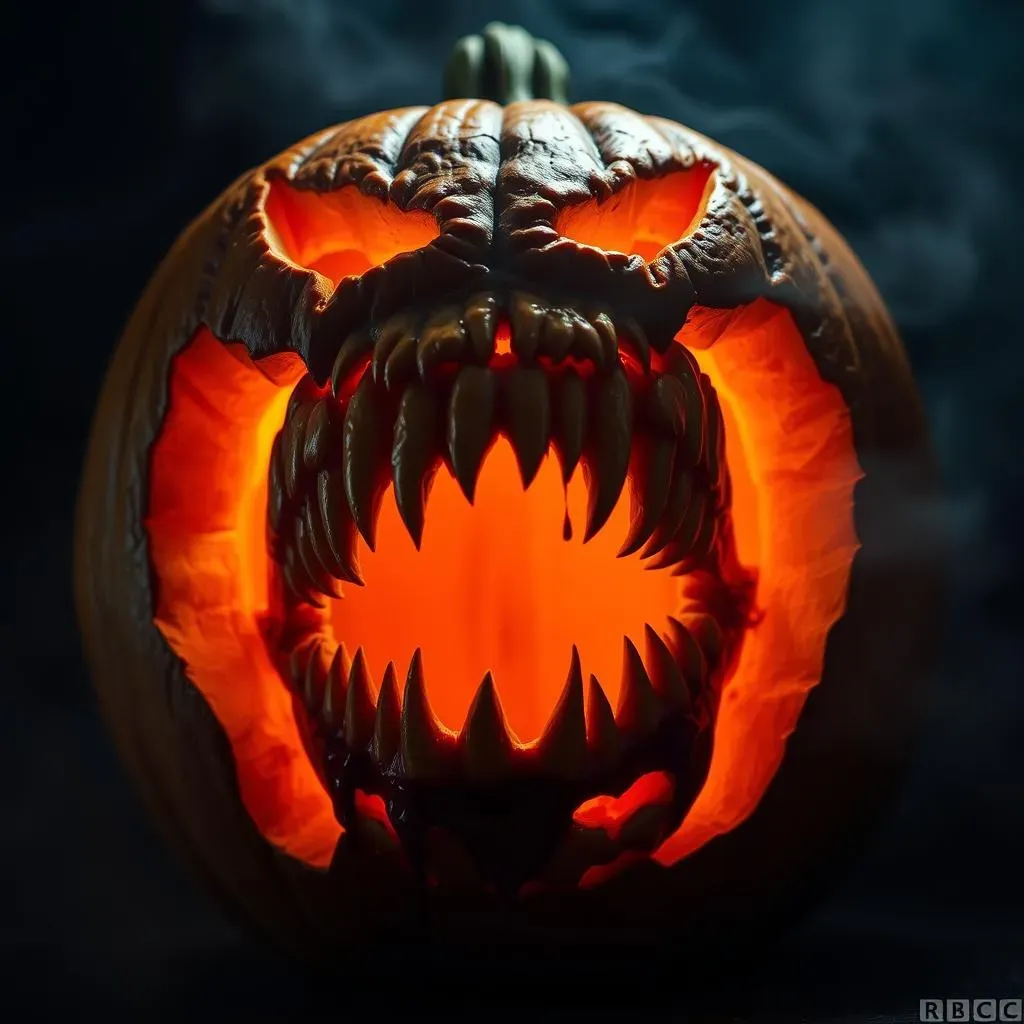
Let's ditch the friendly smile and dive headfirst into the world of monsters! When it comes to pumpkin carving ideas mouth, monsters offer a treasure trove of inspiration. Think sharp, jagged teeth, gaping maws filled with darkness, and grotesque, asymmetrical shapes. A vampire's fangs, a zombie's decaying grin, or a werewolf's snarling snarl – the possibilities are endless. Consider adding details like dripping blood or exposed gums to really crank up the creep factor. Don't be afraid to get messy and embrace the macabre!
To really sell the monster look, experiment with different carving depths. Carve deep gouges to create the illusion of missing teeth or exposed bone. Use a variety of tools to achieve different textures – a serrated knife for jagged edges, a gouge for deep crevices, and a scraper for smoothing out surfaces. Remember, the more gruesome and unsettling, the better! Your goal is to create a pumpkin that will make trick-or-treaters think twice before approaching your doorstep.
Animal Instincts: Incorporating Animalistic Mouths
Why limit yourself to human-like mouths? Animals offer a whole new realm of inspiration for pumpkin carving ideas mouth. A wolf's howl, a cat's playful grin, or a snake's menacing hiss – each animal has a unique mouth shape that can be adapted to your pumpkin carving. Consider the characteristics of the animal you're depicting and try to capture those in your design. A wide, open mouth with sharp teeth can convey aggression, while a small, pursed mouth can suggest cunning or stealth.
To add an extra layer of realism, pay attention to the details. Carve in whiskers, tongues, or other features that are specific to the animal you're depicting. You can also use different carving depths to create the illusion of fur or scales. For example, you could shave away the pumpkin's surface to create a smooth, sleek look for a snake's mouth, or use a gouge to create a rough, textured look for a wolf's snout. Get creative and have fun with it!
Animal | Mouth Characteristic | Carving Idea |
|---|---|---|
Wolf | Snarling, sharp teeth | Exaggerated teeth, deep gouges |
Cat | Playful grin, whiskers | Curved smile, thin lines for whiskers |
Snake | Hissing, forked tongue | Thin, elongated mouth, carved tongue |
DIY Pumpkin Carving: Tools and Tips for Perfecting Your Pumpkin Mouth
DIY Pumpkin Carving: Tools and Tips for Perfecting Your Pumpkin Mouth
Gather Your Arsenal: Essential Carving Tools
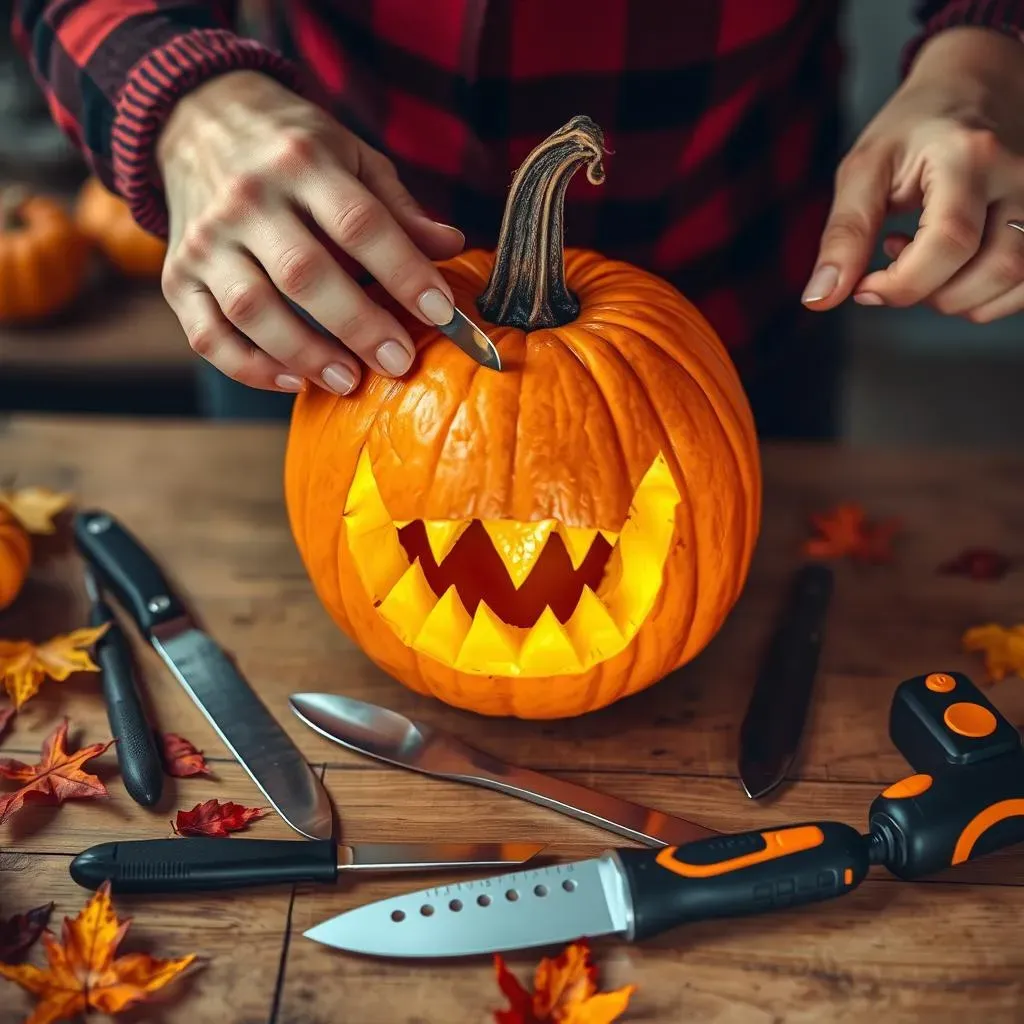
Before you even think about plunging that knife into your pumpkin, make sure you're armed with the right tools for the job. A basic carving kit is a great starting point, but don't be afraid to supplement it with some additional implements. A good serrated knife is essential for cutting through the thick pumpkin skin, while smaller detail knives are perfect for creating intricate designs. Spoons and scrapers will help you scoop out the pumpkin's insides, and stencils can be a lifesaver for transferring complex patterns.
Beyond the basics, consider investing in some specialized tools to take your carving to the next level. A rotary tool with various attachments can be used for everything from smoothing out surfaces to creating fine details. A wood-burning tool can add texture and depth to your carving, and a sculpting tool can help you shape the pumpkin's flesh. Remember, the right tools can make all the difference in the final outcome of your pumpkin masterpiece.
"The best tool is the one you have when you need it." - Jack Nicholson
Technique is Key: Mastering the Art of the Carve
Having the right tools is only half the battle – you also need to master the proper carving techniques. Start by cleaning your pumpkin thoroughly and sketching out your design. When you're ready to start carving, take your time and work carefully. Use smooth, controlled motions and avoid applying too much pressure. If you're using a stencil, make sure to secure it firmly to the pumpkin's surface before you begin carving.
Experiment with different carving depths to create a more dynamic and visually appealing design. Shave away the pumpkin's surface to create highlights and shadows, and carve deeper to create more dramatic effects. Don't be afraid to make mistakes – pumpkin carving is all about experimentation and having fun! And if you do mess up, don't worry – you can always patch it up with a toothpick or a dab of pumpkin puree.
Tool | Use | Tip |
|---|---|---|
Serrated Knife | Cutting through pumpkin skin | Use a sawing motion |
Detail Knife | Creating intricate designs | Hold the knife like a pencil |
Rotary Tool | Smoothing, detailing | Use low speed for control |
Light It Up: Displaying Your Pumpkin Carving Masterpieces with Mouth Aglow
Light It Up: Displaying Your Pumpkin Carving Masterpieces with Mouth Aglow
Illuminating Ideas: Beyond the Basic Candle
so you've spent hours perfecting your pumpkin carving ideas mouth, and now it's time to show it off! But before you reach for that dusty old candle, let's brainstorm some more creative ways to light up your masterpiece. Sure, a candle gets the job done, but it can also be a fire hazard, especially if you've got curious kids or pets running around. Plus, the flickering flame can sometimes obscure the details of your carving.
Consider using battery-operated LED lights instead. They're safer, brighter, and longer-lasting than candles, and they come in a variety of colors and styles. You can find submersible LED lights that will bathe your pumpkin in a cool, eerie glow, or flickering LED tea lights that mimic the look of a real candle without the risk of fire. You could even use a string of fairy lights to create a whimsical, enchanting effect. The possibilities are endless, so get creative and experiment!
Setting the Stage: Presentation is Key
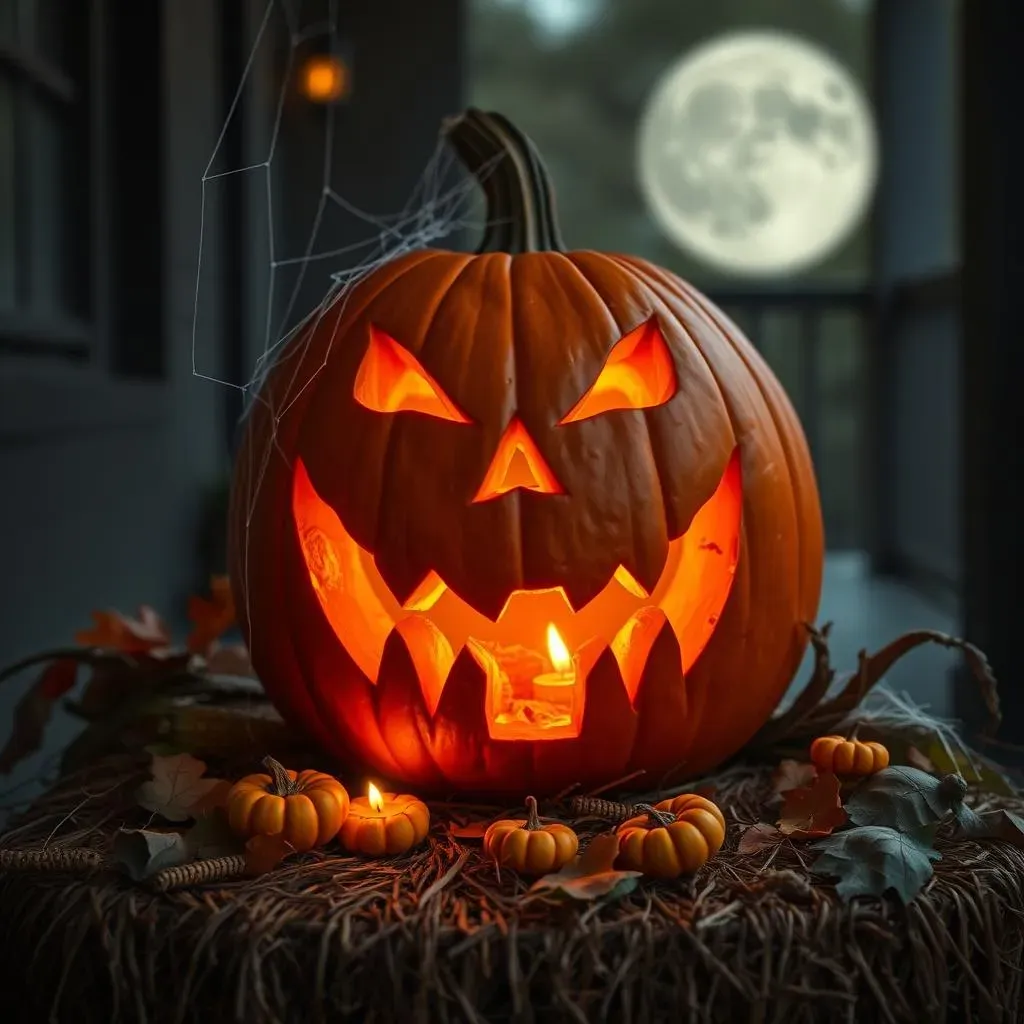
Lighting is important, but don't forget about presentation! How you display your pumpkin can make a big difference in its overall impact. Instead of just plopping it down on your porch, think about creating a spooky scene to showcase your carving. Use hay bales, corn stalks, and other fall decorations to create a rustic, autumnal vibe. Or, if you're going for a more macabre look, drape some cobwebs around your pumpkin and scatter some fake spiders nearby.
Consider the placement of your pumpkin as well. A pumpkin placed high up on a pedestal will command attention, while a pumpkin nestled among other decorations will blend in seamlessly with the Halloween theme. You could even create a whole pumpkin family by grouping together pumpkins of different sizes and shapes. And don't forget about the background! A dark, shadowy backdrop will make your pumpkin's illuminated mouth stand out even more.
Lighting Option | Pros | Cons |
|---|---|---|
Candle | Classic look, warm glow | Fire hazard, short lifespan |
LED Lights | Safe, bright, long-lasting | Can look artificial |
Fairy Lights | Whimsical, enchanting | Can be difficult to arrange |
Conclusion: Carve Your Way to a Spooktacular Halloween!
So there you have it – a treasure trove of pumpkin carving ideas mouth to ignite your Halloween spirit! Whether you opted for a classic toothy grin, a monstrous maw, or something uniquely creative, the most important thing is to have fun and let your imagination run wild. Remember, a well-carved pumpkin is more than just a decoration; it's a symbol of Halloween creativity and a beacon of spooky cheer for trick-or-treaters. Now go forth, carve with confidence, and light up the night with your gourd-geous creations! Happy Halloween!