Table of Contents
Halloween is just around the corner, and what better way to celebrate than with a classic Disney twist? Forget the generic jack-o'-lanterns; this year, let's bring some magic to your doorstep with pumpkin carving ideas Mickey Mouse! Whether you're a seasoned carving pro or a first-timer, transforming a humble pumpkin into a tribute to the most iconic mouse is easier than you think.
Gathering Your Supplies for Mickey Mouse Pumpkin Carving
Gathering Your Supplies for Mickey Mouse Pumpkin Carving
Choosing the Perfect Pumpkin
First things first, you can't carve a Mickey Mouse masterpiece without the perfect pumpkin! Look for one that's relatively smooth, with a sturdy stem and a flat bottom, so it won't wobble. The size depends on your design – a smaller pumpkin is great for a simple Mickey face, while a larger one gives you more canvas for elaborate scenes. Give it a good tap; you want a hollow sound, which means it's ripe and ready to carve. Avoid any pumpkins with soft spots or blemishes, as those are signs of decay.
Essential Carving Tools
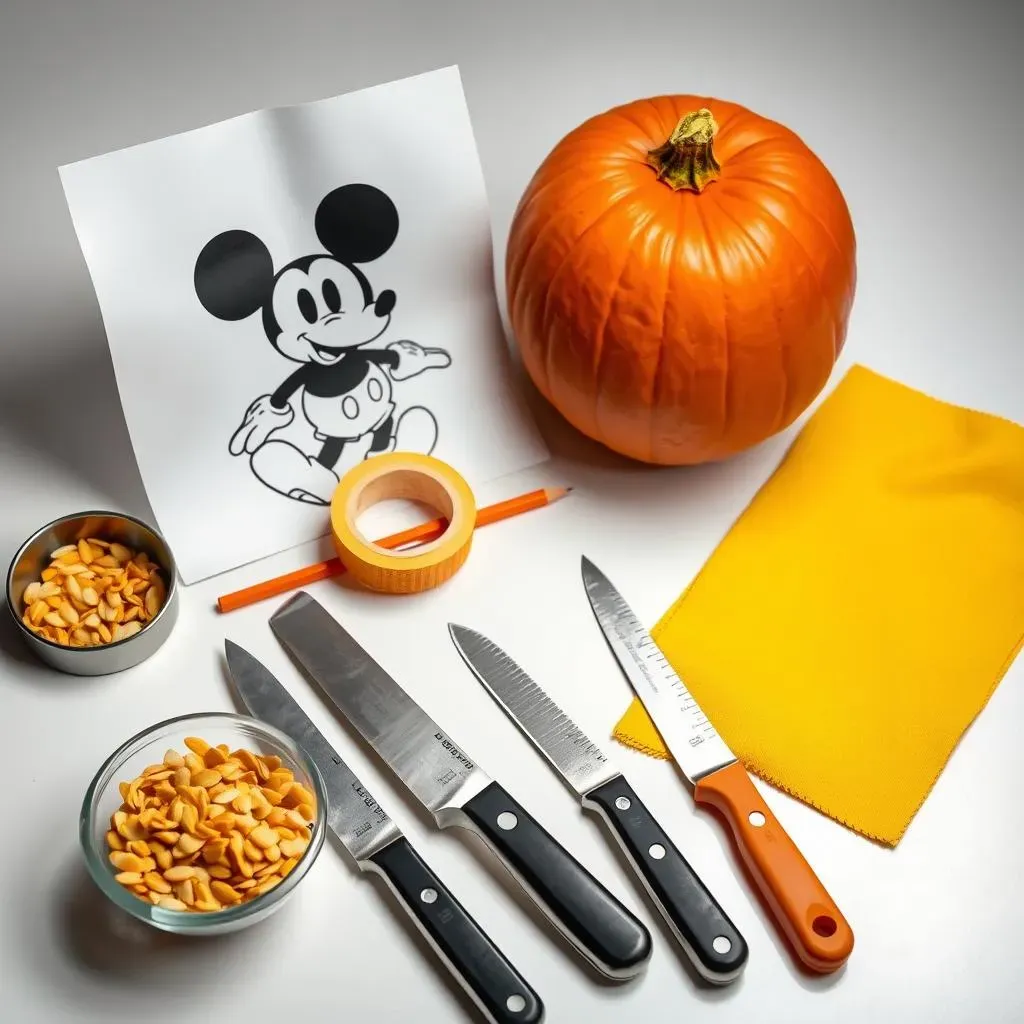
Now that you've got your pumpkin, it's time to gather your tools. A basic pumpkin carving kit is a good starting point, but here's a breakdown of what you'll need:
- Carving knives: Serrated knives in various sizes for different levels of detail.
- Scoop or scraper: For removing the pumpkin guts. A metal ice cream scoop works wonders!
- Pencil or marker: For transferring your Mickey Mouse stencil.
- Tape: To secure the stencil to the pumpkin.
- Awl or poking tool: To poke holes along the stencil lines, making it easier to carve.
- Small saw or X-Acto knife: For fine details and intricate designs.
- Bowl: For the pumpkin guts (save the seeds for roasting!).
- Damp cloth: For wiping away pumpkin debris.
Safety First!
Carving pumpkins can be a fun activity for the whole family, but safety should always be a top priority. Always supervise children closely when they're using sharp tools. Consider investing in a child-safe carving kit with duller blades. Carve in a well-lit area and on a stable surface. And remember, it's always better to err on the side of caution – if a cut seems too difficult or dangerous, don't force it. There's no shame in simplifying the design or asking for help!
Easy Mickey Mouse Pumpkin Carving Stencils for Beginners
Easy Mickey Mouse Pumpkin Carving Stencils for Beginners
Finding the Perfect Beginner-Friendly Stencil
so you're ready to carve Mickey, but maybe you're not exactly Michelangelo with a knife. No worries! The key is starting with a simple stencil. Think classic Mickey silhouette, a basic Mickey head, or even just his iconic ears. There are tons of free, printable stencils online – just do a quick search for "Mickey Mouse pumpkin carving stencil easy." Look for designs with thick lines and minimal detail; the less you have to cut, the better. Websites like Disney Family and Pinterest are goldmines for these kinds of stencils.
Once you've found your stencil, print it out and trim it to fit your pumpkin. Now, here's a pro tip: use painter's tape to secure the stencil to the pumpkin. It's gentle on the pumpkin's surface and won't leave a sticky residue. Then, grab your awl or poking tool and carefully poke holes along the stencil lines. This creates a dotted outline that's much easier to follow when you start carving. Don't skip this step – it's a game-changer!
Stencil Type | Difficulty Level | Ideal Pumpkin Size |
|---|---|---|
Mickey Head Silhouette | Easy | Small to Medium |
Mickey Ears | Easy | Small |
Simple Mickey Face | Medium | Medium to Large |
Step-by-Step Carving for First-Timers
Alright, stencil's on, outline's poked – time to carve! Grab your smallest serrated knife and start by gently sawing along the dotted lines. Remember, slow and steady wins the race. Don't try to force the knife; let it do the work. If you're having trouble, try making small, shallow cuts instead of one big one. It's easier to control and less likely to result in a pumpkin-carving disaster.
As you carve, periodically remove the cut-out pieces of pumpkin. This will give you a clearer view of your progress and prevent the stencil from getting obscured. If you accidentally carve outside the lines (it happens to the best of us!), don't panic. You can often smooth out small mistakes with your fingers or use a toothpick to reattach a loose piece. And hey, even if it's not perfect, it's still a Mickey Mouse pumpkin, and that's pretty awesome!
Advanced Mickey Mouse Pumpkin Carving Designs

Advanced Mickey Mouse Pumpkin Carving Designs
Stepping Up Your Carving Game
so you've mastered the basic Mickey silhouette – awesome! Now it's time to take things to the next level with some advanced Mickey Mouse pumpkin carving designs. We're talking intricate character portraits, dynamic scenes from your favorite Disney movies, and even 3D effects that will make your pumpkin the envy of the neighborhood. But be warned: these designs require patience, precision, and a steady hand. They're not for the faint of heart (or the easily frustrated!).
The first step is finding the right stencil. Forget those simple outlines; you'll need a detailed pattern with shading and intricate lines. Websites like Etsy and DeviantArt are great resources for finding advanced Mickey Mouse stencils created by talented artists. You might even consider creating your own custom stencil if you're feeling ambitious! Just remember that the more complex the design, the more challenging the carving process will be.
Tools for the Advanced Carver
To tackle these intricate designs, you'll need more than just a basic carving kit. Here's a rundown of essential tools for advanced Mickey Mouse pumpkin carving:
- Precision carving knives: These knives have thin, flexible blades that allow for intricate cuts and fine details.
- Wood carving tools: Gouges and chisels can be used to create depth and texture in your design.
- Ribbon tools: These tools are used to smooth out edges and create subtle curves.
- Clay sculpting tools: These can be used to refine details and add texture to your carving.
- Dremel tool: A rotary tool with various attachments can be used for etching, sanding, and creating 3D effects.
- Tracing paper: For transferring your stencil accurately.
- Graphite paper: For transferring fine details without smudging.
Tips for Making Your Mickey Mouse Pumpkin Last Longer
Tips for Making Your Mickey Mouse Pumpkin Last Longer
The Pumpkin Preservation Playbook
Alright, you've poured your heart and soul into carving the perfect Mickey Mouse pumpkin. The last thing you want is for it to turn into a mushy mess before Halloween even arrives! So, how do you keep your pumpkin looking fresh and fabulous for as long as possible? The key is understanding what causes pumpkins to decay in the first place: moisture loss and mold growth.
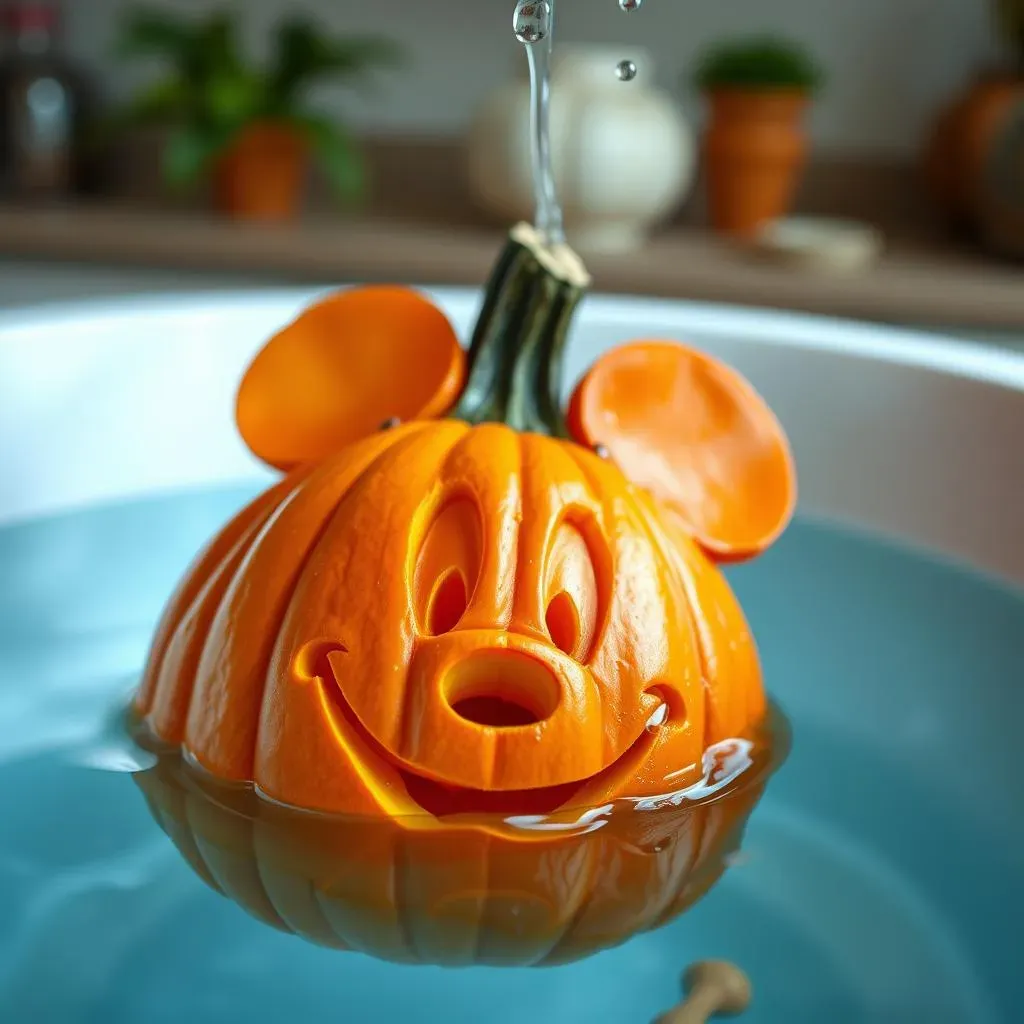
To combat moisture loss, think of your pumpkin like a thirsty plant. After carving, it's losing moisture through the exposed flesh. One of the best ways to rehydrate it is to give it a daily bath! Fill a large tub or bucket with cold water and submerge your pumpkin for a few hours each day. This will help it retain moisture and prevent it from shriveling up. Just make sure to dry it thoroughly before putting it back on display.
Preservation Method | Frequency | Benefits |
|---|---|---|
Water Submersion | Daily | Rehydrates pumpkin, prevents shriveling |
Petroleum Jelly | After Carving | Seals in moisture, prevents drying |
Bleach Solution Spray | Every Other Day | Kills mold and bacteria, slows decay |
Battling Bacteria and Boosting Longevity
Mold and bacteria are the enemy of a long-lasting Mickey Mouse pumpkin. To fight them off, you need to create an inhospitable environment. That's where bleach comes in! Mix a tablespoon of bleach with a quart of water and pour the solution into a spray bottle. Lightly mist the inside and outside of your pumpkin every other day. The bleach will kill any mold spores or bacteria that are trying to set up shop.
Another trick is to seal in moisture with petroleum jelly. After carving, apply a thin layer of petroleum jelly to all the exposed edges of the pumpkin. This will create a barrier that prevents moisture from escaping and keeps the pumpkin from drying out. You can also try using pumpkin sealant sprays, which are specifically designed to prolong the life of carved pumpkins. And finally, keep your pumpkin in a cool, dry place away from direct sunlight. Heat and humidity will only accelerate the decay process.
Beyond Carving: Creative Mickey Mouse Pumpkin Decorating Ideas
Beyond Carving: Creative Mickey Mouse Pumpkin Decorating Ideas
Painting Your Pumpkin: A Colorful Mickey Celebration
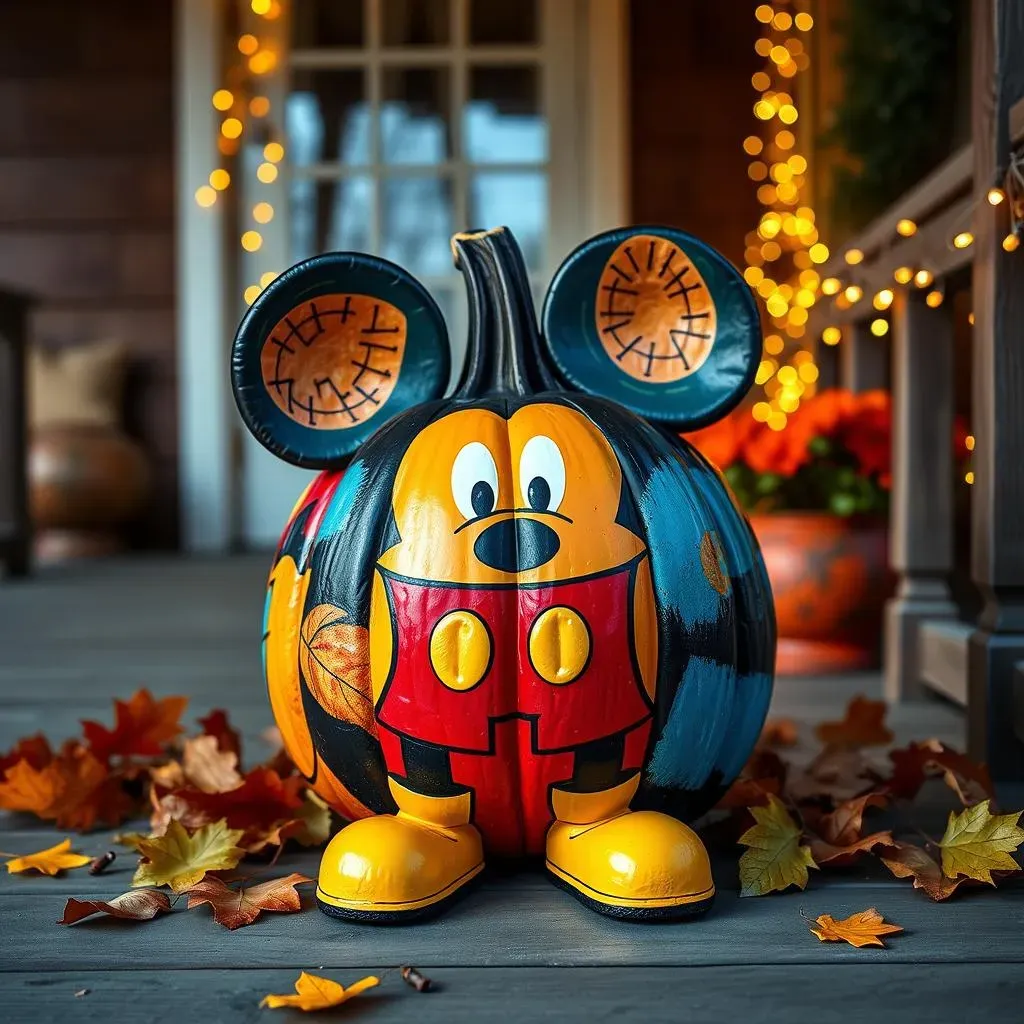
so maybe you're not into the whole carving thing, or maybe you just want to add some extra pizzazz to your Mickey Mouse pumpkin. No problem! Painting is a fantastic way to decorate your pumpkin without any sharp tools involved. You can go for a classic Mickey color scheme – red shorts, white gloves, yellow shoes – or get creative with your own unique designs. Acrylic paints work best on pumpkins, as they're durable and weather-resistant. Start with a base coat of white to make the colors really pop. Then, sketch out your design with a pencil before you start painting.
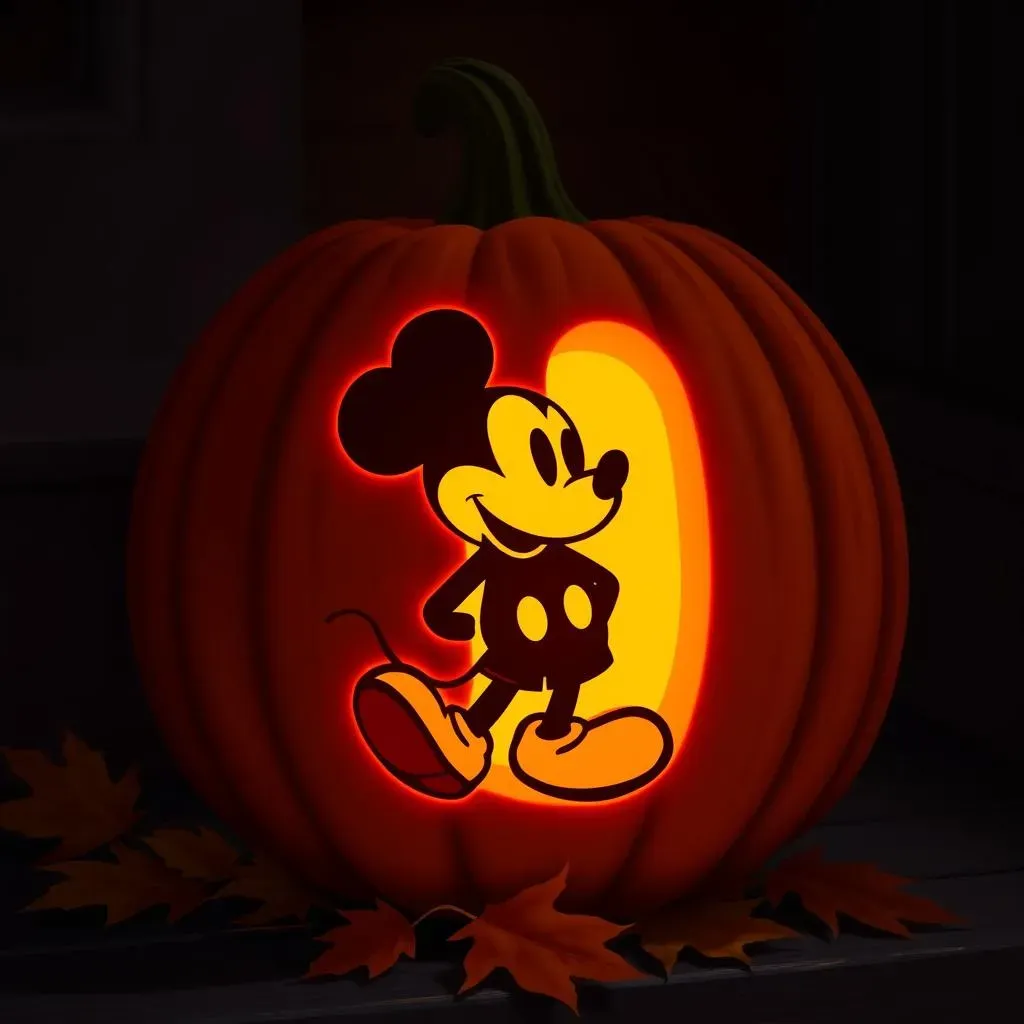
For a fun twist, try using glow-in-the-dark paint to create a spooky, illuminated Mickey Mouse pumpkin. Or, if you're feeling extra fancy, you can add glitter, sequins, or other embellishments to your painted design. Just remember to seal your finished masterpiece with a clear coat of varnish to protect it from the elements.
Mickey Mouse Pumpkin Decoupage: A Collage of Disney Magic
Decoupage is another fantastic way to decorate your Mickey Mouse pumpkin without carving. It involves gluing paper cutouts onto the surface of the pumpkin to create a collage-like effect. You can use anything from Disney-themed scrapbook paper to vintage Mickey Mouse comic books. The possibilities are endless!
To decoupage your pumpkin, start by gathering your materials: paper cutouts, Mod Podge (a type of decoupage glue), a foam brush, and scissors. Cut out your desired images from the paper and arrange them on the pumpkin to get an idea of the layout. Then, apply a thin layer of Mod Podge to the back of each cutout and carefully press it onto the pumpkin. Smooth out any wrinkles or air bubbles with your fingers. Once you've covered the entire pumpkin, apply a final coat of Mod Podge to seal everything in. Let it dry completely, and you've got a unique and eye-catching Mickey Mouse pumpkin!
Decoration Style | Materials Needed | Difficulty |
|---|---|---|
Painted Mickey | Acrylic paints, brushes, stencils | Easy to Medium |
Decoupage Mickey | Paper cutouts, Mod Podge, foam brush | Easy to Medium |
Glittered Mickey | Glitter, glue, sealant | Easy |
Accessorizing Your Mickey Mouse Pumpkin: Hats, Bows, and More!
Sometimes, all it takes is a few well-chosen accessories to transform your Mickey Mouse pumpkin from ordinary to extraordinary. Think of your pumpkin as a blank canvas and let your creativity shine! A classic Mickey Mouse hat is a must-have accessory. You can buy a miniature hat online or make your own out of felt or cardboard. Attach it to the top of the pumpkin with hot glue or craft wire.
For a feminine touch, add a Minnie Mouse bow! You can make a bow out of ribbon, fabric, or even paper. Attach it to the side of the pumpkin with hot glue or pins. Other fun accessories include Mickey Mouse gloves, ears, and even a little pair of shoes. You can find these items at most craft stores or online retailers. Get creative and have fun accessorizing your Mickey Mouse pumpkin to create a truly unique and personalized Halloween decoration.
Conclusion: A Mickey Mouse Halloween to Remember
With a little creativity and these pumpkin carving ideas Mickey Mouse, you're well on your way to creating a Halloween display that's both spooky and sweet. From simple stencils to elaborate designs, there's a Mickey Mouse pumpkin project for every skill level. So gather your tools, choose your favorite design, and get ready to carve some Disney magic into your Halloween night. Happy carving!