Table of Contents
Halloween is creeping closer, and what better way to celebrate than by combining two of the greatest things in the universe: Marvel superheroes and creatively carved pumpkins? If you're on the hunt for pumpkin carving ideas marvel-style, you've hit the jackpot. Forget about basic jack-o'-lanterns; we're talking about transforming your porch into a Hall of Fame for Earth's Mightiest Heroes (and a few villains too).
Unleash Your Inner Hero: Easy Marvel Pumpkin Carving Ideas

Unleash Your Inner Hero: Easy Marvel Pumpkin Carving Ideas
Choosing Your Heroic Canvas
so you're ready to dive into the world of Marvel pumpkin carving, awesome! First things first: you need a pumpkin. But not just any pumpkin. Think about the character you want to carve. A round, stout pumpkin is perfect for someone like the Hulk, while a taller, more slender one might be better suited for Thor or Loki. Check out the shape, size, and surface. You're looking for a smooth, relatively blemish-free surface to make tracing easier. And remember, bigger isn't always better; sometimes, a smaller pumpkin is easier to manage, especially if you're tackling a more intricate design.
Don't forget to give your pumpkin a little "hero's welcome" by washing it down with soap and water. This'll get rid of any dirt or grime that could mess with your carving. Once it's dry, you're ready to roll!
Gathering Your Avengers-Worthy Tools
You wouldn't send Iron Man into battle without his suit, and you shouldn't carve a pumpkin without the right tools. Sure, you *could* use a basic kitchen knife, but trust me, you'll have a much easier time (and get better results) with a proper carving kit. Look for kits that include small saws, gouges, and scrapers. These will allow you to create finer details and avoid those frustrating jagged edges. Also, scoop is essential for removing the pumpkin guts.
Consider a poking tool; it's indispensable for transferring your stencil. A sturdy spoon or ice cream scoop to scrape the insides clean. And a good source of light, like a lamp or flashlight, to see what you're doing.
Stencils: Your Secret Weapon
Unless you're some kind of pumpkin-carving savant, you'll probably want to use a stencil. Luckily, there are tons of free Marvel pumpkin carving stencils available online. A quick search will turn up everything from simple character outlines to incredibly detailed portraits. Print out your chosen stencil and tape it to your pumpkin. Then, using a poking tool or needle, poke holes along the stencil lines. This will transfer the design onto the pumpkin's surface. Remove the stencil, and you'll have a dotted outline to guide your carving.
When choosing a stencil, think about your skill level. If you're a beginner, start with something simple, like Captain America's shield or the Avengers logo. If you're feeling more ambitious, go for a more complex design, like Iron Man's mask or Black Widow's emblem. Remember, there's no shame in starting small, the goal is to have fun and create something awesome!
Stencil Type | Difficulty | Recommended For |
|---|---|---|
Simple Outlines (e.g., Shield) | Easy | Beginners, Kids |
Character Faces (e.g., Hulk) | Medium | Intermediate Carvers |
Intricate Designs (e.g., Iron Man) | Hard | Experienced Carvers |
Avengers Assemble: Stencils for SuperPowered Pumpkin Carvings
Avengers Assemble: Stencils for SuperPowered Pumpkin Carvings
Iron Man's Iconic Arc Reactor
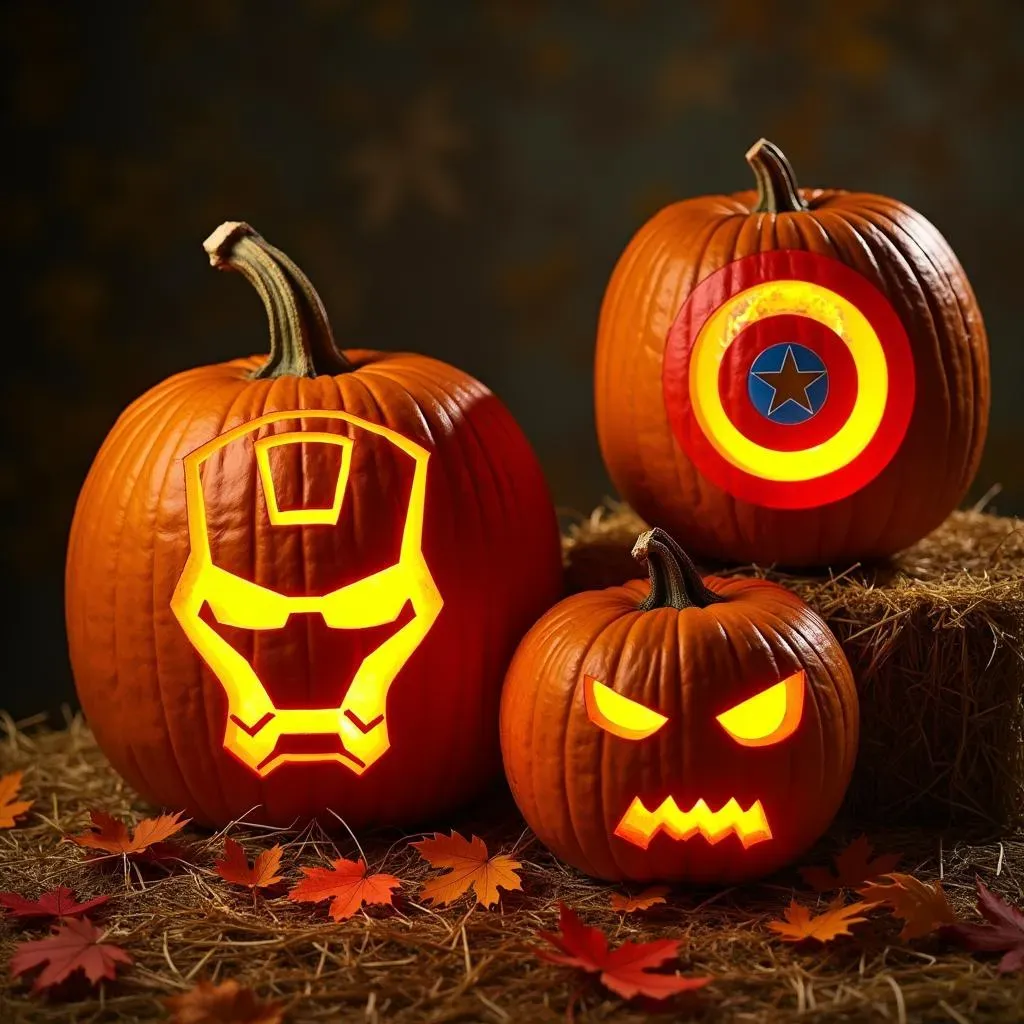
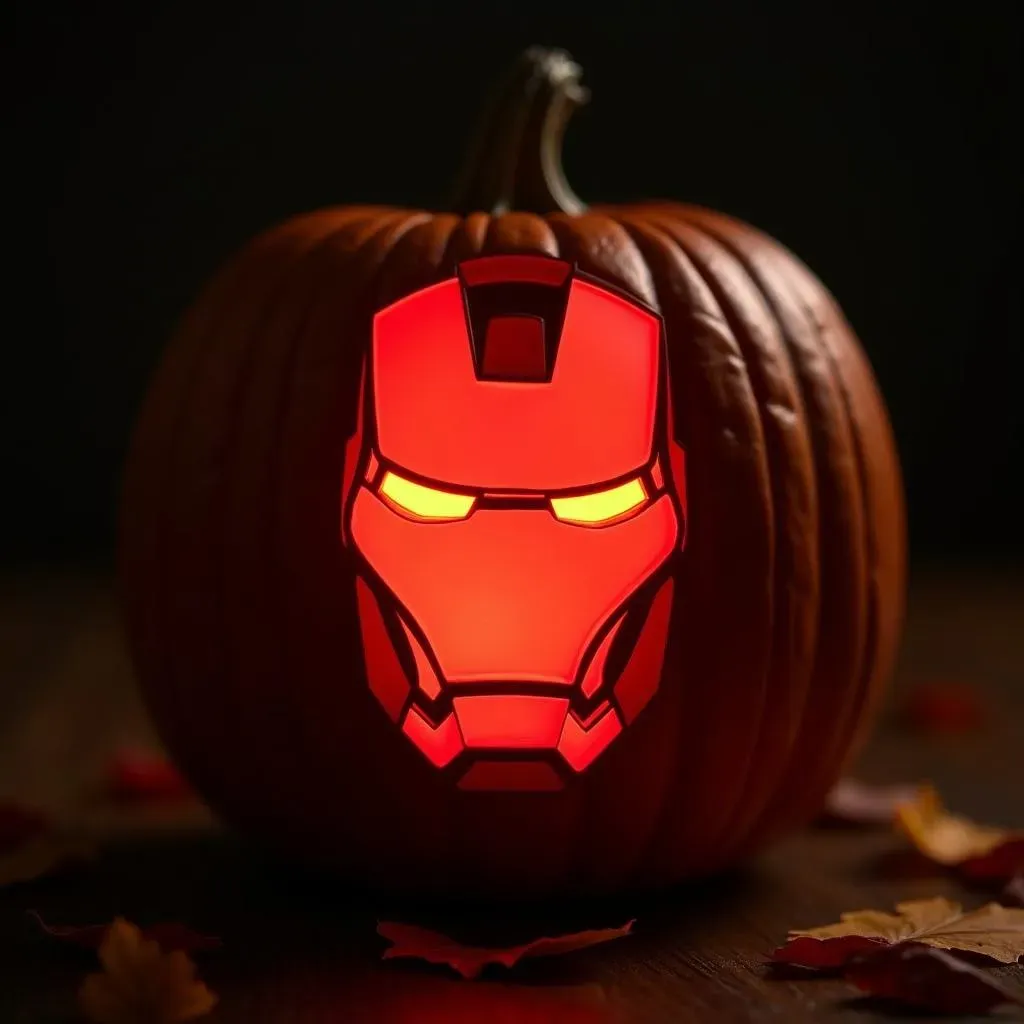
Alright, let's kick things off with a bang – Iron Man! Carving Tony Stark's Arc Reactor into a pumpkin is a surefire way to impress. The key here is precision. You'll want a stencil that clearly defines the concentric circles and the intricate details within. Once you've got your stencil taped on, use a small poking tool to trace the design carefully. When it comes to carving, go slow and steady. Use a thin, sharp carving tool to create clean lines and avoid jagged edges. Remember, the Arc Reactor is all about clean, geometric shapes, so take your time and focus on accuracy.
To really make your Iron Man pumpkin shine, consider using a battery-operated tea light or LED to illuminate the Arc Reactor from within. This will create a striking visual effect that's sure to turn heads. And if you're feeling extra ambitious, you could even try adding some additional details, like Iron Man's eyes or the outline of his helmet. Just remember to keep it simple and avoid overcrowding the design.
Captain America's Unbreakable Shield
Next up, we have Captain America's iconic shield. This is a great option for beginners, as the design is relatively simple and straightforward. Find a stencil of the shield online and print it out. Tape the stencil to your pumpkin, and use a poking tool to transfer the design. When carving, start with the outer circle and work your way inwards. Use a small saw or gouge to remove the pumpkin flesh within each section of the shield. Be careful not to cut too deep, as you want to maintain the shield's overall shape and integrity.
To add some extra flair, consider painting the shield with red, white, and blue acrylic paint. This will really make it pop and give it a more authentic look. You could also try adding some battle damage to the shield, like cracks or dents, to give it a more weathered appearance. Just remember to have fun and let your creativity run wild!
Character | Stencil Complexity | Best For |
|---|---|---|
Iron Man (Arc Reactor) | Medium-High | Precision Carvers |
Captain America (Shield) | Easy | Beginners |
The Hulk (Face) | Medium | Those Who Like a Challenge |
From Thanos to Groot: Mastering Marvel Character Pumpkin Designs
From Thanos to Groot: Mastering Marvel Character Pumpkin Designs
The Mad Titan's Menacing Grin (Thanos)
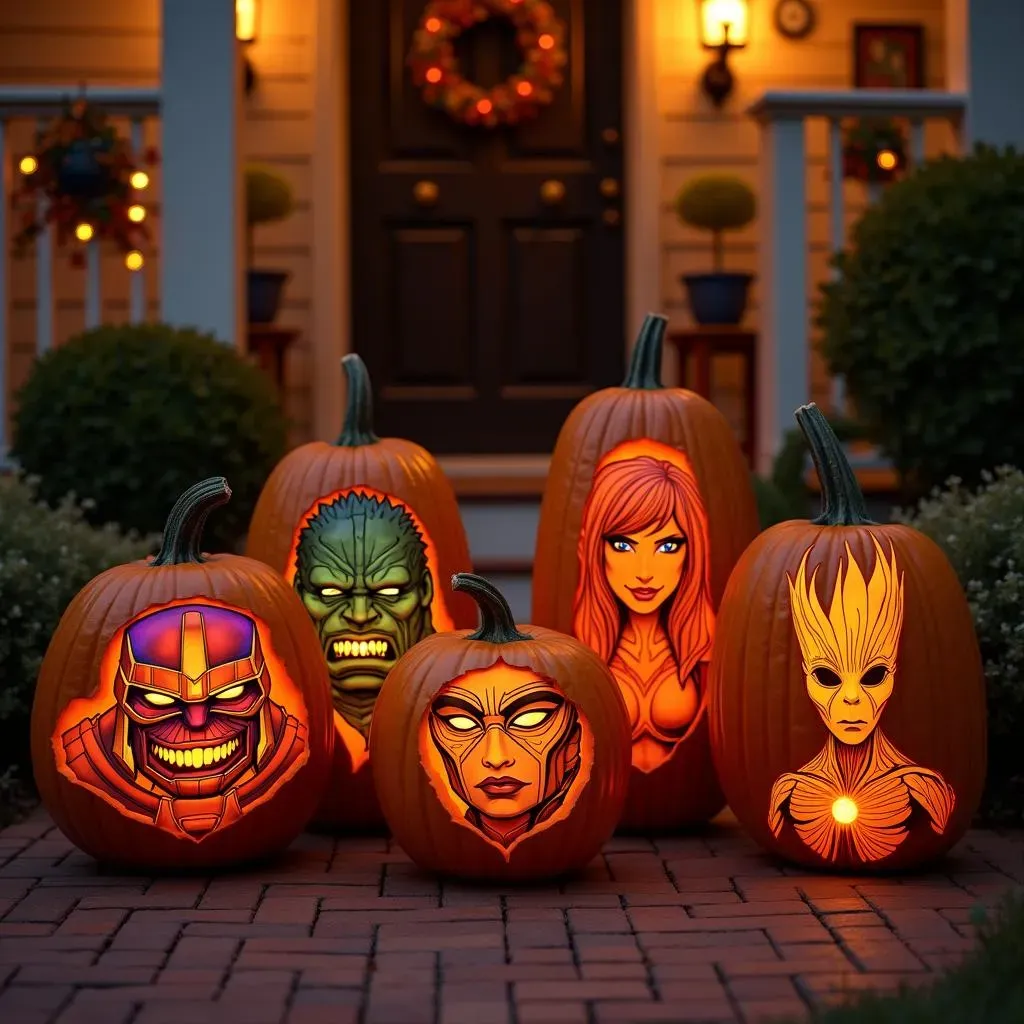
Alright, let's talk Thanos. Carving the Mad Titan is not for the faint of heart, but the results are totally worth it. The key to a good Thanos pumpkin is capturing his menacing expression. You'll want a stencil that emphasizes his furrowed brow, his cruel smile, and his powerful chin. When carving, pay close attention to the shadows and highlights. Use varying depths to create a sense of dimension and make his face really pop. And don't forget the Infinity Gauntlet! Carving the Gauntlet is tricky, but it adds a ton of visual interest to the design. Use a thin, sharp carving tool to create the intricate details of the stones.
To really sell the effect, consider using a purple light inside the pumpkin. This will give Thanos an eerie, otherworldly glow. You could also try adding some cracks or fissures to the pumpkin's surface to make him look even more battle-worn.
The Incredible Hulk's Raging Visage
Hulk smash... pumpkins! Carving the Hulk is all about capturing his raw power and intensity. Look for a stencil that showcases his bulging muscles, his snarling teeth, and his angry eyes. When carving, don't be afraid to go bold. Use large, sweeping cuts to create a sense of movement and energy. Focus on the contours of his face and body to emphasize his strength. And don't forget his signature green skin! You can achieve this by using a green light inside the pumpkin or by painting the surface with green acrylic paint.
For an extra touch, try adding some torn fabric or ripped clothing to the design. This will give the Hulk a more savage and untamed look. You could also try carving some cracks or fissures into the pumpkin's surface to simulate the damage he inflicts on everything he touches.
Black Widow's Deadly Elegance
Natasha Romanoff, a.k.a. Black Widow, brings a touch of sleekness to our pumpkin patch. For Black Widow, think sharp lines and a focus on her intense gaze. A stencil highlighting her determined expression and the subtle details of her hairstyle is key. Use precise cuts to define her features, and consider using a smaller tool for the finer details around her eyes and mouth. The goal is to capture her strength and intelligence through your carving.
To make your Black Widow pumpkin stand out, experiment with shading. Carve some areas deeper than others to create shadows that accentuate her cheekbones and jawline. A red light inside the pumpkin can subtly mimic the red in her hourglass symbols, adding a cool, thematic touch.
Baby Groot's Adorable Charm
We are Groot... and we are also carving pumpkins! Baby Groot is a fantastic choice for a cute and less intimidating Marvel pumpkin. Look for stencils that emphasize his big, innocent eyes and his twig-like body. When carving, use gentle, rounded cuts to create a soft and friendly appearance. Pay special attention to his mouth, as this is where a lot of his charm comes from.
To really bring Baby Groot to life, consider adding some small details like leaves or vines. You can carve these directly into the pumpkin's surface or attach them using toothpicks. A warm, inviting light inside the pumpkin will enhance his adorable features and make him the star of your Halloween display.
Character | Key Features to Emphasize | Lighting Suggestion |
|---|---|---|
Thanos | Menacing expression, Infinity Gauntlet | Purple light |
Hulk | Bulging muscles, angry eyes | Green light |
Black Widow | Sharp lines, intense gaze | Red light (subtle) |
Baby Groot | Big eyes, twig-like body | Warm, inviting light |
Light Up the Night: Tips for Flawless Marvel Pumpkin Carving
Light Up the Night: Tips for Flawless Marvel Pumpkin Carving
you've got your stencil, you've got your tools, and you've got a pumpkin ready to be transformed into a symbol of Marvel heroism. But how do you take your carving from "meh" to "marvel-ous"? It's all about the details, my friend. Lighting is key, and choosing the right tools can make all the difference. Let's dive into some tips that will help you light up the night with your flawless Marvel pumpkin carving.
First off, think about your lighting. A basic tea light is fine, but if you want to really make your pumpkin pop, consider using a battery-operated LED light. These lights come in a variety of colors, so you can choose one that complements your character. A green light for Hulk, a blue light for Captain America, a red light for Iron Man. You get the idea. Also, LED lights are much safer than candles, especially if you have kids or pets running around.
Mastering the Art of Shading
Shading can add a whole new dimension to your pumpkin carving. It involves carving the pumpkin at different depths to create areas of light and shadow. This technique can be used to emphasize certain features of your character, like the Hulk's bulging muscles or Thanos's menacing grin. To achieve shading, use a gouge or scraper to carefully remove thin layers of pumpkin flesh. The thinner the layer, the more light will pass through, creating a brighter area. Experiment with different depths to achieve the desired effect.
Another trick is to use a technique called "scoring." This involves lightly scratching the surface of the pumpkin with a sharp tool. Scoring doesn't remove any pumpkin flesh, but it does create a textured surface that reflects light differently. This can be used to add subtle details to your carving, like wrinkles or scars.
Protecting Your Masterpiece
So, you've spent hours carving your perfect Marvel pumpkin. The last thing you want is for it to rot and collapse before Halloween. Luckily, there are a few things you can do to prolong its lifespan. First, make sure to clean out all of the pumpkin guts thoroughly. Any remaining flesh will attract bacteria and speed up the decomposition process. You can also try spraying the inside of the pumpkin with a bleach solution (1 part bleach to 10 parts water). This will kill any bacteria that are already present and help to prevent future growth.
Another tip is to keep your pumpkin cool and dry. Avoid placing it in direct sunlight or near a heat source. If possible, store it in a refrigerator or cool basement when it's not on display. You can also try applying a thin layer of petroleum jelly to the cut edges of the pumpkin. This will help to seal in moisture and prevent the pumpkin from drying out.
Tip | Description | Benefits |
|---|---|---|
Use LED lights | Battery-operated lights in various colors. | Safer, customizable lighting. |
Master Shading | Carve at different depths. | Adds dimension and detail. |
Protect the Pumpkin | Clean thoroughly, use bleach solution, keep cool. | Prolongs lifespan. |
Level Up Your Halloween with Marvel Pumpkin Carvings
So, there you have it – a treasure trove of pumpkin carving ideas marvel fans will adore. Whether you choose to carve the stoic Captain America's shield or the menacing visage of Thanos, remember that the most important thing is to have fun and let your creativity shine. These pumpkins aren't just decorations; they're a testament to your fandom and artistic flair. Light them up, display them proudly, and let the neighborhood marvel at your superhero-inspired creations. Happy carving, and may your Halloween be filled with more treats than tricks!