Table of Contents
Halloween is creeping closer, and what better way to celebrate than by merging the spooky season with the epic world of Middle-earth? Forget your basic jack-o'-lantern; this year, we're diving deep into the realm of pumpkin carving ideas lord of the rings. Whether you're a seasoned carving pro or a hobbit just starting your adventure, there's a design here for you. From the fiery Balrog to the wise Gandalf, and even the mischievous Gollum, get ready to transform your porch into a scene straight out of Tolkien's masterpiece.
Gollum, Frodo, and More: Easy Lord of the Rings Pumpkin Carving Ideas
Gollum, Frodo, and More: Easy Lord of the Rings Pumpkin Carving Ideas
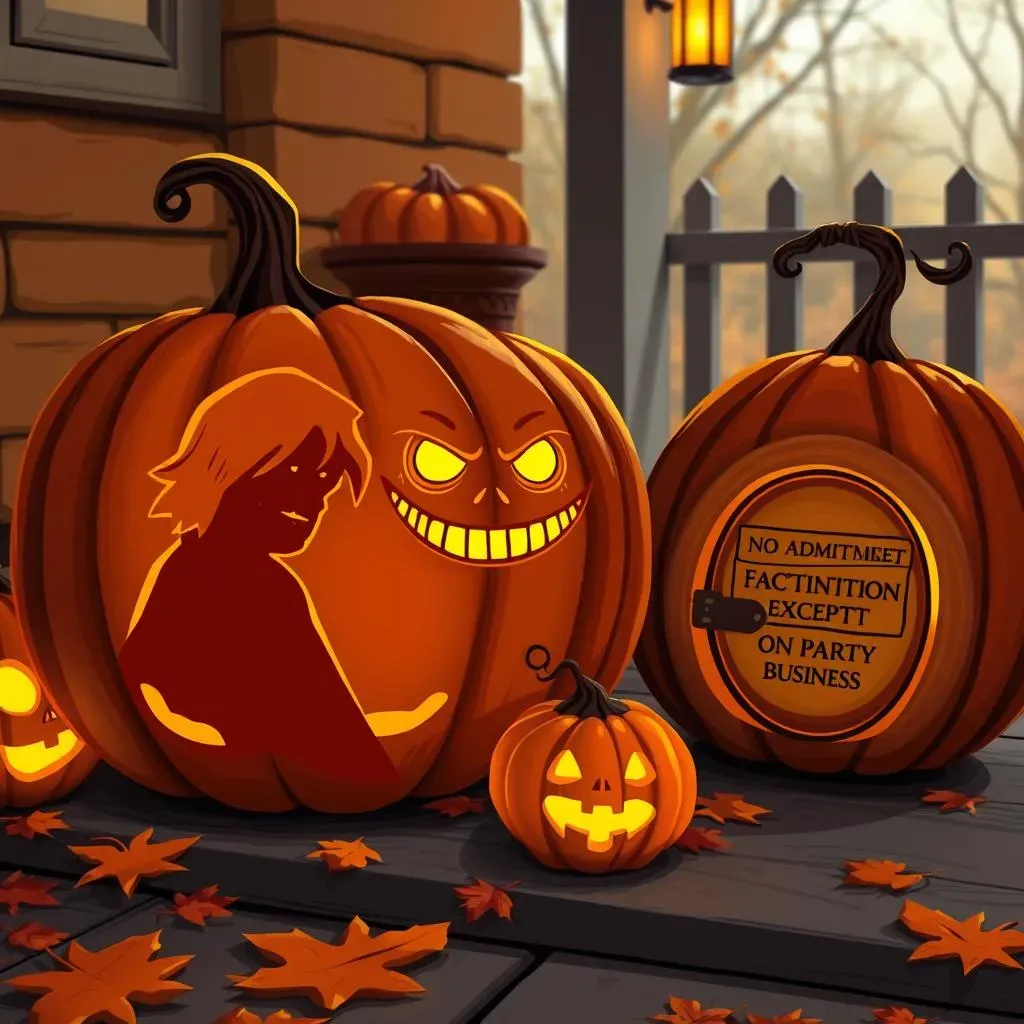
Frodo's Simple Silhouette
Let's start with Frodo, the brave little hobbit. A simple silhouette of Frodo is perfect for beginners. Think about that iconic side profile, with his curly hair and determined expression. You don't need intricate details; focus on capturing the essence of the character. A basic stencil will be your best friend here. Print one out, tape it to your pumpkin, and trace away! Remember, it's all about having fun, so don't stress about perfection.
Consider adding a small, stylized version of the One Ring somewhere near Frodo's silhouette. It’s a subtle touch that any LOTR fan will appreciate. I remember one year, my first attempt at a Frodo pumpkin looked more like a potato with hair. But hey, it still got a laugh, and that's what Halloween is all about, right? Embrace the imperfections!
Gollum's Creepy Grin
Next up, we have Gollum, the creepy, crawly creature obsessed with the Ring. Gollum's distinctive features—his large eyes, pointy ears, and sinister grin—make for a surprisingly easy carving. Focus on exaggerating those features for a truly spooky effect. Again, a simple stencil works wonders. The key is to use a thin carving tool to create those fine lines around his mouth and eyes. Safety first, though! Take your time and don't rush.
To really amplify the creepiness, try adding some backlighting behind Gollum’s eyes. It'll give him that eerie, unsettling glow that's sure to send shivers down the spines of trick-or-treaters. Just picture it: a dark night, and Gollum's glowing eyes peering out from your porch. *shudders* That's Halloween done right!
Shire-Inspired Simplicity
If character faces aren't your thing, how about a Shire-inspired design? Think about the rolling hills, cozy hobbit holes, and the general peacefulness of the Shire. A simple outline of a hobbit hole door, surrounded by round windows and perhaps a smoking chimney, is a great option. You can even add some simple floral patterns around the door for extra flair. This design is all about capturing the warmth and charm of Hobbiton.
To take it up a notch, consider carving a tiny "No Admittance Except on Party Business" sign above the door. It's a subtle nod to Bilbo's eccentric personality and will definitely earn you some bonus points with fellow LOTR nerds. Plus, it’s a fun way to add a bit of humor to your pumpkin display. Who knows, maybe some friendly hobbits will stop by for a visit!
"You Shall Not Pass!" Gandalf Pumpkin Carving: A StepbyStep Guide
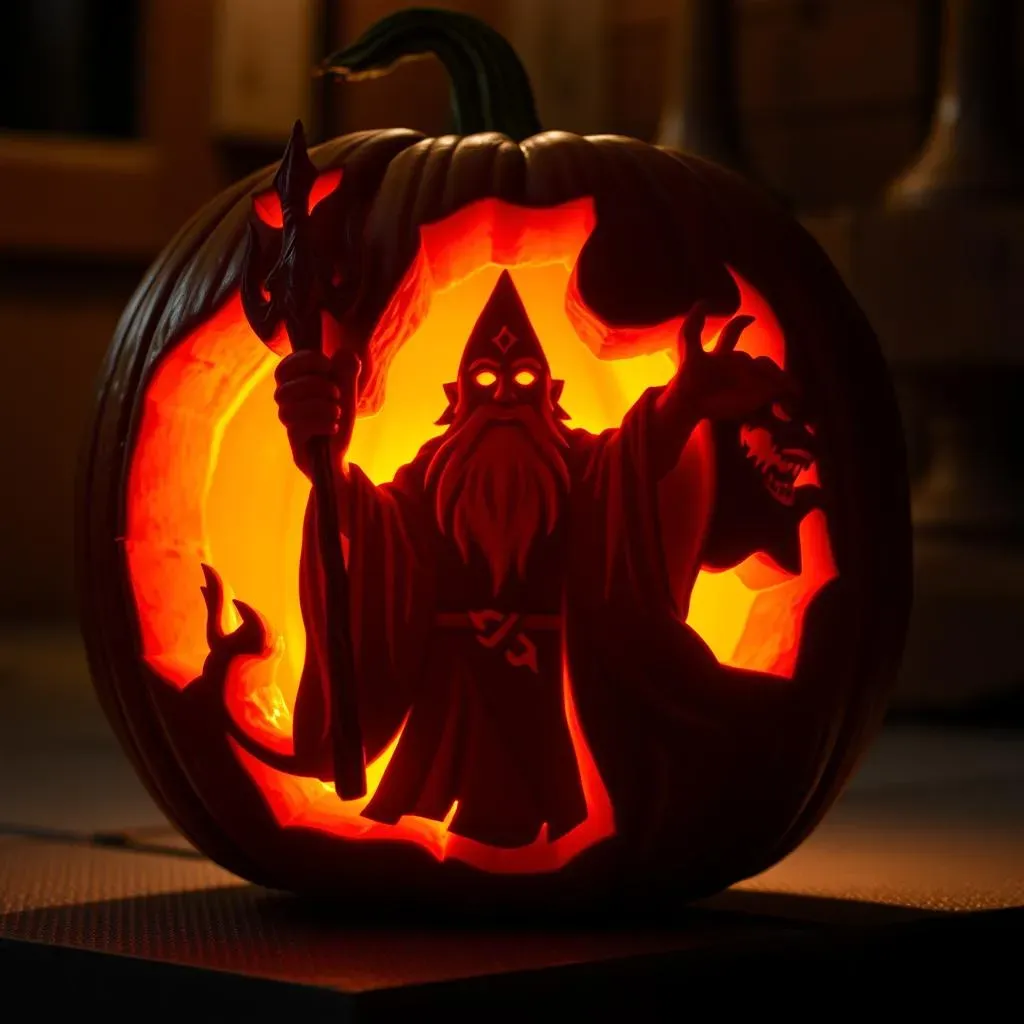
"You Shall Not Pass!" Gandalf Pumpkin Carving: A StepbyStep Guide
Alright, buckle up, because this is where things get epic! We're tackling the "You Shall Not Pass!" Gandalf pumpkin carving. This one's a bit more challenging, but trust me, the result is totally worth it. Imagine the look on everyone's faces when they see Gandalf the Grey, staff in hand, defying the Balrog on your front porch. It’s a statement piece, a declaration of your LOTR devotion, and a guaranteed conversation starter.
The key to a successful Gandalf carving is a good stencil. You can find tons of free ones online – just search for "Gandalf pumpkin stencil" or "You Shall Not Pass pumpkin pattern." Look for one that captures Gandalf's stern expression and the dynamic pose of him facing off against the fiery Balrog. Once you've got your stencil, print it out and get ready to transfer it to your pumpkin. Remember, patience is key! Don't rush the process, or you might end up with a Gandalf that looks more like a grumpy garden gnome.
Before you even think about touching a carving tool to your pumpkin, make sure you've got the right setup. You'll need a well-lit workspace, a sturdy table, and all your tools within easy reach. Safety goggles are a must – pumpkin guts in the eye are no fun! And, of course, a good playlist of LOTR music to set the mood. Because let’s be honest, carving a Gandalf pumpkin without the soundtrack is just wrong.
Step | Action | Tip |
|---|---|---|
1 | Prepare the Pumpkin | Cut a hole in the bottom instead of the top to preserve the stem. |
2 | Transfer the Stencil | Tape the stencil securely and use a poking tool to outline the design. |
3 | Carve the Details | Start with the smallest, most intricate details first. |
4 | Light it Up | Use an LED candle or a string of fairy lights for a magical glow. |
Now, for the actual carving. Start with the small details first – Gandalf's beard, his staff, and the flames of the Balrog. Use a thin carving tool for these intricate areas. Once you've got the small stuff out of the way, move on to the larger areas. Remember to carve slowly and carefully, following the lines of your stencil. If you accidentally slip, don't panic! You can usually fix minor mistakes with a toothpick or by smoothing out the edges.
Beyond the Shire: Advanced Lord of the Rings Pumpkin Designs
Beyond the Shire: Advanced Lord of the Rings Pumpkin Designs
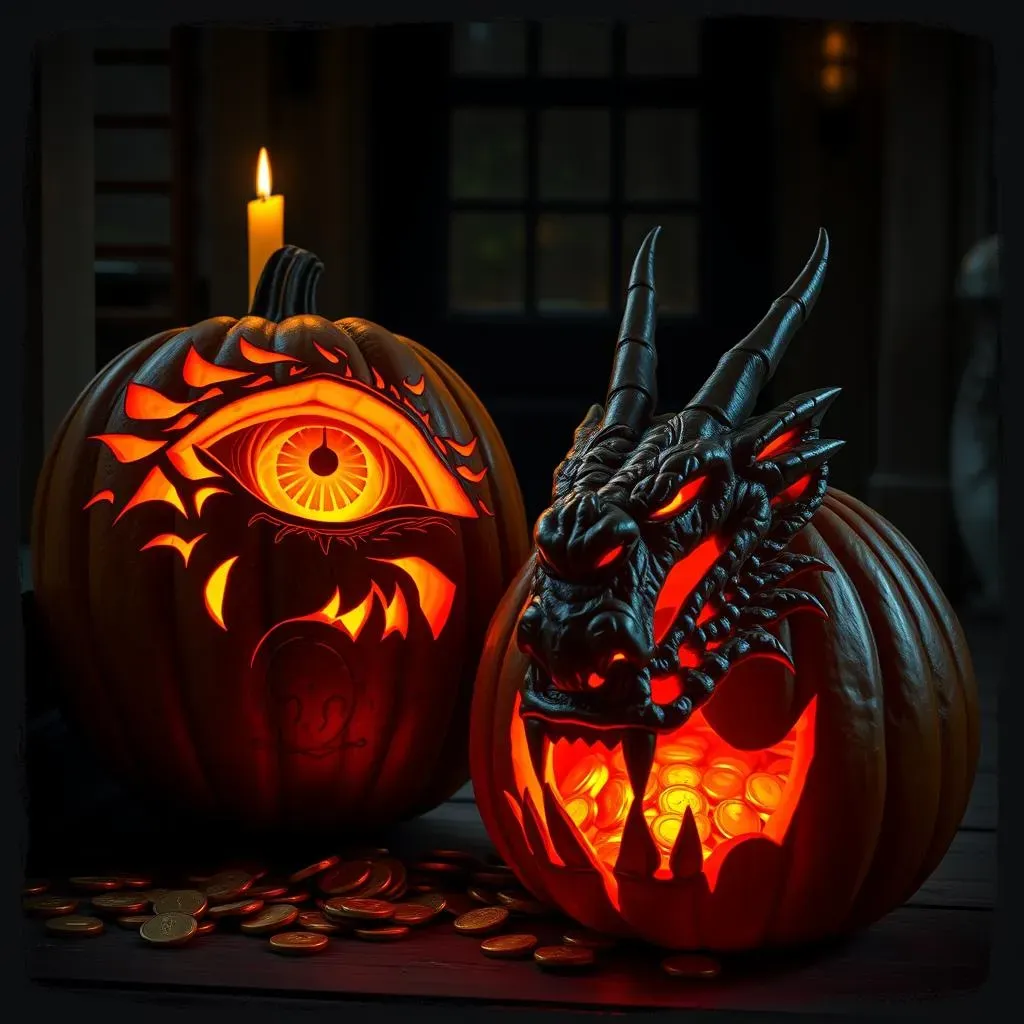
The Eye of Sauron: A Fiery Challenge
Ready to step up your pumpkin game? Let's tackle the Eye of Sauron. This design is all about capturing that menacing, all-seeing gaze. Think fiery colors, sharp lines, and an overall sense of dread. To really nail this one, you'll need a detailed stencil and a steady hand. Start by carving out the basic shape of the eye, then carefully add the intricate details of the pupil and the surrounding flames. This one's not for the faint of heart, but the result is absolutely stunning. Imagine the Eye of Sauron glowing ominously on your porch – it's the ultimate power move for any LOTR fan!
Pro tip: use different depths of carving to create a more realistic effect. Carve deeper in the areas where you want the light to shine through more intensely, and shallower in the areas where you want a more subtle glow. This will give your Eye of Sauron pumpkin a dynamic, three-dimensional look that's sure to impress. And don't be afraid to experiment with different lighting techniques – a flickering candle or a colored LED can really enhance the fiery effect. It's all about creating that sense of impending doom!
I’m not gonna lie, this one took me a few tries to get right. The first time, it looked more like a confused cyclops than the Dark Lord's all-seeing eye. But hey, practice makes perfect, right? Keep at it, and you'll be amazed at what you can create.
Smaug the Magnificent: Dragon Pumpkin Art
If you're feeling particularly ambitious, why not try carving Smaug the Magnificent? This is a truly epic undertaking, but the payoff is huge. Smaug's intricate scales, menacing teeth, and fiery breath make for a visually stunning design. You'll need a high-quality stencil and a lot of patience for this one. Start by outlining the basic shape of the dragon, then gradually add the details of the scales, wings, and facial features. This is a great way to show off your carving skills and impress your friends and neighbors.
To really make your Smaug pumpkin stand out, consider adding some extra details, like a pile of gold coins beneath the dragon or a miniature version of the Lonely Mountain in the background. You can even use some craft foam or cardboard to create three-dimensional elements that will really bring your design to life. And don't forget the lighting! A red or orange LED will give Smaug that fiery, dragon-like glow that's sure to terrify (and delight) trick-or-treaters. Just be careful not to set your pumpkin on fire – we don't want a repeat of the Lonely Mountain incident!
Design | Difficulty | Details | Lighting |
|---|---|---|---|
Eye of Sauron | Advanced | Fiery details, sharp lines | Flickering candle, colored LED |
Smaug the Magnificent | Expert | Intricate scales, menacing teeth | Red or orange LED |
Tools of the Trade: Essential Gear for LOTR Pumpkin Carving
Tools of the Trade: Essential Gear for LOTR Pumpkin Carving
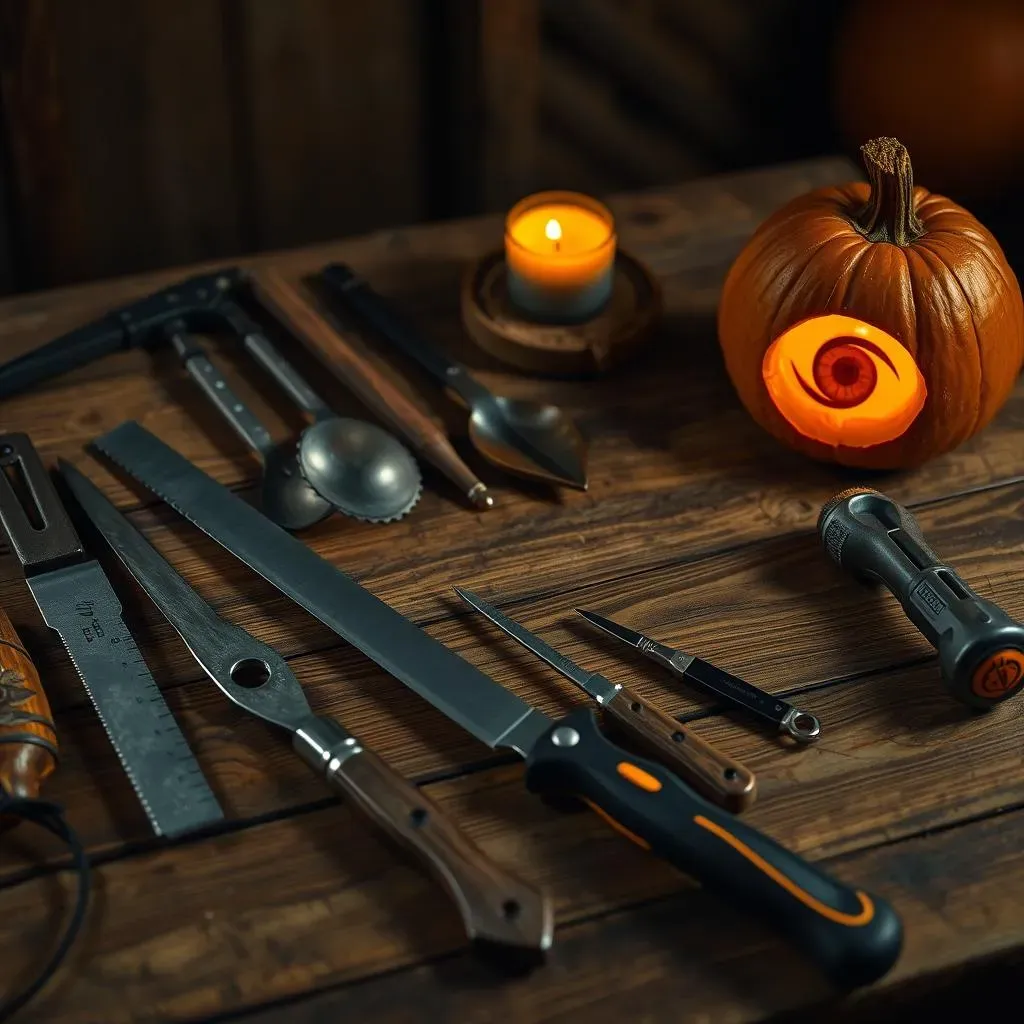
The Basic Toolkit: What You Absolutely Need
Alright, before you even think about tackling Smaug, let's talk tools. You can't carve Middle-earth masterpieces with just any old knife. You need the right gear! At the very least, you'll need a good carving kit. These usually include a variety of saws, scoops, and detail tools. A sturdy poking tool is a must for transferring stencils, and a good scoop will help you get all that pumpkin gunk out. Trust me, you don't want to skip this step. Nobody wants a moldy Gandalf!
Beyond the basic kit, consider investing in some specialized tools. A thin, flexible carving knife is perfect for creating those intricate details in designs like the Eye of Sauron or Smaug's scales. And don't forget about lighting! A good LED candle or a string of fairy lights can make all the difference in how your pumpkin looks at night. It's all about creating that magical, Middle-earth ambiance.
Beyond the Basics: Level Up Your Carving Game
Ready to take your carving skills to the next level? Then it's time to invest in some advanced tools. A rotary tool, like a Dremel, can be a game-changer for creating smooth lines and intricate details. These tools allow you to carve with precision and control, making even the most complex designs possible. Just be careful – these things are powerful! Start with a low speed and practice on a scrap pumpkin before you tackle your masterpiece.
Another useful tool is a sculpting kit. These kits include a variety of small, specialized tools that are perfect for creating three-dimensional effects. You can use them to add texture to Smaug's scales, create depth in the Eye of Sauron, or even sculpt miniature versions of your favorite LOTR characters. The possibilities are endless! It's all about experimenting and finding what works best for you.
Safety First, Hobbits!
let's get serious for a second. Carving pumpkins can be dangerous if you're not careful. Always use caution when handling sharp tools, and never let children carve unsupervised. A good pair of carving gloves can protect your hands from cuts and scrapes. And don't forget about eye protection! Pumpkin guts in the eye are no fun for anyone.
Also, make sure you have a well-lit workspace. Carving in the dark is a recipe for disaster. And take breaks! Carving can be tiring, especially when you're working on a complex design. Get up, stretch your legs, and grab a snack. Your hands (and your pumpkin) will thank you for it.
Tool | Use | Safety Tip |
|---|---|---|
Carving Knife | Cutting large shapes | Always cut away from yourself |
Detail Tool | Creating fine lines | Use a light touch |
Rotary Tool | Smooth lines, intricate details | Start with a low speed |
Scoop | Removing pumpkin guts | Wear gloves |
Light Up Middleearth: Displaying Your Lord of the Rings Pumpkin Carvings
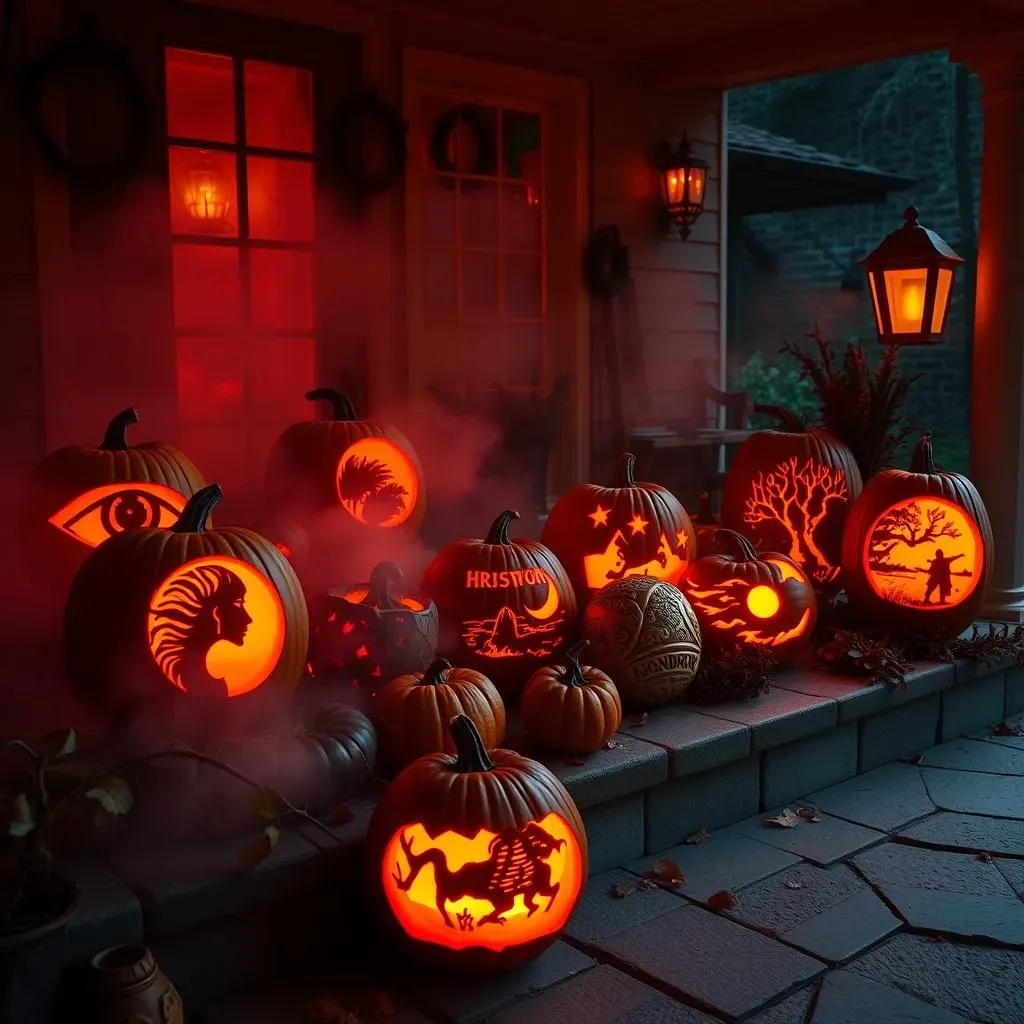
Light Up Middleearth: Displaying Your Lord of the Rings Pumpkin Carvings
Setting the Stage: Ambiance is Everything
you've spent hours carving your masterpiece, now it's time to show it off! But slapping a pumpkin on your porch isn't enough. We're talking Middle-earth here, so we need to create the right ambiance. Think about the lighting, the placement, and the overall vibe. Do you want a spooky, Mordor-esque display, or a cozy, Hobbiton-inspired scene? The choice is yours, but whatever you do, commit to the theme!
Consider adding some extra touches to enhance the effect. A fog machine can create a spooky, ethereal atmosphere, while some strategically placed branches and leaves can evoke the forests of Middle-earth. And don't forget about sound! A subtle soundtrack of LOTR music or some spooky ambient sounds can really set the mood. It's all about creating an immersive experience that will transport your guests to another world.
Choosing the Right Light Source: LEDs vs. Candles
Now, let's talk lighting. Traditionally, people use candles to illuminate their pumpkins, but I'm here to tell you that LEDs are the way to go. They're safer, longer-lasting, and they come in a variety of colors. Plus, you don't have to worry about accidentally setting your pumpkin (or your house) on fire. Trust me, your local fire department will thank you.
If you're going for a spooky vibe, a flickering orange or red LED can create a menacing glow. For a more magical effect, try a string of fairy lights. You can even find LEDs that change color, allowing you to create a dynamic, ever-changing display. And don't forget about placement! Experiment with different angles and positions to find the perfect lighting setup for your pumpkin. A well-lit pumpkin is a happy pumpkin!
Light Source | Pros | Cons | Best For |
|---|---|---|---|
LED Candle | Safe, long-lasting, various colors | Less traditional | General illumination, spooky effects |
Fairy Lights | Magical, ethereal | Can be less bright | Creating ambiance |
Real Candle | Traditional | Fire hazard, short-lasting | When you want to live dangerously (not recommended!) |
A Final Word: May Your Pumpkins Shine Bright!
So, there you have it – a treasure trove of pumpkin carving ideas lord of the rings to ignite your Halloween spirit. Whether you chose a simple hobbit hole or tackled the fiery Balrog, remember that the most important thing is to have fun and let your creativity shine. With a little patience, some handy tools, and a love for Tolkien's world, you can transform ordinary pumpkins into extraordinary works of art. May your jack-o'-lanterns light up the night, and may your Halloween be filled with Middle-earth magic!