Table of Contents
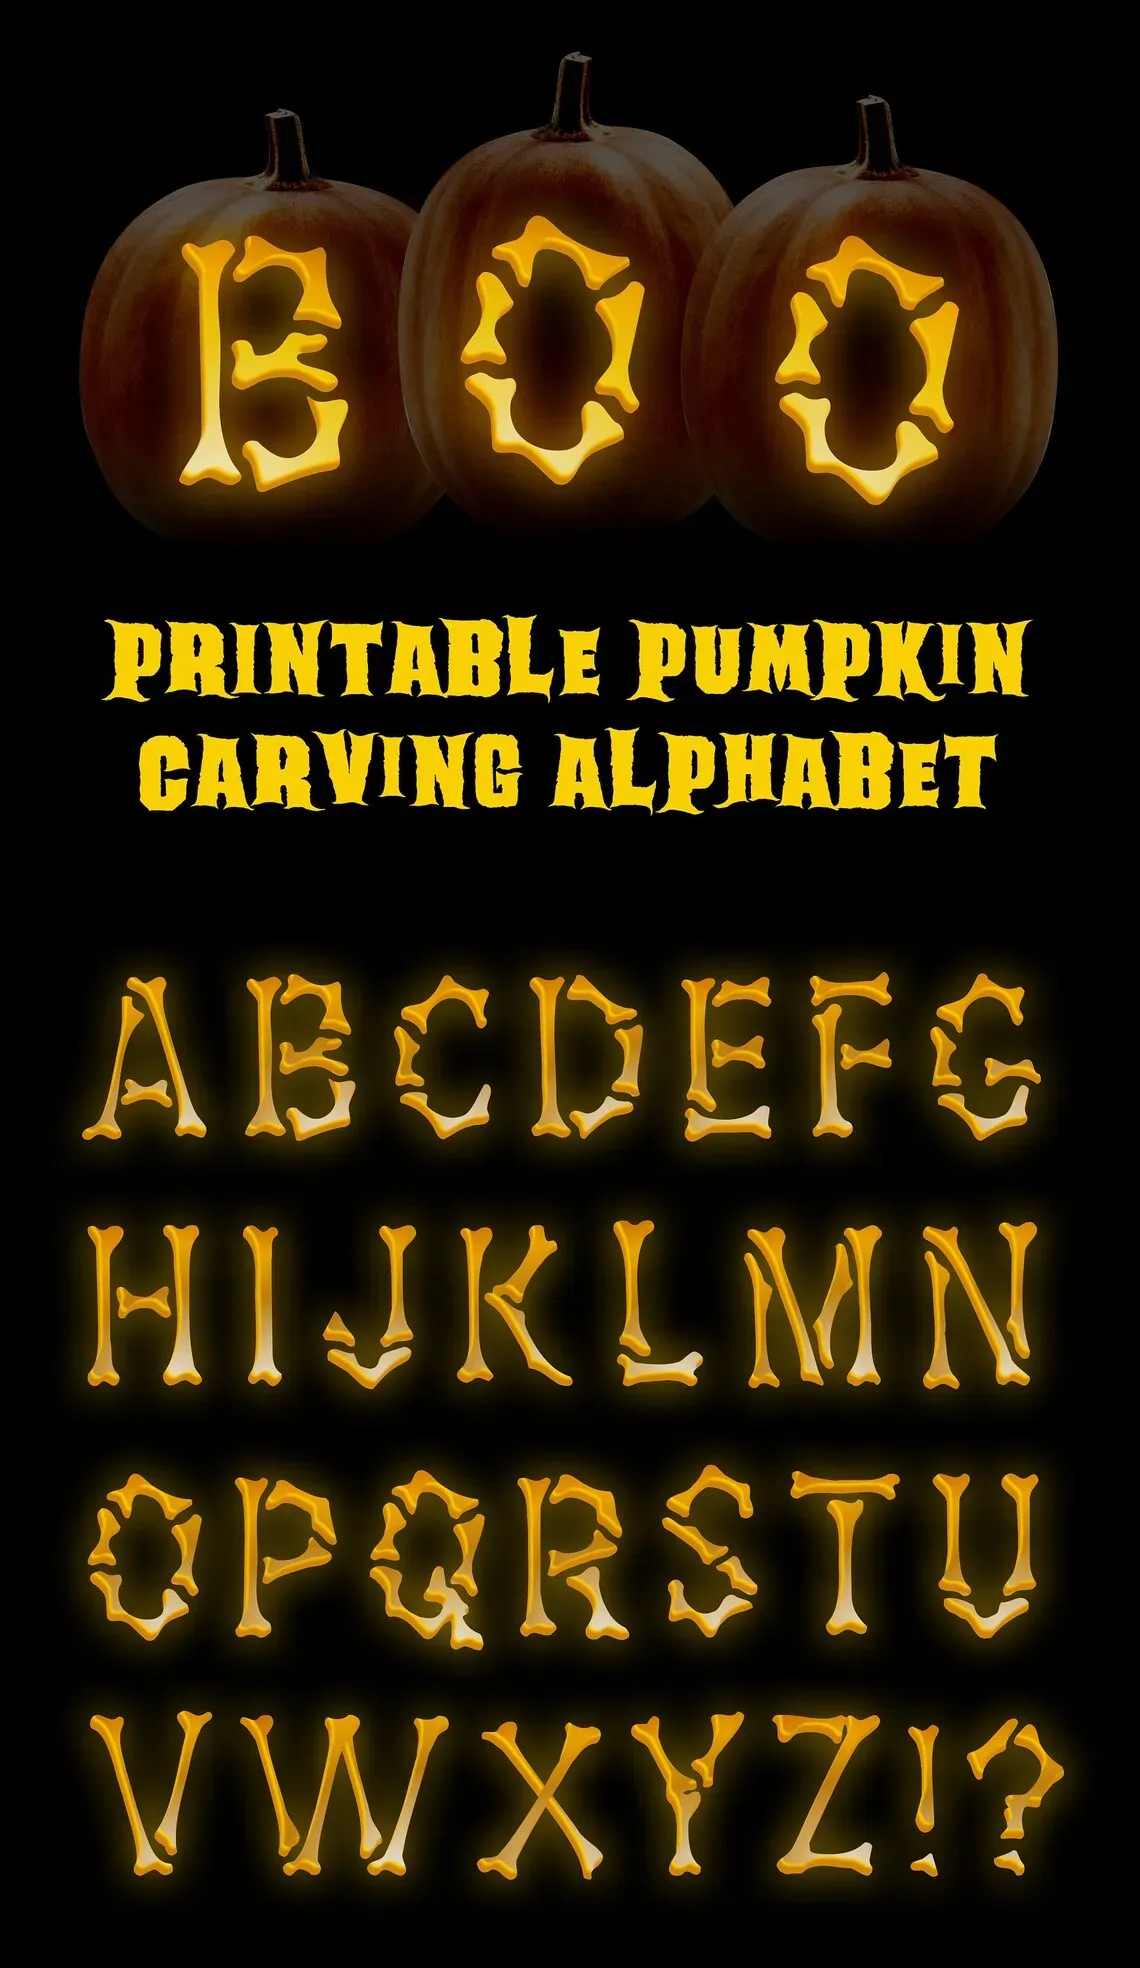
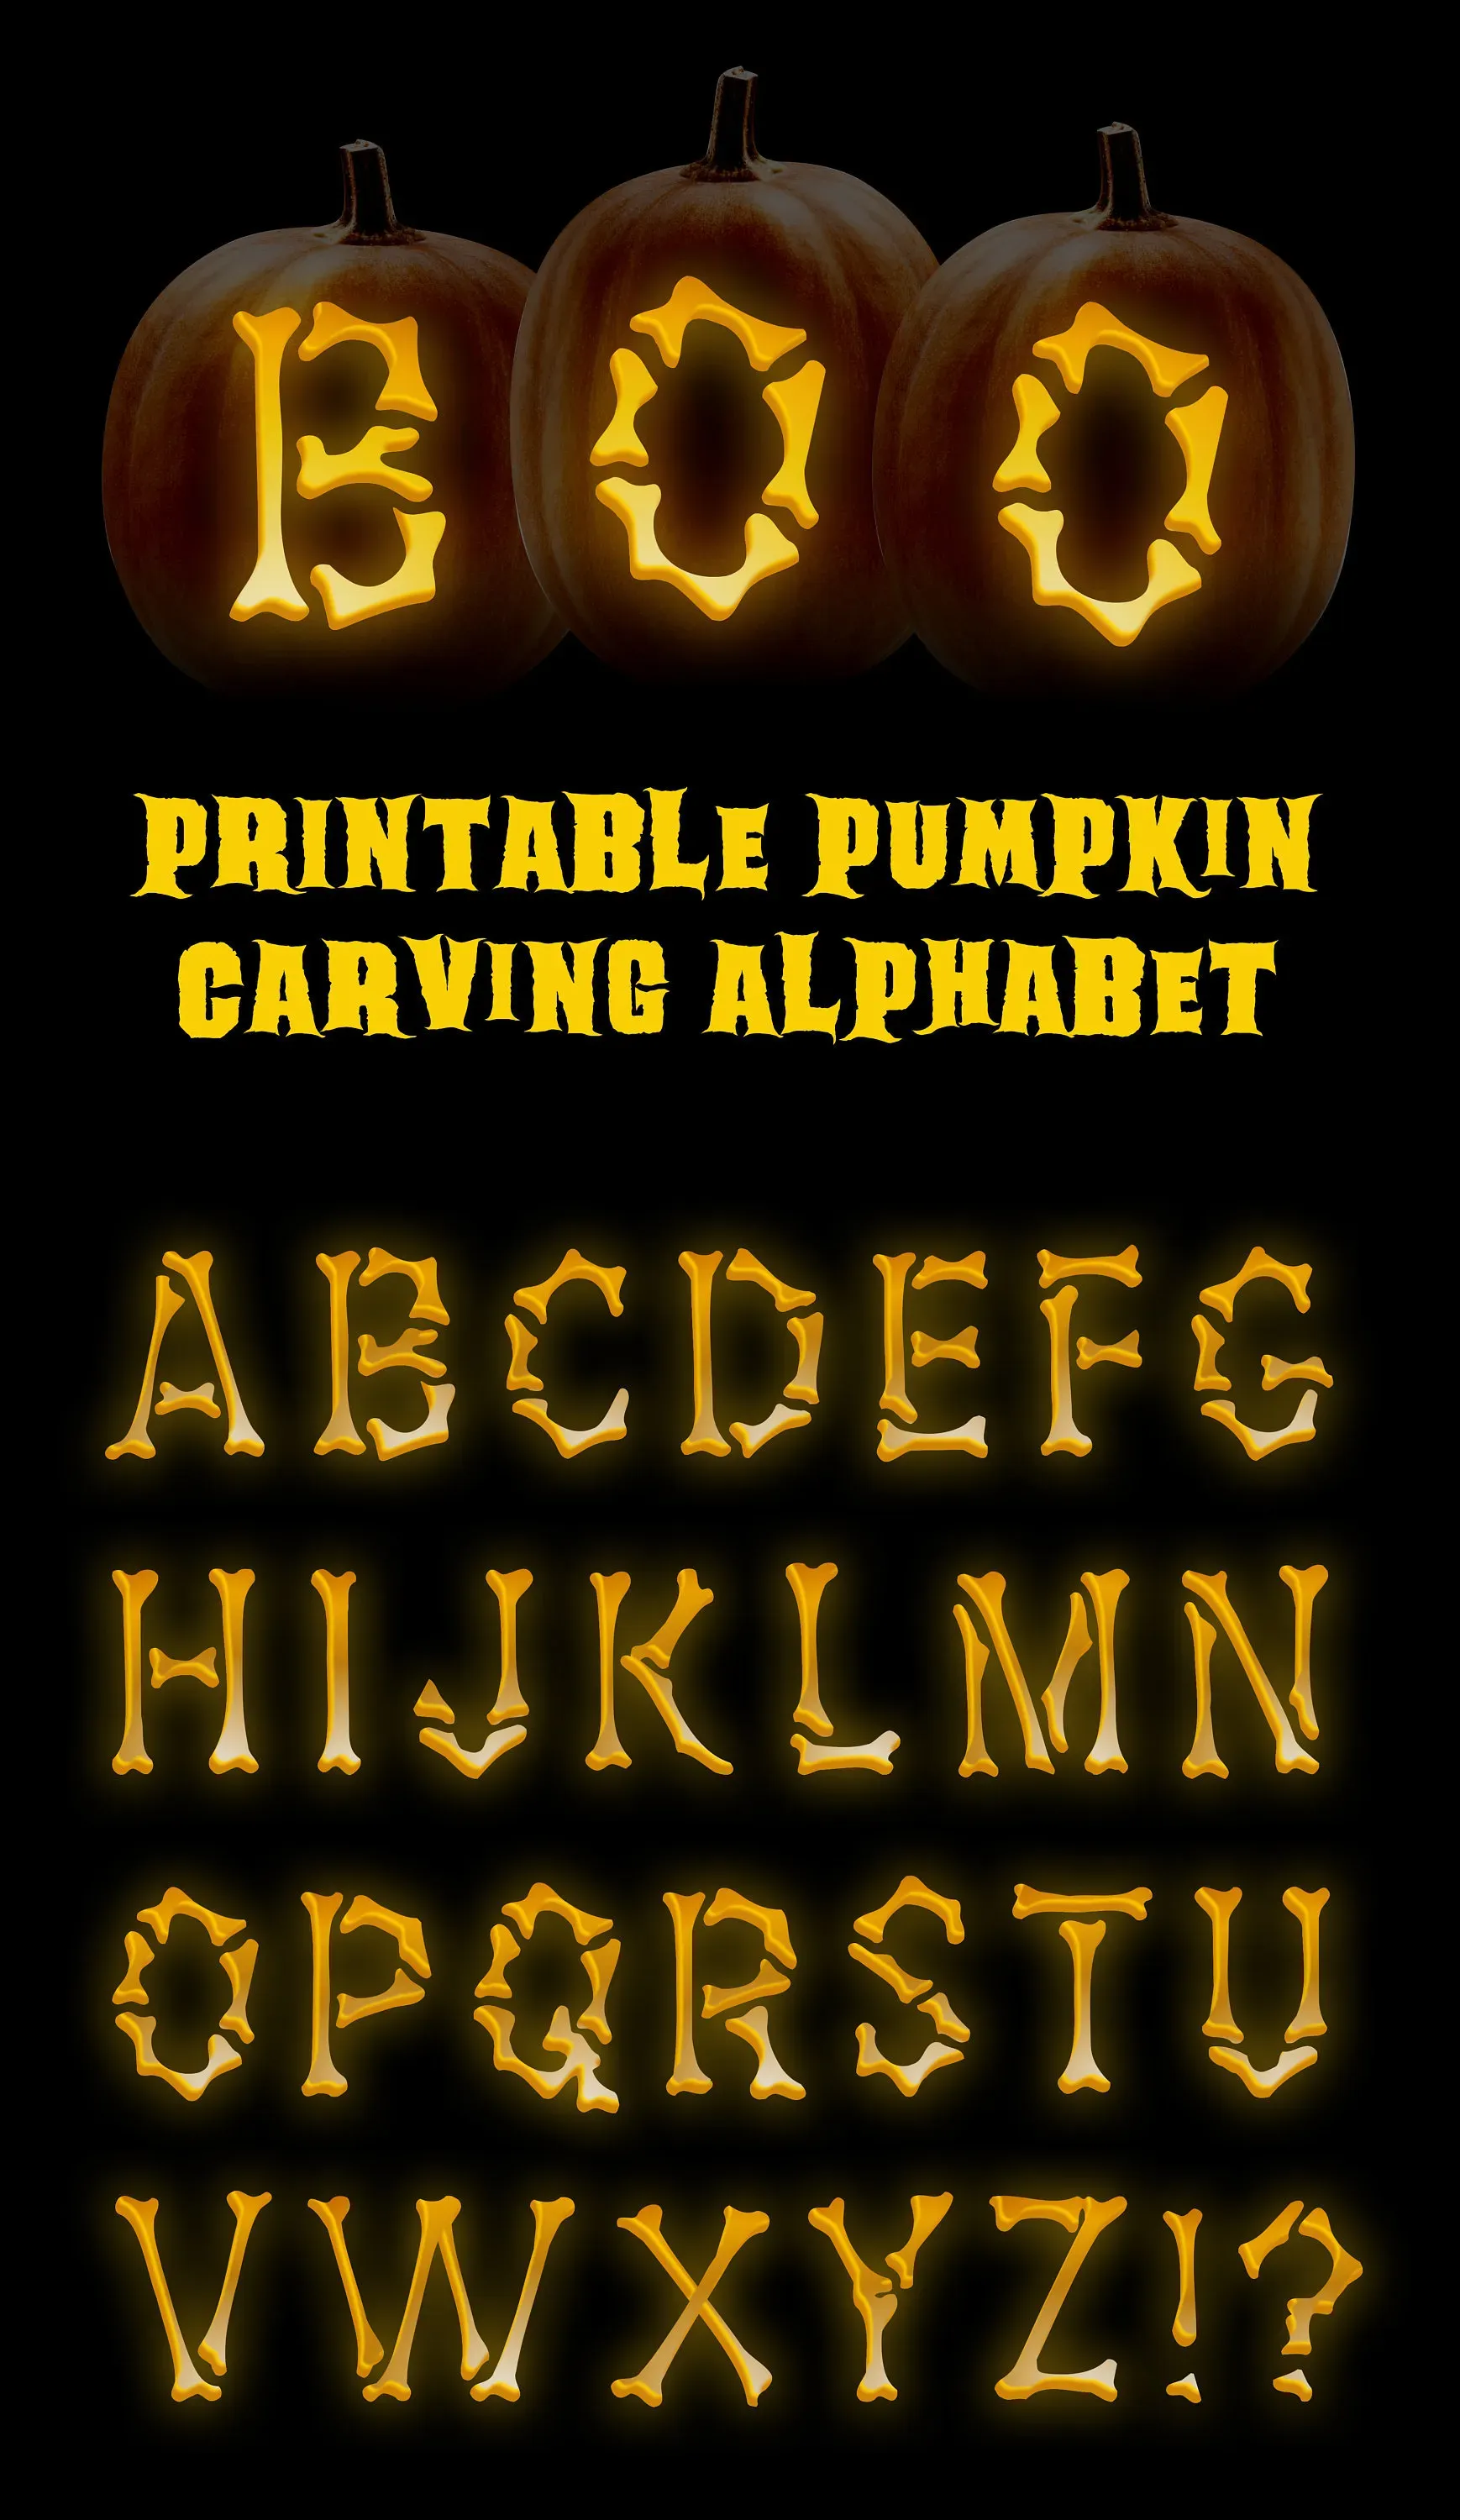
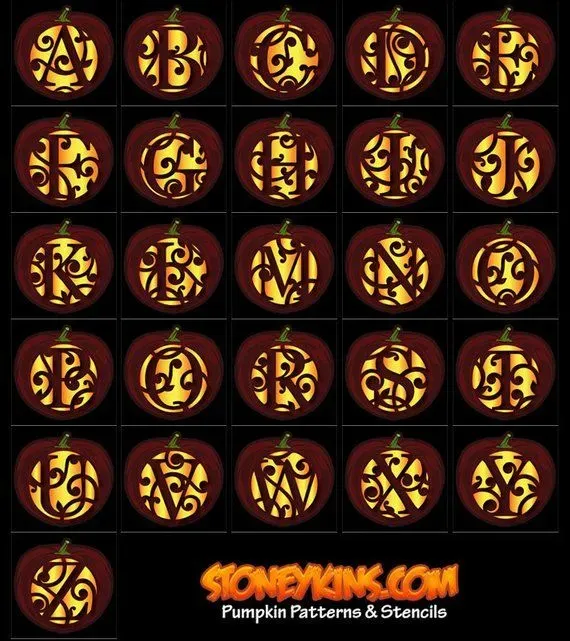
Every year, the same old triangle eyes and jagged grins show up on porches. While classic, they don't exactly scream originality. Want to ditch the predictable and put your own stamp on Halloween? Carving letters into your pumpkin is a straightforward way to personalize your spooky decor, whether it's spelling out a chilling message or just your initials.
Getting Started: Tools for Pumpkin Carving Letters
Getting Started: Tools for Pumpkin Carving Letters
Gathering Your Arsenal
Alright, so you want to go beyond the basic jack-o'-lantern and actually spell something out on that big orange canvas? Good call. But before you dive in, tossing a dull kitchen knife at a pumpkin is a recipe for frustration, maybe even a trip to the emergency room. You need the right gear. Think of it like painting; you wouldn't use a house brush for fine detail work. For precision pumpkin carving ideas letters, you're going to need a few specific items that make the job way cleaner and less likely to result in snapped tools or mangled typography. You'll want something for cutting the lid and scraping, something for the actual letter work, and maybe a trick or two for the really fiddly bits.
StepbyStep: Carving Your Pumpkin Letters Design
StepbyStep: Carving Your Pumpkin Letters Design
Getting Down to Business: Transferring Your Design
Alright, tools ready? Good. Now for the actual carving. The first hurdle with pumpkin carving ideas letters is getting your design onto that round surface accurately. Freehanding letters can look…rustic, to put it kindly. Unless that's the look you're going for (hey, no judgment!), you'll want a template. Print out your letters in the font and size you like. Simple block letters are easiest to start with, but you can get fancy once you've got the hang of it. Cut out the paper template, then tape it securely onto the smoothest part of your pumpkin. Make sure it's flat against the surface as much as possible. Now, grab a sharp pencil, a thumbtack, or even a specialized pumpkin poking tool (yes, they exist, and they're actually helpful). You're going to use this to poke small holes along the outline of each letter, transferring the design onto the pumpkin skin. Space the holes fairly close together – maybe about an eighth to a quarter of an inch apart – so you have a clear line to follow later. Once you've poked all the way around every letter, carefully peel off the paper template. You should see a dotted outline of your letters on the pumpkin surface, ready for carving.
Creative Pumpkin Carving Ideas: Beyond Basic Letters
Creative Pumpkin Carving Ideas: Beyond Basic Letters
Getting Creative with Fonts and Styles
you've mastered the basic block letter. That's a solid start. But sticking to Courier New on your pumpkin is like wearing socks with sandals – technically functional, but visually questionable. This is where the fun starts with creative pumpkin carving ideas letters. Think about different fonts. A spooky, drippy font for a haunted house message. A clean, modern sans-serif for a minimalist look. Or maybe a swirly, elegant script for something a bit more whimsical. Don't just cut out the shape; think about carving away the background around the letter, leaving the letter itself raised, or vice versa. You can also vary the depth of your carving to create shadows and dimension, making the letters really pop, especially when lit from within.
Spelling Out Something More Interesting
Beyond just initials or a simple "BOO," consider what message you actually want your pumpkin to convey. "ENTER IF YOU DARE" takes more effort but has a much bigger impact. Spelling out your street number is practical but adds a personalized touch. A series of pumpkins, each with one letter, can spell out a longer phrase like "HAPPY HALLOWEEN" or "TRICK OR TREAT YO'SELF." You aren't limited to just letters either. Combine text with simple carved shapes – a spider crawling near the word "SPIDER," or a bat silhouette next to "BATS." This adds visual interest and integrates the text into a larger design, pushing your pumpkin carving ideas letters into more complex territory.
- Try a distressed or weathered font for a spooky, old-time feel.
- Carve only the outline of the letter instead of cutting it all the way through.
- Use different size letters on the same pumpkin for visual hierarchy.
- Combine carved letters with painted elements for extra flair.
- Create a monogram using intertwined initials.
Techniques Beyond the Basic Cut-Out
Standard cut-through letters are classic, sure. But if you want your pumpkin carving ideas letters to stand out, explore techniques that don't involve removing the entire letter shape. Surface carving, or etching, removes just the top layer of the pumpkin skin. This works great for fine details or delicate fonts where cutting all the way through would make the letter unstable. When lit, these areas glow with a softer light than the cut-out sections, creating a nice contrast. You can also use tools like a Dremel or even a drill with different bits to create patterns, dots, or textured areas around your letters, adding another layer of complexity to your design. It takes more patience, but the result looks significantly more polished than a simple cut-out.
Troubleshooting & Tips for Great Pumpkin Letters

Troubleshooting & Tips for Great Pumpkin Letters
Handling Common Carving Headaches
So you've got your design traced, you're gripping your carving tool, and suddenly that perfect line wobbles, or a thin bridge between letters snaps. Welcome to the club. Carving letters on a round surface is tricky. One common issue with pumpkin carving ideas letters is dealing with the varying thickness of the pumpkin wall – some spots are thin and easy to cut, others require more pressure, which can lead to slips. If a piece breaks off that shouldn't have, don't panic immediately. Sometimes you can carefully reattach it with a toothpick or two. Another problem is letters looking squished or distorted once carved; this often happens if you didn't account for the curve of the pumpkin when tracing your template. Always step back and look at your template on the pumpkin from different angles before you start cutting.
Making Your Carved Letters Last Longer
Making Your Carved Letters Last Longer
Fighting the inevitable: Why Pumpkins Decay
Alright, you've spent an hour, maybe two, meticulously bringing your pumpkin carving ideas letters to life. The design is perfect, the letters are sharp, and it looks fantastic on your porch. Then, a few days later, you notice it. A little bit of shriveling around the edges. A touch of fuzz. The dreaded sag. Pumpkins, bless their squashy hearts, are organic matter, and once you slice into them, you've basically given rot and mold an open invitation. The clock starts ticking the moment you make that first cut. Humidity, temperature fluctuations, and hungry little microorganisms all conspire against your masterpiece. You can't stop it forever, but you can definitely slow down the process and get more than just a couple of nights out of your hard work on those pumpkin carving ideas letters.
Simple Steps to Extend the Display Life
So, how do you give your carved pumpkin letters a fighting chance against the elements and decay? First off, start with a healthy pumpkin. No soft spots, no bruises. Give it a quick wash before you even start carving – getting off surface dirt helps. Once carved, the enemy is dehydration and mold. A common trick is giving your pumpkin a bath. Submerge the entire carved pumpkin in a bucket of cold water for several hours, or even overnight. This rehydrates the flesh. After its soak, let it air dry thoroughly. To combat mold, a light spritz of a bleach solution (about one tablespoon of bleach per quart of water) on the cut surfaces can help kill off mold spores. Some folks swear by petroleum jelly or vegetable oil rubbed on the cut edges to seal in moisture, but be warned, this can sometimes attract pests. A dedicated pumpkin preservative spray is also an option, readily available around Halloween.
Here are a few things to try:
- Soak the carved pumpkin in cold water for several hours.
- Spray cut surfaces with a dilute bleach solution (1 tbsp bleach per quart water).
- Consider a commercial pumpkin preservative spray.
- Avoid direct sunlight or heat sources; a cool, dry spot is best.
- If using petroleum jelly or oil, apply sparingly and be aware it might attract bugs.
- Cover or bring the pumpkin inside during freezing temperatures.
Putting the Final Touches on Your Carved Pumpkin Letters
So, you've gutted the gourd, wrestled with stencils, navigated the tricky curves, and brought your chosen words to life on your pumpkin. You've moved past the basic triangle face and created something that actually says something (literally). Remember, getting clean lines and durable results comes down to having the right tools, taking your time with the steps, and maybe applying a little sealant to keep the rot at bay. Whether you spelled out a spooky warning or just your street number, your pumpkin now stands out from the crowd of generic jack-o'-lanterns. Give yourself a pat on the back; you've officially upped your Halloween game.