Table of Contents
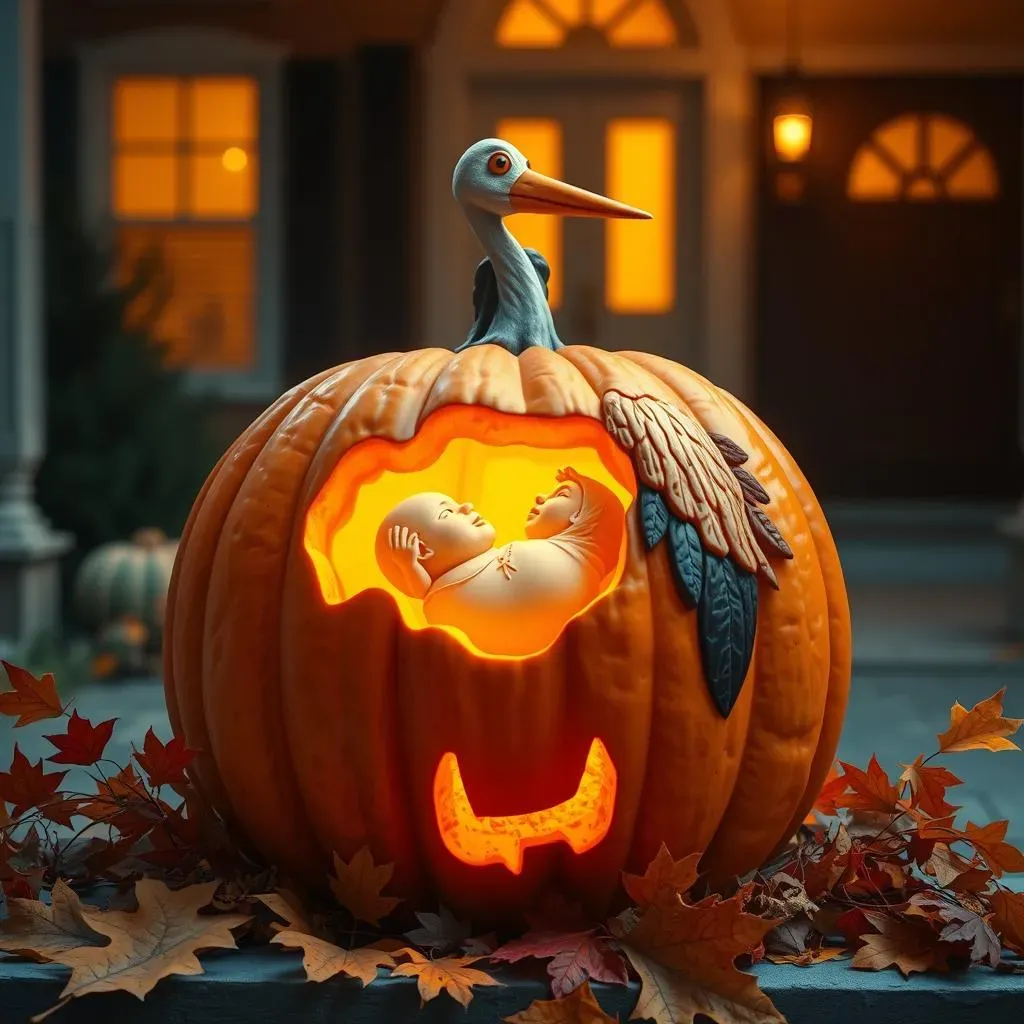
Looking for unique and slightly twisted Halloween fun? Forget the basic ghost and goblin routine! This year, we're diving headfirst into the wonderfully weird world of pumpkin carving ideas labor and delivery. Yes, you read that right. We're talking jack-o'-lanterns that capture the miracle (and the messy reality) of childbirth.
Why a Labor & Delivery Pumpkin? The Story Behind Our Carving
Why a Labor & Delivery Pumpkin? The Story Behind Our Carving
so you might be thinking, "A labor and delivery pumpkin? Seriously?" And yeah, I get it. It's not exactly traditional Halloween fare. But that's precisely why it's so awesome! In a sea of predictable ghosts and ghouls, a labor and delivery pumpkin is a guaranteed head-turner. It's unexpected, it's a little bit shocking, and it's definitely memorable. Plus, it's a chance to celebrate the incredible miracle of childbirth in a fun, albeit slightly unconventional, way. Think of it as a tribute to all the amazing moms out there, disguised as a spooky squash.
From Dilation to Delivery: Creative Pumpkin Carving Ideas
From Dilation to Delivery: Creative Pumpkin Carving Ideas
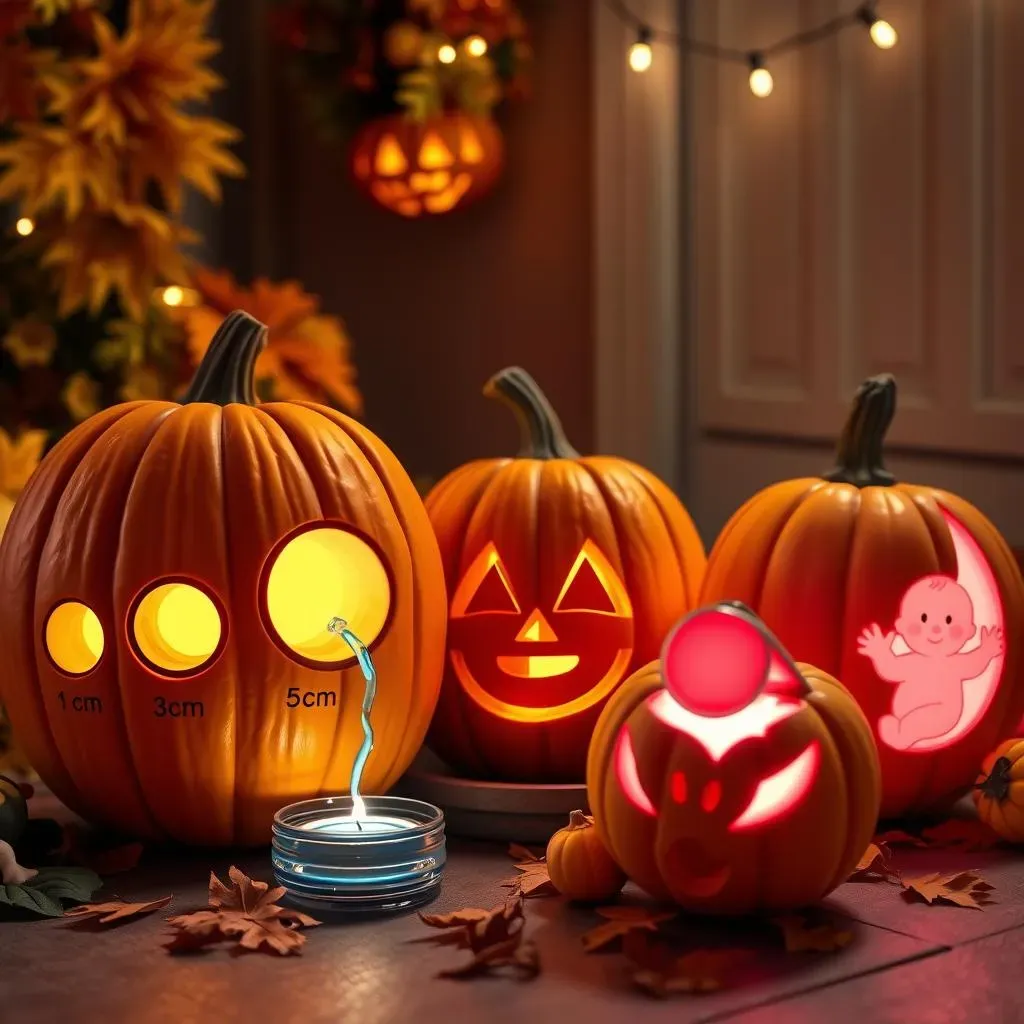
Dilation Demonstration: The Educational Pumpkin
so you want to get a little educational with your pumpkin? Let's talk dilation! This is a super visual way to represent the stages of labor. Grab a few different-sized circle cookie cutters (or even just draw circles on paper and use those as templates). Carve out circles on one side of the pumpkin, gradually increasing in size. You can even label each circle with the corresponding centimeter measurement (1cm, 3cm, 5cm, etc.). It's a fun and informative way to show what's happening during labor – and maybe even freak out a few trick-or-treaters who aren't expecting a science lesson with their candy!
To take it up a notch, use a battery-operated tea light inside the pumpkin. As the light shines through the different-sized circles, it'll create a cool visual effect, emphasizing the gradual opening. You could even add some funny commentary like, "Almost there!" or "Just a little bit more!" next to each dilation stage. This pumpkin is guaranteed to be a hit with anyone in the medical field – or anyone who's ever been through labor themselves!
The "Water Breaking" Pumpkin: A Drippingly Fun Idea
Ready for something a little messier? This one is all about the "water breaking" moment. Carve a cute little baby face into your pumpkin. Then, above the face, create a small reservoir. Fill it with water dyed blue or green (for amniotic fluid vibes, of course!). Then, poke a tiny hole near the baby's face so the "water" slowly drips down.
To make it even more dramatic, use a small pump (like the kind used for fish tanks) to create a continuous flow of "water." Just be sure to put a tray underneath to catch the drips! This pumpkin is definitely going to get some laughs (and maybe a few gasps) – it's all about embracing the slightly absurd side of childbirth.
The "It's a..." Pumpkin: Gender Reveal with a Twist
Expecting parents, listen up! Why not use your Halloween pumpkin as a fun gender reveal? Carve a cute baby design on the pumpkin, but keep the inside hidden. Then, fill the pumpkin with either pink or blue LED lights (or even pink or blue confetti, if you're feeling brave!). At your Halloween party, have the parents-to-be open the pumpkin to reveal the gender of their little one.
This is a super memorable and creative way to share the exciting news with friends and family. Plus, it's a lot more unique than the typical cake-cutting gender reveal. Just be sure to have your camera ready to capture everyone's reactions!
Pumpkin Idea | Difficulty | Wow Factor |
|---|---|---|
Dilation Demo | Medium | High (Educational) |
Water Breaking | Medium-High | High (Messy Fun) |
Gender Reveal | Medium | Very High (Sentimental) |
DIY Labor & Delivery Pumpkin: A StepbyStep Guide

DIY Labor & Delivery Pumpkin: A StepbyStep Guide
Gather Your Supplies: The Birthing Kit (for Pumpkins!)
Alright, future pumpkin obstetricians, let's get our supplies in order! First, you'll need a pumpkin, obviously. Choose one that's big enough to accommodate your design and has a relatively smooth surface. Next, grab your carving tools. A basic carving kit with various saws and scoops will do the trick, but feel free to get fancy with specialized tools if you're feeling ambitious. You'll also need a bowl to collect all the pumpkin guts (seeds, stringy bits – the whole shebang). And don't forget a good light source – a battery-operated candle or LED light is perfect for illuminating your masterpiece.
Beyond the basics, you might want to consider some extra embellishments. Think paint (acrylic or spray paint), markers, googly eyes, yarn (for hair!), or even small plastic baby dolls to really amp up the labor and delivery theme. Get creative and use whatever you have on hand! Remember, this is all about having fun and expressing your unique vision.
Carving with Care: From Incision to Illumination
time to get down to business! Start by drawing your design onto the pumpkin with a marker. If you're doing the dilation demonstration, trace your circle templates. For the water breaking pumpkin, sketch out the baby face and the reservoir. Once you're happy with your design, carefully begin carving. Use a sawing motion with your carving tools to cut along the lines. Remember to take your time and be patient. Rushing can lead to mistakes (and potentially dangerous slips with sharp tools!).
Once you've finished carving, scoop out all the pumpkin guts. This is where that bowl comes in handy! Make sure to remove all the seeds and stringy bits to create a clean canvas for your design. Finally, insert your light source and watch your labor and delivery pumpkin come to life!
Adding the "Wow" Factor: Embellishments and Extra Touches
Now for the fun part: adding those extra details that will really make your pumpkin stand out! If you're going for a more realistic look, use paint to add shading and highlights to the baby's face or the dilation circles. Googly eyes can add a touch of humor and personality. Yarn can be used to create a cute little hairstyle for your pumpkin baby. And those plastic baby dolls? Well, they can be strategically placed to create some truly memorable (and slightly disturbing) scenes!
Don't be afraid to experiment and get creative. There are no rules when it comes to pumpkin carving, so let your imagination run wild! The more unique and outrageous your design, the more attention it's sure to get.
Step | Description | Tips |
|---|---|---|
1. Gather Supplies | Pumpkin, carving tools, light, decorations | Choose a smooth, large pumpkin |
2. Carve Design | Carefully cut along drawn lines | Take your time to avoid mistakes |
3. Add Embellishments | Paint, googly eyes, yarn, baby dolls | Get creative and have fun! |
Karen Moses's Labor & Delivery Pumpkin: Inspiration and Techniques
Karen Moses's Labor & Delivery Pumpkin: Inspiration and Techniques
The Story Behind the Viral Sensation
Alright, let's talk about Karen Moses. While I don't have a full biography on her, her work has definitely made waves in the niche world of labor and delivery-themed pumpkin carving. It's all about that underboob pumpkin she carved for the hospital she works at. It's kickass. Her pumpkin wasn't just a carving; it was a statement – a celebration of the female body and the incredible feat of childbirth, all wrapped up in a Halloween package. It's the kind of bold creativity that inspires others to think outside the box (or, in this case, the gourd).
What's so captivating about Moses's work is its unapologetic honesty. It doesn't shy away from the messiness or the slightly shocking aspects of labor. Instead, it embraces them with humor and a touch of artistic flair. That's what makes it so relatable and memorable. It's not just a pumpkin; it's a conversation starter, a way to normalize the conversation around childbirth, and a testament to the power of creativity to challenge and inspire.
Techniques to Steal (and Adapt!)
So, how can you channel your inner Karen Moses and create your own labor and delivery masterpiece? Start by studying her work. Pay attention to the details. How did she use shading to create depth and dimension? What kind of tools did she use to achieve those intricate details? Don't be afraid to experiment and try new things. The key is to find your own voice and your own unique style.
Consider the overall message you want to convey. Do you want to be funny? Thought-provoking? Educational? Once you have a clear vision, start sketching out your design. Don't worry about being perfect – the beauty of pumpkin carving is that it's inherently imperfect. Embrace the flaws and let your creativity shine through. And most importantly, have fun! Carving a labor and delivery pumpkin should be a celebration of life, laughter, and the incredible journey of childbirth.
Inspiration Source | Key Technique | Adaptation Ideas |
|---|---|---|
Karen Moses's Pumpkin | Underboob carving | Try different poses or expressions |
Viral "Pregnant Pumpkins" | Exaggerated expressions | Add accessories like hats or glasses |
Medical Illustrations | Anatomical accuracy | Create a series showing stages of labor |
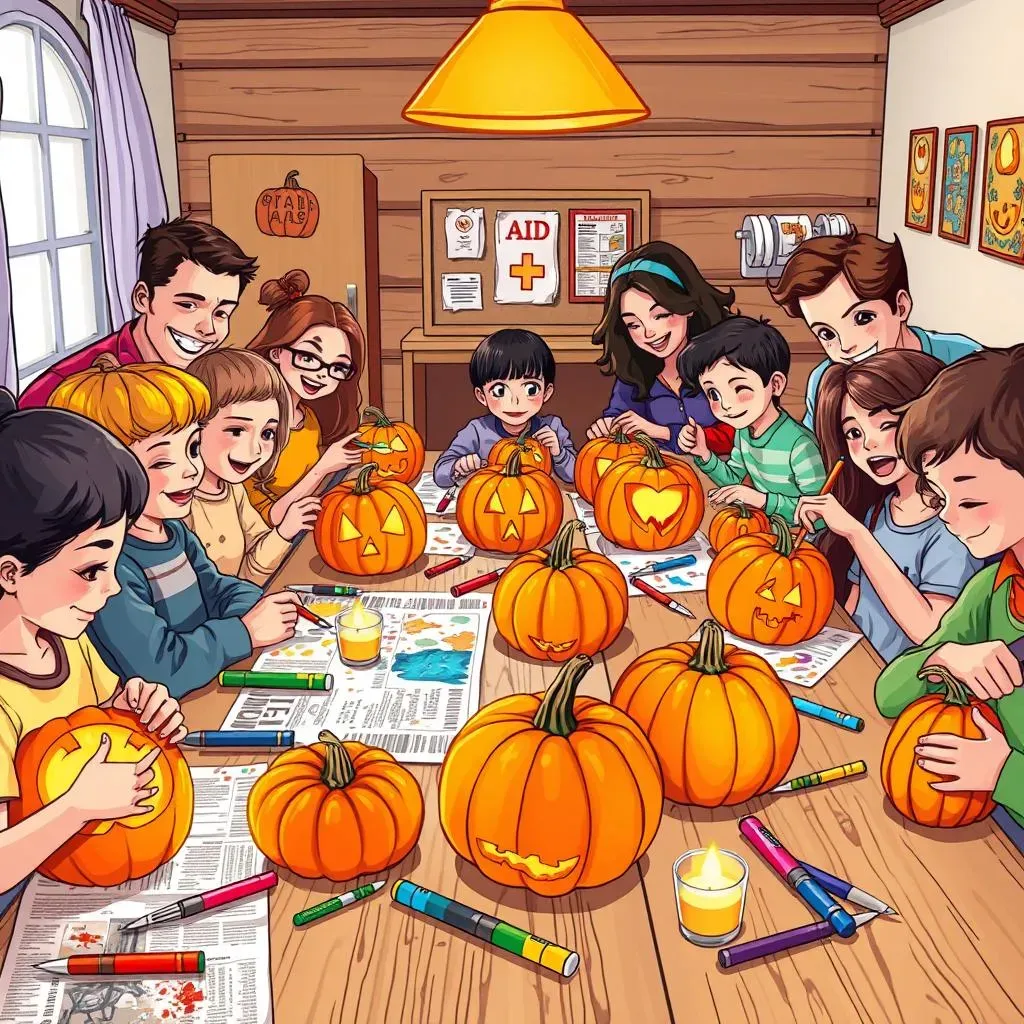
Spooktacular & Safe: Tips for a FamilyFriendly Pumpkin Carving Experience
Spooktacular & Safe: Tips for a FamilyFriendly Pumpkin Carving Experience
Age-Appropriate Tools: Kid-Friendly Carving Options
Alright, safety first, people! Especially when you've got little goblins eager to get their hands on sharp objects. Forget the pointy knives for the kiddos. Instead, invest in some kid-friendly carving tools. These usually come in plastic and are designed to be less dangerous while still allowing kids to participate in the fun. Think small saws with dull teeth, scoops with rounded edges, and stencils that are easy to trace.
Another great option is to let the kids decorate the pumpkin with paint, markers, stickers, or even glue and glitter (if you're brave!). This allows them to express their creativity without any risk of injury. And remember, adult supervision is key! Even with kid-friendly tools, accidents can happen, so keep a close eye on your little ones and offer guidance and assistance as needed.
Workspace Wisdom: Setting Up a Safe Carving Station
Your carving station is your command center, so make sure it's set up for success (and safety!). Choose a well-lit area with plenty of space to spread out. Cover your work surface with newspaper or a plastic tablecloth to protect it from pumpkin guts and potential spills. Have a designated bowl for collecting all the seeds and stringy bits. And keep a first-aid kit nearby, just in case.
It's also a good idea to establish some ground rules before you start carving. Remind everyone to take their time, be careful with the tools, and keep their fingers away from the blades. And most importantly, emphasize that carving is a team effort – everyone should be looking out for each other and helping to keep the workspace clean and organized.
Light It Up Right: Safe Illumination Options
time to bring your pumpkin to life! But before you reach for that open flame, let's talk about some safer alternatives. Traditional candles can be a fire hazard, especially around kids and flammable decorations. Instead, opt for battery-operated tea lights or LED lights. These provide a warm, inviting glow without any risk of fire.
You can also find color-changing LED lights that will add a fun and festive touch to your pumpkin. Or, if you're feeling really fancy, you can even use a small spotlight to illuminate your pumpkin from the outside. Whatever you choose, make sure the light source is securely placed inside the pumpkin and won't tip over or fall out. And always supervise children around illuminated pumpkins to prevent any accidents.
Safety Tip | Description | Why It Matters |
|---|---|---|
Kid-Friendly Tools | Use plastic, dull-edged tools | Reduces risk of cuts and injuries |
Safe Workspace | Well-lit, covered surface | Prevents slips, spills, and messes |
Safe Illumination | Battery-operated lights | Eliminates fire hazards |
From Pumpkin Patch to Delivery Room: A Carving Conclusion
So, there you have it! Hopefully, you're now brimming with inspiration to tackle your own labor and delivery-themed pumpkin. Remember, the goal is to have fun, get creative, and maybe even spark a few laughs (or gasps!) along the way. Whether you go for a subtly educational dilation display or a full-on pumpkin birth extravaganza, your unique creation is sure to be a Halloween hit. And who knows, maybe you'll even inspire others to embrace the wonderfully weird side of pumpkin carving. Happy haunting, and happy carving!