Table of Contents
Forget the same old toothy grin this Halloween! If you're searching for unique and slightly twisted pumpkin carving ideas jail cell designs are a guaranteed way to spookify your porch. This guide walks you through creating your very own pumpkin prison, complete with tiny toy inmates (or maybe some strategically placed gummy worms – the choice is yours!). We'll cover everything from gathering your materials to adding the final touches that'll make your jail cell pumpkin the talk of the trick-or-treat route. First, we'll dive into the essential tools and supplies you'll need to construct your gourd-geous jail. Then, get ready for a step-by-step tutorial on carving the perfect barred window and hollowing out your pumpkin. Feeling creative? We'll explore different variations on the jail cell theme, from spooky zombie prisoners to comical skeleton convicts. Finally, we'll share tips on keeping your pumpkin looking fresh and answering common carving conundrums. So, grab your carving kit and let's get started on this delightfully dark Halloween project!
Materials for Your Jail Cell Pumpkin Carving
Materials for Your Jail Cell Pumpkin Carving
The Essential Toolkit
Before you even think about sketching out those bars, let's gather the arsenal. You'll need a good-sized pumpkin, of course – not too big, not too small, just right for a spooky inmate. Think about the shape, too; a taller pumpkin might lend itself better to a prison cell vibe. Then comes the carving kit. Those flimsy plastic tools from the supermarket? They might work in a pinch, but a decent set with various saws and scoops will make your life so much easier. Trust me, you'll thank me later when you're not wrestling with pumpkin guts and dull blades.
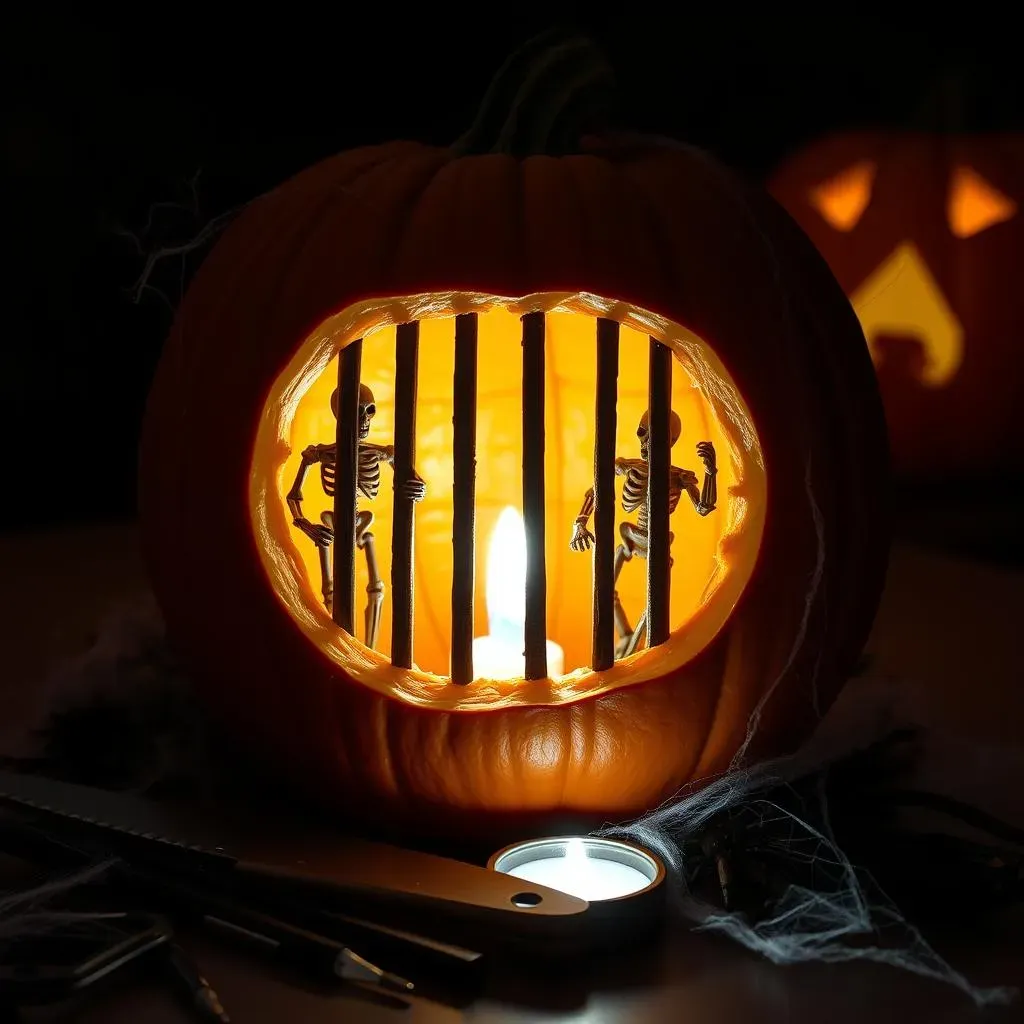
Beyond the basics, consider these crucial components: A sturdy serrated knife for cutting the lid and jail window, a scoop for gutting (duh!), and smaller detail tools for refining those bars. Don't forget a poking tool or skewer for making the cocktail stick holes. And speaking of cocktail sticks, grab a box; they're the key to keeping your inmates behind bars! Lastly, you'll want a light source – a tea light or a battery-operated candle. Safety first, people! No one wants a pumpkin inferno on Halloween night.
- Pumpkin: Choose a size and shape that suits your vision.
- Carving Kit: Invest in quality tools for easier carving.
- Serrated Knife: For cutting the lid and jail window.
- Scoop: To remove the pumpkin guts.
- Detail Tools: For refining the jail bars and adding details.
- Poking Tool/Skewer: To create holes for the cocktail sticks.
- Cocktail Sticks: To form the jail bars.
- Light Source: Tea light or battery-operated candle (safety first!).
Adding the Inmates and Ambiance
Now for the fun part! What's a jail cell without its prisoners? Raid your kids' toy box for small Halloween-themed figures – skeletons, zombies, spiders, whatever screams "creepy" to you. Gummy worms also work surprisingly well (and are edible after their stint in the slammer). Think about scale – you want your inmates to look appropriately sized for their pumpkin prison. And don't be afraid to get creative with their poses; maybe one's trying to escape, another's slumped in despair, and a third is just chilling, waiting for parole.
To boost the spooky factor, consider adding some extra touches. Black paint or markers can be used to darken the bars or add shadows. Cobwebs (the fake, stretchy kind, of course) draped around the jail cell create an eerie atmosphere. You could even add some dry ice for a smoky, haunted effect (but be careful with that stuff!). Remember, the goal is to create a scene that's both creepy and captivating. Let your imagination run wild, and don't be afraid to experiment!
StepbyStep: Carving Your Pumpkin Jail Cell
StepbyStep: Carving Your Pumpkin Jail Cell
Drawing the Blueprint and Gutting the Gourd
Alright, future pumpkin prison architects, let's get down to business! First, you'll want to sketch out your design directly onto the pumpkin. A washable marker works best for this – that way, if you mess up, you can easily wipe it clean and start over. Draw a rectangle for the jail window, making sure it's large enough to showcase your inmates. Then, draw a circle or jagged line around the stem – this will be your lid. Pro-tip: angle the knife inwards when you cut the lid, so it sits snugly back in place.
Once you've got your outlines, it's time for the messy part: gutting! Carefully cut along the lid outline with your serrated knife, then pull the lid off. Now, grab your scoop and start scraping out all those stringy fibers and seeds. You want a nice, clean cavity for your prisoners to reside in. Don't be afraid to get your hands dirty – it's all part of the Halloween fun! And remember, the smoother the inside, the brighter your light will shine through.
Carving the Bars and Detailing the Scene
Now for the trickiest part: carving those jail bars. This is where your detail tools come in handy. Carefully cut out the rectangle you drew for the window. Then, using a thin carving tool, start carving vertical lines to create the bars. Remember to leave some space between the bars – you want them to look like actual prison bars, not just a solid wall. Pro-tip: use a sawing motion rather than trying to push the tool through; this will give you cleaner lines and prevent breakage.
Once you've carved the bars, you can add extra details to enhance the scene. Carve a small door or window in the back of the pumpkin for added depth. Use a poking tool to create small holes around the bars, then insert cocktail sticks to reinforce them and create a more realistic "barred" effect. You can even carve a small sign above the window that says "Jail" or "Do Not Enter." The possibilities are endless!
Step | Description | Tools Needed |
|---|---|---|
1. Draw Outlines | Sketch the jail window and lid on the pumpkin. | Washable marker |
2. Cut the Lid | Carefully cut along the lid outline. | Serrated knife |
3. Gut the Pumpkin | Remove all the stringy fibers and seeds. | Scoop |
4. Carve the Window | Cut out the rectangle for the jail window. | Serrated knife |
5. Carve the Bars | Create vertical lines to form the jail bars. | Detail tools |
6. Add Details | Reinforce bars with cocktail sticks, add a sign. | Poking tool, cocktail sticks |
Assembling the Scene and Adding Light
With the carving complete, it's time to assemble your pumpkin prison! Carefully place your chosen inmates inside the pumpkin, arranging them in whatever poses you desire. Use small pieces of tape or glue to secure them in place if necessary. Then, insert the cocktail sticks into the holes around the bars, creating a sturdy cage. If any bars seem weak, add extra sticks for support.
Finally, add your light source. Place a tea light or battery-operated candle inside the pumpkin, behind the inmates. Replace the lid, and step back to admire your handiwork. If you've added any extra details, like cobwebs or dry ice, now's the time to arrange them. And there you have it – your very own spooky jail cell pumpkin, ready to terrify and delight trick-or-treaters!
Creative Jail Cell Pumpkin Ideas & Variations
Creative Jail Cell Pumpkin Ideas & Variations
Beyond the Basics: Theme It Up!
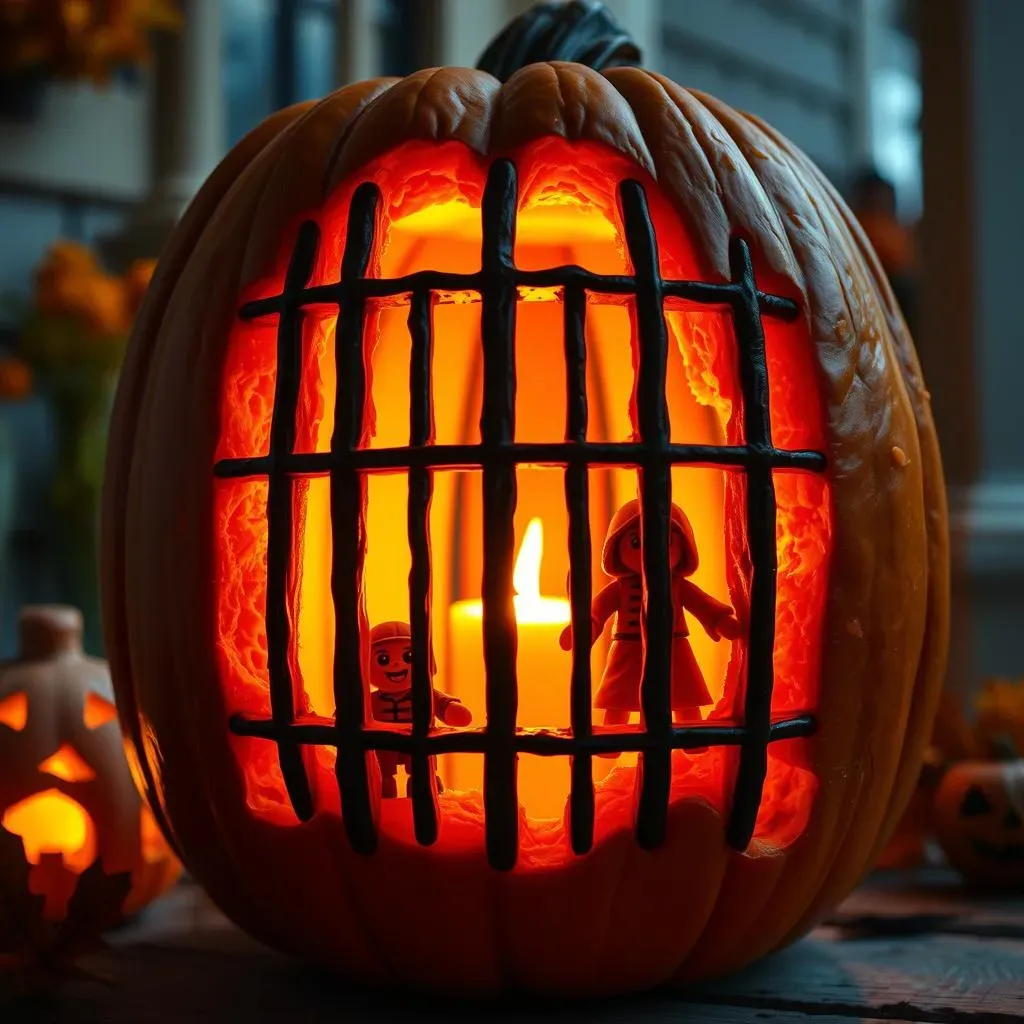
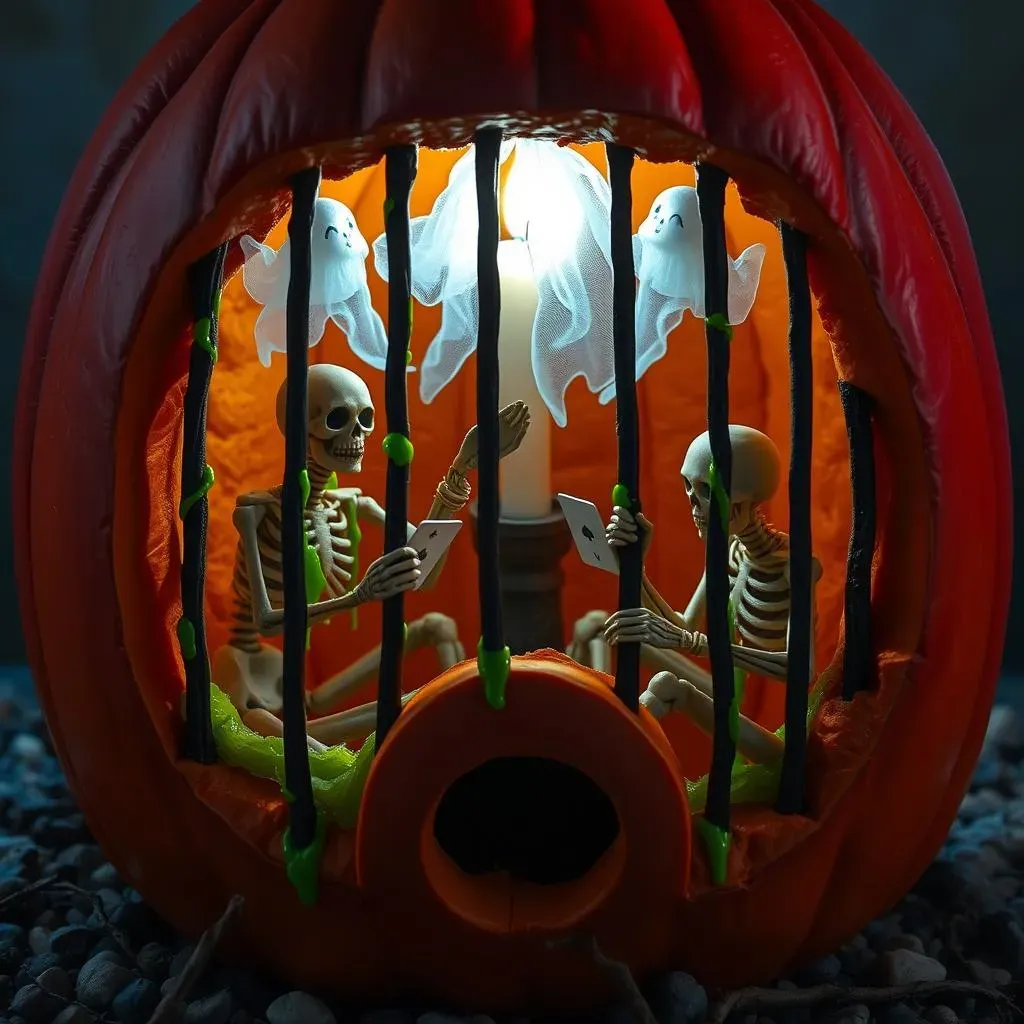
so you've mastered the basic jail cell. Now, let's crank up the creativity! Think themes, my friend. Zombie jail? Perfect for the gore-hounds! Fashion some tattered zombie limbs reaching through the bars, maybe add some green slime dripping down. Ghostly prison? Ethereal! Use cheesecloth to create ghostly figures floating inside, and maybe a battery-operated flicker candle for that spooky, otherworldly glow. Or how about a comical skeleton jail? Position the skeletons playing cards or trying to tunnel out with tiny spoons. The goal is to tell a story, to create a scene that captures the imagination.
Don't be afraid to mix and match elements, either! A zombie skeleton jail? Why not! The more outlandish, the better. Consider adding sound effects. A small, hidden speaker playing eerie moans or rattling chains can really amplify the scare factor. And remember, lighting is key. Experiment with different colored lights to create different moods. A red light can signify danger, while a blue light can create a sense of foreboding. Get creative, have fun, and let your inner mad scientist shine!
Adding Depth and Dimension
Want to take your pumpkin jail cell to the next level? Think about adding depth and dimension. Instead of just carving a flat window, try carving multiple layers to create a sense of perspective. Carve smaller bars in the background to make the jail cell seem deeper. Use different sized inmates to create the illusion of distance. You can even carve a small tunnel leading out of the back of the jail cell, suggesting an escape attempt in progress.
Another great way to add dimension is to use different materials. Glue small pebbles or twigs around the base of the pumpkin to create a realistic ground. Use cotton balls to create clouds of smoke or fog. Add small pieces of mirror to reflect light and create a sense of mystery. The more textures and materials you incorporate, the more visually interesting your pumpkin jail cell will be.
Theme | Description | Extra Touches |
|---|---|---|
Zombie Jail | Gore and decaying figures. | Green slime, tattered limbs. |
Ghostly Prison | Ethereal ghosts and spooky glow. | Cheesecloth ghosts, flicker candle. |
Skeleton Jail | Comical skeletons in prison. | Playing cards, tiny spoons. |
Tips for a LongLasting Jail Cell Pumpkin Display
Tips for a LongLasting Jail Cell Pumpkin Display
Pick the Right Pumpkin and Prep It Well
so you've poured your heart and soul into this pumpkin masterpiece. Now, let's make sure it lasts longer than a week! It all starts with picking the right pumpkin. Look for one that's firm, with no soft spots or bruises. A thick stem is a good sign of freshness. Once you've got your pumpkin, give it a good cleaning with a mild bleach solution (a tablespoon of bleach per gallon of water). This will kill any bacteria that could cause it to rot faster. And when you're gutting it, make sure to scrape away as much of the stringy flesh as possible – that's where the mold loves to grow.
Think of it like prepping a canvas before painting. The cleaner and drier the surface, the better your artwork will hold up. This initial prep will significantly extend the life of your spooky creation, buying you precious extra days of Halloween glory.
Combatting Dehydration and Mold
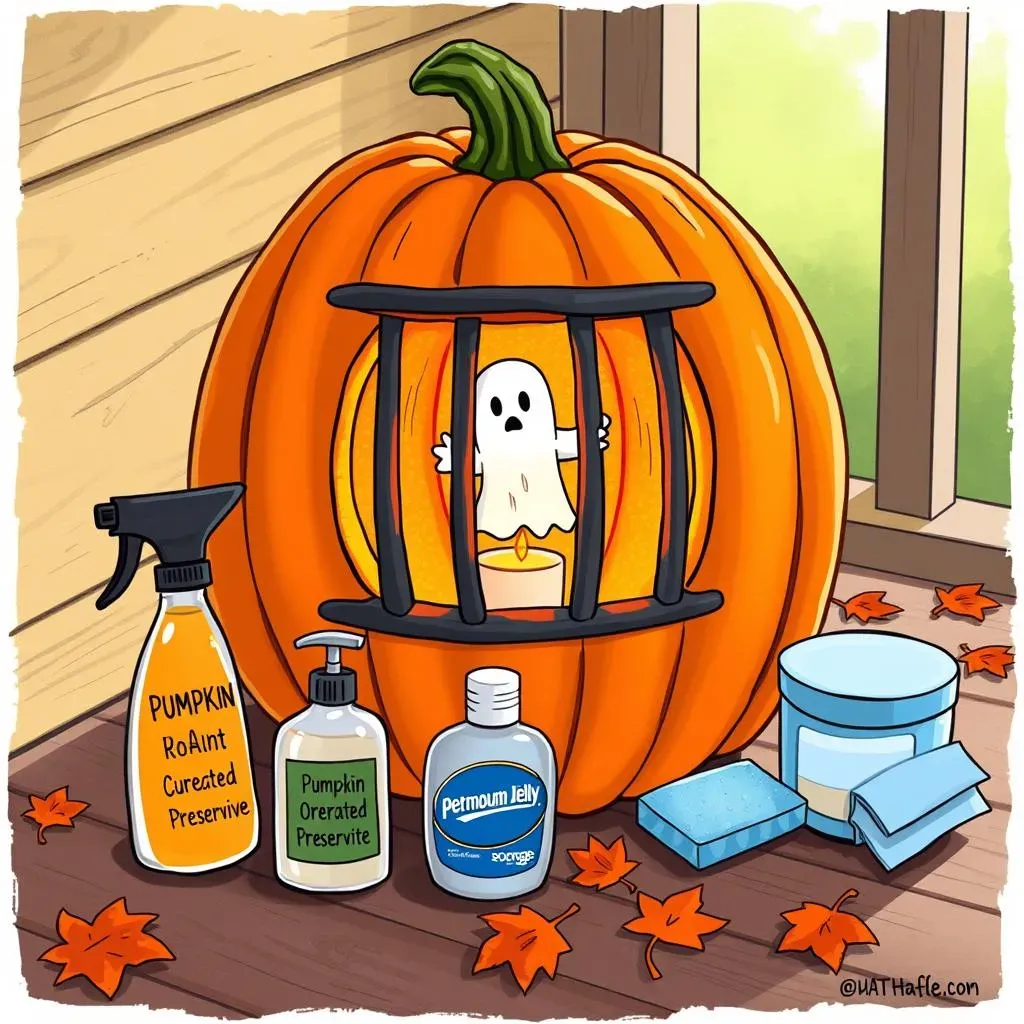
Pumpkins are basically big sponges, and they dry out quickly, leading to shriveling and collapse. To combat dehydration, try giving your pumpkin a daily bath. No, not a bubble bath! Just fill a tub or sink with that same bleach solution and let your pumpkin soak for a couple of hours. This will rehydrate the pumpkin and kill any surface mold. Another trick is to rub petroleum jelly or vegetable oil on the cut surfaces – this creates a barrier that helps to prevent moisture loss.
Mold is another major enemy of pumpkin longevity. Besides the bleach solution, you can also try spraying your pumpkin with a commercial pumpkin preservative. These products contain fungicides that inhibit mold growth. Just be sure to follow the instructions carefully. Also, keep your pumpkin out of direct sunlight and extreme temperatures. A cool, dry place is ideal.
Strategic Placement and Lighting
Where you put your pumpkin jail cell can make a big difference in how long it lasts. Avoid placing it in direct sunlight, which can bake it and cause it to rot faster. A shady spot on your porch or in your yard is ideal. Also, keep it away from areas with high humidity or standing water. Moisture is the enemy! If you're using a real candle, be extra careful. The heat from the candle can dry out the pumpkin and even cause it to catch fire. Battery-operated candles are a much safer option, and they won't produce any heat.
Finally, consider elevating your pumpkin off the ground. This will allow air to circulate around it and prevent moisture from building up underneath. You can use a small stand or even just a few pieces of wood. With a little bit of care and attention, you can keep your pumpkin jail cell looking spooky and spectacular for weeks to come!
Tip | Description | Why It Works |
|---|---|---|
Bleach Wash | Clean pumpkin with bleach solution. | Kills bacteria and mold spores. |
Rehydration Soak | Soak pumpkin in bleach solution. | Rehydrates the pumpkin and kills mold. |
Petroleum Jelly | Apply to cut surfaces. | Prevents moisture loss. |
Cool, Shady Spot | Avoid direct sunlight and heat. | Prevents drying and rotting. |
Elevate Pumpkin | Place on a stand or wood pieces. | Allows air circulation, prevents moisture buildup. |
Troubleshooting Your Pumpkin Carving Jail Cell
Troubleshooting Your Pumpkin Carving Jail Cell
When Things Go Wrong: Common Issues and Fixes
let's be real, pumpkin carving isn't always smooth sailing. Sometimes your knife slips, sometimes the pumpkin cracks, and sometimes your vision just doesn't translate into reality. But don't despair! Every carving mishap is a learning opportunity. One common issue is accidentally breaking a bar while carving. If this happens, don't panic! You can use a toothpick or skewer to reattach the broken piece. Just apply a dab of glue to the broken ends, insert the toothpick for support, and let it dry completely. Another common problem is the pumpkin collapsing. This usually happens if you've carved too much out of the pumpkin or if it's starting to rot. To prevent this, make sure to leave enough supporting flesh around the bars and follow the preservation tips we discussed earlier.
What if your inmates won't stay put? A little double-sided tape or a dab of hot glue (use sparingly!) can work wonders. And if your light isn't shining bright enough, try using a brighter bulb or lining the inside of the pumpkin with aluminum foil to reflect the light. No matter what challenges you face, remember to stay patient, be creative, and don't be afraid to improvise. After all, even a slightly flawed pumpkin jail cell is still way cooler than a boring old jack-o'-lantern!
Problem | Solution |
|---|---|
Broken Bar | Glue with toothpick support. |
Pumpkin Collapsing | Ensure enough supporting flesh, preserve pumpkin. |
Inmates Won't Stay Put | Double-sided tape or hot glue. |
Dim Light | Brighter bulb or aluminum foil lining. |
Locking It Up: Your Spooky Pumpkin Jail Cell Masterpiece
So, you've successfully carved your own pumpkin jail cell! Give yourself a pat on the back for stepping outside the traditional pumpkin-carving box. This unique design is sure to impress your neighbors and add a touch of eerie fun to your Halloween decorations. Remember, the possibilities are endless – experiment with different inmate characters, lighting effects, and even sound effects to create the ultimate spooky scene. Now, dim the lights, place your jail cell pumpkin on display, and prepare for a night of frightful fun!