Table of Contents
Halloween is creeping closer, and you're probably thinking about jack-o'-lanterns. But forget the same old triangle eyes and toothy grins this year. Let's talk pumpkin carving ideas house, where your gourd becomes a miniature home, a spooky haunted mansion, or even a whimsical fairy cottage! This isn't just about carving; it's about crafting a tiny world within a pumpkin.
Pumpkin Carving Ideas House: From Simple to Spectacular
Pumpkin Carving Ideas House: From Simple to Spectacular
let's get real about pumpkin carving ideas house. You don't have to be Michelangelo to create something amazing. We're talking about going beyond the basic jack-o'-lantern and turning your pumpkin into a miniature masterpiece. Think of it as architectural design meets Halloween fun. Whether you're a beginner just starting out, or a seasoned pro looking for fresh inspiration, there's a pumpkin house design out there for you. The beauty of this project lies in its versatility, allowing you to tailor the complexity to your skill level and the time you have available. So, ditch the stencils (at least for now!) and prepare to unleash your inner artist. We will show you how to make your pumpkin the envy of the neighborhood.
DIY Pumpkin House: Essential Tools and Techniques for Carving
DIY Pumpkin House: Essential Tools and Techniques for Carving
Gathering Your Arsenal: The Essential Toolkit
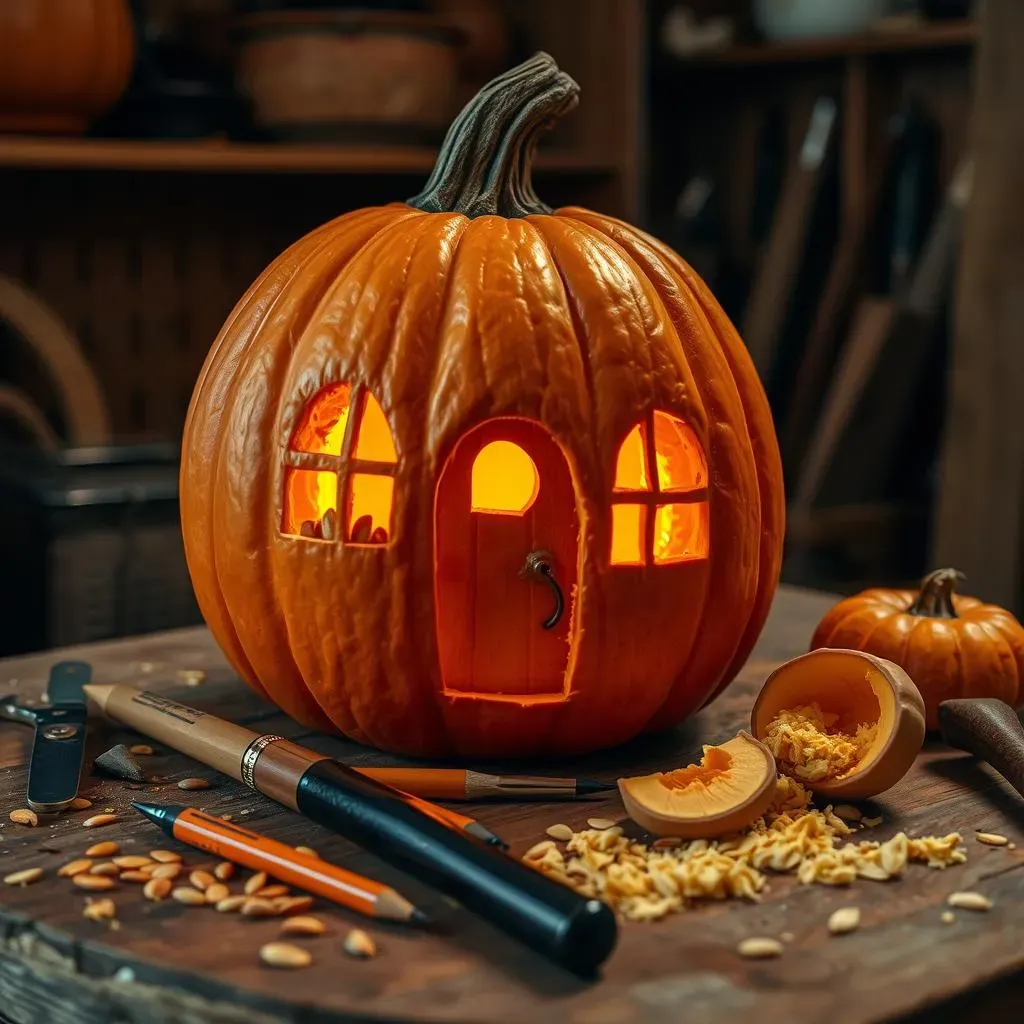
Alright, so you're ready to build a DIY pumpkin house? First things first: you need the right tools. Forget that flimsy plastic carving kit you bought at the grocery store. We're going for precision and detail here! Think of this as equipping yourself for a serious architectural project, just on a smaller, more gourd-like scale.
Here's what you'll need:
- Pumpkin Carving Knife Set: Look for a set with various blade sizes for different levels of detail. Serrated edges are great for sawing, while smaller, pointed blades are perfect for fine lines and intricate designs.
- Pumpkin Scoop: A sturdy scoop is essential for removing the pumpkin guts. Trust me; you don't want to use your hands for this part.
- Pencil or Marker: For sketching your design onto the pumpkin. A water-soluble marker is ideal, as it can be easily wiped away if you make a mistake.
- Paper Towels: For cleaning up messes and wiping down your tools.
- Small Saw: A small, fine-toothed saw can be incredibly useful for cutting out larger sections of the pumpkin, such as doors and windows.
- Clay Modeling Tools: These tools, with their various shapes and sizes, are excellent for sculpting and refining details.
Prepping Your Canvas: Choosing and Cleaning Your Pumpkin
Not all pumpkins are created equal! For a DIY pumpkin house, you want a pumpkin that's relatively smooth, with a flat bottom so it sits nicely. Avoid pumpkins with blemishes, soft spots, or bruises. The size depends on your design, but a medium to large pumpkin will give you more room to work with. Now, the icky part: cleaning. Cut a circle around the stem at the top of the pumpkin, making sure the opening is large enough to fit your hand and scoop. Remove the top and set it aside – you might want to use it as a roof later!
Next, scoop out all the seeds and stringy pulp. Scrape the inside walls clean and thin them out a bit. This will make carving easier and allow more light to shine through. Make sure the walls are not too thin, though, as this can weaken the structure of your pumpkin house. Once you've scraped the insides, wash and dry the pumpkin. Then, you're ready to sketch your design onto the surface.
Mastering the Basics: Carving Techniques for Beginners
you've got your tools, and your pumpkin is prepped and ready to go. Now comes the fun part: carving! Before you start hacking away, remember this: slow and steady wins the race. Rushing will only lead to mistakes and frustration. Begin by transferring your design onto the pumpkin using a pencil or marker. If you're using a stencil, tape it securely to the pumpkin and trace the design with a pointed tool.
When carving, use a sawing motion rather than trying to force the knife through the pumpkin. For intricate details, use small, controlled cuts. Don't be afraid to take breaks and step back to admire your work. This will help you identify any areas that need improvement. If you make a mistake, don't panic! You can often fix small errors by reattaching the piece with toothpicks or by using a bit of pumpkin pulp as "glue."
Technique | Description | Best For |
|---|---|---|
Sawing | Using a serrated knife to cut through the pumpkin flesh with a back-and-forth motion. | Cutting out large shapes, such as doors and windows. |
Puncturing | Using a pointed tool to create small holes in the pumpkin. | Adding details like stars, dots, or textures. |
Relief Carving | Carving away the surface of the pumpkin to create a raised design. | Adding depth and dimension to your pumpkin house. |
Pumpkin Carving Ideas House: Fairy Tale Designs and Inspiration

Pumpkin Carving Ideas House: Fairy Tale Designs and Inspiration
Enchanted Cottages: Bringing Fairy Tales to Life
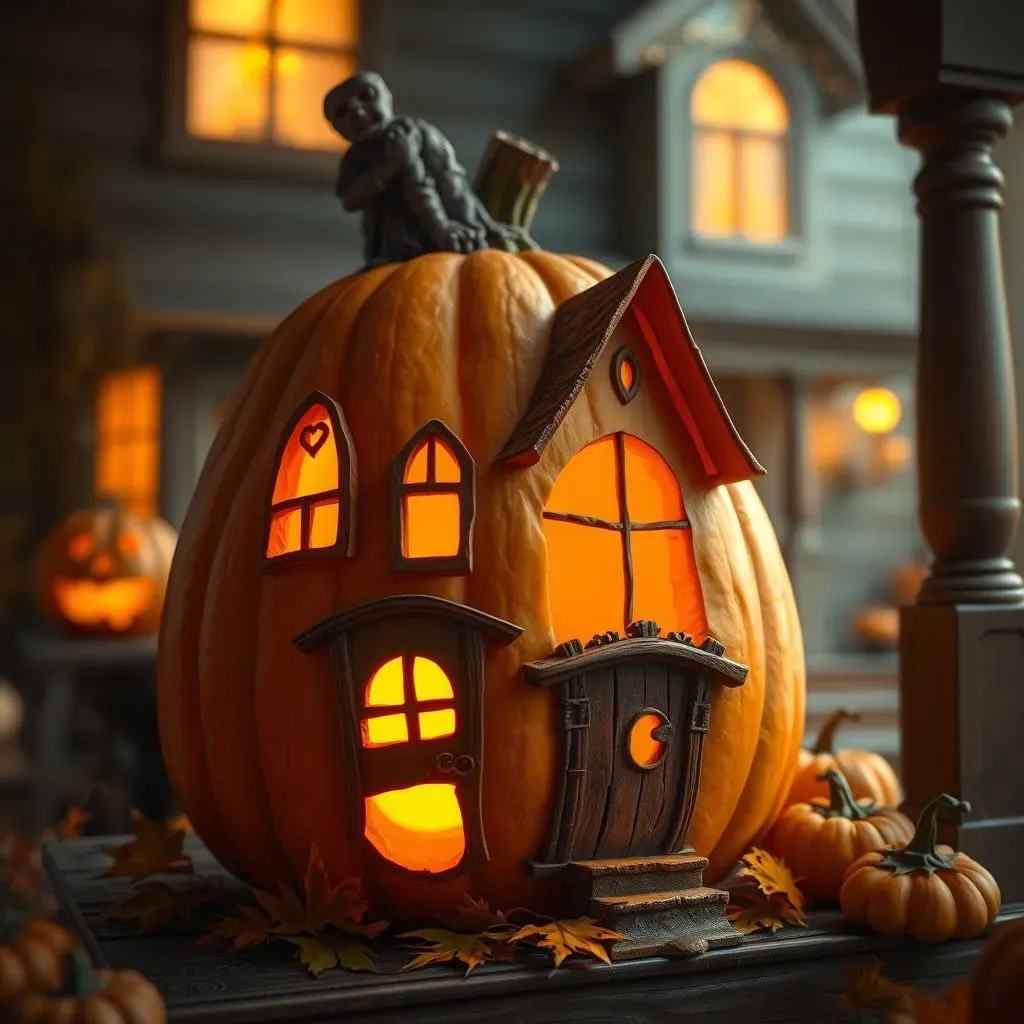
Alright, let's ditch the spooky and dive headfirst into whimsy! When it comes to pumpkin carving ideas house, fairy tale designs are where it's at. Think gingerbread houses, but make them pumpkin. Imagine tiny, crooked windows, a moss-covered roof (we'll get to that later), and maybe even a miniature chimney puffing out some dry ice smoke. The key here is to embrace asymmetry and imperfection. Fairy tale houses aren't supposed to be perfect; they're supposed to look like they've been lived in by magical creatures for centuries.
Consider adding details like winding staircases made from twigs, tiny doors that only fairies could fit through, and glowing mushroom accents carved into the sides. Don't be afraid to mix and match elements from different fairy tales. A Rapunzel-inspired tower rising from the top of your pumpkin? A Hansel and Gretel-style candy cane fence? The possibilities are endless! And remember, lighting is key. Warm, flickering LED candles will create a cozy, inviting glow that will make your fairy tale pumpkin house truly enchanting.
Haunted Hideaways: Spooky and Sweet Inspiration
Not all pumpkin carving ideas house need to be cute and cuddly. If you're craving something a little more spooky, why not create a haunted hideaway? Think dilapidated mansions with boarded-up windows, creepy towers with bats flying out, and graveyards with tiny tombstones surrounding the base. Embrace the darkness! Use deep, jagged cuts to create a sense of decay and dilapidation. Add details like spiderwebs made from hot glue, miniature skeletons peering out of windows, and eerie green lighting to complete the look.
For extra spookiness, consider adding a fog machine inside the pumpkin to create a mysterious, swirling mist effect. Or, carve out tiny holes to create a "peppering" effect, making it look like the house is riddled with bullet holes. Remember, the goal is to create a sense of unease and foreboding. So, let your imagination run wild and embrace your inner ghoul! A haunted pumpkin house is the perfect way to add a touch of macabre charm to your Halloween display.
Fairy Tale Element | Pumpkin House Adaptation |
|---|---|
Mossy Roof | Attach preserved moss or lichen to the top of the pumpkin. |
Winding Staircase | Use twigs or wire to create a miniature staircase leading to a door. |
Glowing Windows | Carve out small windows and place LED candles inside. |
Miniature Chimney | Use a cardboard tube or a small clay pot to create a chimney. |
Advanced Pumpkin Carving Techniques: Creating Intricate House Details

Advanced Pumpkin Carving Techniques: Creating Intricate House Details
Relief Carving: Adding Depth and Dimension
so you've mastered the basics of carving. Now it's time to take your pumpkin carving ideas house to the next level with relief carving. This technique involves carving away the surface of the pumpkin to create a raised design, adding depth and dimension to your creation. Think of it as sculpting with pumpkin flesh! The key to successful relief carving is to work in layers, gradually removing thin slices of pumpkin until you achieve the desired effect. Start by sketching your design onto the pumpkin, then use a small, sharp knife to carefully carve away the surrounding areas. Remember to keep your cuts shallow and controlled, and don't be afraid to experiment with different angles and depths to create interesting shadows and highlights.
Relief carving is perfect for adding architectural details to your pumpkin house, such as ornate window frames, intricate door carvings, and textured walls. It's also a great way to create realistic-looking foliage, such as vines, leaves, and flowers. With a little practice, you'll be amazed at the level of detail you can achieve with this technique.
Using Power Tools: Precision Carving for Experts
For those who are truly dedicated to the art of pumpkin carving ideas house, power tools can be a game-changer. Rotary tools, such as Dremels, allow for incredibly precise carving and detailing, making it possible to create intricate designs that would be impossible to achieve with hand tools alone. However, power tools also require a great deal of skill and caution. Always wear safety glasses and gloves when using power tools, and start with a low speed setting until you get a feel for the tool. Practice on a scrap pumpkin before tackling your masterpiece.
With power tools, you can carve incredibly fine lines, create smooth, rounded edges, and even engrave textures into the pumpkin surface. They're perfect for adding details like tiny windows, intricate brickwork, and realistic wood grain. Just remember to take your time and work slowly, and don't be afraid to experiment with different bits and attachments to achieve the desired effect.
Adding Mixed Media: Elevating Your Pumpkin House
Ready to really make your pumpkin carving ideas house stand out? Consider incorporating mixed media elements into your design. This could include anything from natural materials like twigs, moss, and leaves to craft supplies like glitter, paint, and glue. Adding mixed media can add texture, color, and visual interest to your pumpkin house, transforming it from a simple carving into a true work of art. For example, you could use twigs to create a miniature fence around the base of your pumpkin house, or glue moss to the roof to create a realistic-looking thatch. You could also use paint to add color to the windows and doors, or sprinkle glitter on the roof for a touch of sparkle. The possibilities are endless!
When using mixed media, be sure to choose materials that are weather-resistant and non-toxic. Also, keep in mind the overall aesthetic of your pumpkin house. You want to add elements that complement the design, not detract from it. With a little creativity and experimentation, you can create a pumpkin house that is truly unique and unforgettable.
Mixed Media Element | Application |
|---|---|
Twigs | Fences, staircases, window frames |
Moss | Roofs, walls, ground cover |
Leaves | Roofing, decorative accents |
Glitter | Sparkling details, roof accents |
Paint | Coloring windows, doors, and other features |
Lighting and Display: Showcasing Your Pumpkin Carving Ideas House

Lighting and Display: Showcasing Your Pumpkin Carving Ideas House
Illuminating Your Masterpiece: Choosing the Right Lights
You've poured your heart and soul into creating an amazing pumpkin carving ideas house, so don't let it hide in the shadows! Proper lighting is essential for showcasing your creation and bringing it to life. Forget those old-school incandescent bulbs that get hot and can be a fire hazard. LED candles are the way to go! They're cool to the touch, long-lasting, and come in a variety of colors and effects. For a warm, inviting glow, opt for flickering amber or warm white LED candles. If you want to create a spooky atmosphere, try green, blue, or purple lights. You can also use battery-operated string lights to add a touch of whimsy and sparkle to your pumpkin house. Just be sure to choose lights that are designed for outdoor use, and always keep them away from flammable materials.
Experiment with different lighting arrangements to see what works best for your design. You can place a single light inside the pumpkin to illuminate the entire house, or use multiple lights to highlight specific features. Try placing a light behind a window to create a silhouette effect, or use a spotlight to draw attention to a particularly intricate carving. And don't forget about the surroundings! Consider adding outdoor lighting to create a spooky or enchanting ambiance around your pumpkin house.
Lighting Type | Pros | Cons |
|---|---|---|
LED Candles | Safe, long-lasting, variety of colors and effects | Can be expensive, may not be as bright as other options |
Battery-Operated String Lights | Versatile, easy to use, add a touch of whimsy | Can drain batteries quickly, may not be weather-resistant |
Spotlights | Highlight specific features, create dramatic effects | Can be harsh, may require extension cords |
Creating the Perfect Stage: Display Ideas and Ambiance
Now that you've got your lighting sorted out, it's time to think about display. Don't just plop your pumpkin carving ideas house on the porch and call it a day! Consider the surroundings and create a scene that enhances the overall effect. A simple wooden crate or hay bale can make a great base for your pumpkin house, adding height and visual interest. You can also add natural elements like leaves, branches, and pumpkins to create a more organic and festive display. For a spooky haunted house scene, try adding cobwebs, skeletons, and tombstones. For a whimsical fairy tale scene, add moss, flowers, and miniature figurines.
Don't forget about the sound effects! A spooky soundtrack or some ambient nature sounds can really set the mood. You can also use a fog machine to create a mysterious and ethereal atmosphere. And finally, consider the placement of your pumpkin house. Make sure it's in a location where it will be easily visible to trick-or-treaters and passersby. A well-lit porch or front yard is ideal. With a little creativity and attention to detail, you can create a Halloween display that is both eye-catching and unforgettable.
Here are some ideas for display:
- Elevate: Place your pumpkin house on a hay bale, crate, or overturned pot.
- Surround: Arrange gourds, corn stalks, and fall foliage around the base.
- Accessorize: Add miniature figurines, cobwebs, or tombstones to create a scene.
- Amplify: Use a fog machine or sound effects to enhance the atmosphere.
Crafting Lasting Memories with Your Pumpkin Carving Ideas House
So, you've journeyed from simple cuts to intricate designs, transforming a humble pumpkin into a captivating miniature dwelling. The beauty of exploring pumpkin carving ideas house lies not just in the final product, but in the shared experience of creating something unique. Whether it's a spooky haunted mansion casting eerie shadows or a charming fairy cottage twinkling with warm light, your pumpkin creation will undoubtedly become a cherished centerpiece of your Halloween celebrations. Remember, the most important ingredient is your imagination. Don't be afraid to experiment, embrace imperfections, and most importantly, have fun! This Halloween, let your creativity shine and build a pumpkin carving ideas house that sparks joy and wonder for everyone who sees it.