Table of Contents
Halloween is creeping closer, and what better way to celebrate the season of scares than with some truly terrifying Jack-o'-lanterns? If you're tired of the same old toothy grins and triangle eyes, it's time to unleash your inner horror artist. This year, we're diving deep into the realm of pumpkin carving ideas horror, offering a collection of designs that range from mildly spooky to downright nightmare-inducing. Whether you're a seasoned carving pro or a beginner with a dull knife and a dream, we've got something to ignite your creative (and slightly twisted) imagination.
Sinister Stencils: Easy Horror Pumpkin Carving Ideas
Sinister Stencils: Easy Horror Pumpkin Carving Ideas
Unleashing the Spook with Stencils
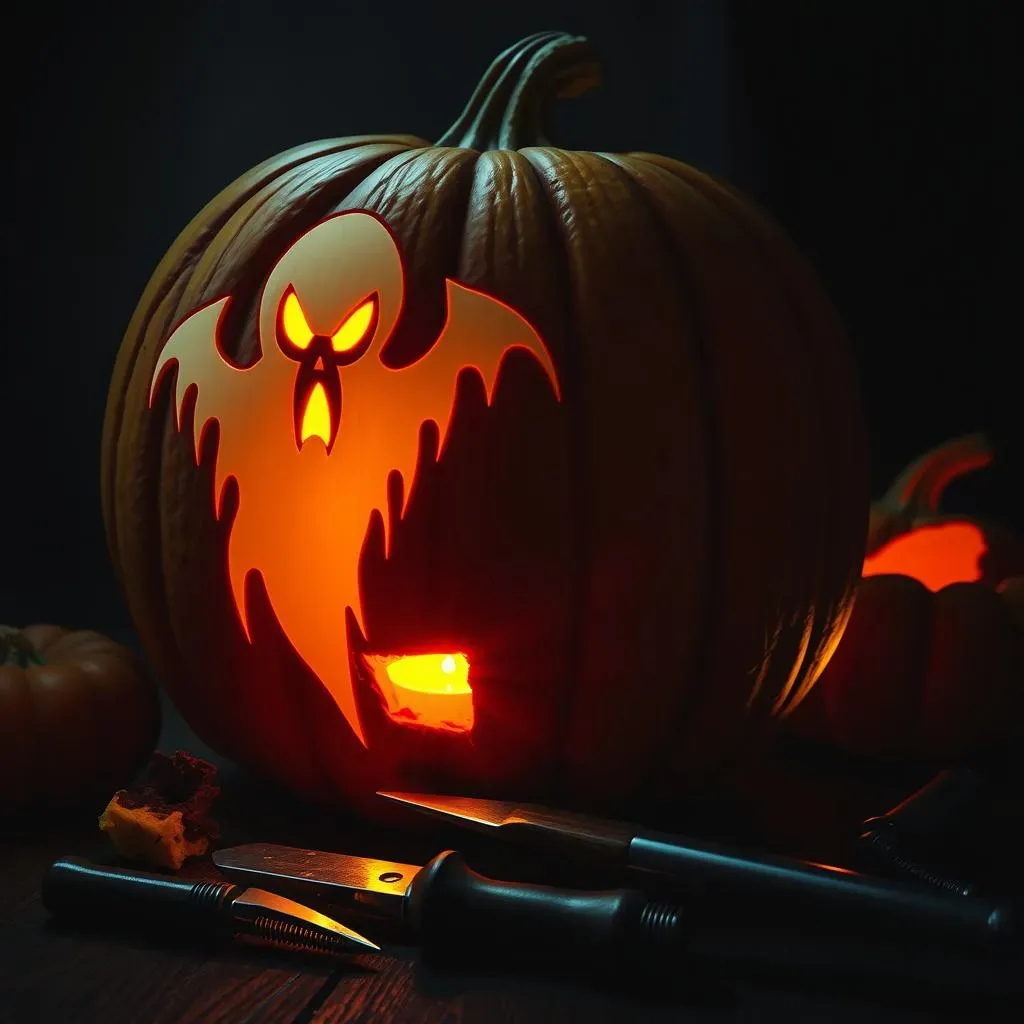
So, you want to carve a pumpkin that screams (literally, if you add a sound effect) but you're not exactly Michelangelo with a paring knife? Fear not! Stencils are your secret weapon. They're like training wheels for terror, guiding your blade to create surprisingly intricate designs without requiring years of sculpting experience. Think of it as paint-by-numbers, but with pumpkin guts and slightly sharper tools. The beauty of stencils is their accessibility; anyone, regardless of artistic skill, can create a genuinely spooky Jack-o'-lantern.
Finding the right stencil is key. The internet is a treasure trove of free and paid options. Search for classic horror icons like ghosts, bats, spiders, or creepy crawlies. Want to kick it up a notch? Look for stencils featuring iconic movie monsters like Frankenstein's monster, Dracula, or even Pennywise. Print them out, tape them to your pumpkin, and get ready to trace your way to Halloween glory. Remember, the simpler the stencil, the easier it will be to carve – perfect for beginners!
Tools of the Trade: Stencil Carving Essentials
Before you dive headfirst into carving, gather your tools. You don't need a fancy kit, but a few essentials will make the process smoother and safer. A good quality serrated pumpkin carving knife is a must. These are designed to easily saw through the pumpkin's thick skin. You'll also want a poking tool, like an awl or thick needle, to create pilot holes along the stencil lines. This makes carving much easier and prevents the stencil from slipping. And, of course, don't forget a large spoon or scoop to remove all those stringy pumpkin innards.
Safety first! Carving can be tricky, so take your time and work in a well-lit area. If you're carving with kids, supervise them closely and consider using kid-friendly carving tools with blunt edges. A first-aid kit is always a good idea to have on hand, just in case. Remember, a little patience and caution go a long way in creating a masterpiece (and avoiding a trip to the emergency room).
Stencil Pro-Tips: From Beginner to Boogeyman
Ready to take your stencil game to the next level? Here are a few pro-tips to transform your pumpkin from basic to boogeyman. First, transfer your stencil with precision. Use a poking tool to create closely spaced holes along the stencil lines. This will create a clear outline to follow when carving. Second, carve in small, controlled movements. Don't try to force the knife through the pumpkin; let the serrated edge do the work. Third, use different carving depths to create dimension. Carve some areas all the way through, and others only partially, to create a glowing effect.
Finally, don't be afraid to get creative! Add your own personal touches to the stencil design. Maybe give your ghost a menacing grin, or add some extra fangs to your vampire. The possibilities are endless! And remember, even mistakes can be turned into something spooky. A jagged edge can become a creepy scar, or a misplaced hole can become a sinister eye. Embrace the imperfections and let your inner horror artist shine!
Tip | Description |
|---|---|
Precision Poking | Create closely spaced holes for a clear outline. |
Controlled Cuts | Use small, sawing motions; don't force the knife. |
Varying Depths | Carve some areas fully, others partially for dimension. |
Embrace Imperfection | Turn mistakes into spooky details. |
Horror Movie Icons: Advanced Pumpkin Carving Designs
Horror Movie Icons: Advanced Pumpkin Carving Designs
Level Up: Beyond the Basic Stencil
Alright, so you've mastered the art of stencils. Now, let's crank up the fear factor and tackle some truly iconic horror movie characters. We're talking Freddy Krueger's razor-gloved hand, Pennywise's sinister grin, or even the eerie mask of Michael Myers. These designs require a bit more skill and patience, but the results are absolutely worth it. Think of it as transforming your pumpkin into a miniature movie poster, a tribute to the films that keep you up at night. This is where pumpkin carving transcends from a simple Halloween activity to a true art form.
The key to success with these advanced designs is meticulous planning. Start by selecting a high-quality image of your chosen character. The clearer the image, the easier it will be to translate onto the pumpkin. Next, consider the complexity of the design. Characters with intricate details, like Freddy's scarred face or the Xenomorph's alien features, will require more time and precision. Don't be afraid to simplify the design if needed. Remember, the goal is to create a recognizable likeness, not a perfect replica.
Tools for Terror: Upgrading Your Carving Arsenal
For these advanced designs, you'll need to upgrade your carving arsenal. Forget the flimsy plastic tools from the store-bought kit. Invest in a set of professional-grade pumpkin carving tools. These typically include a variety of saws, gouges, and sculpting tools, each designed for a specific purpose. A detail knife with a sharp, pointed blade is essential for creating fine lines and intricate details. You might also want to consider a wood-burning tool for adding subtle shading and texture. Think of it as upgrading from finger painting to oil on canvas – the right tools make all the difference.
Also, consider investing in some clay sculpting tools. These can be surprisingly useful for refining details and removing small bits of pumpkin flesh. A small loop tool is perfect for creating recessed areas, while a ribbon tool can be used to smooth out surfaces. And don't forget a good source of light! A bright lamp or headlamp will help you see every detail and prevent you from accidentally carving away too much. Remember, precision is key when working with these complex designs.
Mastering the Shadows: Light and Depth Techniques
The secret to a truly terrifying horror movie icon pumpkin lies in mastering the art of light and depth. Instead of simply carving all the way through the pumpkin, experiment with different carving depths to create a range of shadows and highlights. Carving some areas shallowly will allow light to filter through, creating a subtle glow, while carving others deeply will create dark, dramatic shadows. This technique can add incredible dimension and realism to your design, making your character truly come to life (or, rather, death).
Consider using a technique called "relief carving," where you carve away the surface of the pumpkin to create a raised image. This is particularly effective for creating portraits of horror movie icons. Start by outlining the basic shape of the face, then gradually carve away the surrounding areas, leaving the facial features raised. Use your detail knife to refine the features and add subtle details like wrinkles, scars, and menacing expressions. With a little practice, you can create a pumpkin that looks like it was sculpted by a Hollywood special effects artist.
Technique | Description | Example |
|---|---|---|
Shallow Carving | Allows light to filter through, creating a subtle glow. | Freddy Krueger's burned skin texture. |
Deep Carving | Creates dark, dramatic shadows. | Michael Myers' hollow eye sockets. |
Relief Carving | Carves away the surface to create a raised image. | A portrait of Dracula with sharp cheekbones. |
Creepy Creatures: DIY Scary Pumpkin Faces
Creepy Creatures: DIY Scary Pumpkin Faces
Unleash Your Inner Monster: Designing Original Creatures
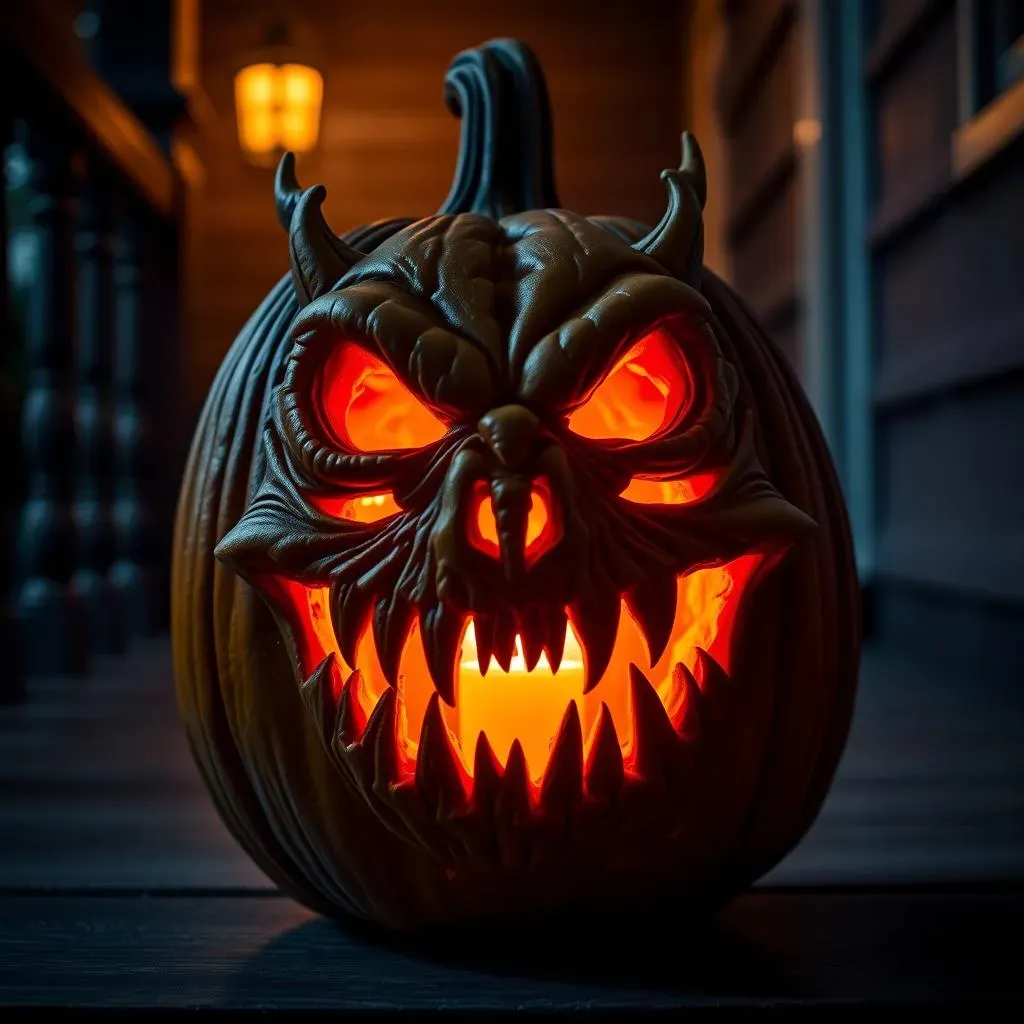
Forget the predictable ghosts and goblins! This year, let's conjure up some truly unique and terrifying creatures straight from the depths of your imagination. We're talking grotesque gargoyles, mutated monsters, and otherworldly horrors that will make your neighbors question their sanity. The beauty of DIY scary pumpkin faces is that there are no rules! Let your creativity run wild and design creatures that are as bizarre and unsettling as possible. Think about combining different animal features, adding grotesque details, and playing with asymmetry to create something truly unforgettable. After all, isn't Halloween the perfect time to unleash your inner mad scientist?
Start by sketching out your creature design on paper. Don't worry about making it perfect; the goal is to get your ideas flowing. Think about the overall shape of the face, the placement of the eyes, nose, and mouth, and any unique features you want to include. Consider using reference images of real-life creatures, like insects, reptiles, or deep-sea fish, for inspiration. Once you have a basic design, transfer it onto your pumpkin and start carving! Remember, the more outlandish and unsettling your creature is, the better!
The Anatomy of Fear: Eyes, Teeth, and Other Ghastly Details
The key to a truly terrifying pumpkin face lies in the details. The eyes should be menacing and unsettling, the teeth sharp and jagged, and any other features should be designed to evoke a sense of dread. Experiment with different eye shapes and sizes to create a variety of expressions. Wide, staring eyes can convey a sense of madness, while narrow, squinting eyes can suggest cunning and malice. Consider carving multiple eyes, or even a single, cyclopean eye, for an extra dose of creepiness.
The mouth is another crucial element. A wide, gaping maw filled with jagged teeth is a classic horror trope, but don't be afraid to get creative. Consider adding fangs, tusks, or even tentacles to your creature's mouth. You can also use different carving depths to create a more realistic and terrifying effect. Remember, the goal is to make your pumpkin face as unsettling and disturbing as possible. So, let your imagination run wild and don't be afraid to push the boundaries of good taste!
Illuminating the Nightmare: Bringing Your Creature to Life
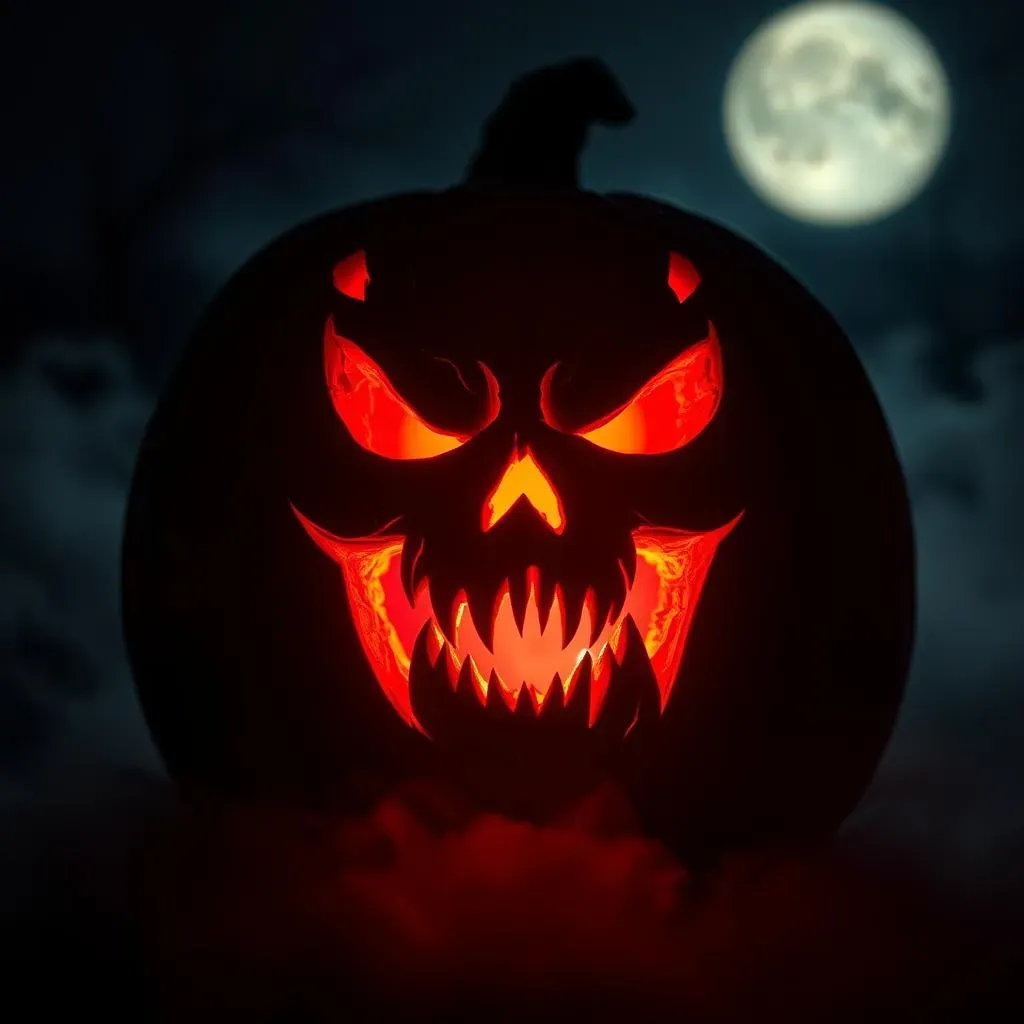
Once you've carved your creepy creature, it's time to bring it to life with light. The right lighting can transform a simple pumpkin face into a truly terrifying spectacle. Instead of using a traditional candle, experiment with different light sources to create a variety of effects. A flickering LED candle can add a sense of unease, while a colored light bulb can cast an eerie glow. Consider using a strobe light to create a disorienting and unsettling effect, or a black light to make certain details pop.
You can also use multiple light sources to create more complex lighting effects. Place a light inside the pumpkin and another behind it to create a dramatic silhouette. Or, use a spotlight to highlight specific features of your creature's face. Remember, the goal is to create an atmosphere of fear and dread. So, experiment with different lighting techniques until you find something that truly captures the essence of your creepy creature.
Detail | Effect | Example |
|---|---|---|
Wide, Staring Eyes | Madness, Panic | A creature driven to insanity. |
Narrow, Squinting Eyes | Cunning, Malice | A scheming, evil pumpkin. |
Jagged, Sharp Teeth | Aggression, Ferocity | A pumpkin ready to devour souls. |
Flickering Light | Unease, Instability | Suggests the presence of something otherworldly. |
Illuminating the Fear: Lighting Techniques for Horror Pumpkin Carvings
Illuminating the Fear: Lighting Techniques for Horror Pumpkin Carvings
Setting the Stage: Beyond the Basic Candle
so you've carved a masterpiece, a true testament to terror. But let's be honest, a simple tea light just isn't going to cut it. We need to think bigger, bolder, and, well, spookier! Lighting is everything when it comes to amplifying the horror of your pumpkin. Think of it as the special effects budget for your Jack-o'-lantern. It's what takes it from a cute decoration to a chilling spectacle that will make trick-or-treaters think twice before ringing your doorbell. Ditch the predictable candle and let's explore some truly terrifying lighting options.
The key here is experimentation. Don't be afraid to try different colors, intensities, and effects. Think about what kind of mood you're trying to create. Do you want a subtle sense of unease, or a full-blown jump scare? The right lighting can make all the difference. And remember, safety first! Always use battery-operated lights to avoid any fire hazards. After all, the only thing that should be burning on Halloween is your neighbor's envy.
Color Your Fears: Choosing the Right Hues
Color plays a crucial role in setting the tone for your horror pumpkin. Forget the warm, inviting glow of a traditional candle. We're going for chilling, unsettling, and downright creepy! Red is a classic choice for horror, evoking images of blood, fire, and general mayhem. Green can create a sickly, ghoulish effect, perfect for zombies and other undead creatures. Blue can add an eerie, otherworldly feel, suggesting something alien or supernatural. And don't underestimate the power of purple, which can create a sense of mystery and dread. The key is to choose a color that complements your carving design and enhances the overall horror factor.
Consider using colored LED lights to create a variety of effects. You can even find lights that slowly change color, adding an extra layer of unease. Experiment with different combinations of colors to see what works best for your pumpkin. A red light shining through the jagged teeth of a monster can be truly terrifying, while a blue light illuminating the hollow eyes of a ghost can send shivers down your spine. Remember, the goal is to create a visual experience that is as unsettling as possible.
Special Effects: Adding Movement and Atmosphere
Want to take your pumpkin lighting to the next level? Consider adding some special effects to create a truly immersive horror experience. A flickering LED candle can simulate the unsteady glow of a real flame, adding a sense of unease and unpredictability. A strobe light can create a disorienting and unsettling effect, making your pumpkin seem to come alive. And a fog machine, placed strategically behind your pumpkin, can add an eerie atmosphere that will send chills down your spine. The key is to use these effects sparingly and intentionally, to enhance the overall horror factor without overwhelming the design.
You can also use sound effects to amplify the fear. A hidden speaker playing creepy music or spooky sound effects can create a truly immersive experience. Think about the sounds of wind howling, chains rattling, or ghostly whispers. These sounds, combined with the right lighting, can transform your pumpkin from a simple decoration into a terrifying work of art. Just be careful not to scare your neighbors too much!
Effect | Description | Impact |
|---|---|---|
Flickering Light | Simulates an unsteady flame. | Adds unease and unpredictability. |
Strobe Light | Creates a disorienting effect. | Makes the pumpkin seem to come alive. |
Fog Machine | Adds an eerie atmosphere. | Creates a sense of mystery and dread. |
Sound Effects | Creepy music, spooky sounds. | Creates an immersive horror experience. |
Beyond the Carve: Creative Ways to Display Your Horror Pumpkins
Beyond the Carve: Creative Ways to Display Your Horror Pumpkins
Elevating the Scare: Unique Display Ideas
So, you've poured your heart (and pumpkin guts) into creating a truly terrifying Jack-o'-lantern. Now, don't just plop it on the porch and call it a day! The way you display your horror pumpkins can significantly amplify their impact, transforming your entire home into a haunted haven. Think beyond the traditional porch setting and consider creative ways to showcase your spooky creations, both indoors and outdoors. We're talking about turning your pumpkins into focal points, conversation starters, and the ultimate symbols of Halloween horror. Let's explore some display ideas that will make your neighbors green with envy (and possibly a little scared!).
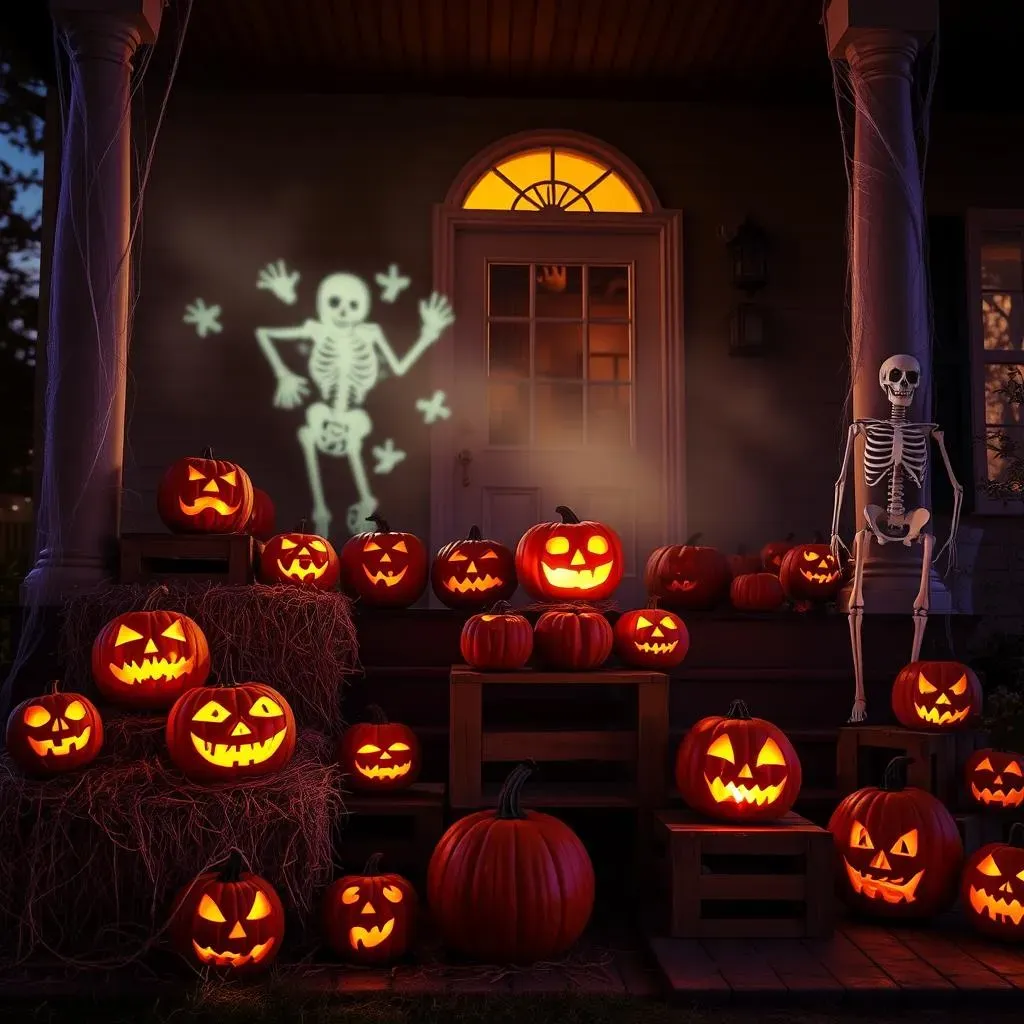
One of the simplest yet most effective ways to elevate your display is to play with height. Use varying sizes of hay bales, wooden crates, or even overturned buckets to create different levels. This adds visual interest and allows you to showcase multiple pumpkins without them getting lost in the crowd. Consider grouping pumpkins with different sizes, shapes, and carving styles to create a dynamic and eye-catching arrangement. And don't forget to incorporate other Halloween decorations, like skeletons, cobwebs, and spooky lighting, to complete the scene.
Setting the Scene: Indoor Horror Showcases
Don't limit your pumpkin displays to the outdoors! Bring the horror inside to create a truly immersive Halloween experience. A mantelpiece is the perfect spot to showcase a collection of smaller, intricately carved pumpkins. Arrange them amongst candles, spooky figurines, and draped cobwebs for a chilling centerpiece. You can also create a spooky vignette on a side table or bookshelf, using pumpkins as the focal point. Consider placing a single, dramatically lit pumpkin on a pedestal to create a museum-worthy display of horror.
For a truly unique indoor display, consider suspending pumpkins from the ceiling using fishing line. This creates a floating, ethereal effect that is both unsettling and visually stunning. Just make sure the pumpkins are securely attached and won't pose a hazard to anyone walking below. You can also use pumpkins as planters for spooky succulents or carnivorous plants, adding a touch of macabre beauty to your indoor space. Remember, the key is to create a cohesive and visually arresting display that will leave your guests both impressed and slightly terrified.
Outdoor Terrors: Creating a Spooky Ambiance
The porch is the traditional spot for displaying Halloween pumpkins, but that doesn't mean you have to stick to the traditional arrangement. Think beyond the single pumpkin on the doorstep and create a multi-layered, immersive display that will transform your entire yard into a haunted wonderland. Use lighting to create dramatic shadows and highlight specific features of your pumpkins. Consider projecting spooky images onto your house, using your pumpkins as part of the larger scene. And don't forget the sound effects! Hidden speakers playing creepy music or spooky sound effects can add an extra layer of terror to your outdoor display.
For a truly unforgettable outdoor display, consider creating a pumpkin graveyard. Arrange carved pumpkins on faux tombstones, surrounded by cobwebs and eerie lighting. You can even add a fog machine to create a spooky mist that will envelop your entire yard. Or, create a pumpkin patch filled with different sizes and shapes of pumpkins, some carved and some left natural. This creates a visually interesting and inviting scene that will draw trick-or-treaters in. Remember, the goal is to create an outdoor display that is both visually stunning and genuinely terrifying.
Display Idea | Description | Impact |
|---|---|---|
Elevated Heights | Use hay bales, crates, etc. | Adds visual interest and showcases multiple pumpkins. |
Indoor Vignettes | Pumpkins on mantels, tables, etc. | Creates a chilling centerpiece. |
Suspended Pumpkins | Pumpkins hanging from the ceiling. | Creates a floating, ethereal effect. |
Pumpkin Graveyard | Pumpkins on tombstones. | Transforms your yard into a haunted wonderland. |
Embrace the Gore: Your Horror Pumpkin Carving Masterpiece Awaits
So, there you have it – a cauldron full of pumpkin carving ideas horror to ignite your Halloween spirit. From sinister stencils to elaborate horror movie tributes, you're now equipped to create Jack-o'-lanterns that will send shivers down spines. Remember, the key to a truly terrifying pumpkin is creativity and a willingness to embrace the gruesome. Don't be afraid to experiment with different techniques, lighting, and display methods to achieve the ultimate horror effect. Now go forth, carve boldly, and unleash the fear this Halloween!