Table of Contents
Ready to ditch the spooky and embrace the adorable this Halloween? If you're searching for pumpkin carving ideas heart eyes are a fantastic way to add a touch of sweetness to your doorstep. Forget the scary monsters and ghouls; we're diving into a world of cute and expressive pumpkins that are sure to bring a smile to everyone's face. This guide is your go-to resource for creating the most lovable heart eyes pumpkins on the block, whether you're a seasoned carving pro or a complete beginner.
Simple Heart Eyes Pumpkin Carving Ideas for Beginners
Simple Heart Eyes Pumpkin Carving Ideas for Beginners
Easy Heart Cut-Outs
Let's start with the basics. If you're new to pumpkin carving or just want a super simple design, heart cut-outs are the way to go. All you need is a pumpkin, a stencil (or a steady hand), and your carving tools. Trace or draw hearts of different sizes onto your pumpkin, then carefully carve them out. You can arrange the hearts randomly, create a pattern, or even form a larger heart shape with smaller ones. It's a quick, easy, and adorable way to decorate your pumpkin.
For an extra touch, try using different carving depths. Carve some hearts all the way through for a bright glow, and others only partially through to create a subtle, shadowy effect. This adds dimension and visual interest to your design without requiring advanced carving skills. Remember, safety first! Take your time, use the right tools, and don't be afraid to ask for help if you need it.
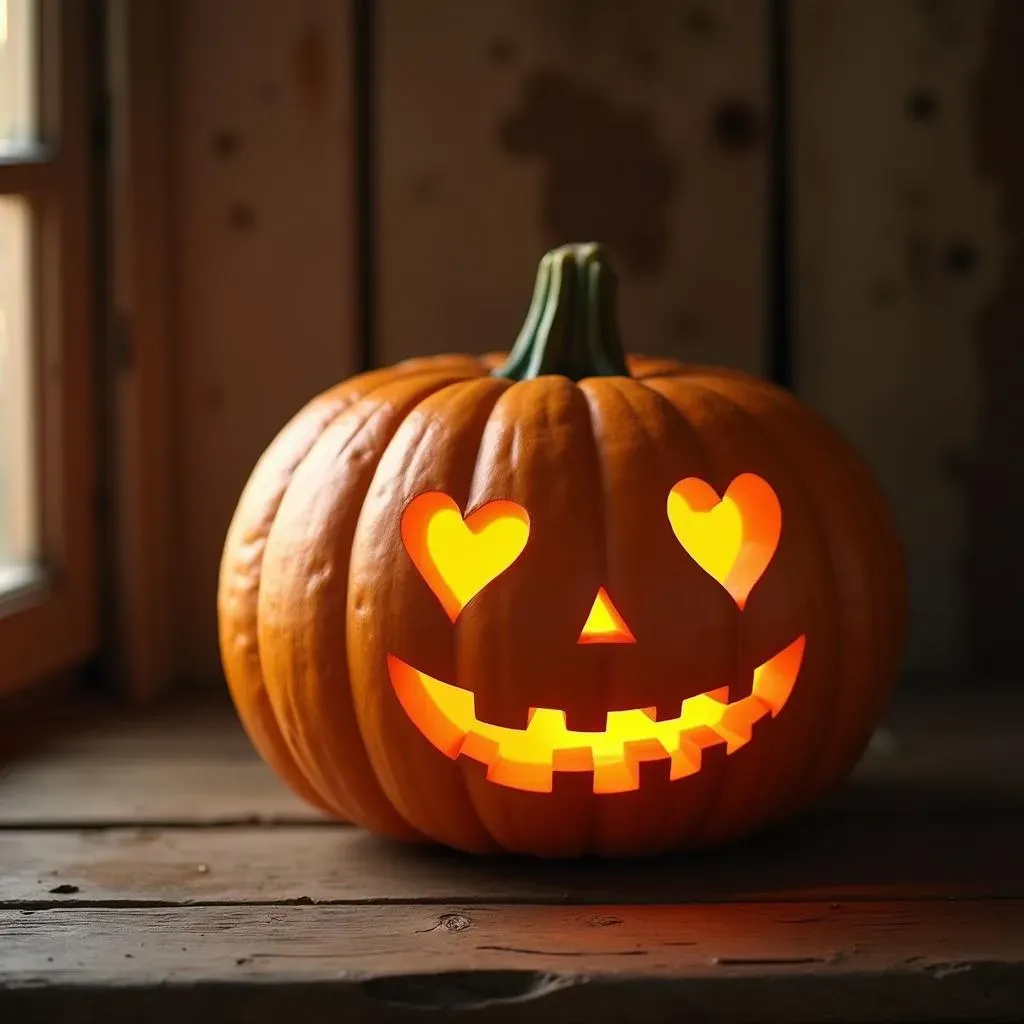
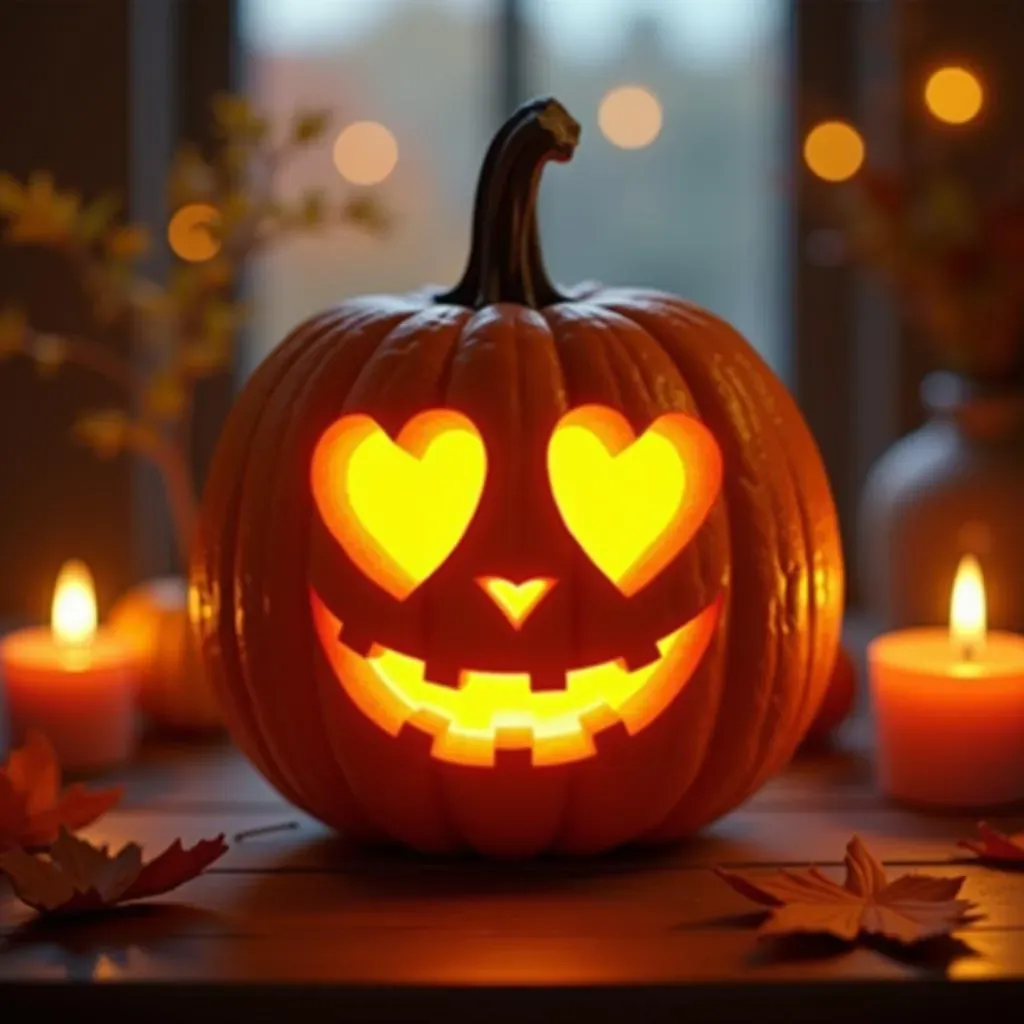
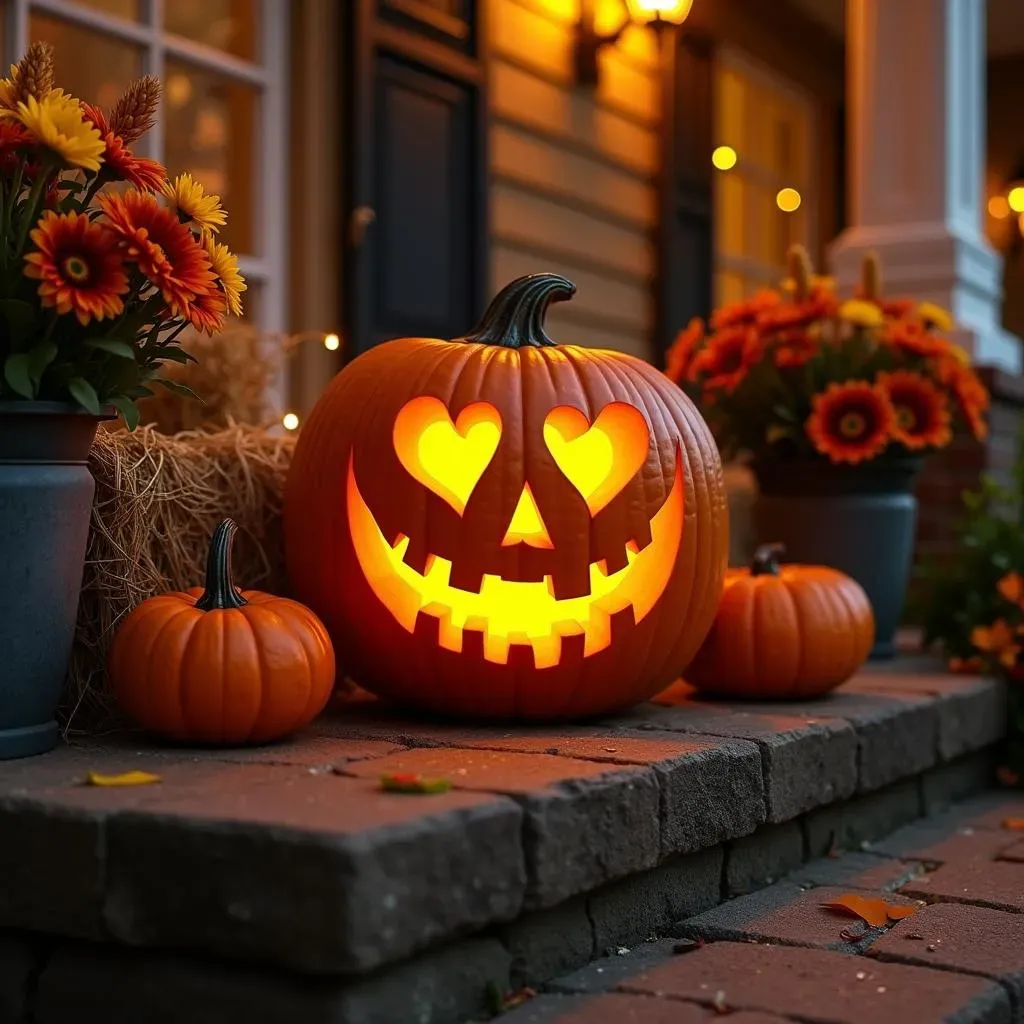
Heart Eyes with a Smiling Face
Want to add a bit more personality to your heart eyes pumpkin? Combine the heart eyes with a simple smiling mouth. This design is still beginner-friendly but adds a lot of character. Simply carve out two heart shapes for the eyes and a curved line for the smile. You can make the smile wide and goofy or subtle and sweet – it's all up to you!
To make the heart eyes really pop, consider using a smaller pumpkin. This will make the hearts appear larger in proportion to the face. You can also experiment with different heart shapes. Try rounded hearts, pointed hearts, or even slightly asymmetrical hearts for a more unique look. And don't forget to clean up the edges of your carving to ensure a crisp, professional finish.
Difficulty | Time | Tools |
|---|---|---|
Easy | 30-45 minutes | Pumpkin carving kit, stencil (optional) |
Tools & Tips for Perfect Heart Eyes Pumpkin Carvings
Tools & Tips for Perfect Heart Eyes Pumpkin Carvings
Essential Carving Tools
Alright, let's talk tools! You can't carve a masterpiece without the right equipment. A basic pumpkin carving kit is a good starting point, but if you're serious about those heart eyes, consider investing in a few extra items. A serrated knife is great for cutting open the pumpkin and thinning the walls, while smaller detail knives will help you create those precise heart shapes. Scoops are essential for removing the pumpkin guts, and stencils can be a lifesaver if you're not confident in your freehand drawing skills.
I also recommend having a poking tool or an awl on hand. These are perfect for transferring stencil designs onto the pumpkin or for creating small ventilation holes to prevent your pumpkin from rotting too quickly. And don't forget about safety! Always use carving tools with care and consider wearing gloves to protect your hands.
Pumpkin Prep is Key
Before you even think about carving, you need to prep your pumpkin properly. Start by washing the outside of the pumpkin to remove any dirt or debris. Then, cut a large hole in the top or back of the pumpkin (I prefer the back – it hides the opening!). Reach inside and scoop out all the seeds and pulp. Scrape the inside walls until they're relatively smooth and thin. This will make carving much easier and allow more light to shine through.
Here's a pro tip: after you've cleaned out your pumpkin, rub the cut edges with petroleum jelly. This will help prevent them from drying out and cracking. You can also spritz the inside of the pumpkin with a bleach solution (1 part bleach to 10 parts water) to kill any mold or bacteria. This will help your pumpkin last longer, so you can enjoy those heart eyes for days to come!
Tool | Purpose |
|---|---|
Serrated Knife | Cutting open pumpkin, thinning walls |
Detail Knives | Creating precise heart shapes |
Scoops | Removing seeds and pulp |
Stencils | Guiding carving design |
Awl/Poking Tool | Transferring stencils, ventilation |
Lighting Matters
The right lighting can make or break your heart eyes pumpkin. A traditional candle is a classic choice, but battery-operated lights are safer and longer-lasting. You can find LED candles that flicker like real flames or even color-changing lights that add a fun, festive touch. Experiment with different lighting options to see what looks best with your design.
Consider the placement of your light source. If you're using a single light, position it in the center of the pumpkin. If you're using multiple lights, arrange them to create a more even glow. You can also use colored cellophane or tissue paper to create different lighting effects. For example, placing a piece of red cellophane behind the heart eyes will give them a warm, romantic glow.
Creative Heart Eyes Pumpkin Design Variations
Creative Heart Eyes Pumpkin Design Variations
Stacked Heart Eyes
Want to take your heart eyes pumpkin to the next level? Try stacking the hearts! Carve a large heart at the top and then smaller hearts cascading down the pumpkin's surface. This creates a visually stunning effect that's sure to impress. You can use different sizes and shapes of hearts for added interest, or even incorporate other design elements like stars or swirls.
To really make the stacked hearts stand out, consider painting the inside of the pumpkin a contrasting color. This will create a dramatic effect when the light shines through. You can also use different carving depths to create a sense of depth and dimension. Remember, the key is to have fun and experiment! Don't be afraid to try new things and see what works best for you.
Heart Eyes with Eyelashes
For an extra touch of cuteness, add eyelashes to your heart eyes pumpkin. This is a simple detail that can make a big difference. Simply carve small, curved lines above the hearts to create the illusion of eyelashes. You can make the eyelashes long and dramatic or short and subtle – it's all up to you!
You can also experiment with different eyelash styles. Try adding multiple layers of eyelashes for a more voluminous look, or even create individual eyelashes using small pieces of craft foam or felt. And don't forget to consider the overall shape of the pumpkin when designing your eyelashes. A rounder pumpkin might look best with shorter, more curved eyelashes, while a taller pumpkin might be better suited for longer, more dramatic lashes.
Design Element | Description |
|---|---|
Stacked Hearts | Hearts cascading down the pumpkin |
Eyelashes | Curved lines above the hearts |
Painted Interior | Contrasting color inside the pumpkin |
Heart Eyes Animal Faces
Why not combine heart eyes with your favorite animal? Carve a cat, dog, or even a unicorn face onto your pumpkin and replace the eyes with hearts. This is a fun and creative way to personalize your pumpkin and show off your love for animals. You can find stencils online or create your own designs. Just remember to keep the design simple and easy to carve.
To make your animal face pumpkin even more unique, consider adding other animal-related elements. Carve paw prints around the base of the pumpkin, or add a pair of ears made from craft foam or felt. You can also paint the pumpkin to match the color of your favorite animal. The possibilities are endless!
Heart Eyes Emoji Pumpkin Carving: A StepbyStep Guide
Heart Eyes Emoji Pumpkin Carving: A StepbyStep Guide
Step 1: Gather Your Supplies
Alright, let's get down to business! To carve your very own heart eyes emoji pumpkin, you'll need a few essential supplies. First, grab a pumpkin that's round and relatively smooth. The smoother the surface, the easier it will be to carve those perfect hearts. You'll also need a pumpkin carving kit, which typically includes a serrated knife, a scoop, and some smaller detail tools. If you don't have a kit, a sturdy kitchen knife and a spoon will work in a pinch. And of course, you'll need a stencil of the heart eyes emoji. You can find these online or even draw your own!
In addition to the basics, I recommend having a few extra items on hand. A poking tool or an awl is great for transferring the stencil design onto the pumpkin. A damp cloth will help you keep your hands and tools clean. And a battery-operated candle or LED light will illuminate your masterpiece without the risk of fire. Finally, don't forget a large bowl to collect all the pumpkin guts. Trust me, you'll thank me later!
Step 2: Prep Your Pumpkin
Now that you've gathered your supplies, it's time to prep your pumpkin. Start by washing the outside of the pumpkin to remove any dirt or debris. Then, carefully cut a large hole in the back of the pumpkin. I prefer the back because it hides the opening and keeps the focus on the front of the design. Reach inside and scoop out all the seeds and pulp. This can be a messy job, so be sure to have that bowl handy!
Once you've removed all the seeds and pulp, scrape the inside walls of the pumpkin until they're relatively smooth and thin. This will make carving much easier and allow more light to shine through. Be careful not to scrape too hard, though, or you might weaken the pumpkin's structure. After you've finished scraping, wipe down the inside of the pumpkin with a damp cloth to remove any remaining debris.
Step | Description |
|---|---|
1 | Gather supplies (pumpkin, carving kit, stencil) |
2 | Wash and cut open the pumpkin |
3 | Remove seeds and pulp |
4 | Scrape the inside walls |
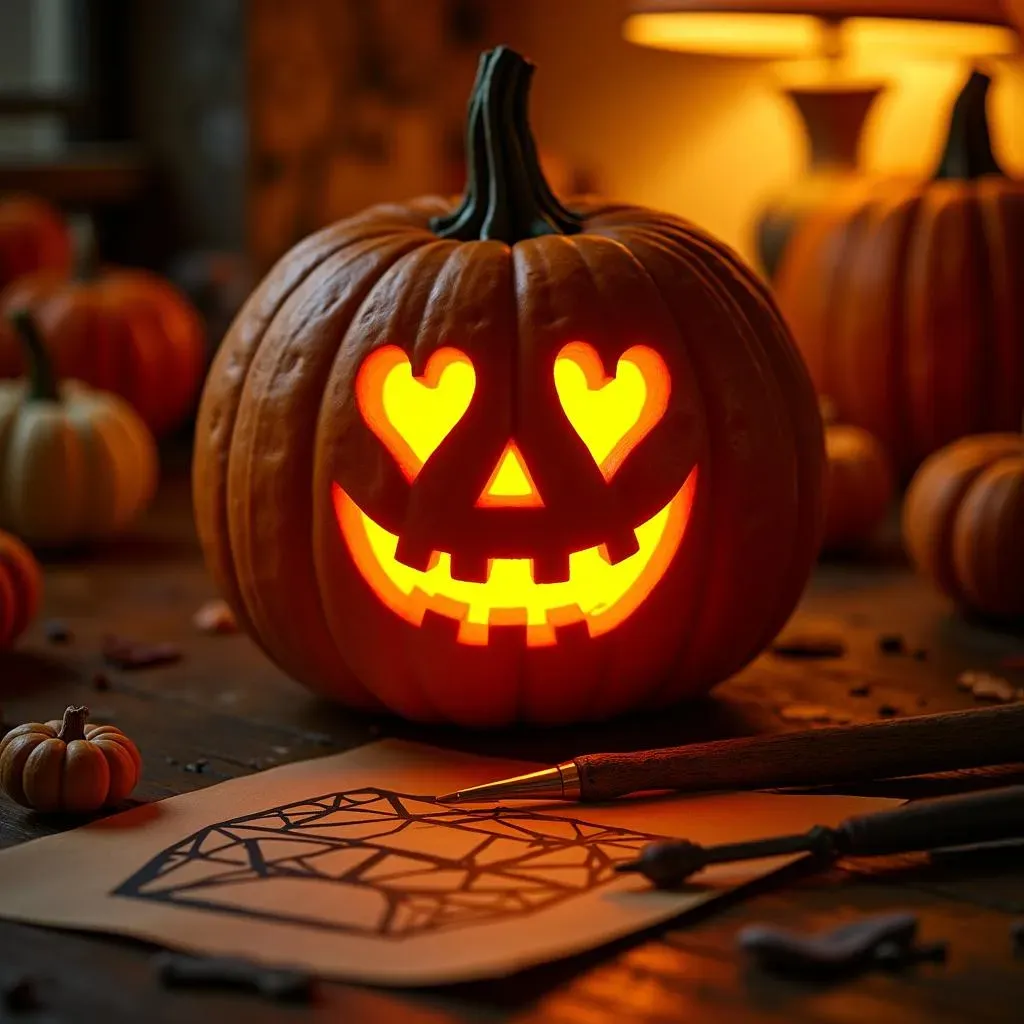
Step 3: Transfer the Stencil
With your pumpkin prepped and ready to go, it's time to transfer the heart eyes emoji stencil onto the surface. If you're using a printable stencil, tape it securely to the front of the pumpkin. Then, use a poking tool or an awl to create small holes along the stencil lines. These holes will serve as a guide for your carving. If you're drawing your own stencil, use a marker to sketch the design directly onto the pumpkin. Don't worry if it's not perfect – you can always make adjustments later.
When transferring the stencil, pay close attention to the placement of the heart eyes. You want them to be evenly spaced and proportional to the size of the pumpkin. If you're having trouble visualizing the final result, try holding the stencil up to the pumpkin and stepping back to take a look. This will give you a better sense of how the design will appear once it's carved.
Step 4: Carve the Design
Now for the fun part – carving those heart eyes! Using a serrated knife or a detail tool, carefully follow the stencil lines or the outline of your drawing. Start with the smaller details, like the curves of the hearts, and then move on to the larger areas. Be sure to take your time and use a sawing motion to cut through the pumpkin's flesh. Don't try to force the knife, or you might end up with jagged edges or even break the pumpkin.
As you carve, periodically remove the cut-out pieces of pumpkin to reveal the design. This will help you see your progress and make any necessary adjustments. If you accidentally cut too far, don't panic! You can usually fix small mistakes by reattaching the piece with toothpicks or by using a bit of pumpkin pulp as glue. And remember, even if your pumpkin isn't perfect, it's still a unique and adorable creation!
Displaying Your Heart Eyes Pumpkin Carving Masterpiece
Displaying Your Heart Eyes Pumpkin Carving Masterpiece
Front Porch Pride
you've poured your heart and soul into carving the perfect heart eyes pumpkin – now it's time to show it off! The classic spot is, of course, your front porch. Place your pumpkin on a sturdy table or stand where it can be easily seen by trick-or-treaters and passersby. Surround it with other fall decorations like hay bales, corn stalks, and colorful mums to create a festive display. And don't forget the lighting! A well-lit pumpkin is a happy pumpkin.
Consider the height of your display. You want your pumpkin to be visible, but not so high that it's at risk of being knocked over. You can also use multiple pumpkins to create a tiered display, with the heart eyes pumpkin taking center stage. And if you're feeling extra creative, try adding a spooky soundtrack to your porch display. Nothing sets the mood like some eerie Halloween tunes!
Indoor Illumination
If you prefer to keep your heart eyes pumpkin indoors, there are plenty of creative ways to display it. Place it on a mantelpiece surrounded by candles and other decorative items. Use it as a centerpiece for your dining table, or display it on a bookshelf alongside your favorite Halloween-themed books. You can even create a mini pumpkin patch in your living room using a few small hay bales and some faux leaves.
When displaying your pumpkin indoors, be mindful of the lighting. A warm, soft light will create a cozy and inviting atmosphere, while a brighter light will make the heart eyes really pop. You can also use colored lights to add a touch of whimsy. And don't forget to protect your furniture! Place your pumpkin on a coaster or a placemat to prevent any moisture from damaging the surface.
Display Location | Decorating Ideas |
|---|---|
Front Porch | Hay bales, corn stalks, mums, spooky soundtrack |
Mantelpiece | Candles, decorative items |
Dining Table | Centerpiece, festive tablecloth |
Bookshelf | Halloween-themed books, faux leaves |
Safety First!
Whether you're displaying your heart eyes pumpkin indoors or outdoors, safety should always be your top priority. If you're using real candles, never leave them unattended and keep them away from flammable materials. Battery-operated lights are a safer alternative, especially if you have children or pets. And be sure to keep your pumpkin out of reach of small children and animals to prevent them from accidentally knocking it over or ingesting any of the pumpkin flesh.
Also, be aware of the weather conditions. If it's raining or windy, you might want to bring your pumpkin indoors to protect it from the elements. And if you live in an area with squirrels or other critters, you might need to take extra precautions to prevent them from nibbling on your masterpiece. A little bit of planning and common sense can go a long way in ensuring that your heart eyes pumpkin stays safe and beautiful throughout the Halloween season.
Spread the Love with Your Heart Eyes Pumpkin
So, you've reached the end of our heart eyes pumpkin carving adventure! Hopefully, you're now brimming with inspiration and ready to create a pumpkin that's as cute as it is creative. Remember, the most important thing is to have fun and let your personality shine through. Whether you opt for a simple emoji design or a more elaborate, personalized creation, your heart eyes pumpkin is sure to spread some joy and make your Halloween display extra special. Now go forth, carve with love, and let those heart eyes light up the night!