Table of Contents
Tired of the same old jack-o'-lantern grin? This Halloween, why not combine your love for the links with your pumpkin carving skills? We're ditching the spooky clichés and teeing off with 11 awesome pumpkin carving ideas golf enthusiasts will adore. From meticulously carved golf logos to hilarious depictions of those "uh-oh" moments on the course, get ready to transform your porch into a golfer's Halloween paradise. Whether you're a seasoned carving pro or a newbie with a par-fect pun in mind, these ideas will inspire you to create a unique and memorable display. So, grab your carving tools (or paintbrushes!), and let's get ready to drive some creativity into your Halloween decorations. This guide will walk you through crafting golf-themed masterpieces, from etching iconic logos to painting portraits of your favorite players, even using actual golf balls and tees to add a touch of realism. Get ready to impress your neighbors and show off your passion for the game with these fun and festive pumpkin designs!
Tee Off with These GolfThemed Pumpkin Carving Ideas

Tee Off with These GolfThemed Pumpkin Carving Ideas
Fairway to Fright Night
so you're a golf nut and Halloween is creeping closer? Let’s ditch the generic ghosts and goblins and bring your two loves together. Think beyond the basic triangle eyes and snaggle-toothed grin. We're talking full-on golf-themed pumpkin masterpieces that'll have your neighbors saying, "Fore!" (get it?). From subtle nods to the sport to over-the-top tributes, there's a golf-inspired pumpkin carving idea for every skill level and sense of humor.
Imagine a pumpkin subtly etched with the dimple pattern of a golf ball. Or perhaps a more ambitious project: a golfer in mid-swing, frozen in pumpkiny action. The possibilities are endless. The key is to embrace the challenge and have fun with it. After all, even a slightly wonky golf pumpkin is still way cooler than another boring jack-o'-lantern, right?
From Tee to Green (Glow)
Don't feel pressured to be a pumpkin Picasso right away. Start simple. A golf ball design is super easy. Stencils are your friend. Trace a golf ball on a pumpkin and then carve it to perfection. You can paint the pumpkin a solid color before. It will look more like a golf ball. Or you can take the challenge and create a golf course scene. Think mini-golf, but make it spooky!
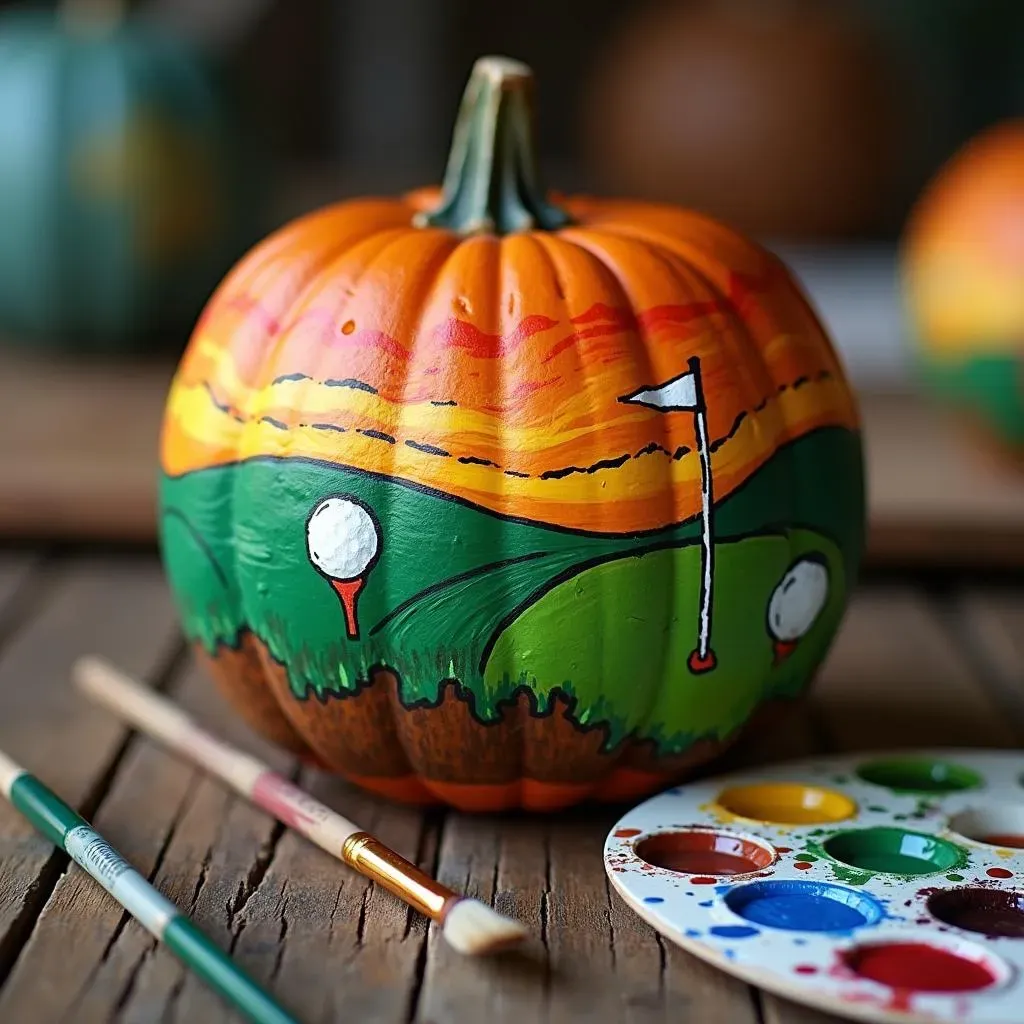
Putting Around with Pumpkins
If carving isn't your forte, don't sweat it! Painting is your new best friend. Grab some acrylics and transform your pumpkin into a canvas for your favorite golfer's portrait. A cartoonish Tiger Woods? Absolutely. A minimalist Rickie Fowler? Go for it. Or, for a truly unique touch, use real golf tees to create a textured design. Stick them in to form a pattern, a letter, or even the outline of a golf club. Boom – instant golf-themed pumpkin awesomeness!
Consider adding a small putting green around the base of your pumpkin. Use felt or artificial turf and a mini-putter. Now you have a decoration and a game! Just be prepared for some friendly competition from the trick-or-treaters.
Ace Your Carving Game: Golf Logo Pumpkins
Ace Your Carving Game: Golf Logo Pumpkins
Show Your Allegiance: Logo Selection
Ready to take your pumpkin carving to the next level? Nothing screams "golf fanatic" quite like a meticulously carved golf logo. Whether it's the iconic Titleist script, the Callaway chevron, or the TaylorMade emblem, choosing the right logo is key. Think about your favorite brand or the logo that resonates most with your personal golf journey. This isn't just about decoration; it's a statement. It's about showcasing your passion for the game, one pumpkin at a time.
Before you even touch a carving tool, do your homework. Find a high-resolution image of the logo you want to carve. The clearer the image, the easier it will be to transfer onto your pumpkin. Print it out in the size you want the logo to be on your pumpkin. Trust me, a little prep work goes a long way in avoiding a logo that looks more like a squashed golf ball than a symbol of your favorite brand.
Tools of the Trade: Carving Like a Pro
Now, let's talk tools. A basic pumpkin carving kit might work, but for intricate logo work, you'll want to upgrade your arsenal. Invest in some smaller, more precise carving tools, like those used for wood carving or linoleum cutting. These will allow you to create finer details and sharper lines. A good transfer method is also essential. You can either tape the printed logo onto your pumpkin and use a poking tool to trace the outline, or use carbon paper to transfer the image directly onto the surface. Remember, patience is your friend here. Rushing will only lead to jagged edges and a logo that's less "pro shop" and more "chop shop."
From Flat to Fantastic: The Carving Process
With your logo transferred and your tools ready, it's time to get carving. Start with the outline of the logo, using small, controlled cuts. Work your way inward, removing small pieces of pumpkin flesh at a time. Remember, it's easier to remove more pumpkin than it is to put it back. If the logo has multiple layers or colors, consider using different carving depths to create a 3D effect. For example, you could carve the main logo deeper and then lightly etch the surrounding details. This will add depth and visual interest to your pumpkin masterpiece. Finally, light it up! A well-placed light inside the pumpkin will make your logo pop and show off all your hard work.
Don’t be afraid to experiment with different lighting options. A colored bulb can add a unique twist, or you could even use a flickering LED candle to create a spooky ambiance. No matter how you light it, a golf logo pumpkin is sure to be a conversation starter and a testament to your love for the game.
Beyond the Carve: GolfInspired Pumpkin Painting
Beyond the Carve: GolfInspired Pumpkin Painting
Brushstrokes and Birdies
Alright, so maybe wielding a carving knife isn't your cup of tee. No problem! Painting pumpkins opens up a whole new fairway of possibilities. Think of your pumpkin as a blank canvas just begging for a golf-themed masterpiece. You can go for realistic portraits, abstract designs, or even just simple, bold patterns. The beauty of painting is that it's way less messy than carving, and you can easily correct mistakes. Plus, it's a great option for those of us who are, shall we say, "artistically challenged" in the carving department.
Acrylic Ace: Choosing Your Palette
When it comes to painting, acrylics are your best friend. They're durable, water-resistant, and come in a rainbow of colors. Opt for outdoor acrylics if you plan to display your pumpkin outside, as they'll hold up better against the elements. As for brushes, a variety of sizes will come in handy. Use larger brushes for base coats and backgrounds, and smaller, finer brushes for details and outlines. Don't forget a palette for mixing colors and a cup of water for rinsing your brushes. Pro tip: a damp sponge is great for creating textured effects or blending colors seamlessly.
Tee-riffic Techniques: From Base Coat to Brilliance
Before you start painting, make sure your pumpkin is clean and dry. A light sanding can also help the paint adhere better. Start with a base coat of your desired color. This will create a smooth surface for your design. Once the base coat is dry, sketch out your design with a pencil. This will help you stay on track and avoid any major mishaps. Then, start painting! Work in layers, allowing each layer to dry before adding the next. This will prevent colors from bleeding and create a more polished look. For intricate details, use a fine-tipped brush and a steady hand. And don't be afraid to experiment with different techniques, like stippling, dry brushing, or even adding glitter for a touch of sparkle.
Finally, seal your painted pumpkin with a clear coat of varnish to protect it from the elements and keep your masterpiece looking its best. With a little creativity and some basic painting supplies, you can transform your pumpkin into a golf-themed work of art that will impress even the most discerning golf aficionado.
Capturing Golf's Funny Side: Relatable Pumpkin Faces
Capturing Golf's Funny Side: Relatable Pumpkin Faces
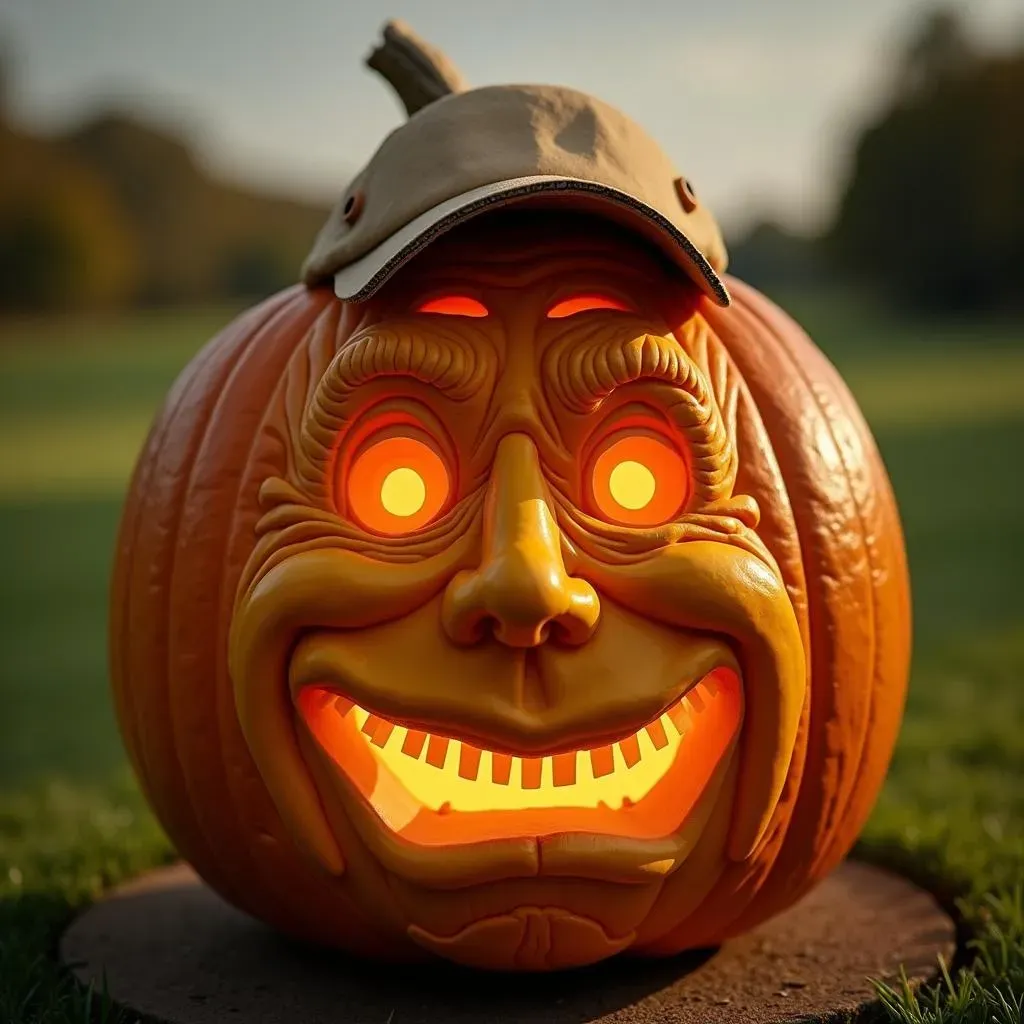
let's be honest, golf isn't always birdies and sunshine. Sometimes, it's shanks into the woods and three-putt nightmares. And those moments? They're pure comedic gold. So, why not immortalize them on a pumpkin? Think about that face you make after chunking a chip shot, or the sheer disbelief when your putt lips out. These are the faces of relatable golf, the ones every golfer knows and loves (to hate). Capturing these expressions on a pumpkin is not only hilarious, but it's also a way to connect with fellow golfers and share a laugh about the struggles of the game.
Consider turning your pumpkin into a monument to the "grip it and rip it" gone wrong. Picture a pumpkin with bulging eyes, a contorted mouth, and maybe even a few cracks to simulate the stress of a wayward drive. Or, go for the classic "reading the green" face, complete with squinting eyes and a furrowed brow. The key is to exaggerate the features and capture the raw emotion of the moment. After all, the more over-the-top, the funnier it will be.
To really nail these relatable pumpkin faces, think about using different carving techniques to create texture and depth. A shallow gouge can create the illusion of wrinkles, while a deeper cut can emphasize a furrowed brow. You can also use paint to add details like sweat, tears, or even a rogue blade of grass stuck to the golfer's cheek. And don't be afraid to get creative with accessories. A small visor made of cardboard, a toothpick "cigar," or even a mini-golf club can add to the comedic effect. The goal is to create a pumpkin that's not only funny but also instantly recognizable to anyone who's ever stepped foot on a golf course.
Level Up Your Pumpkin: Incorporating Real Golf Gear
Level Up Your Pumpkin: Incorporating Real Golf Gear
Tee-riffic Transformations: Beyond the Carve
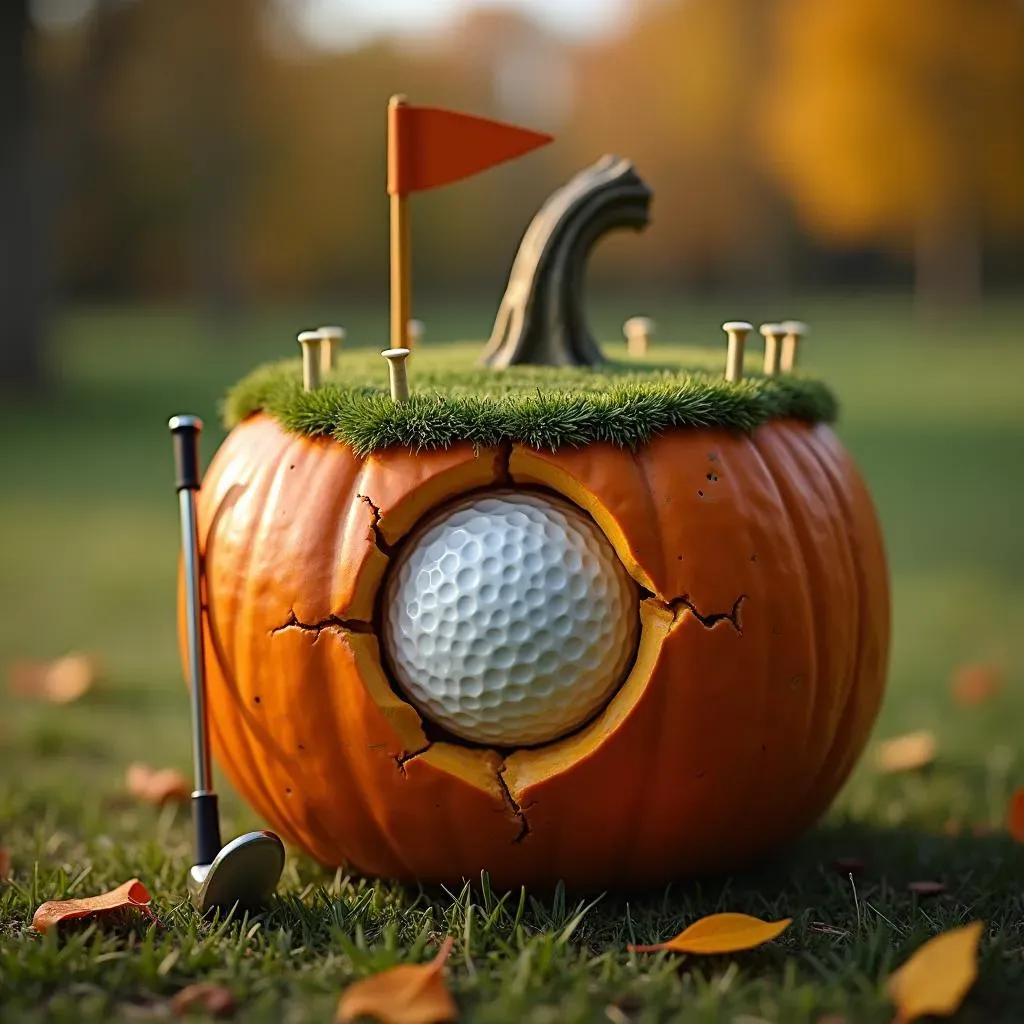
Alright, let's kick things up a notch! We've carved, we've painted, we've even captured the agony of a shanked drive. But what if we could take our golf-themed pumpkins to a whole new dimension? I'm talking about incorporating actual golf gear! Think golf balls, tees, gloves – anything you've got lying around that can add a touch of authenticity and a whole lot of "wow" factor. This is where your pumpkin goes from being a simple decoration to a true conversation piece. It's about pushing the boundaries of pumpkin art and creating something that's both visually stunning and undeniably golf-centric.
Imagine a pumpkin with a golf ball seemingly embedded in its side, creating the illusion of a direct hit. Or a pumpkin adorned with a "green" of tees, meticulously arranged to mimic the putting surface. The possibilities are endless, and the only limit is your imagination (and maybe your supply of spare golf balls). This isn't just about decorating; it's about crafting a mini-golfing diorama right on your front porch!
Gear Up: What to Use
So, what kind of golf gear can you actually use on a pumpkin? Here are a few ideas to get you started:
- Golf Balls: Attach them to the pumpkin using glue or toothpicks to create the illusion of impact or to form a decorative pattern.
- Golf Tees: Stick them into the pumpkin to create texture, spell out words, or even form the outline of a golf course.
- Golf Gloves: Drape a glove over the pumpkin to add a touch of realism, or even use it as a makeshift "hairpiece" for your pumpkin golfer.
- Miniature Golf Clubs: Prop a mini club against the pumpkin to add a touch of whimsy, or even create a miniature golf scene around the base of the pumpkin.
- Divot Repair Tools: Use them as decorative accents, or even to create a "scarred" effect on the pumpkin's surface.
Remember, safety first! Be careful when using sharp objects, and always supervise children when they're working with golf gear. And don't be afraid to get creative! The more unique and unexpected your use of golf gear, the more impressive your pumpkin will be.
Putting It All Together: Design Ideas
so you've got your gear, you've got your pumpkin, now what? Here are a few design ideas to spark your creativity:
- The "Impact" Pumpkin: Carve a hole in the side of the pumpkin and insert a golf ball, creating the illusion of a direct hit. Add some cracks around the hole to simulate the impact.
- The "Tee Green" Pumpkin: Cover the top of the pumpkin with golf tees, creating a miniature putting green. Add a small flag made of paper or fabric.
- The "Golfer's Nightmare" Pumpkin: Carve a face of despair on the pumpkin and surround it with golf balls, tees, and broken golf clubs. A true representation of a bad round.
Or, you could go for a more abstract design. Use golf balls to create a mosaic pattern on the pumpkin's surface, or arrange tees in a geometric design. The key is to have fun and let your creativity flow. With a little imagination and some spare golf gear, you can transform your pumpkin into a true work of art that will impress even the most discerning golf enthusiast. So go ahead, level up your pumpkin and show the world your love for the game!
Drive Home the Halloween Fun with Golf-Themed Pumpkins
So, there you have it – 11 ways to bring your love of golf to your Halloween decorations with creative pumpkin carving ideas golf. Whether you choose to carve a detailed portrait of your favorite golfer, paint a hilarious scene from the course, or even incorporate real golf balls and tees into your design, the possibilities are endless. Don't be afraid to get creative, experiment with different techniques, and most importantly, have fun! This Halloween, let your pumpkin be a reflection of your passion for the game and a conversation starter for all your golf-loving friends and neighbors. Now go on, grab a pumpkin, and get carving!