Table of Contents
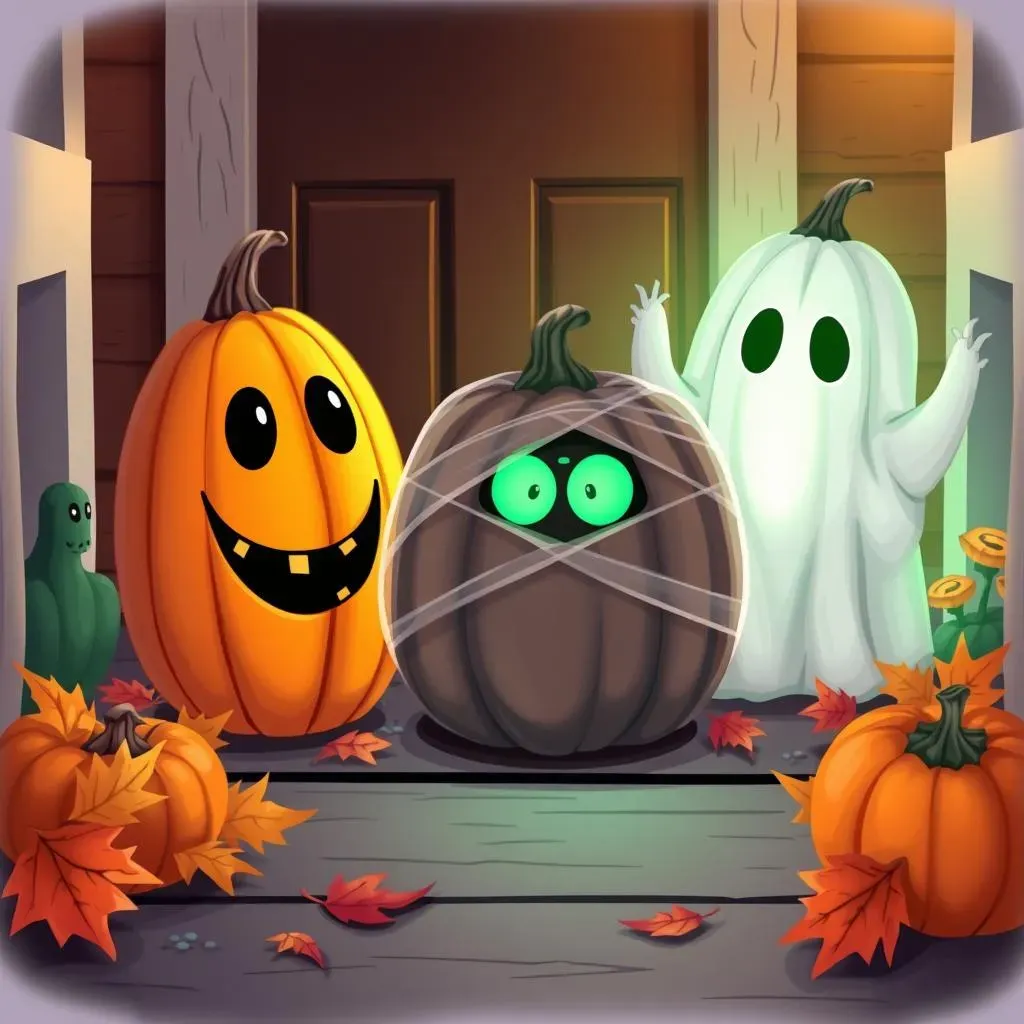
Halloween is creeping closer, and what better way to celebrate than with some creatively spooky decorations? Forget the generic jack-o'-lanterns this year and dive into the world of pumpkin carving ideas ghost! Whether you're a seasoned carving pro or a newbie looking for a fun family activity, we've got you covered. This guide is your one-stop shop for turning ordinary pumpkins into ghostly masterpieces. We'll explore a range of inspirations, from classic ethereal apparitions to modern, minimalist specters. Get ready to learn step-by-step carving techniques that will bring your ghostly visions to life, plus discover fantastic no-carve options for a mess-free alternative. Perfect for kids and adults alike, these no-carve methods are just as effective at creating a spooky ambiance. Finally, prepare to be amazed by a gallery of creative pumpkin carving ideas, showcasing different styles and skill levels to spark your own imagination. So, grab your carving tools (or paintbrushes!), and let's conjure up some seriously spooky fun!
Ethereal Inspirations: Discovering Ghost Pumpkin Carving Ideas
Ethereal Inspirations: Discovering Ghost Pumpkin Carving Ideas
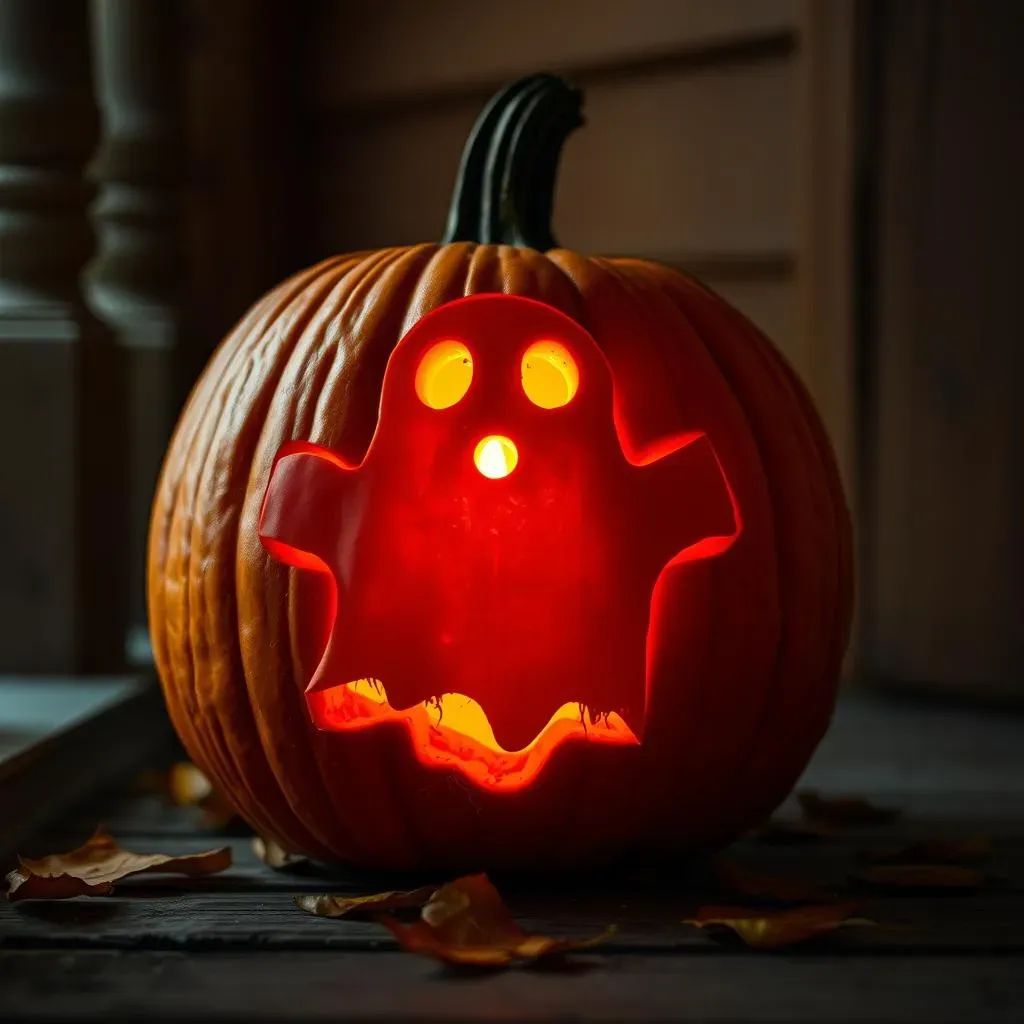
Classic Ghostly Silhouettes
When you think "ghost," what pops into your head? Probably those classic, sheet-wearing specters, right? These simple silhouettes are a fantastic starting point for your pumpkin carving adventure. Think Casper the Friendly Ghost, but make it spooky-chic. The beauty of these designs lies in their simplicity – a few well-placed circles for eyes and a wavy mouth, and you've got an instantly recognizable ghost. But don't let the simplicity fool you; with a little creativity, you can elevate these classic shapes.
Consider adding details like tattered edges to the "sheet" or varying the size and shape of the eye holes for a more dynamic look. You could even create a whole ghostly family on a series of pumpkins, each with its unique personality. And hey, if you're feeling extra ambitious, try carving a slightly raised area around the ghost to give it a three-dimensional effect. It's all about taking that familiar image and making it your own!
Modern Minimalist Ghosts
Maybe you're not into the traditional, cartoony ghost look. That's totally cool! Modern design is all about clean lines and simplicity, and that aesthetic translates perfectly to pumpkin carving. Think geometric shapes, negative space, and subtle details. Instead of carving out a whole ghost shape, try using a series of triangles or squares to suggest a ghostly form.
You could even create an abstract pattern that evokes a sense of unease and mystery. The key here is restraint – less is more. Focus on creating a visually striking design with minimal carving. This approach is not only stylish but also a great option if you're short on time or just want a less messy carving experience. Plus, a minimalist ghost pumpkin looks incredibly chic on a porch or windowsill.
Ghost Style | Description | Skill Level |
|---|---|---|
Classic Silhouette | Simple, sheet-wearing ghost shape | Beginner |
Minimalist Ghost | Geometric shapes, negative space | Intermediate |
3D Ghost | Raised carving, layered effect | Advanced |
DIY Ghost Pumpkin: StepbyStep Carving Guide
DIY Ghost Pumpkin: StepbyStep Carving Guide
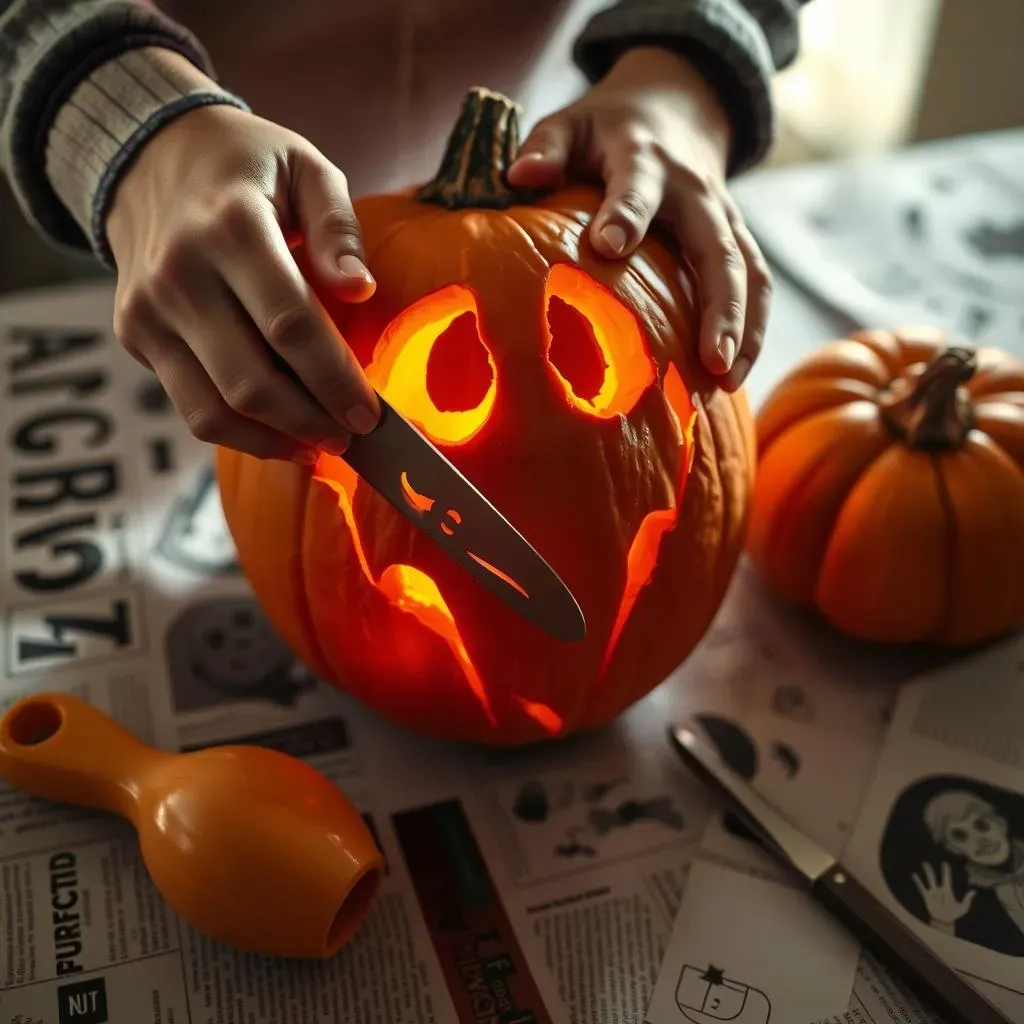
Gather Your Ghostly Gear
Alright, so you've got your pumpkin and a vision of a spooky specter dancing in your head. Awesome! But before you start hacking away, let's make sure you have all the right tools for the job. First, you'll need a good carving kit. These usually come with a variety of saws, scoops, and pokers designed specifically for pumpkin carving. A sturdy serrated knife is also essential for cutting the initial opening and any larger shapes. Don't forget a scoop or large spoon to clean out the pumpkin guts – nobody wants a slimy ghost!
Next up, you'll need a stencil or template of your chosen ghost design. You can find tons of free printable stencils online, or you can even draw your own! A poking tool or awl will help you transfer the stencil onto the pumpkin's surface. Finally, grab a bowl for the pumpkin seeds (roasting them is a delicious Halloween treat!) and some newspaper or a drop cloth to protect your workspace. Safety first, folks! A well-lit area and a pair of gloves are also highly recommended.
Having the right tools makes all the difference!
- Carving Kit (saws, scoops, pokers)
- Serrated Knife
- Scoop or Large Spoon
- Ghost Stencil or Template
- Poking Tool or Awl
- Bowl for Seeds
- Newspaper or Drop Cloth
- Gloves (optional)
- Well-Lit Workspace
Carving Your Casper: A Step-by-Step Guide
gear's ready, design's picked – let's get carving! Start by carefully cutting a large circle around the stem of the pumpkin. Make sure to angle the knife inward slightly, creating a lid that won't fall through. Once the lid is off, it's time to get your hands dirty and scoop out all the seeds and pulp. Scrape the inside walls smooth for easier carving. Now, tape your stencil to the pumpkin and use your poking tool to transfer the design by poking holes along the stencil lines.
Remove the stencil and grab your carving tools. Start with the smaller, more intricate details first. Use short, controlled strokes, sawing along the dotted lines you created. For larger areas, use a larger saw and take your time. Remember, it's easier to remove more pumpkin than to put it back! Once you've carved out all the design elements, carefully push the cut pieces out from the inside. Pop the lid back on, add a candle or LED light, and voila! You've got a spooky-cool DIY ghost pumpkin!
NoCarve Ghost Pumpkin Ideas: Spooky Fun for Everyone
NoCarve Ghost Pumpkin Ideas: Spooky Fun for Everyone
Paint Your Own Phantom: Easy Painting Techniques
Alright, let's ditch the knives and embrace the paintbrushes! Painting your ghost pumpkin is a super easy and incredibly versatile way to create a spooky masterpiece. You're not limited by carving tools, so your creativity can really run wild. Start with a base coat of white paint to give your ghost a classic ethereal look. From there, you can add details like spooky eyes, a ghostly grin, or even swirling spectral patterns. Acrylic paints work best, as they adhere well to the pumpkin's surface and dry quickly. For a more textured effect, try using sponges or stippling brushes to create a wispy, ghostly appearance. And don't be afraid to experiment with different colors! A touch of grey or blue can add depth and dimension to your phantom.
This is a fantastic option for younger kids who might not be ready for carving tools. Plus, it's a lot less messy! Grab some paint, brushes, and let your imagination soar. You could even create a whole family of painted ghost pumpkins, each with its unique personality and expression. Get creative and have fun!
Gauze and Glory: Mummifying Your Pumpkin
Want to give your ghost pumpkin a truly unique and creepy look? Try mummifying it! This is a super simple technique that involves wrapping your pumpkin in gauze to create a spooky, bandaged effect. Start by gathering some white gauze – you can find it at most drugstores or craft stores. Then, simply wrap the gauze around the pumpkin, overlapping the layers to create a mummy-like appearance. Secure the ends of the gauze with glue or tape. For an extra touch of creepiness, you can add googly eyes peeking out from under the bandages. This technique is not only easy but also incredibly effective at creating a spooky and eye-catching decoration.
Consider using different colors of gauze for a more unique look. You could also add some fake blood or dirt to the bandages for a truly gruesome effect. The possibilities are endless! This is a great project to do with kids, as it's both fun and easy to create. Plus, it's a guaranteed conversation starter!
Glow-in-the-Dark Specters: Light Up the Night
Take your no-carve ghost pumpkin to the next level by making it glow in the dark! This is a simple and effective way to create a spooky and eye-catching decoration that will light up your porch or windowsill. You can use glow-in-the-dark paint to create ghostly designs on your pumpkin, or you can attach glow-in-the-dark stickers or accessories. Another option is to insert a battery-operated LED light inside the pumpkin to create a spooky, glowing effect. This is a great way to add some extra ambiance to your Halloween decorations.
Experiment with different colors of glow-in-the-dark paint to create a truly unique and mesmerizing effect. You could even create a whole family of glowing ghost pumpkins, each with its own unique design and color. This is a fun and easy project that will add a touch of magic to your Halloween celebrations.
No-Carve Technique | Description | Materials Needed |
|---|---|---|
Painting | Creating ghostly designs with paint | Acrylic paints, brushes, sponges |
Mummifying | Wrapping pumpkin in gauze | Gauze, glue or tape, googly eyes (optional) |
Glow-in-the-Dark | Adding glow-in-the-dark elements | Glow-in-the-dark paint, stickers, LED lights |
Ghostly Gallery: Showcase of Creative Pumpkin Carving
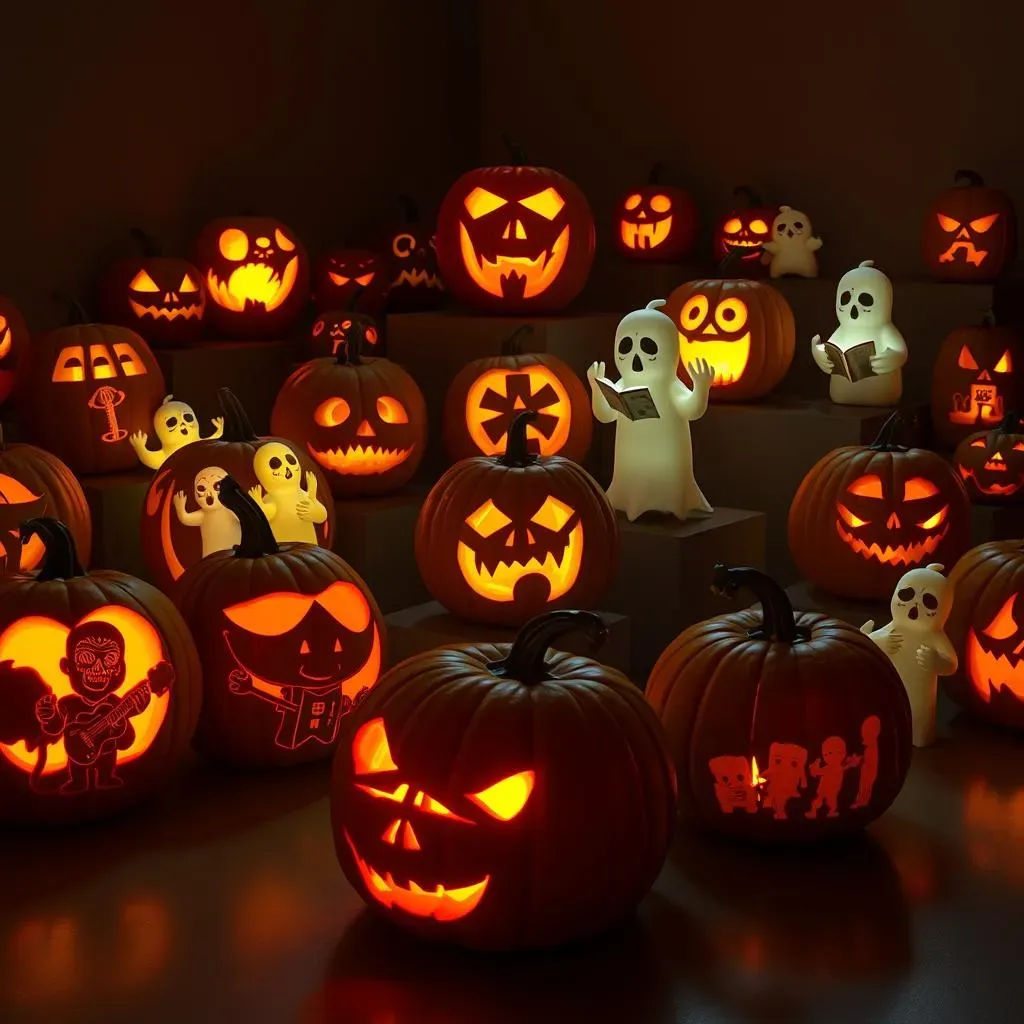
Ghostly Gallery: Showcase of Creative Pumpkin Carving
Spectacular Specters: Advanced Carving Techniques
Ready to take your pumpkin carving skills to the next level? Let's dive into some advanced techniques that will transform your ordinary pumpkin into a ghostly work of art! We're talking about intricate details, layered carving, and creating a truly three-dimensional effect. Think beyond the basic silhouette and consider adding depth and texture to your design. One popular technique is to carve different layers of the pumpkin, creating a sense of perspective and dimension. You can also use specialized carving tools to create fine details like hair, wrinkles, or intricate patterns.
Another advanced technique is to use light and shadow to your advantage. By strategically carving out certain areas of the pumpkin, you can create a dramatic interplay of light and shadow that will enhance the ghostly effect. This requires careful planning and execution, but the results are well worth the effort. These techniques require patience, precision, and a steady hand, but the results are truly spectacular. So, if you're ready to challenge yourself and create a pumpkin that will wow your neighbors, give these advanced carving techniques a try!
Beyond the Basics: Unique Ghostly Themes
Who says ghosts have to be scary? Let's explore some unique and unexpected themes for your ghost pumpkin carvings! Think beyond the traditional "boo!" and consider incorporating elements of humor, whimsy, or even pop culture into your design. How about a ghost playing a musical instrument? Or a ghost reading a book? Or even a ghost dressed up as your favorite superhero? The possibilities are endless!
Another fun idea is to create a ghost pumpkin that reflects your personal interests or hobbies. Are you a fan of science fiction? Then create a ghost pumpkin inspired by your favorite sci-fi movie or TV show. Do you love animals? Then carve a ghost pumpkin in the shape of a ghostly cat or dog. The key is to think outside the box and create a design that is both unique and personal. Don't be afraid to experiment with different colors, textures, and materials to bring your vision to life. Remember, the goal is to have fun and create a pumpkin that reflects your own unique personality!
Illuminating Ideas: Lighting Your Ghostly Creations
You've put in the time and effort to create a stunning ghost pumpkin carving, but the job's not done yet! The right lighting can make all the difference in bringing your ghostly creation to life. Forget the traditional candle – there are so many other options to consider! Battery-operated LED lights are a great choice, as they are safe, long-lasting, and come in a variety of colors. You can use a single light to create a simple, glowing effect, or you can use multiple lights to create a more dramatic and dynamic display.
Another option is to use a spotlight to highlight specific areas of your carving. This is a great way to showcase intricate details and create a sense of depth and dimension. You can also experiment with different colors of light to create a spooky and atmospheric effect. Blue or green lights can give your ghost pumpkin a chilling, otherworldly glow, while orange or red lights can create a more warm and inviting ambiance. No matter what lighting option you choose, be sure to experiment and find what works best for your particular design. With the right lighting, your ghost pumpkin carving will be the star of the show!
Lighting Option | Description | Pros | Cons |
|---|---|---|---|
LED Lights | Battery-operated lights in various colors | Safe, long-lasting, versatile | May require battery replacement |
Spotlight | Highlights specific areas of carving | Showcases details, creates depth | Can be harsh if not positioned correctly |
Colored Lights | Creates spooky and atmospheric effect | Enhances mood, adds visual interest | May not be suitable for all designs |
Embrace the Ghostly Spirit: Your Pumpkin Carving Adventure Awaits
From intricate carvings that capture the ethereal beauty of ghosts to simple, no-carve designs perfect for little hands, the world of ghost-themed pumpkin decorating is brimming with creative possibilities. Whether you're aiming for spooky elegance or playful frights, these pumpkin carving ideas ghost offer a fantastic way to personalize your Halloween decor and create lasting memories with family and friends. So, let your imagination soar, embrace the spirit of the season, and transform your pumpkins into hauntingly delightful works of art. Happy haunting!