Table of Contents
Halloween is creeping closer, and what better way to celebrate than with a glowing, ghoulish grin carved into a pumpkin? Forget the complex designs that require an art degree; we're diving headfirst into the world of pumpkin carving ideas easy scary. Whether you're a seasoned pro or a first-time carver, we've got you covered with a collection of spooky, yet simple designs that will transform your pumpkin into the scariest on the block.
Simple and Spooky: Easy Scary Pumpkin Faces

Simple and Spooky: Easy Scary Pumpkin Faces
Let's kick things off with the classics, shall we? We're talking about those instantly recognizable scary faces that have been haunting porches for generations. Think jagged teeth, menacing eyes, and maybe a crooked nose for good measure. What makes these designs so great is their simplicity. You don't need to be Picasso to pull them off. A few well-placed triangles, squares, and curves, and you've got yourself a frighteningly fantastic Jack-O-Lantern.
The key here is exaggeration. Make those teeth extra pointy, the eyes wide and wild, and the mouth a gaping void of darkness. Don't be afraid to get a little asymmetrical, either. Imperfection adds character and makes your pumpkin look even more menacing. I remember one year, I accidentally carved one eye slightly higher than the other, and it ended up looking like my pumpkin was perpetually raising an eyebrow in suspicion. It was the scariest, and funniest, pumpkin I ever made!
- Triangle Eyes: A classic for a reason. Simple, effective, and instantly recognizable.
- Jagged Teeth: Vary the size and spacing for a more menacing grin.
- Crooked Smile: An asymmetrical mouth adds character and a touch of madness.
- Unibrow: Connect those eyebrows for an extra touch of menace.
Beyond the Basic Triangle: Creative Easy Scary Pumpkin Carving
Beyond the Basic Triangle: Creative Easy Scary Pumpkin Carving
Subverting Expectations: Silhouettes and Shadows
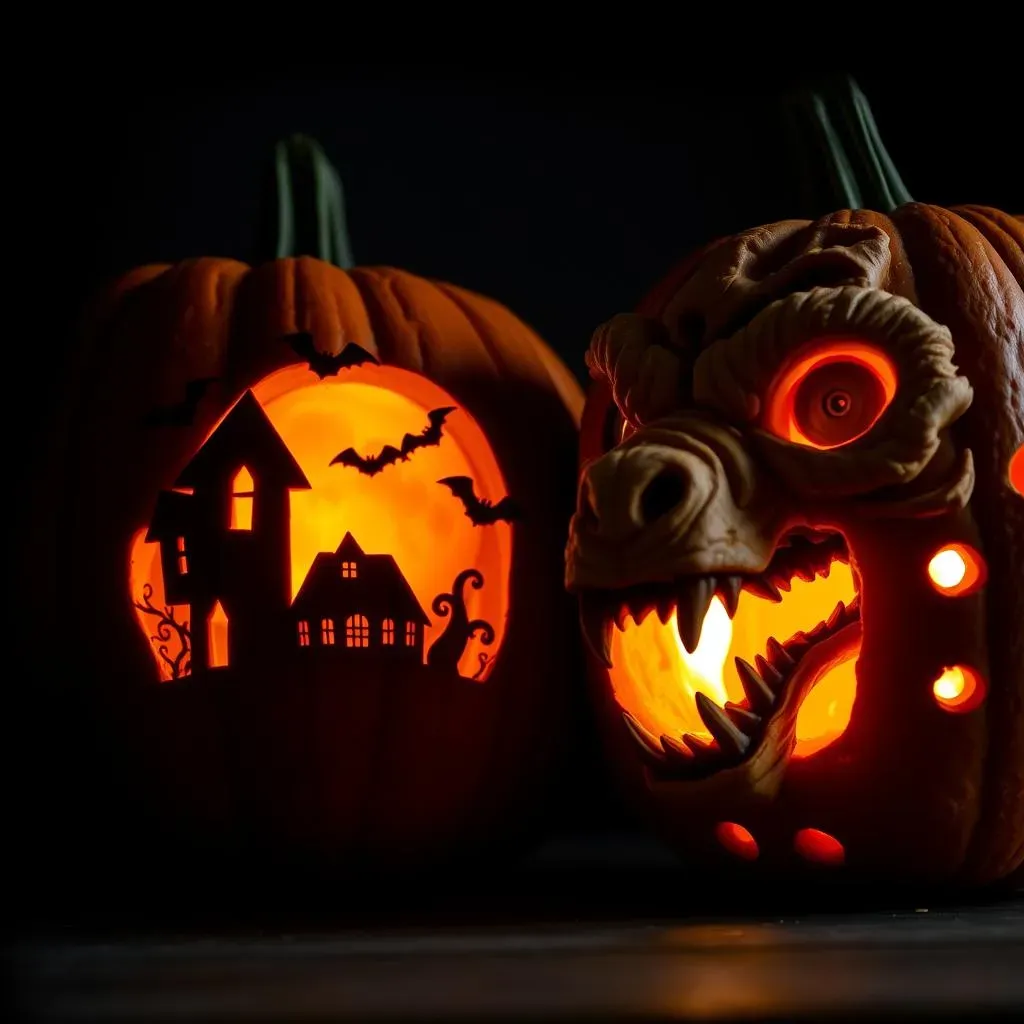
so you've mastered the classic scary face. What's next? Let's ditch the traditional features and play with silhouettes and shadows. Instead of carving out the details, try carving away the pumpkin's surface to create a raised design. Think spooky trees against a full moon, a menacing cat perched on a fence, or even a creepy graveyard scene. The key is to use varying depths to create a sense of depth and dimension. The light shining through the thinner areas will create a haunting glow, while the thicker areas will remain in shadow, adding to the spooky effect.
I once carved a silhouette of a haunted house with bats flying around it. I used a small gouging tool to carefully remove the outer layer of the pumpkin, creating a textured surface that looked like old, weathered wood. When I lit it up, the shadows danced and flickered, making it look like the house was actually alive. It was way more impressive than any simple scary face I had ever carved!
Pro Tip: Use a template for more complex silhouettes. Trace the design onto your pumpkin and then carefully carve away the surrounding areas.
Embrace the Imperfect: Monster Mashups and Abstract Horrors
Who says your scary pumpkin has to be a recognizable monster? Why not create your own creature of the night? Mix and match features from different monsters, add some abstract shapes, and let your imagination run wild. Maybe your pumpkin has vampire fangs, zombie eyes, and a werewolf's snout. The more bizarre and unsettling, the better!
This is where you can really get creative and experiment with different carving techniques. Try using a drill to create small, irregular holes, or a vegetable peeler to create textured surfaces. You can even use cookie cutters to create fun and spooky shapes. The goal is to create a pumpkin that is both scary and unique, a true reflection of your own twisted imagination. Don't worry about making mistakes; imperfections only add to the character of your monster mashup. After all, what's scarier than something you can't quite define?
Monster Part | Description | Carving Technique |
|---|---|---|
Vampire Fangs | Sharp, pointed teeth | Small, precise cuts with a carving knife |
Zombie Eyes | Cloudy, vacant stare | Shallow gouges with a spoon or scoop |
Werewolf Snout | Furry, animalistic nose | Textured surface created with a vegetable peeler |
Tools of Terror: Essential Gear for Easy Scary Pumpkin Carving

Tools of Terror: Essential Gear for Easy Scary Pumpkin Carving
The Basic Arsenal: Knives, Scoops, and Saws
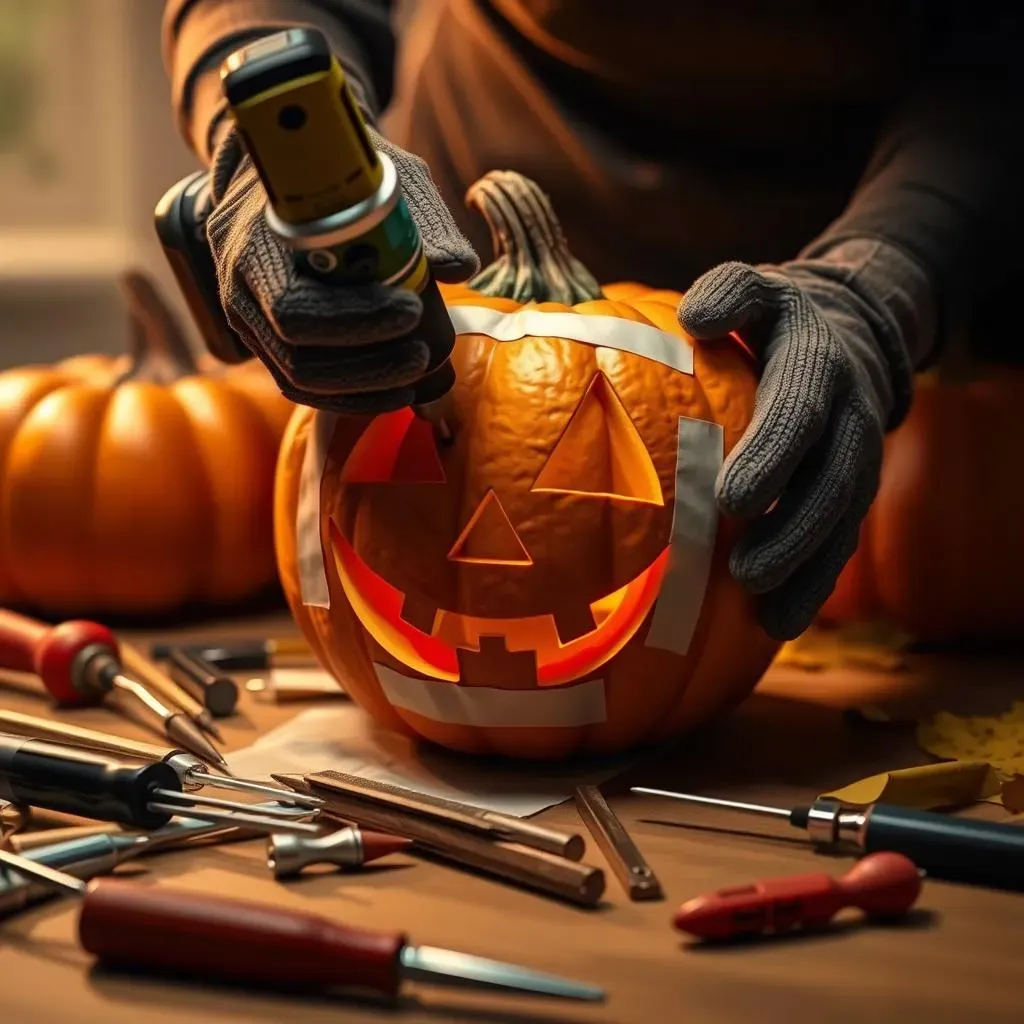
Alright, let's talk tools. You can't carve a masterpiece with your bare hands (unless you're some kind of pumpkin-wielding superhero). The good news is, you don't need a fancy set of professional carving tools to create some seriously spooky pumpkins. A basic carving kit, readily available at most grocery stores and pharmacies during Halloween season, will do the trick. Look for a kit that includes a couple of different sized serrated knives, a scoop for gutting the pumpkin, and maybe a small saw for more intricate details.
Personally, I'm a big fan of those thin, flexible serrated knives. They're perfect for making clean, precise cuts, and they're especially useful for carving those jagged teeth and creepy smiles. The scoop is essential for removing all those gooey pumpkin seeds and stringy bits (more on that later), and the saw can come in handy for carving out larger areas or adding some extra texture to your design. Remember, safety first! Always carve in a well-lit area and use a sturdy surface to prevent slips and accidents.
Beyond the Kit: Upgrading Your Carving Game
Ready to take your carving skills to the next level? Then it's time to invest in some more specialized tools. A good set of wood carving tools can work wonders on a pumpkin, allowing you to create finer details and more intricate designs. Look for gouges, chisels, and V-tools in various sizes. These tools are perfect for creating those subtle shadows and textures that can really make your pumpkin stand out.
Another must-have for serious carvers is a power carving tool, like a rotary tool with various attachments. These tools can make quick work of removing large areas of pumpkin flesh, and they're also great for creating smooth, rounded edges. Just be careful not to get too carried away! It's easy to accidentally carve too deep or remove too much material with a power tool. Start slow and practice on a scrap pumpkin before tackling your masterpiece.
Tool | Purpose | Why You Need It |
|---|---|---|
Serrated Knives (various sizes) | Making precise cuts and carving details | Essential for creating clean lines and intricate designs |
Scoop | Removing seeds and pulp | Makes gutting the pumpkin much easier and cleaner |
Small Saw | Carving larger areas and adding texture | Useful for creating more complex designs |
Wood Carving Tools (gouges, chisels) | Creating fine details and textures | Elevates your carving from basic to professional-looking |
Power Carving Tool (rotary tool) | Removing large areas and creating smooth edges | Saves time and effort, especially for complex designs |
Stencils and Shortcuts: Making Easy Scary Pumpkin Carving a Breeze
Stencils and Shortcuts: Making Easy Scary Pumpkin Carving a Breeze
Printable Panic: Finding and Using Stencils
let's face it, not everyone is a natural artist. And that's perfectly fine! That's where stencils come in. They're your secret weapon for creating impressive, scary pumpkins without having to freehand anything. The internet is overflowing with free printable stencils, from classic scary faces to more elaborate designs featuring movie monsters, spooky animals, and creepy symbols. A quick search for "free Halloween pumpkin stencils" will yield a treasure trove of options.
Once you've found a stencil you like, print it out and tape it to your pumpkin. Use a poking tool or an awl to poke holes along the lines of the design, transferring the pattern onto the pumpkin's surface. Then, remove the stencil and connect the dots with your carving tools. It's like a spooky connect-the-dots for adults! I've found that using a variety of stencil designs can really elevate your porch display. One year, I did a whole series of pumpkins with different horror movie icons – it was a huge hit!
Speed Carving Secrets: Tools and Techniques
Time is precious, especially during the busy Halloween season. So, let's talk about some shortcuts that can help you carve your pumpkins faster and more efficiently. First, invest in a good quality pumpkin carving kit. The cheap plastic tools that come with some kits can be flimsy and frustrating to use. A sturdy set of serrated knives and a good scoop will make the whole process much smoother.
Another time-saving tip is to use a power drill with a small drill bit to create small holes for details like eyes and noses. This is much faster than trying to carve these details by hand. And speaking of hands, wear gloves! Pumpkin guts can be sticky and messy, and gloves will protect your hands from getting covered in orange goo. Trust me, your future self will thank you.
Shortcut | Description | Time Saved |
|---|---|---|
Using Printable Stencils | Transferring pre-made designs onto your pumpkin | Significantly reduces carving time and ensures accuracy |
High-Quality Carving Kit | Sturdy and efficient tools | Faster and easier carving, less frustration |
Power Drill for Details | Creating small holes for eyes, noses, etc. | Much faster than carving these details by hand |
Wearing Gloves | Protecting hands from mess and irritation | Reduces cleanup time and discomfort |
The Gutting Game: Making it Less Gross
Let's be honest, the worst part of pumpkin carving is dealing with the guts. It's slimy, stringy, and just plain gross. But fear not, there are ways to make this task less unpleasant. First, invest in a good quality scoop. The plastic scoops that come with most carving kits are often flimsy and ineffective. A metal ice cream scoop or a sturdy spoon will work much better.
Another trick is to use a wet/dry vacuum to suck out the guts. This is much faster and less messy than scooping them out by hand. Just be sure to empty the vacuum canister frequently, as pumpkin guts can clog it up quickly. And finally, don't throw away the seeds! Roasted pumpkin seeds are a delicious and healthy snack. Just rinse them off, toss them with some olive oil and salt, and roast them in the oven until they're crispy and golden brown. It's a win-win!
Light Up the Night: Displaying Your Easy Scary Pumpkin Masterpiece
Light Up the Night: Displaying Your Easy Scary Pumpkin Masterpiece
The Classic Candle: Timeless Terror
you've poured your heart (and maybe some pumpkin guts) into creating the perfect easy scary pumpkin. Now, it's time to show it off! And what's more classic than a flickering candle nestled inside? The warm, dancing light creates an eerie ambiance that's perfect for Halloween night. But before you go sticking just any old candle in there, let's talk safety and technique.
First, choose a candle that's appropriately sized for your pumpkin. You don't want it to be so tall that it's sticking out the top, or so small that it gets lost in the darkness. A votive candle or a small pillar candle works well. Place the candle on a stable surface inside the pumpkin, away from any flammable materials (like those pesky pumpkin guts you didn't quite get out). And never leave a lit candle unattended! If you're worried about safety, consider using a battery-operated candle instead. They provide the same spooky glow without the risk of fire.
Beyond the Flame: Modern Illumination Options
While candles are classic, there's a whole world of modern illumination options out there that can take your easy scary pumpkin to the next level. Battery-operated LED lights are a popular choice, and for good reason. They're safe, long-lasting, and come in a variety of colors. You can even find flickering LED candles that mimic the look of a real flame without the fire hazard.
Another fun option is to use a string of fairy lights. Drape them inside your pumpkin for a whimsical, ethereal glow. Or, if you really want to get creative, try using a colored light bulb. A green or purple light can add an extra touch of spookiness to your design. Just be sure to use a low-wattage bulb to avoid overheating the pumpkin. I remember one year, I used a blacklight inside my pumpkin, and it made the white parts of the design glow in the dark. It was seriously cool!
Lighting Option | Pros | Cons | Best For |
|---|---|---|---|
Candle | Classic look, warm glow | Fire hazard, needs supervision | Traditionalists, creating a vintage vibe |
LED Candle | Safe, long-lasting, various styles | Can look less authentic than a real flame | Families with kids, safety-conscious carvers |
Fairy Lights | Whimsical glow, adds sparkle | Can be difficult to arrange inside the pumpkin | Creating a magical, ethereal effect |
Colored Light Bulb | Adds a unique, spooky touch | Can overheat the pumpkin, requires a low-wattage bulb | Experimenters, those wanting a bold statement |
Setting the Stage: Placement and Presentation
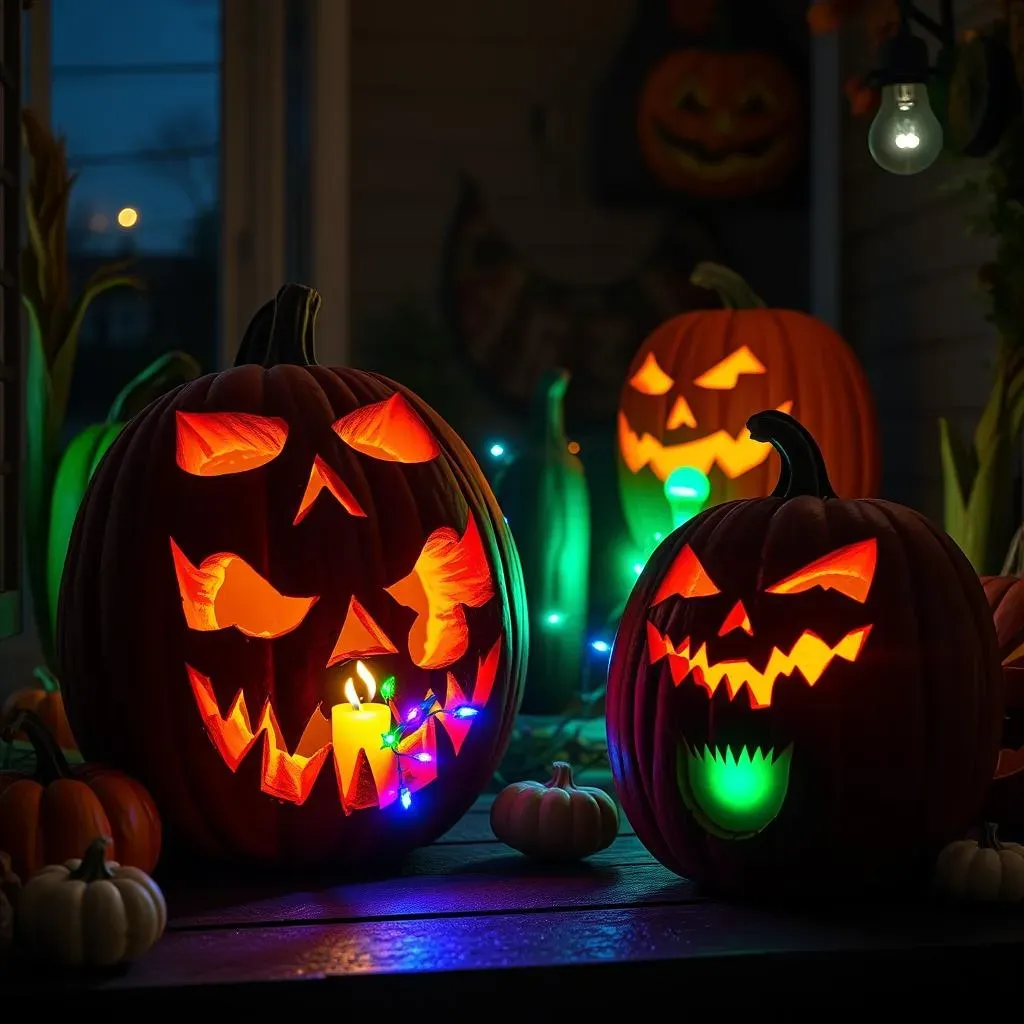
So, you've carved your easy scary pumpkin and lit it up. Now, it's time to think about placement and presentation. Where you put your pumpkin can make a big difference in its overall impact. A well-lit porch is a classic choice, but don't be afraid to get creative. Place your pumpkin on a hay bale, surround it with gourds and corn stalks, or create a whole spooky scene with other Halloween decorations.
Consider the angle of your pumpkin, too. Do you want it to be facing straight ahead, or slightly tilted to one side? Tilting it slightly can add a touch of mystery and intrigue. And don't forget about the background! A plain wall can be a bit boring, so try adding a spooky backdrop, like a cobweb or a Halloween-themed banner. The key is to create a visually appealing display that showcases your pumpkin in the best possible light (pun intended!). Remember, Halloween is all about having fun and getting creative, so don't be afraid to experiment and try new things. After all, the scariest pumpkin is the one that's made with love (and maybe a little bit of terror!).
Spooktacular Success: Mastering Easy Scary Pumpkin Carving
So, you've journeyed through the realm of easy scary pumpkin carving, armed with fresh ideas, essential tools knowledge, and clever shortcuts. Remember, the most important ingredient is a dash of creativity and a whole lot of Halloween spirit. Whether you opted for a classic menacing grin or a more unique spooky design, your glowing Jack-O-Lantern is sure to be a frightfully delightful addition to your Halloween decor. Now go forth, carve with confidence, and let your spooky pumpkin masterpiece light up the night!