Table of Contents
Halloween is creeping closer, and what better way to celebrate than with a jack-o'-lantern that truly reflects your personality? If you're a cat lover, you're in for a treat! Forget the generic ghouls and goblins this year and embrace your feline obsession with some fantastic pumpkin carving ideas cat. This guide is your one-stop shop for creating a purr-fectly spooky masterpiece, whether you're a seasoned carving pro or a first-time pumpkin artist. We'll explore everything from essential tools and easy carving techniques to no-carve decorating options that are perfect for all ages. Ready to transform your pumpkin into a tribute to your furry friend? We'll dive into a curated collection of stencil ideas, ranging from simple silhouettes to intricate portraits. If carving isn't your thing, fear not! We'll unleash a treasure trove of no-carve decorating ideas using paint, glitter, and other craft supplies. Finally, we'll cover the best ways to illuminate and display your feline-inspired creation, ensuring it becomes the star of your Halloween décor. So, grab your carving tools (or your paintbrushes!), and let's get started on crafting a cat-tivating pumpkin that will have all the neighbors meowing with envy.
Purrfect Pumpkin Prep: Essential Tools and Tips for Carving Success
Purrfect Pumpkin Prep: Essential Tools and Tips for Carving Success
Gather Your Gear: The Essential Carving Toolkit
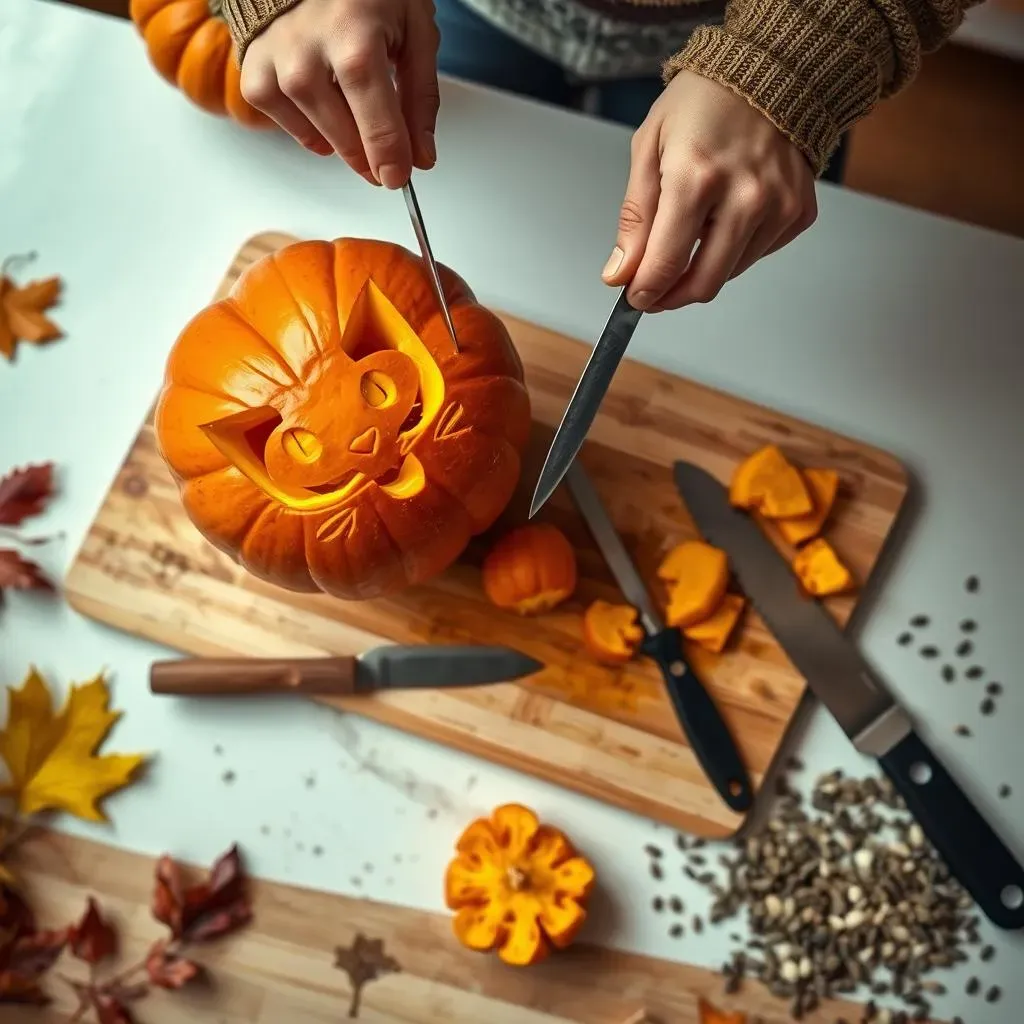
Before you even think about sketching a whisker, you'll need the right tools. Forget that flimsy plastic knife that comes with most pumpkin carving kits – we're aiming for precision and safety here! Invest in a decent set of carving tools; they’ll make your life so much easier and your cat pumpkin so much better. Think of it like this: you wouldn't try to paint a masterpiece with a dried-up crayon, would you? Same principle applies here. Good tools are key.
A good pumpkin carving kit should include a variety of saws, gouges, and scoops. A thin, serrated knife is perfect for intricate details, while a larger saw will help you remove bigger chunks of pumpkin. A scoop is essential for gutting the pumpkin (more on that later), and a sturdy poker or awl can be useful for transferring stencils. Don't forget a good cutting board to protect your work surface!
Tool | Purpose |
|---|---|
Serrated Knife (thin) | Intricate details, fine lines |
Larger Saw | Removing large chunks of pumpkin |
Scoop | Gutting the pumpkin, removing seeds and pulp |
Poker/Awl | Transferring stencils |
Cutting Board | Protecting work surface |
From Guts to Glory: Preparing Your Pumpkin Canvas
so you've got your tools. Now, let's talk pumpkin selection and prep. Look for a pumpkin that's relatively smooth, with a sturdy stem and a flat bottom so it won't wobble. Give it a good thump – you want it to sound hollow. Avoid pumpkins with soft spots or blemishes, as these can indicate rot. Once you've found your perfect pumpkin, it's time to get down and dirty.
First, cut a hole in the top of the pumpkin, around the stem. Make sure the hole is large enough to fit your hand inside comfortably. Angle the knife inward slightly as you cut, so the lid will sit back on securely. Now comes the fun part: gutting! Use your scoop to remove all the seeds and stringy pulp from inside the pumpkin. Scrape the walls clean to create a smooth surface for carving. Pro tip: roast the pumpkin seeds for a delicious snack! Simply toss them with olive oil, salt, and your favorite spices, and bake at 350°F (175°C) until golden brown and crispy.
Crazy Cat Pumpkin Carving: Stencil Selection and Design Inspiration
Crazy Cat Pumpkin Carving: Stencil Selection and Design Inspiration
Unleash Your Inner Feline Artist: Finding the Perfect Stencil
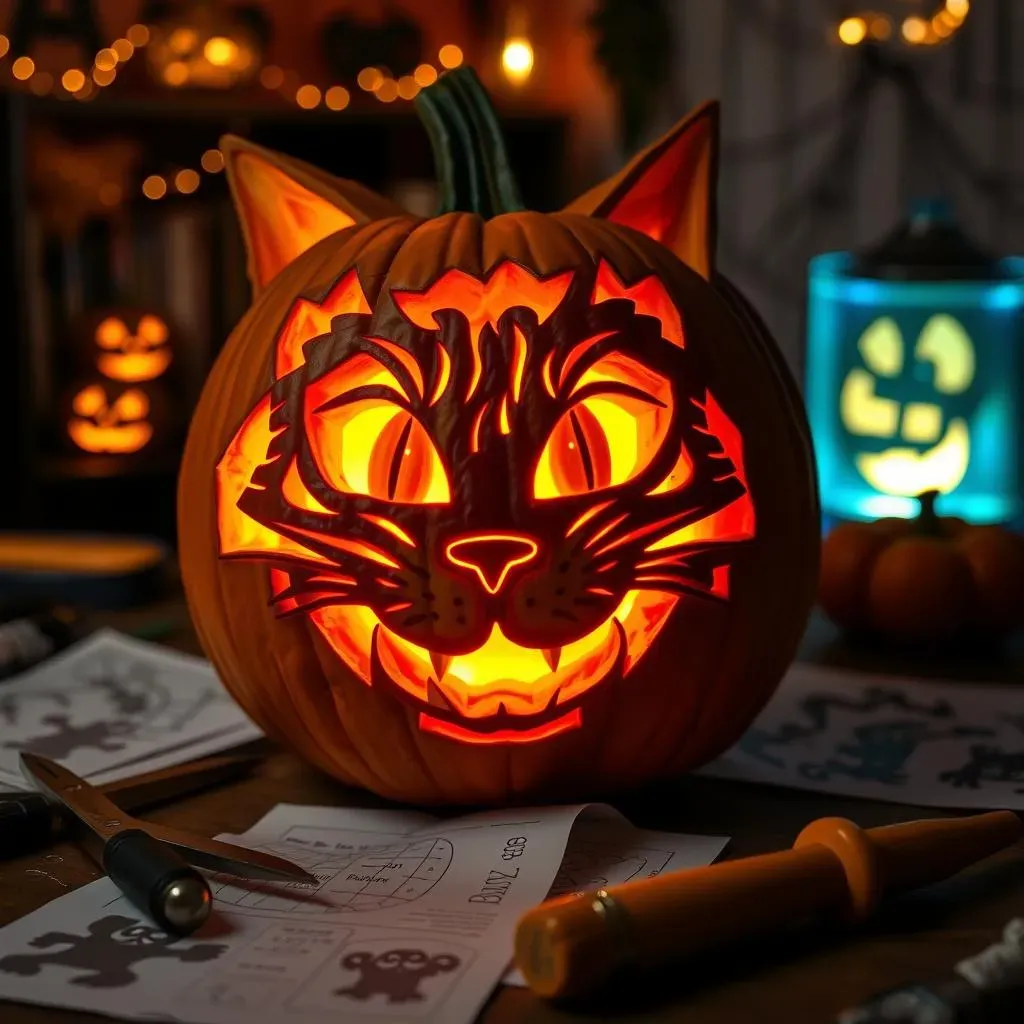
Alright, you've got your pumpkin prepped and ready to go. Now comes the fun part: choosing a stencil! The possibilities are endless when it comes to crazy cat pumpkin carving. Do you want a cute and cuddly kitten, a sleek and mysterious black cat, or a downright spooky feline fiend? The choice is yours! Start by browsing online for free printable stencils. Pinterest is a goldmine for pumpkin carving inspiration, with tons of cat-themed designs to choose from. Websites dedicated to Halloween crafts often have extensive stencil libraries as well.
Consider your skill level when selecting a stencil. If you're a beginner, stick to simpler designs with fewer intricate details. A basic cat silhouette or a cartoonish cat face is a great place to start. As you gain confidence, you can move on to more complex designs with shading, fur textures, and elaborate poses. Remember, it's better to start small and succeed than to bite off more than you can chew and end up with a pumpkin carving disaster!
Here's a quote to get you inspired:
From Paper to Pumpkin: Transferring Your Design
Once you've found the perfect stencil, it's time to transfer it to your pumpkin. There are several ways to do this, but one of the easiest is to tape the stencil to the pumpkin and use a poker or awl to poke holes along the lines of the design. Make sure the holes are close enough together that you can easily see the outline when you remove the stencil. Alternatively, you can use transfer paper. Simply place the transfer paper between the stencil and the pumpkin, trace over the design with a pencil, and the image will be transferred to the pumpkin's surface.
For more complex designs, consider using a washable marker to trace the stencil directly onto the pumpkin. This allows you to see the entire design at once and make any necessary adjustments before you start carving. However, be sure to use a marker that is easily washable, just in case you make a mistake. And remember, patience is key! Take your time and be careful to transfer the design accurately. A well-transferred stencil will make the carving process much smoother and ensure a stunning final result.
Stencil Type | Difficulty Level | Description |
|---|---|---|
Simple Silhouette | Beginner | Basic outline of a cat shape |
Cartoon Cat Face | Beginner | Easy-to-carve facial features |
Realistic Cat Portrait | Advanced | Detailed depiction of a cat's face, with shading and fur texture |
Black Cat with Arched Back | Intermediate | Classic spooky cat image |
NoCarve Cat Pumpkin Decorating: Creative Ideas Beyond the Blade
NoCarve Cat Pumpkin Decorating: Creative Ideas Beyond the Blade
Paint a Purr-fect Portrait
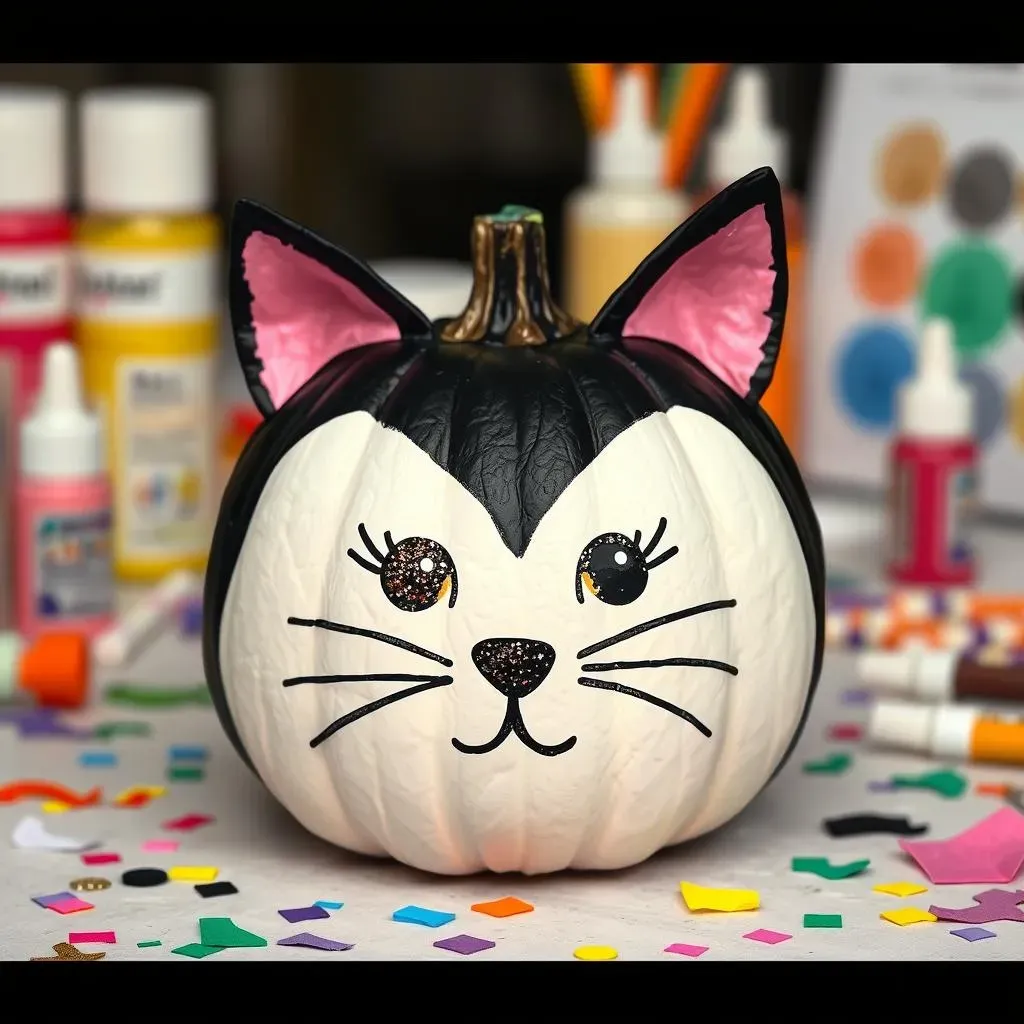
Who says you need a knife to create a stunning cat pumpkin? No-carve cat pumpkin decorating opens up a world of possibilities for all ages and skill levels. One of the simplest and most effective methods is to paint your pumpkin. Grab some acrylic paints in your favorite colors and let your inner artist shine! You can paint a realistic portrait of your own cat, a whimsical cartoon character, or an abstract feline design. The choice is yours!
Before you start painting, wipe down the pumpkin with a damp cloth to remove any dirt or grime. Then, sketch your design lightly with a pencil. This will help you stay on track as you paint. Use small brushes for detail work and larger brushes for filling in larger areas. Don't be afraid to experiment with different techniques, such as dry brushing, stippling, or blending. And if you make a mistake, don't worry! Acrylic paint is easily washable when it's wet. Just wipe it off with a damp cloth and start again.
Here are some paint color ideas:
- Black and white for a classic tuxedo cat
- Orange and brown for a tabby cat
- Calico colors (orange, black, and white) for a unique look
- Pastel colors for a whimsical, cartoonish cat
Glitter and Glam: Adding Sparkle to Your Feline Friend
Want to add some extra pizzazz to your cat pumpkin? Glitter is your best friend! A little sparkle can go a long way in transforming a plain pumpkin into a glamorous feline masterpiece. There are several ways to incorporate glitter into your no-carve design. You can apply glitter directly to the pumpkin using craft glue, or you can create glitter stencils by cutting out cat shapes from adhesive paper and covering them with glitter. For a more subtle effect, try mixing glitter into your paint for a shimmering finish.
When working with glitter, it's important to protect your work surface and wear old clothes. Glitter tends to get everywhere! Place a sheet of newspaper or parchment paper under your pumpkin to catch any stray glitter. And be sure to use a good quality craft glue that will hold the glitter securely in place. Once the glue is dry, you can seal the glitter with a clear coat of spray varnish to prevent it from flaking off. This will also give your pumpkin a glossy, professional-looking finish.
Here are some ideas for using glitter:
Glitter Application | Description |
|---|---|
Glitter Outline | Trace the outline of your cat design with glitter glue and sprinkle with glitter. |
Glitter Accents | Add glitter to specific areas, such as the eyes, nose, or whiskers. |
Full Glitter Coverage | Cover the entire pumpkin with glitter for a dazzling effect. |
Crafty Cats: Embellishments and Accessories
Beyond paint and glitter, there are countless other ways to decorate your no-carve cat pumpkin. Get creative with embellishments and accessories! Craft stores are a treasure trove of supplies that can be used to add personality and detail to your feline friend. Consider using felt to create ears, whiskers, and other facial features. Buttons can be used for eyes, and yarn can be used for a cute little tail. You can even use pipe cleaners to create posable limbs!
Hot glue is your friend when it comes to attaching embellishments to your pumpkin. Just be careful not to burn yourself! Apply a small amount of hot glue to the back of the embellishment and press it firmly onto the pumpkin. Hold it in place for a few seconds until the glue cools and sets. For larger embellishments, you may need to use more glue or reinforce the attachment with toothpicks. With a little imagination and some crafty supplies, you can transform your pumpkin into a one-of-a-kind cat creation!
Illuminating Your Feline Masterpiece: Display Ideas and Safety Tips
Illuminating Your Feline Masterpiece: Display Ideas and Safety Tips
Light It Up: Choosing the Right Illumination
You've poured your heart and soul into creating the perfect cat pumpkin, now it's time to make it glow! But before you reach for that old-school candle, let's talk about some safer and more visually appealing options. Traditional candles can be a fire hazard, especially if you have curious pets or little ones running around. Plus, they tend to produce soot that can blacken the inside of your pumpkin. So, what are the alternatives?
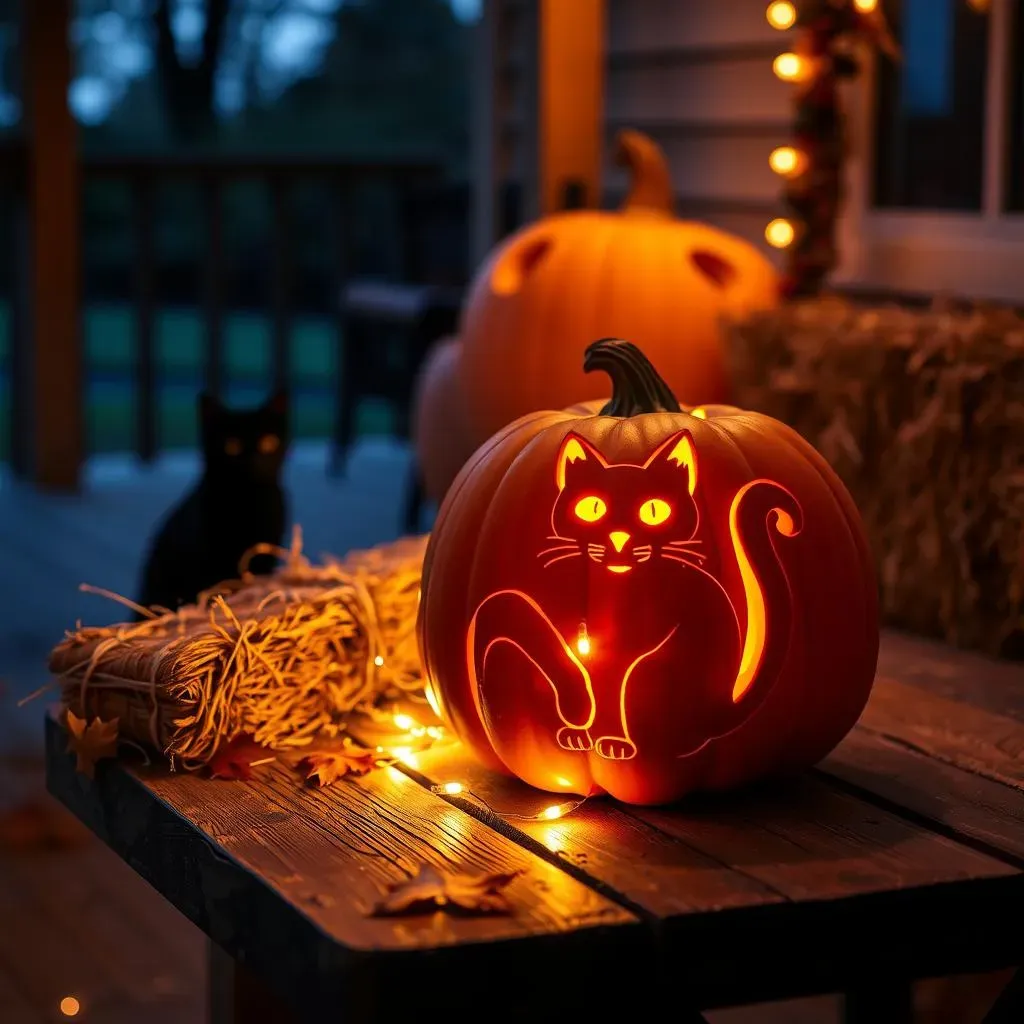
Battery-operated LED lights are the way to go! They're safe, long-lasting, and come in a variety of colors and styles. You can find individual tea lights, string lights, or even submersible lights that can be placed in a water-filled container inside the pumpkin for a cool, reflective effect. For a more dramatic look, consider using a spotlight to illuminate your pumpkin from below. This will create a spooky, upward-casting glow that will really make your cat carving stand out. And if you're feeling extra fancy, you can even find LED lights that flicker or change colors, adding an extra layer of spookiness to your display.
Here's a comparison of lighting options:
Lighting Option | Pros | Cons |
|---|---|---|
Candles | Traditional, warm glow | Fire hazard, soot, short lifespan |
LED Tea Lights | Safe, long-lasting, inexpensive | Less bright than candles |
LED String Lights | Versatile, can be arranged in various patterns | May require more batteries |
Spotlight | Dramatic effect, highlights details | Requires an outlet, can be too bright |
Showcase Your Spooky Sidekick: Display Ideas and Safety First
Alright, your cat pumpkin is glowing like a Cheshire cat in the dark. Now, where's the best place to show off your masterpiece? Placement is key! A well-placed pumpkin can add a touch of Halloween magic to any space, while a poorly placed pumpkin can look awkward or even dangerous.
The classic spot is, of course, on your front porch. Place your illuminated cat pumpkin on a sturdy table or steps, away from flammable materials like dry leaves or decorations. If you have a railing, you can even hang smaller cat pumpkins from hooks or twine. Inside, consider placing your pumpkin on a mantelpiece, windowsill, or as a centerpiece on your dining table. Just be sure to keep it away from curtains, tablecloths, or anything else that could potentially catch fire. And remember, safety first! Always supervise children and pets around lit pumpkins, and never leave a candle-lit pumpkin unattended.
Here are some display ideas:
- Line your walkway with cat pumpkins for a spooky entrance.
- Create a cat-themed Halloween vignette on your porch with pumpkins, hay bales, and other decorations.
- Place a small cat pumpkin on each place setting at your Halloween dinner party.
- Use cat pumpkins as part of a larger Halloween display in your yard.
Crafting Your Cat-tastic Halloween: Final Thoughts
From simple silhouettes to elaborate portraits, the world of pumpkin carving ideas cat offers endless possibilities for celebrating Halloween with your favorite furry friend. Whether you opted for the traditional carving route or unleashed your creativity with no-carve decorations, the most important thing is to have fun and let your personality shine. So, light up your feline masterpiece, display it proudly, and get ready to welcome trick-or-treaters with a touch of purr-fectly spooky charm. Happy Halloween!