Table of Contents
Forget the same old toothy grin this Halloween! If you're craving a pumpkin display that's less "monster mash" and more "modern masterpiece," you've landed in the right place. We're diving headfirst into the world of pumpkin carving ideas aesthetic, exploring designs that range from subtly spooky to downright chic. This isn't your grandma's jack-o'-lantern (unless your grandma has seriously good taste). Get ready to ditch the predictable triangle eyes and embrace a new era of gourd-geous creativity.
Elevate Your Halloween: Aesthetic Pumpkin Carving Ideas for 2024
Elevate Your Halloween: Aesthetic Pumpkin Carving Ideas for 2024
so you're tired of the same old scary faces staring out from your porch, right? This year, it's time to ditch the predictable and embrace the world of aesthetic pumpkin carving. Think beyond the basic jack-o'-lantern and imagine pumpkins that are sophisticated, stylish, and maybe just a little bit spooky. We're talking designs that complement your home's décor, reflect your personal style, and impress your neighbors with your artistic flair. Forget jump scares; this year, it's all about elevated elegance.
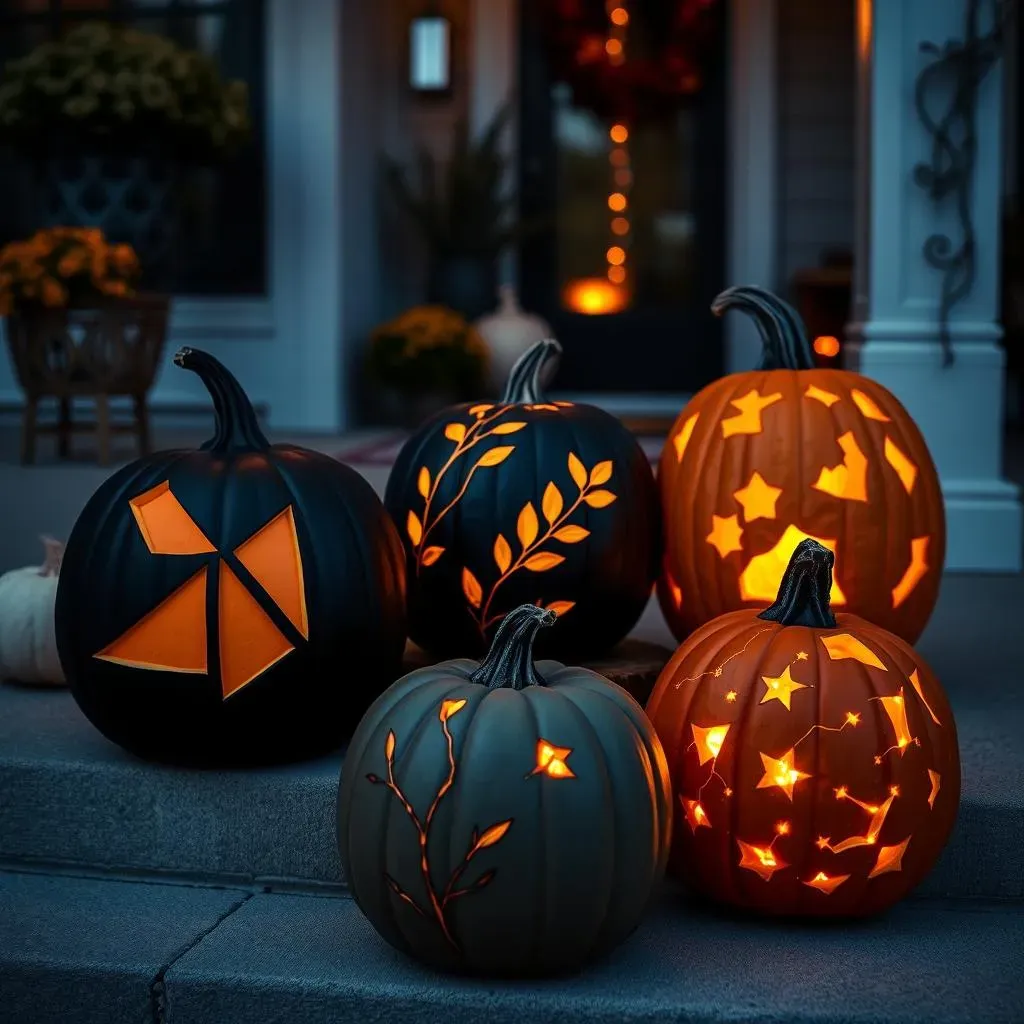
For 2024, trends are leaning towards a blend of modern minimalism and classic Halloween charm. Think clean lines, geometric patterns, and subtle details that catch the eye. We're also seeing a rise in nature-inspired designs, incorporating leaves, vines, and even constellations into pumpkin carving. And don't forget the power of paint! A coat of metallic gold or a matte black finish can instantly transform a basic pumpkin into a statement piece.
But where do you even begin? Don't worry; it's easier than you think. Start by considering your overall Halloween theme. Are you going for a rustic autumn vibe, a glamorous gothic look, or a playful, whimsical feel? Once you have a theme in mind, you can start brainstorming design ideas that complement it. And remember, less is often more. A simple, elegant design can be just as impactful as a complex, intricate carving.
- Monochromatic Magic: Paint your pumpkin a solid color (think black, white, or metallic) and then carve a simple geometric design.
- Nature's Embrace: Carve leaves, vines, or flowers into your pumpkin for a touch of organic beauty.
- Constellation Creations: Use a drill to create a pattern of stars on your pumpkin, then place a light inside to illuminate the celestial design.
- House Numbers: Carve your house numbers into a pumpkin for a personalized touch.
Beyond the Basic Jacko'Lantern: Unique Pumpkin Carving Designs

Beyond the Basic Jacko'Lantern: Unique Pumpkin Carving Designs
Alright, so you're officially over the standard spooky face. I get it! Let's ditch the clichés and dive into some truly unique pumpkin carving designs. Think about what really excites you. Are you a bookworm? Carve a stack of books or your favorite literary character. Obsessed with succulents? A pumpkin covered in carved cacti would be seriously cool. The key is to personalize it! Forget what you *think* a jack-o'-lantern should look like and let your imagination run wild. Trust me, the more unexpected, the better.
One trend I'm really digging is the use of negative space. Instead of carving out the traditional shapes, carve away the background to reveal a stunning silhouette. This works especially well with intricate designs like mandalas or floral patterns. Another idea? Incorporate different textures. Use various carving tools to create a mix of smooth and rough surfaces, adding depth and dimension to your design. You could even add embellishments like studs, glitter, or paint for an extra touch of personality.
Feeling overwhelmed? Don't be! Start with a simple design and gradually add more detail as you get comfortable. There are tons of free stencils available online, but don't be afraid to customize them to make them your own. And remember, there's no such thing as a "wrong" way to carve a pumpkin. The most important thing is to have fun and express your creativity. So grab your tools, unleash your inner artist, and get ready to create a pumpkin masterpiece that's truly one-of-a-kind!
- Literary Luminary: Carve a stack of books, a quote from your favorite novel, or the silhouette of a beloved literary character.
- Succulent Surprise: Transform your pumpkin into a desert oasis with carved cacti and succulent designs.
- Mandala Magic: Create a mesmerizing mandala pattern using a variety of carving tools.
- Silhouette Statement: Carve away the background to reveal a stunning silhouette of a tree, animal, or geometric design.
DIY Pumpkin Carving Aesthetic: Tools, Tips, and Techniques

DIY Pumpkin Carving Aesthetic: Tools, Tips, and Techniques
Gather Your Arsenal: Essential Pumpkin Carving Tools
so you're ready to get your hands dirty? Awesome! But before you dive in, let's talk tools. Forget that flimsy plastic carving kit you bought at the grocery store. If you're serious about achieving an aesthetic pumpkin carving, you need the right equipment. We're talking about tools that give you precision, control, and, most importantly, prevent you from accidentally stabbing yourself (safety first, always!).
Think of it like this: you wouldn't try to paint a masterpiece with a kindergarten brush, right? Same goes for pumpkin carving. Invest in a good quality carving kit with various saws, gouges, and scoops. A sturdy serrated knife is essential for cutting open the pumpkin and removing the seeds. Smaller saws and gouges are perfect for carving intricate details, and a scoop will make quick work of emptying the pumpkin's guts. And don't forget about stencils! Whether you're a beginner or a seasoned pro, stencils can help you achieve a clean, professional-looking design.
- Serrated Knife: For cutting open the pumpkin and removing the seeds.
- Small Saws and Gouges: For carving intricate details.
- Scoop: For quickly emptying the pumpkin's guts.
- Stencils: For achieving a clean, professional-looking design.
- Pencils/Markers: For transferring the design to the pumpkin.
Pro Tips for a Flawless Finish: Achieving Pumpkin Perfection
Alright, you've got your tools, you've got your design, now it's time to get carving! But before you start hacking away, let me share a few pro tips that will help you achieve a flawless finish. First things first: make sure your pumpkin is clean and dry. Wipe it down with a damp cloth to remove any dirt or debris. This will help your tools glide smoothly and prevent your design from smudging.
Next, take your time! Rushing will only lead to mistakes and frustration. Carve slowly and carefully, following your stencil or design as closely as possible. If you're carving a complex design, work in sections, starting with the smallest details and gradually moving to the larger areas. And don't be afraid to experiment! Pumpkin carving is all about creativity and self-expression, so have fun with it. If you make a mistake, don't panic! You can always use toothpicks or glue to reattach any broken pieces. And finally, remember to light your pumpkin properly. A flickering candle or a string of fairy lights can add a magical touch to your creation.
Tip | Description |
|---|---|
Clean and Dry Pumpkin | Wipe down your pumpkin to remove dirt and debris. |
Take Your Time | Carve slowly and carefully, avoiding rushing. |
Work in Sections | Start with the smallest details and gradually move to larger areas. |
Experiment and Have Fun | Don't be afraid to get creative and express yourself. |
Light it Up | Use a candle or fairy lights to add a magical touch. |
Pumpkin Carving Ideas Aesthetic: From Spooky to Chic
Pumpkin Carving Ideas Aesthetic: From Spooky to Chic
Embrace the Spooky Side: Classic Halloween with a Twist
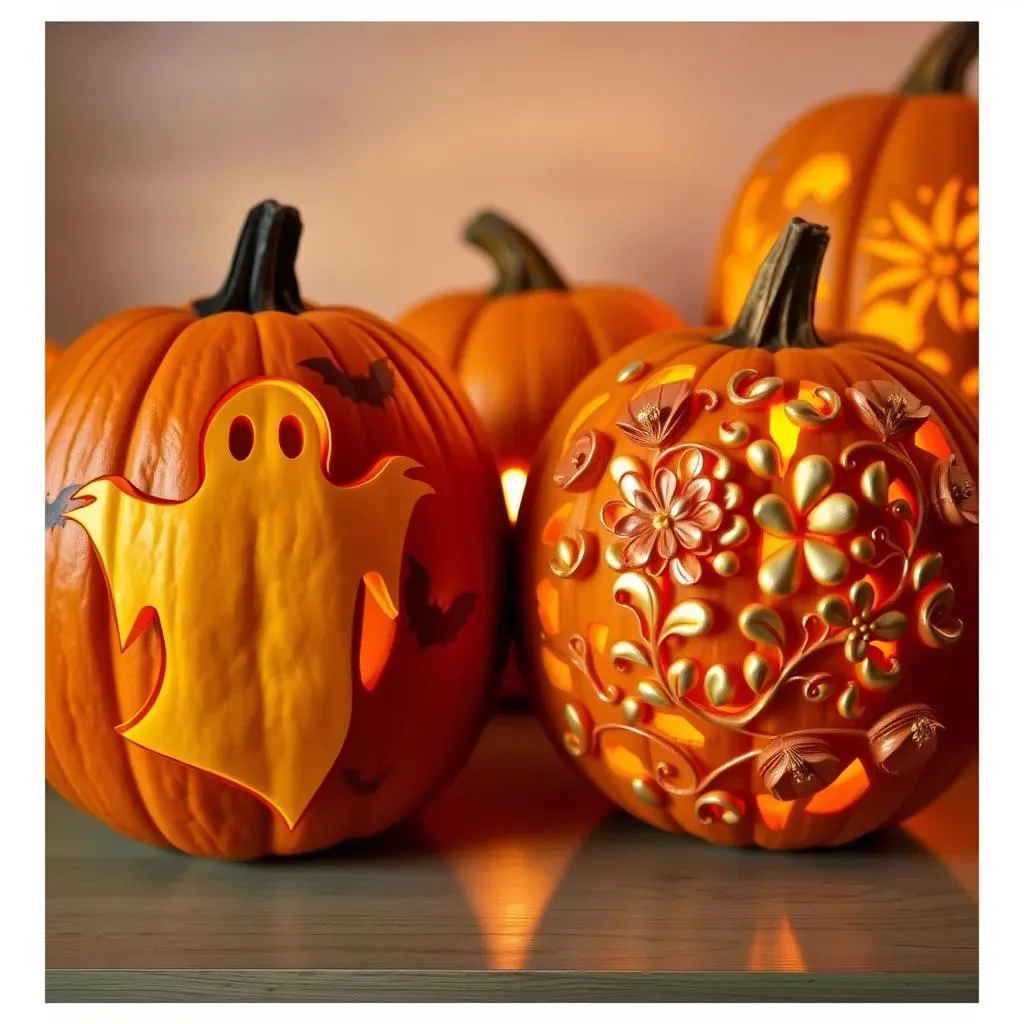
Let's be real, Halloween isn't Halloween without a little bit of spooky. But even "scary" can be stylish! Instead of the same old grotesque monster faces, think about classic Halloween motifs like ghosts, bats, and spiders, but rendered with a more refined aesthetic. A minimalist ghost silhouette, a swarm of bats arranged in a geometric pattern, or a spiderweb with delicate, intricate details – these are all ways to embrace the spooky side without sacrificing your sense of style. Consider using varying depths of carving to create shadows and highlights that add dimension and drama to your spooky design.
Another fun idea is to play with the pumpkin itself. Instead of carving a traditional jack-o'-lantern face, why not carve a spooky scene onto the side of the pumpkin? Think a haunted house on a hill, a graveyard with looming tombstones, or a witch flying across a full moon. You can even incorporate natural elements like twigs and leaves to add to the eerie atmosphere. Remember, the key is to be creative and have fun with it!
Chic and Stylish: Elevating the Pumpkin to Art Form
Alright, let's flip the script and focus on the "chic" side of things. Who says pumpkins can't be elegant and sophisticated? Think of your pumpkin as a blank canvas and let your inner artist shine! Geometric patterns are a great way to add a modern touch to your pumpkin carving. Think clean lines, sharp angles, and symmetrical designs. You can even incorporate metallic paint or glitter to add a touch of glamour.
Floral designs are another fantastic option for a chic pumpkin carving. Carve delicate flowers, leaves, and vines into your pumpkin for a touch of organic beauty. You can even use real flowers and foliage to embellish your design. Another idea is to create a monogram pumpkin. Carve your initials or your family's initials into a pumpkin for a personalized touch. This is a great way to add a touch of sophistication to your Halloween décor.
- Geometric Glam: Clean lines, sharp angles, and metallic accents.
- Floral Fantasy: Delicate flowers, leaves, and vines for organic beauty.
- Monogram Magic: Personalized initials for a sophisticated touch.
Playing with Light and Shadow: Creating Ambiance
No matter what design you choose, the way you light your pumpkin can make all the difference. A simple candle can create a warm, inviting glow, while a string of fairy lights can add a touch of whimsy. For a more dramatic effect, try using colored lights or spotlights to highlight certain areas of your design. You can even use a fog machine to create an eerie atmosphere around your pumpkin.
Experiment with different lighting techniques to see what works best for your design. And don't be afraid to get creative! You can even use household items like tin foil or mirrors to reflect light and create interesting patterns. Remember, the goal is to create an ambiance that complements your overall Halloween theme and showcases your pumpkin carving in the best possible light. After all, a well-lit pumpkin is a happy pumpkin!
Lighting Technique | Description |
|---|---|
Candlelight | Warm, inviting glow. |
Fairy Lights | Whimsical and magical. |
Colored Lights | Dramatic and eye-catching. |
Spotlights | Highlight specific areas of your design. |
Fog Machine | Eerie and atmospheric. |
Crafting Your Aesthetic Halloween: Final Thoughts
As the autumn leaves fall and Halloween night approaches, remember that pumpkin carving is more than just a tradition – it's a canvas for your creativity. Whether you've embraced minimalist chic, spooky elegance, or whimsical charm, your unique pumpkin carving ideas aesthetic will undoubtedly set your home apart. So, light up your masterpiece, share your spooky spirit, and enjoy the enchanting ambiance you've created. Happy carving, and may your Halloween be filled with frightfully delightful moments and gourd-geous displays!