Table of Contents
Ready to take your pumpkin carving from "cute" to "wow"? This article is your ultimate guide to professional pumpkin carving ideas, transforming ordinary gourds into breathtaking Halloween masterpieces. We'll journey from basic techniques to advanced artistry, exploring essential tools, inspiring designs, and expert tips to elevate your carving skills. Whether you're a seasoned carver or a complete beginner, get ready to unlock your creative potential and impress everyone with your incredible pumpkin creations. Prepare to be amazed by the stunning transformations possible, and learn how to achieve professional-level results with our easy-to-follow instructions and inspiring gallery of professional pumpkin carving ideas. Let's carve some seriously impressive pumpkins!
Mastering the Art of Professional Pumpkin Carving
So, you're diving into the world of professional pumpkin carving? Fantastic! It's a rewarding journey, blending artistry, precision, and a touch of spooky fun. Think of it like sculpting, but with a delicious, seasonal canvas. The key to mastering this craft is understanding that it's not just about carving a face; it's about creating a three-dimensional artwork. We'll explore various techniques, from simple carving to intricate etching and even the use of stencils for complex designs. Remember, practice makes perfect, so don't be afraid to experiment! Start with simpler pumpkin carving techniques before tackling those incredibly detailed designs. And don't forget the importance of choosing the right pumpkin! A firm, well-shaped pumpkin is your foundation for a stunning piece.
Skill Level | Recommended Technique | Example Design |
|---|---|---|
Beginner | Simple carving with basic tools | Classic jack-o'-lantern face |
Intermediate | Etching and layering | Intricate floral patterns |
Advanced | 3D carving, multi-pumpkin designs | Realistic portraits or scenes |
One thing that often trips up beginners is tool selection. You don't need a huge arsenal, but having the right tools is crucial for clean cuts and precise details. A good quality carving kit is a great investment, but even some household tools can work in a pinch. For example, a sturdy paring knife can be used for initial cuts, while a small detail knife is perfect for intricate work. Check out our post on advanced pumpkin carving tools for more ideas.
- Sharp carving tools (knives, saws, gouges)
- Stencils (optional, but helpful for complex designs)
- Scoop for removing pumpkin guts
- Drill (for adding extra details or light effects)
- Candle or LED light source
Remember, even professionals started somewhere. Don’t get discouraged if your first attempts aren't perfect. This is a skill that takes time and practice to master. The more you carve, the better you'll become at understanding the pumpkin's structure and how to manipulate it to create your vision. And don't hesitate to seek out inspiration from other artists. There's a wealth of resources available online, from tutorials to stunning galleries of professional pumpkin carving ideas that can ignite your creativity.
Essential Tools and Techniques for Professional Pumpkin Carving
Let's talk tools! Having the right equipment is half the battle when it comes to professional-level pumpkin carving. Forget flimsy knives; we're talking precision instruments that allow for intricate details and clean cuts. A good quality carving kit, complete with various sizes of saws, gouges, and detail knives, is a worthwhile investment. But if you're on a budget, don't worry! A sharp paring knife, a sturdy spoon for gutting, and even some dental tools can work wonders for those fine details. And don't underestimate the power of a good stencil – it's your best friend for complex designs. For more advanced techniques, check out our guide on advanced pumpkin carving tools.
- High-quality carving knives (various sizes and shapes)
- Small saws for intricate cuts
- Gouges for creating depth and texture
- Detail knives for fine work
- Pumpkin gutting tools (scoop or spoon)
- Stencils (various designs)
- Drill (optional, for adding light effects or extra details)
Now, let's discuss techniques. Beyond the basic carving, there's a whole world of possibilities. Etching, for example, involves carefully shaving away layers of pumpkin skin to create shading and depth. This technique allows for incredibly realistic and detailed designs. Then there's 3D carving, where you sculpt the pumpkin itself to create stunning three-dimensional effects. This is where a drill can come in handy for adding additional features or creating internal lighting effects. Finally, don't be afraid to experiment with different lighting options – LED lights can create a whole new dimension to your finished pumpkin. For more inspiration, check out our gallery of advanced Halloween pumpkin designs.
Technique | Description | Best For |
|---|---|---|
Basic Carving | Simple cuts to create shapes and outlines | Beginner-friendly designs |
Etching | Shaving away layers of pumpkin skin for shading and depth | Realistic portraits and intricate designs |
3D Carving | Sculpting the pumpkin to create three-dimensional effects | Complex scenes and unique shapes |
Remember, the key to mastering any technique is practice! Don't be afraid to experiment, make mistakes, and learn from them. The more you work with pumpkins, the better you'll understand their structure and how to manipulate them to bring your creative vision to life. And don't forget the fun part—let your imagination run wild! There are no limits to what you can create with a little patience and creativity. Looking for some more advanced ideas? Check out our page on complex pumpkin carving designs for more inspiration!
Stunning Professional Pumpkin Carving Designs & Inspiration
Stunning Professional Pumpkin Carving Designs & Inspiration
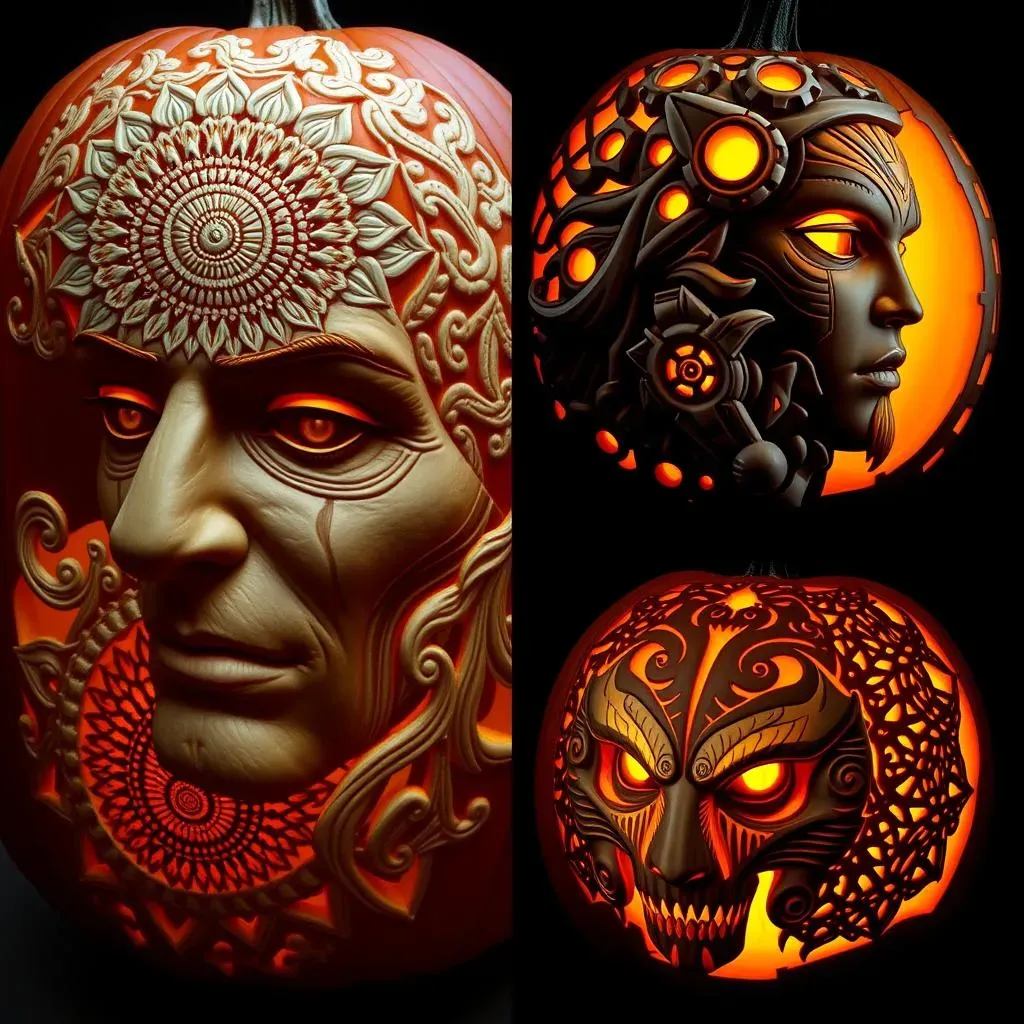
Realistic Portraits and Scenes
Let's dive into the truly awe-inspiring world of realistic pumpkin carving! Imagine transforming your pumpkin into a detailed portrait of your favorite character, a spooky scene from a classic horror film, or even a breathtaking landscape. The key here is precision and attention to detail. You'll need sharp tools, a steady hand, and maybe a few stencils to help you achieve those fine lines and subtle shading. Don't be afraid to experiment with different techniques, like etching, to add depth and dimension to your masterpiece. For some extra inspiration, take a look at our gallery of complex pumpkin carving designs.
- Use high-resolution images as references.
- Practice your etching techniques for smooth shading.
- Consider using multiple pumpkins for larger scenes.
Intricate Patterns and Geometric Designs
If realism isn't your style, then how about exploring the captivating world of intricate patterns and geometric designs? Think mesmerizing mandalas, elegant floral arrangements, or even complex Celtic knots. These designs often lend themselves well to stencils, allowing you to create stunning, symmetrical patterns with ease. Experiment with different lighting techniques to highlight the intricate details of your design. And remember, even small details can make a huge impact. Check out some examples of intricate pumpkin carving patterns to fire up your imagination.
Design Type | Tools | Tips |
|---|---|---|
Mandalas | Small saws, detail knives, stencils | Focus on symmetry and fine lines |
Floral Designs | Gouges, detail knives, stencils | Vary the depth of cuts for added dimension |
Geometric Patterns | Saws, drills, stencils | Use straight lines and precise angles |
Fantasy and Sci-Fi Themes
For those who love a bit of fantasy or sci-fi, the possibilities are truly endless! Transform your pumpkin into a fearsome dragon, a whimsical fairy, or a futuristic robot. Let your imagination run wild and create a unique design that reflects your personal style. You could even carve a scene from your favorite movie or video game. The key is to think outside the box and create a design that is both visually stunning and full of character. For more inspiration, explore our collection of advanced Halloween pumpkin designs.
From Beginner to Pro: Tips for Achieving Professional Pumpkin Carving Results
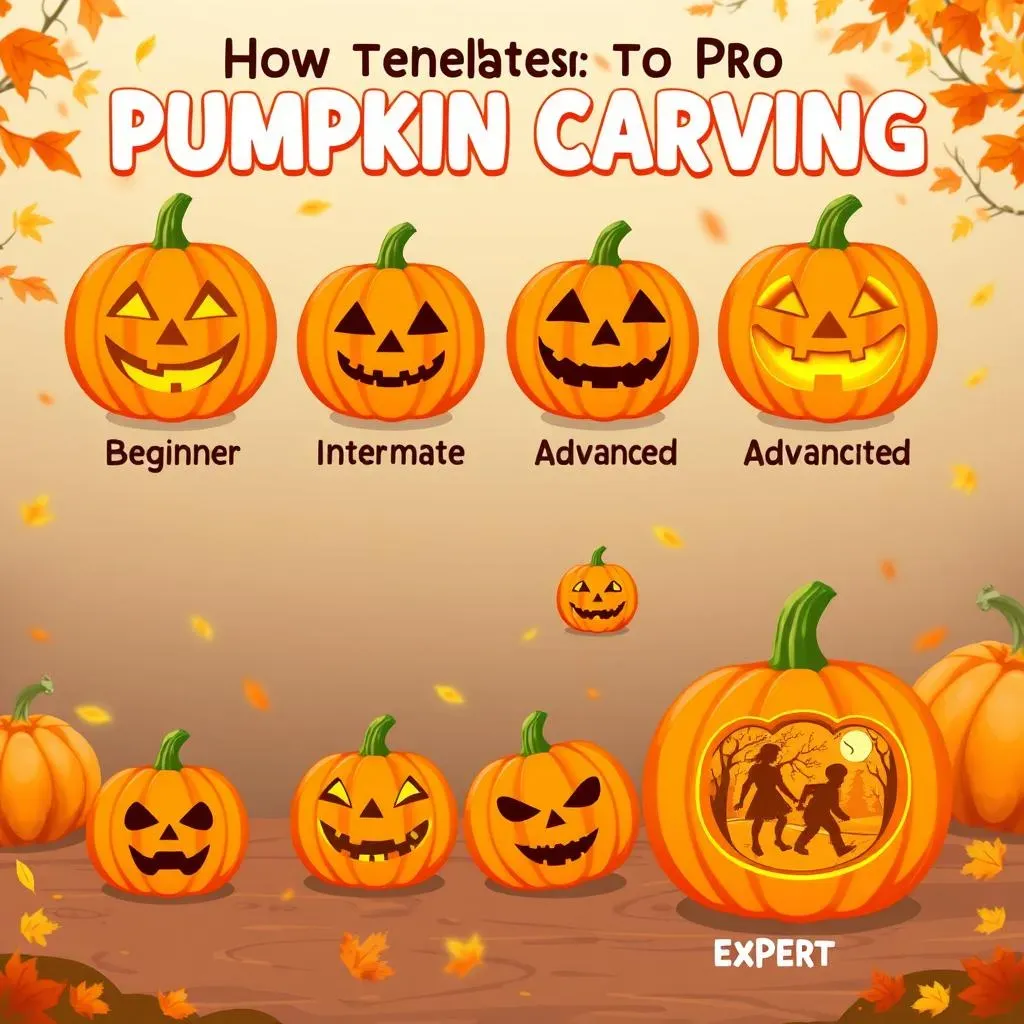
From Beginner to Pro: Tips for Achieving Professional Pumpkin Carving Results
Mastering the Fundamentals
So you want to go from pumpkin carving novice to pro? Awesome! It's a journey, not a race. Start by focusing on the basics. Practice makes perfect, and that's especially true with pumpkin carving. Begin with simple designs. Think classic jack-o'-lanterns, but aim for clean, precise cuts. A sharp knife is your best friend here – dull tools lead to ragged edges and frustration. Get comfortable with your tools before tackling anything too ambitious. Remember, even the most intricate designs start with basic shapes and lines. For extra guidance, check out our beginner-friendly guide on detailed pumpkin carving techniques.
Next, experiment with different carving techniques. Try etching – it's like drawing with a knife, creating shading and depth. Start with simple shading on a basic design before moving to more complex patterns. Gradually work your way up to more challenging designs, and don’t be afraid to use stencils! They're lifesavers for complex patterns and help ensure symmetry. Practice on a few pumpkins before committing to your masterpiece. This is also a great time to find your style, are you into cute pumpkins or spooky scary ones? Check out our post on professional pumpkin carving tips for more ideas.
- Practice basic cuts and shapes.
- Experiment with etching techniques.
- Utilize stencils for complex designs.
- Practice on multiple pumpkins.
Elevating Your Skills
Once you've mastered the basics, it's time to level up! Explore more advanced techniques like 3D carving. This involves sculpting the pumpkin itself, creating stunning three-dimensional effects. It requires more skill and precision, but the results are breathtaking. Think about adding internal lighting to enhance the drama. LED lights are fantastic for this, creating a truly magical effect. Don’t be afraid to experiment with different lighting colors and placements to add to the atmosphere. For inspiration, browse through our collection of advanced Halloween pumpkin designs.
Consider using multiple pumpkins to create larger, more complex scenes. Think about combining different techniques, mixing etching with 3D carving for a truly unique design. And most importantly, let your creativity run wild! Don't be afraid to experiment with different styles and approaches. Seek inspiration from other artists, but always strive to develop your own unique voice. The beauty of pumpkin carving lies in its versatility – there are no limits to what you can create! Remember, even the most skilled carvers continue to learn and refine their techniques. So keep practicing, keep experimenting, and keep having fun! For additional inspiration, see our collection of complex pumpkin carving designs.
Skill Level | Technique | Tip |
|---|---|---|
Intermediate | 3D Carving | Start with simple shapes |
Advanced | Multi-pumpkin scenes | Plan your composition carefully |
Expert | Realistic portraits | Use high-resolution images |