Table of Contents
Halloween's creeping closer, and you know what that means: it's time to unleash your inner pumpkin Picasso! Forget friendly faces and goofy grins; we're diving headfirst into the realm of the macabre. Are you ready to transform ordinary gourds into spine-chilling spectacles? This isn't your grandma's pumpkin carving guide. We're talking fangs, claws, and things that go bump in the night. If you're searching for printable scary pumpkin carving ideas, you've hit the jackpot. This guide is your one-stop shop for turning pumpkins into portals of pure terror. I'll walk you through finding the perfect stencils, arming yourself with the right tools, and mastering techniques to make your jack-o'-lantern the envy of every ghoul and goblin. From beginner-friendly frights to advanced artistic endeavors, I've got something to make everyone scream. Get ready to ditch the dull and embrace the dread – let's carve up some nightmares!
Find Your Perfect Printable Scary Pumpkin Carving Ideas
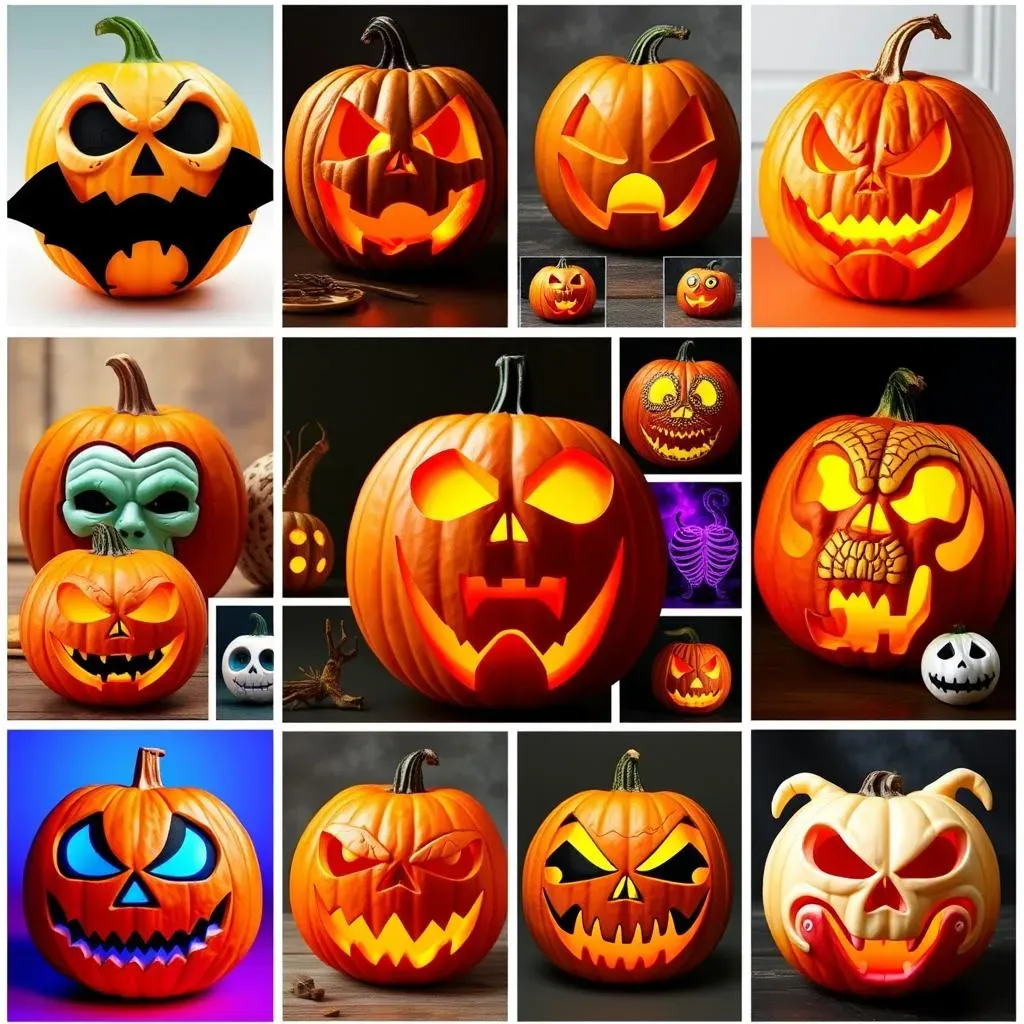
Find Your Perfect Printable Scary Pumpkin Carving Ideas
First things first, let's nail down what kind of frightful masterpiece you're aiming for. Are we talking classic horror icons, like Dracula or Frankenstein's monster? Maybe you're leaning towards creepy crawlies, like spiders or snakes slithering across your pumpkin canvas? Or perhaps you want something totally original, a unique creature born from the depths of your imagination! The beauty of printable scary pumpkin carving ideas is the sheer variety available. Spend some time browsing online. Check out sites like Etsy and Pinterest for inspiration, but don't be afraid to think outside the box (or, in this case, the pumpkin).
Consider your skill level, too. Are you a pumpkin carving pro, ready to tackle intricate designs with tiny details? Or are you a beginner, just looking for a simple but effective scare? There's no shame in starting small! Plenty of free, easy-to-use stencils are available online. Remember, the goal is to have fun (and maybe give the neighbors a little fright), so choose a design that excites you and matches your carving capabilities.
Tools and Tips for Terrifyingly Good Printable Scary Pumpkin Carvings
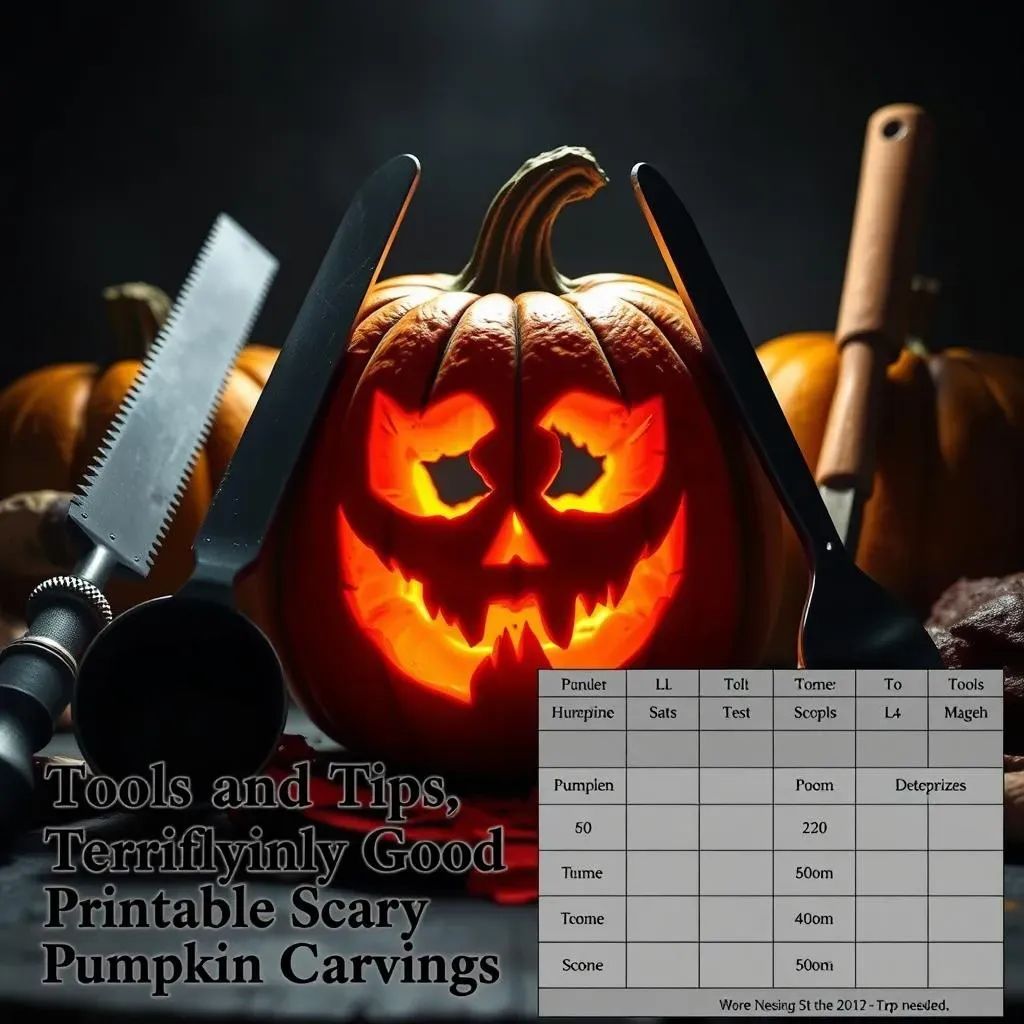
Tools and Tips for Terrifyingly Good Printable Scary Pumpkin Carvings
Alright, so you've got your printable scary pumpkin carving ideas picked out. Awesome! Now, before you start hacking away like a maniac, let's talk tools. You wouldn't try to paint a masterpiece with a toothbrush, would you? Same goes for pumpkin carving. Ditch the flimsy kitchen knife and invest in a decent carving kit. These usually include various sizes of saws, scoops, and pokers, designed specifically for pumpkin flesh. Trust me, your hands (and your pumpkin) will thank you.
Beyond the kit, consider these essentials: A sturdy surface (preferably covered in newspaper – pumpkin guts get everywhere!), a good light source (you don't want to accidentally carve off a finger), and a wet/dry vacuum. Seriously, that vacuum will be your best friend when it comes to cleanup. Speaking of cleanup, don't forget a bowl for the seeds if you're planning on roasting them later. Pumpkin seeds are delicious, but that's a whole other article.
Tool | Why You Need It |
|---|---|
Pumpkin Carving Kit | Includes specialized saws and scoops for efficient carving. |
Sturdy Surface & Newspaper | Protects your workspace from pumpkin mess. |
Good Lighting | Ensures precision and prevents accidents. |
Wet/Dry Vacuum | Makes cleanup a breeze. |
Now, for some tips to avoid pumpkin carving carnage. First, always cut away from yourself. This seems obvious, but when you're wrestling with a stubborn piece of pumpkin, it's easy to get careless. Second, thin the pumpkin walls where you'll be carving intricate details. This makes it much easier to push the saw through. Finally, don't be afraid to get creative! Use different tools to create different textures and effects. Experiment with shading and depth to bring your scary pumpkin carving ideas to life.
From Stencil to Showstopper: Easy Printable Scary Pumpkin Carving Techniques
From Stencil to Showstopper: Easy Printable Scary Pumpkin Carving Techniques
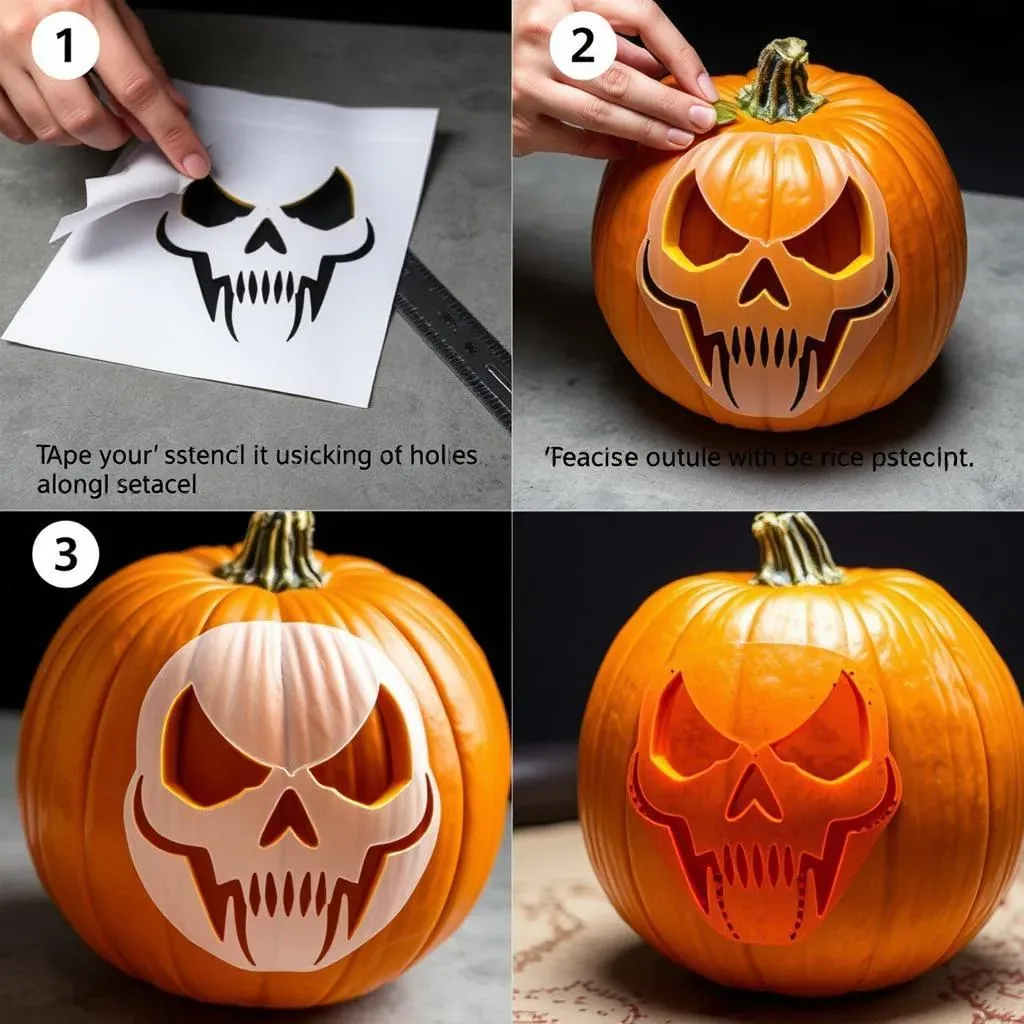
Prep Like a Pro
You've got your printable scary pumpkin carving ideas and your tools – now it's time to get that stencil onto your pumpkin! Don't just slap it on and start cutting. First, clean and dry your pumpkin. Then, tape the stencil securely to the surface. You can use regular tape or, for curved surfaces, painter's tape works wonders. Now, grab a poker or a sharp needle tool and carefully poke holes along the stencil lines. The closer the holes, the more accurate your carving will be. Think of it like a connect-the-dots for horror!
Once you've poked all the holes, remove the stencil. You should now have a dotted outline of your design on the pumpkin. If some of the dots are faint, just go over them again. The key here is patience. Rushing this step can lead to a sloppy final product, and nobody wants a scary pumpkin carving that looks like it was attacked by a toddler with a butter knife.
Carving Confidence
Time to bring those printable scary pumpkin carving ideas to life! Start by carving out the smallest and most intricate details first. This prevents you from accidentally damaging larger sections later on. Use short, controlled strokes with your carving saw. Don't try to force the saw through the pumpkin; let it do the work. If you encounter resistance, try thinning the pumpkin wall from the inside.
As you carve, periodically remove the cut-out pieces of pumpkin. This will give you a clearer view of your progress and prevent the design from becoming obscured. Keep a damp cloth handy to wipe away any pumpkin gunk that accumulates on your tools or the pumpkin surface. Remember, precision is key to achieving a truly terrifying effect.
Technique | Description | Benefit |
|---|---|---|
Start with Small Details | Carve intricate sections first. | Prevents accidental damage to larger areas. |
Short, Controlled Strokes | Use precise movements with the carving saw. | Ensures clean and accurate cuts. |
Remove Cut-Out Pieces | Regularly clear away carved sections. | Maintains a clear view of the design. |
Illumination Inspiration
Your printable scary pumpkin carving ideas are now a reality, but the show's not over yet! How you illuminate your jack-o'-lantern can make or break the final effect. Forget those old-fashioned candles – they're messy, smoky, and a fire hazard waiting to happen. Opt for battery-operated LED lights instead. They're brighter, safer, and last much longer. Plus, you can find them in a variety of colors to create different spooky moods.
Experiment with different lighting techniques. Try placing the light source inside the pumpkin at different angles to create dramatic shadows. Or, use multiple smaller lights to illuminate specific areas of the design. You can even find flickering LED lights that mimic the look of a real flame, adding an extra touch of realism to your scary pumpkin carving. The possibilities are endless!
Beyond the Basics: Advanced Printable Scary Pumpkin Carving Projects
Beyond the Basics: Advanced Printable Scary Pumpkin Carving Projects
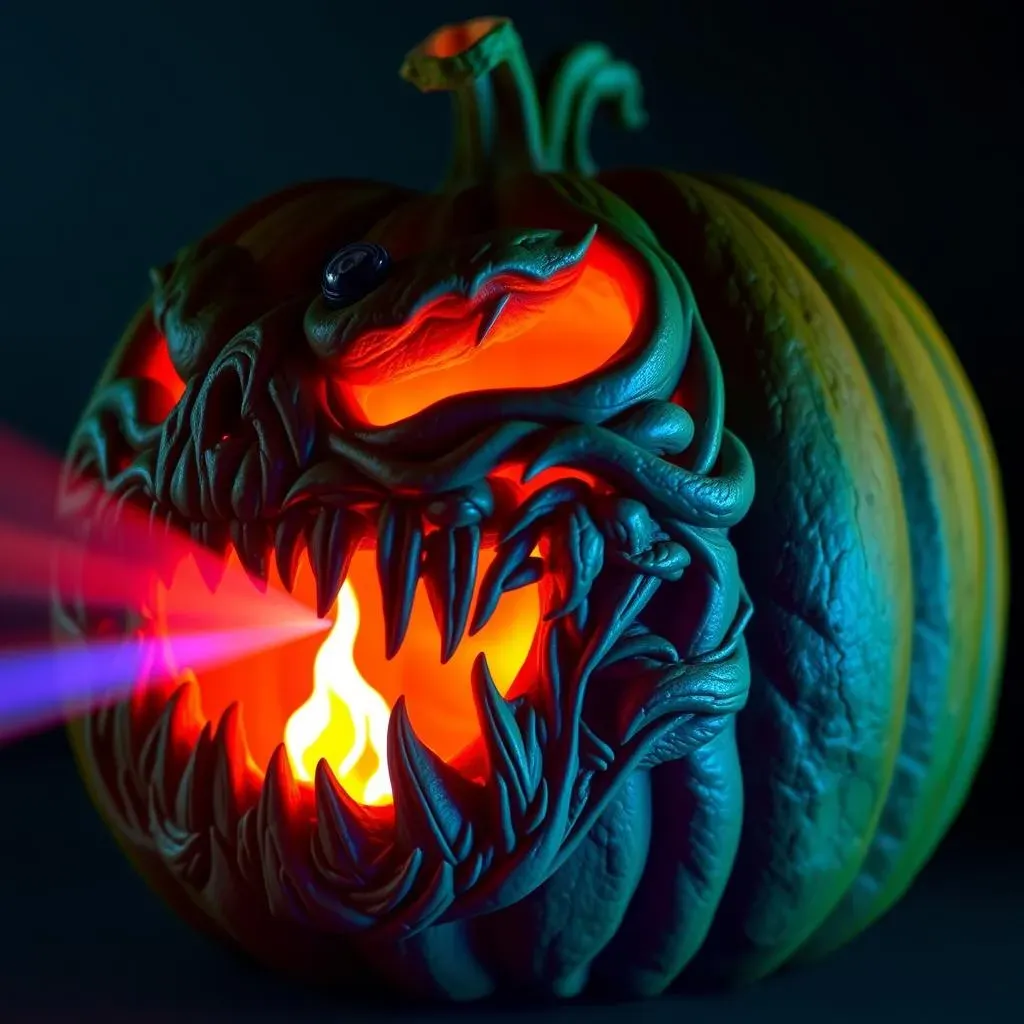
3D Pumpkin Pro
Ready to take your printable scary pumpkin carving ideas to the next dimension? Forget flat, two-dimensional designs! We're talking about creating depth, texture, and truly eye-popping effects. This involves layering different carving techniques, using various tools to sculpt the pumpkin surface, and even incorporating other materials. Think protruding fangs, sunken eyes, and gnarled, twisted features that seem to leap off the pumpkin.
One technique is to use wood carving tools to create fine details and textures. You can also experiment with "shaving" the pumpkin skin to different depths to create shading and highlights. Another trick is to carve separate pieces of pumpkin and attach them to the main pumpkin using toothpicks or skewers. This allows you to create complex shapes and add dimension to your design. Just remember to plan your design carefully and work in stages to avoid accidentally destroying your masterpiece.
Light and Shadow Sorcery
Lighting is crucial for any printable scary pumpkin carving ideas, but with advanced projects, you can really push the boundaries of illumination. Instead of just sticking a light inside, consider using multiple light sources to create dramatic shadows and highlight specific features. You can also experiment with colored lights to create different spooky moods. Red for blood, green for slime, purple for a truly eerie glow – the choice is yours!
Another advanced technique is to use a small projector to project images or animations onto the pumpkin surface. This allows you to create incredibly detailed and dynamic designs. You can project moving eyes, flickering flames, or even ghostly apparitions onto your pumpkin. Just be sure to use a projector that is small and lightweight enough to be easily positioned, and choose images or animations that complement your overall design.
Technique | Description | Effect |
|---|---|---|
Layered Carving | Carving at different depths. | Creates shading and highlights. |
Attached Pieces | Adding separately carved elements. | Adds dimension and complexity. |
Colored Lights | Using different color LEDs. | Creates spooky moods. |
Projected Images | Projecting images onto the pumpkin. | Creates dynamic designs. |
Unleash Your Inner Monster Carver!
So, there you have it! You're now armed with enough printable scary pumpkin carving ideas and know-how to make this Halloween the spookiest yet. Don't be afraid to experiment, get messy, and most importantly, have fun conjuring up some truly terrifying jack-o'-lanterns. Remember, the goal isn't perfection, it's petrifying! Now go forth and carve some screams – your neighborhood awaits its annual dose of pumpkin-induced nightmares!