Table of Contents
Halloween is just around the corner, and that means it's time to unleash your inner artist on a pumpkin! But who says pumpkin carving has to be all about terrifying ghouls and gruesome monsters? This year, let's ditch the scary and embrace the fun with some fantastic non scary pumpkin carving ideas. Whether you're a seasoned pro or a complete beginner, there's a design out there for you. We're diving deep into a world of friendly faces, adorable animals, and whimsical patterns that will light up your porch without giving anyone nightmares. This guide is your one-stop shop for transforming ordinary pumpkins into delightful Halloween decorations. We'll explore a range of easy-to-follow carving techniques, share tips on selecting the perfect pumpkin and the right tools, and even provide some handy stencils to get you started. Plus, we'll cover essential tricks for keeping your carved creations looking fresh and festive for longer. And if carving isn't your thing, don't worry! We've got a treasure trove of no-carve decorating ideas that are just as creative and eye-catching. So, grab your pumpkin, gather your supplies, and get ready to create some spooktacular, yet totally non-scary, Halloween magic!
Beyond the Boo: Creative Non Scary Pumpkin Carving Ideas
Beyond the Boo: Creative Non Scary Pumpkin Carving Ideas
Friendly Faces and Fun Characters
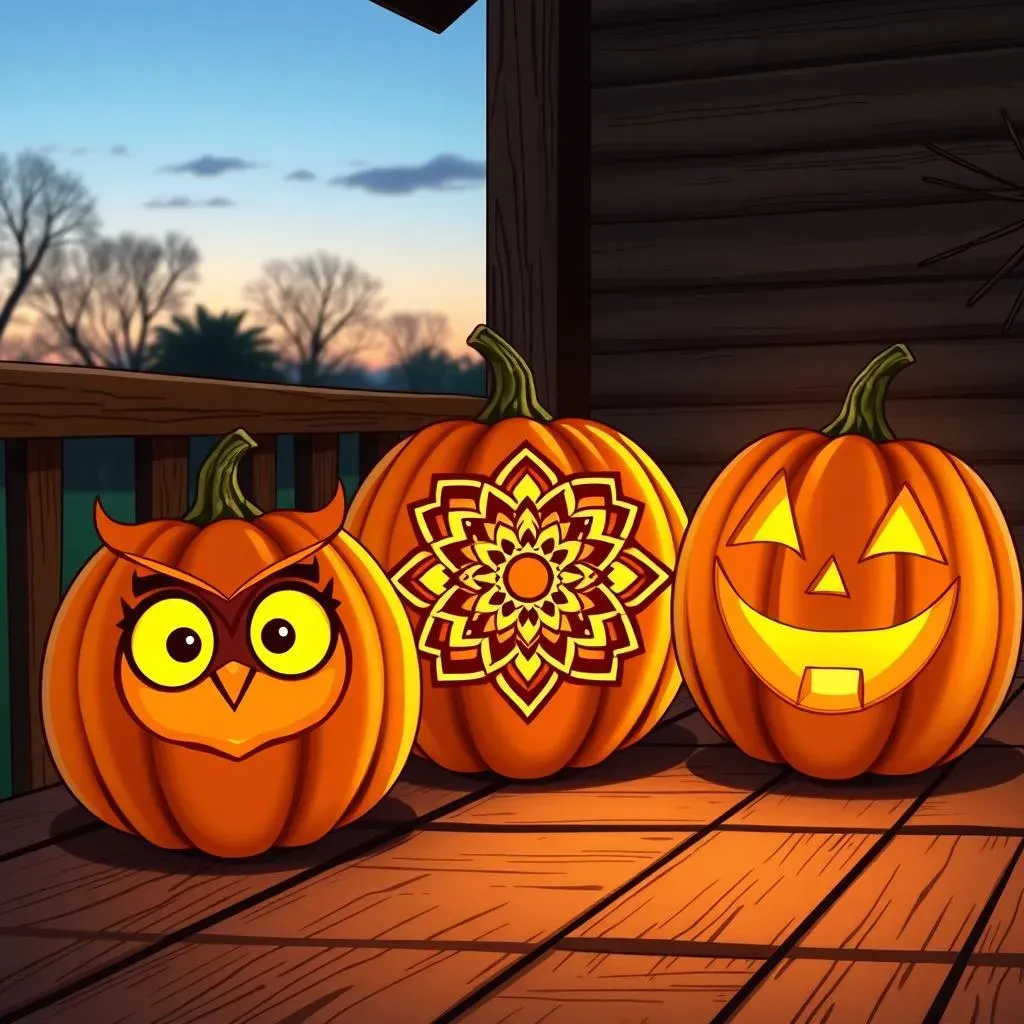
Forget the fangs and menacing grins! When it comes to non scary pumpkin carving ideas, think friendly faces and lovable characters. A classic jack-o'-lantern with a wide, toothy smile is always a winner, but why not get more creative? Consider carving a cute cartoon character, a silly monster with googly eyes, or even a portrait of your favorite pet. The key is to keep the expressions lighthearted and welcoming.
One year, my neighbor carved a pumpkin that looked exactly like her fluffy Persian cat. She even added little triangular ears made from construction paper. It was the cutest pumpkin on the block! The possibilities are endless – think owls, cats, or even a Minion!
- Classic Smiley Face: A timeless and cheerful option.
- Cartoon Characters: From Mickey Mouse to Peppa Pig, bring your child's favorite character to life.
- Animal Faces: Cats, dogs, owls, or even a friendly-looking monster!
Whimsical Patterns and Geometric Designs
Non scary pumpkin carving ideas don't always have to be about faces. Intricate patterns and geometric designs can be just as eye-catching and festive. Think stars, moons, flowers, or even abstract shapes. These designs are not only visually appealing but also offer a great opportunity to practice your carving skills.
I've seen some stunning pumpkins carved with mandala-inspired patterns. They look incredibly elegant when illuminated from within. Plus, these types of designs often require less precision than character carvings, making them a great option for beginners.
To create a star pattern, you can use a star-shaped cookie cutter to trace the outline onto the pumpkin, then carefully carve along the lines. For a more intricate design, try using a stencil or drawing freehand.
Tools & Techniques for Easy, Non Scary Pumpkin Carving
Tools & Techniques for Easy, Non Scary Pumpkin Carving
Gathering Your Gear: Essential Pumpkin Carving Tools
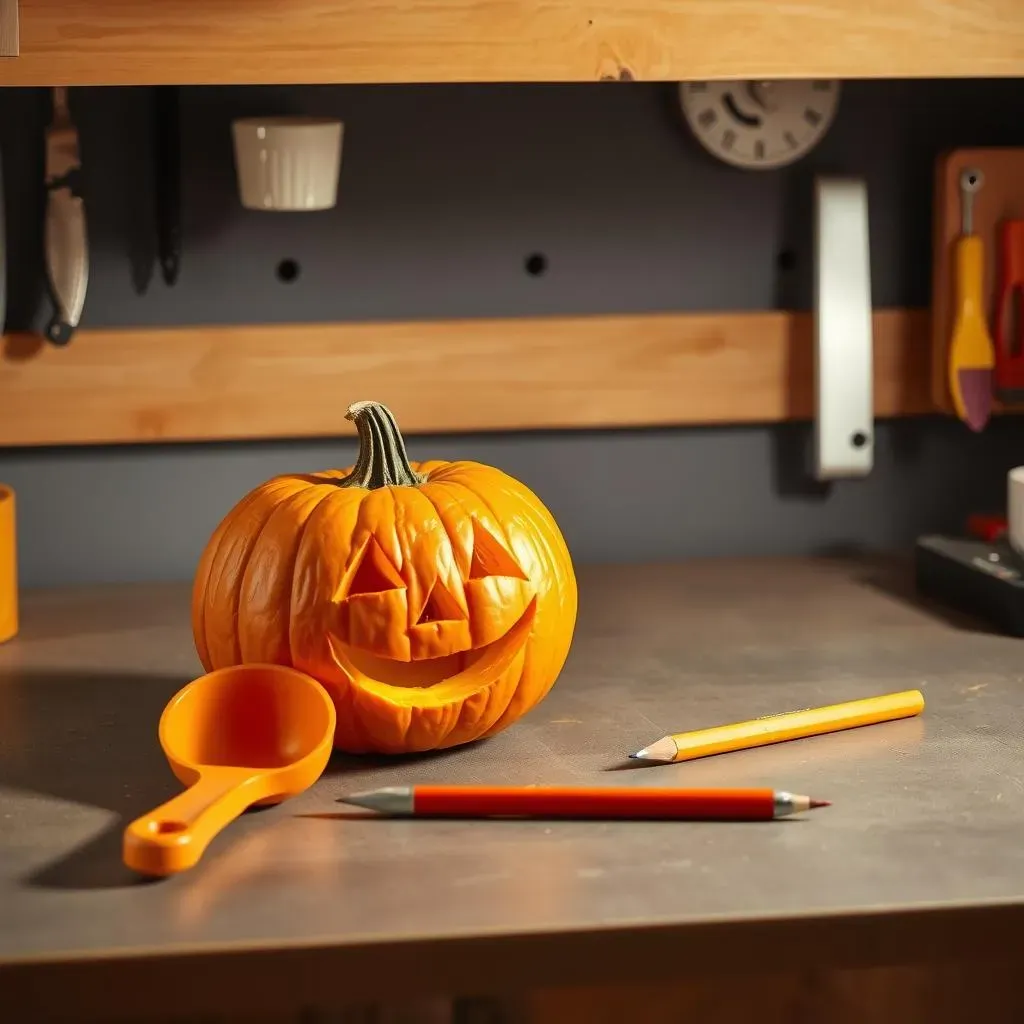
Alright, so you've got your non scary pumpkin carving ideas swirling around in your head – awesome! But before you dive in, let's talk tools. Having the right equipment can make all the difference between a frustrating mess and a smooth, enjoyable carving experience. You don't need a fancy professional kit, but a few key items will definitely come in handy. Think of it like prepping for a delicious meal – the right tools make the cooking process so much easier and more fun!
First off, you'll need a good carving knife. Forget your kitchen knives – they're usually too big and unwieldy. Look for a serrated knife specifically designed for pumpkin carving. These knives are typically smaller and have a thinner blade, allowing for more precise cuts. A small, sturdy saw can also be useful for cutting out larger sections or intricate details. And don't forget a scoop! A good, solid scoop is essential for removing all those pumpkin guts and seeds. You can use a metal spoon, but a dedicated scoop with a scraper edge will make the job much easier.
Tool | Purpose | Alternative |
|---|---|---|
Serrated Carving Knife | Making precise cuts and details | Small, thin kitchen knife |
Pumpkin Scoop | Removing seeds and pulp | Large metal spoon |
Small Saw | Cutting out larger sections | Utility knife (with caution) |
Pencil or Marker | Transferring stencils or drawing designs | Dry-erase marker |
Non Scary Pumpkin Carving: Stencils and Templates for Beginners
Non Scary Pumpkin Carving: Stencils and Templates for Beginners
The Magic of Stencils: Your Non Scary Pumpkin Carving Shortcut
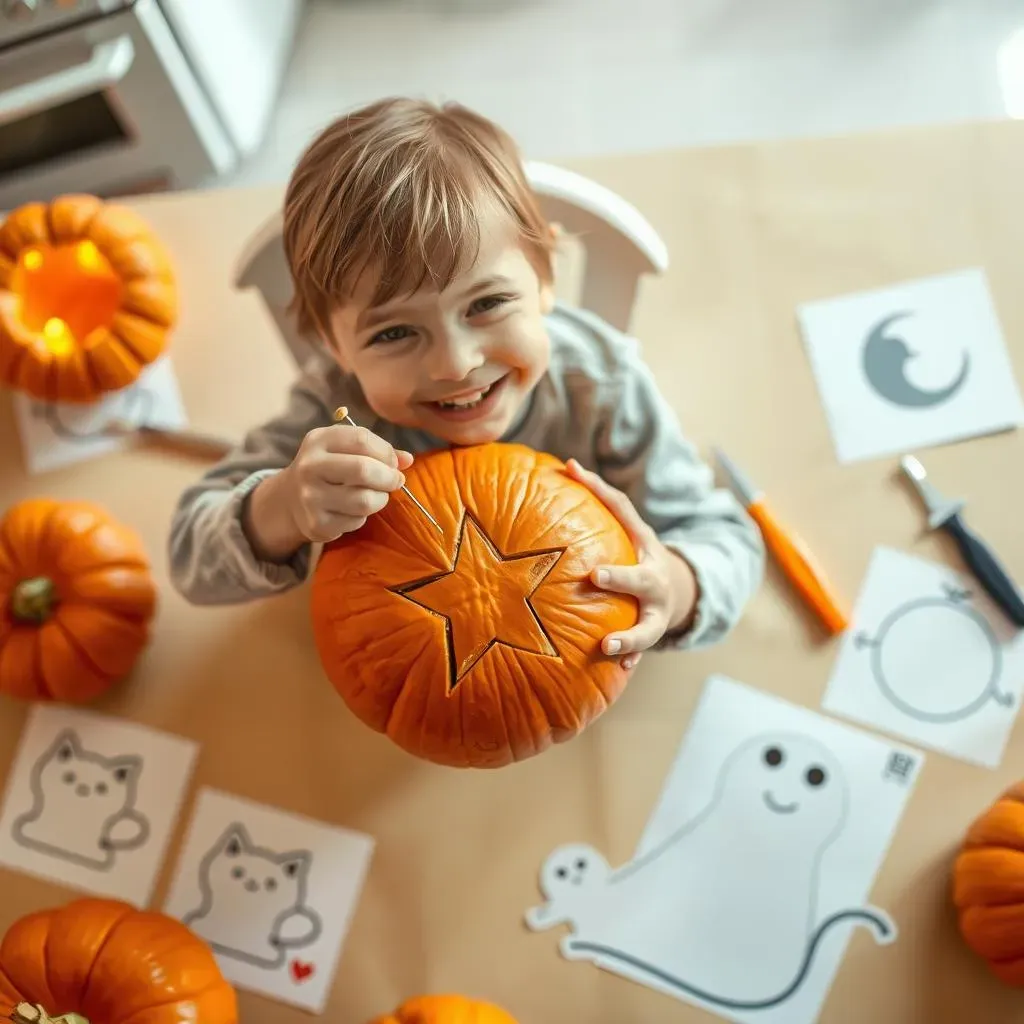
let's be real – not everyone is a natural-born artist with a pumpkin carving knife. And that's perfectly fine! That's where stencils and templates come in, your secret weapon for creating impressive non scary pumpkin carving designs without the stress. Think of them as training wheels for your pumpkin carving adventures. They provide a clear outline to follow, making the whole process much easier and less intimidating, especially for beginners or younger carvers. Plus, with so many free stencils available online, you're sure to find the perfect design to match your skill level and Halloween vibe.
I remember the first time I tried carving a pumpkin without a stencil. Let's just say it looked more like a misshapen blob than the cute ghost I was aiming for! Stencils are a game-changer. They take the guesswork out of the process and allow you to focus on the fun of carving.
Finding and Using the Perfect Stencil
So, where do you find these magical stencils? The internet is your best friend! A quick search for "free pumpkin carving stencils" will yield a treasure trove of options, from simple shapes and characters to more complex and detailed designs. Websites like Pinterest, Pumpkin Pile, and even some craft stores offer printable stencils that you can download and use for free. When choosing a stencil, consider your skill level and the size of your pumpkin. A very intricate stencil might be challenging for a beginner, while a simple design might look a bit lost on a large pumpkin. Once you've found your stencil, print it out and prepare to transfer it to your pumpkin.
To transfer the stencil, tape it securely to the front of your pumpkin. Then, use a pushpin, toothpick, or tracing wheel to poke small holes along the stencil lines. These holes will act as a guide when you start carving. Once you've traced the entire design, remove the stencil and you'll see a dotted outline on your pumpkin. Now, grab your carving tools and carefully follow the dots to bring your non scary pumpkin carving idea to life!
Stencil Type | Difficulty Level | Examples |
|---|---|---|
Simple Shapes | Beginner | Stars, moons, circles |
Cartoon Characters | Intermediate | Mickey Mouse, Snoopy |
Words/Letters | Intermediate | "Boo," "Happy Halloween" |
Intricate Designs | Advanced | Mandalas, detailed portraits |
Making Your Non Scary Pumpkin Carving Last: Tips & Tricks
Making Your Non Scary Pumpkin Carving Last: Tips & Tricks
The Longevity Game: Keeping Your Pumpkin Fresh
So, you've poured your heart and soul into creating a stunning non scary pumpkin carving masterpiece. The last thing you want is for it to turn into a mushy, moldy mess within a few days! Luckily, there are several proven tricks to extend the life of your carved pumpkin and keep it looking its best for as long as possible. Think of it as pumpkin preservation 101 – a few simple steps can make a huge difference.
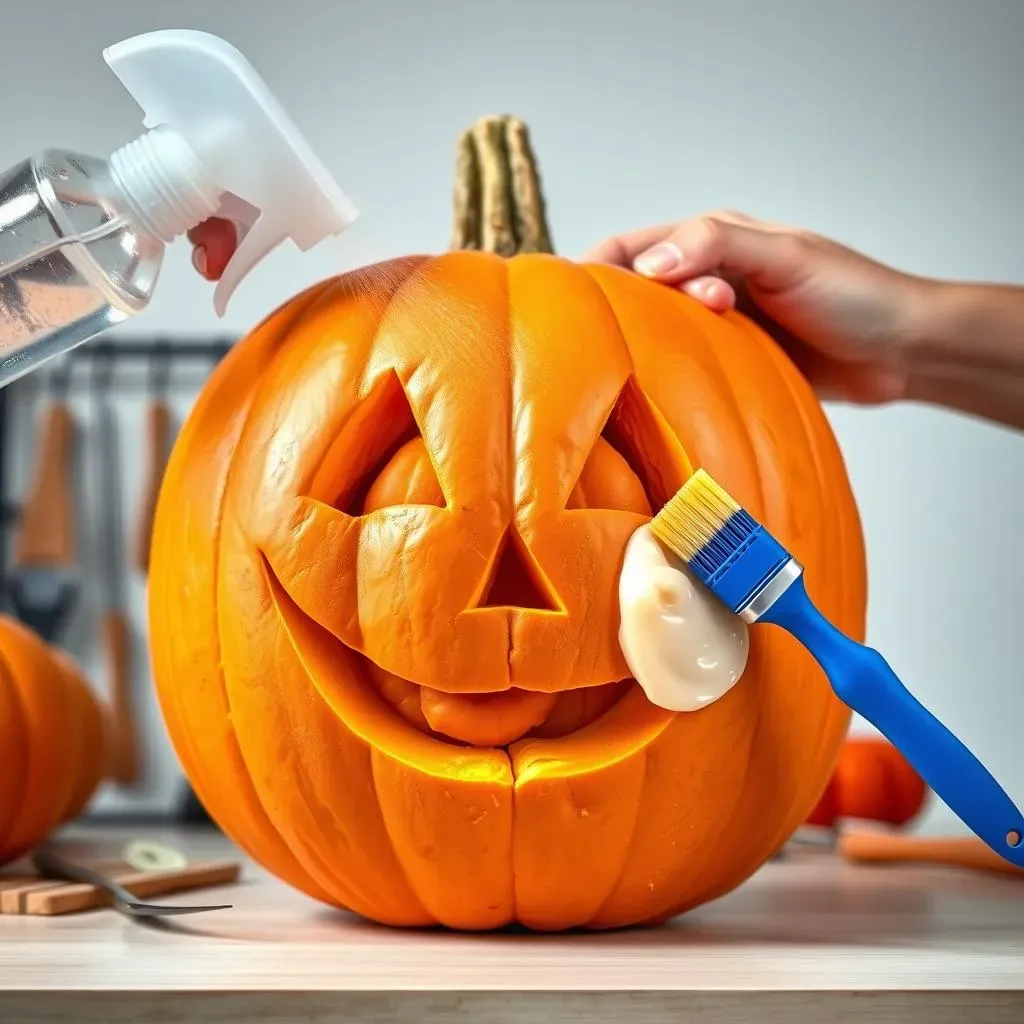
One of the biggest enemies of a carved pumpkin is dehydration. Once you cut into the pumpkin, it starts to lose moisture, causing it to shrivel and collapse. To combat this, try soaking your carved pumpkin in a bath of cold water for several hours, or even overnight. This will help rehydrate the pumpkin and keep it firm. You can also spray the inside and outside of the pumpkin with a mixture of water and a small amount of bleach (about a tablespoon of bleach per gallon of water). The bleach will help kill bacteria and mold that can cause the pumpkin to rot.
Fighting Mold and Decay: Practical Preservation Techniques
Beyond hydration, preventing mold and decay is crucial for making your non scary pumpkin carving last. Mold loves moisture, so keeping your pumpkin dry when it's not being hydrated is key. After soaking or spraying your pumpkin, pat it dry with a clean towel. You can also apply a thin layer of petroleum jelly or vegetable oil to the cut surfaces. This will create a barrier that helps to prevent moisture loss and keeps mold from growing. Another popular trick is to use pumpkin preservative sprays, which are available at most craft stores. These sprays contain ingredients that help to inhibit mold growth and prolong the life of your carved pumpkin.
Also, consider where you display your pumpkin. Direct sunlight and warm temperatures can accelerate the decomposition process. Place your pumpkin in a cool, shaded area, away from direct sunlight and heat sources. If possible, bring your pumpkin indoors at night, or when the weather is particularly warm or humid. This will help to slow down the rate of decay and keep your carving looking fresher for longer. And remember, regular cleaning can also help to prevent mold growth. Gently wipe down the inside and outside of your pumpkin with a damp cloth every few days to remove any dirt or debris.
Technique | Description | Frequency |
|---|---|---|
Soaking | Submerge carved pumpkin in cold water (optional: add bleach) | Every 1-2 days |
Petroleum Jelly/Oil | Apply a thin layer to cut surfaces | After soaking or drying |
Preservative Spray | Apply commercial pumpkin preservative | As directed on product |
Cool Storage | Keep pumpkin in a cool, shaded area | Continuously |
NoCarve Alternatives: Non Scary Pumpkin Decorating Ideas
NoCarve Alternatives: Non Scary Pumpkin Decorating Ideas
Painting Pumpkins: A Canvas of Creativity
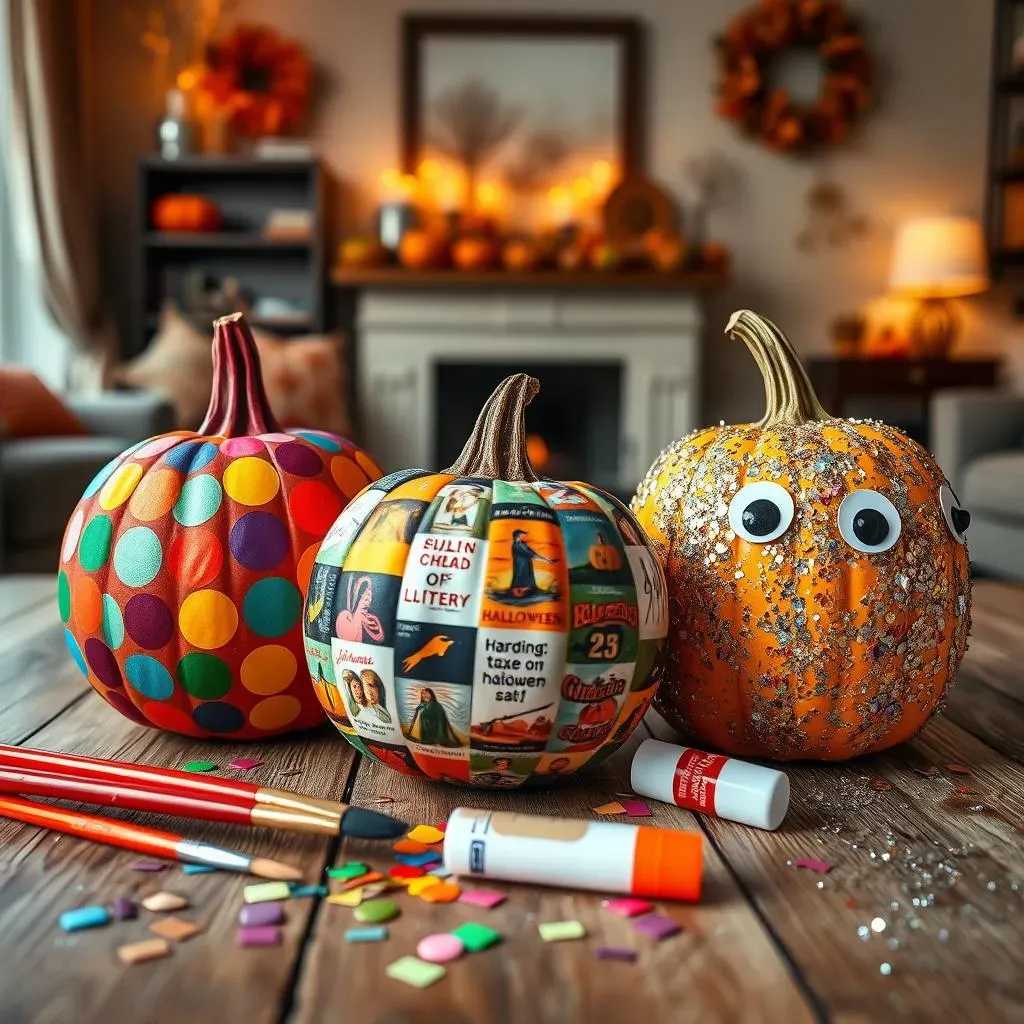
Alright, so you're not into carving – no problem! There's a whole universe of no-carve alternatives that are just as fun and festive. Painting pumpkins is a classic for a reason. It's super easy, endlessly customizable, and perfect for all ages. You can use acrylic paints, craft paints, or even spray paint to create your masterpiece. Think solid colors, polka dots, stripes, or even intricate floral patterns. Get the kids involved and let their imaginations run wild!
I remember one year, my niece painted her pumpkin to look like a giant strawberry. She even added little green paper "leaves" at the top. It was adorable and totally unique! The possibilities are truly endless.
- Solid Colors: A simple and elegant option.
- Polka Dots: Fun, festive, and easy to do.
- Stripes: Classic and customizable with different colors.
- Floral Patterns: Elegant and intricate designs.
Pumpkin Decoupage: A Collage of Spooky Fun
Decoupage is another fantastic no-carve pumpkin decorating idea that allows you to create stunning, textured designs. It involves gluing paper cutouts onto the surface of the pumpkin to create a collage effect. You can use anything from scrapbook paper and fabric scraps to old book pages and vintage maps. This technique is perfect for creating a vintage-inspired or whimsical look.
I once saw a pumpkin completely covered in vintage Halloween postcards. It was such a unique and eye-catching decoration! To decoupage a pumpkin, simply cut out your desired shapes, apply a thin layer of Mod Podge or other decoupage glue to the back of the paper, and then carefully press it onto the pumpkin. Once the glue is dry, seal the entire pumpkin with another layer of Mod Podge to protect the design.
Pumpkin Embellishments: Adding Sparkle and Shine
Sometimes, all you need is a little sparkle to transform a plain pumpkin into a festive Halloween decoration. Embellishments like glitter, sequins, rhinestones, and googly eyes can add instant personality and charm to your pumpkin. You can glue these embellishments directly onto the pumpkin's surface, or use them to create more elaborate designs. Think glittery spiderwebs, sequined bats, or googly-eyed monsters.
My friend Sarah is the queen of pumpkin embellishments. She once created a pumpkin covered in hundreds of tiny rhinestones. It was incredibly sparkly and glamorous! To embellish a pumpkin, simply apply a small amount of glue to the back of your chosen embellishment and then press it onto the pumpkin. For larger embellishments, you may need to use a stronger adhesive like hot glue.
Embellishment | Application | Effect |
|---|---|---|
Glitter | Sprinkle over wet glue | Sparkly, glamorous |
Sequins | Glue individually or in patterns | Shimmering, textured |
Rhinestones | Glue individually or in clusters | Elegant, eye-catching |
Googly Eyes | Glue on for instant personality | Whimsical, fun |
Spreading Smiles, Not Scares: Your Non Scary Pumpkin Carving Masterpiece
So, there you have it! A whole host of non scary pumpkin carving ideas to brighten up your Halloween. From simple shapes to intricate designs, the possibilities are endless. Remember, the most important thing is to have fun and let your creativity shine. Whether you choose to carve, paint, or bedazzle, your pumpkin is sure to be a standout on the block. So, go forth, create, and spread some smiles this Halloween – no scares required!