Table of Contents
Halloween's just around the corner, and what better way to celebrate than by creating some truly spectacular jack-o'-lanterns? Forget those simple triangle eyes and jagged smiles! This year, we're diving headfirst into the world of intricate pumpkin carving patterns. This article will guide you on a journey from pumpkin-carving novice to confident artist. We'll start with the basics, covering essential tools and techniques that will unlock your creative potential. Think of it as a step-by-step guide to transform your humble pumpkin into a breathtaking work of art. We'll then explore a gallery of stunning intricate pumpkin carving patterns, offering inspiration for designs ranging from spooky and classic to whimsical and modern. Whether you're aiming for a simple yet elegant design or a truly complex masterpiece, you'll find plenty of ideas to spark your imagination. Finally, we'll equip you with the knowledge to take your pumpkin carving skills to the next level, offering tips and tricks to help you create intricate pumpkin carving patterns that will amaze your friends and family. So, grab your carving tools, and let's get started on creating some unforgettable Halloween decorations! Prepare to be amazed by the possibilities of intricate pumpkin carving patterns.
Exploring Intricate Pumpkin Carving Patterns: A Beginner's Guide
Exploring Intricate Pumpkin Carving Patterns: A Beginner's Guide
Getting Started: Your First Intricate Pumpkin Carving
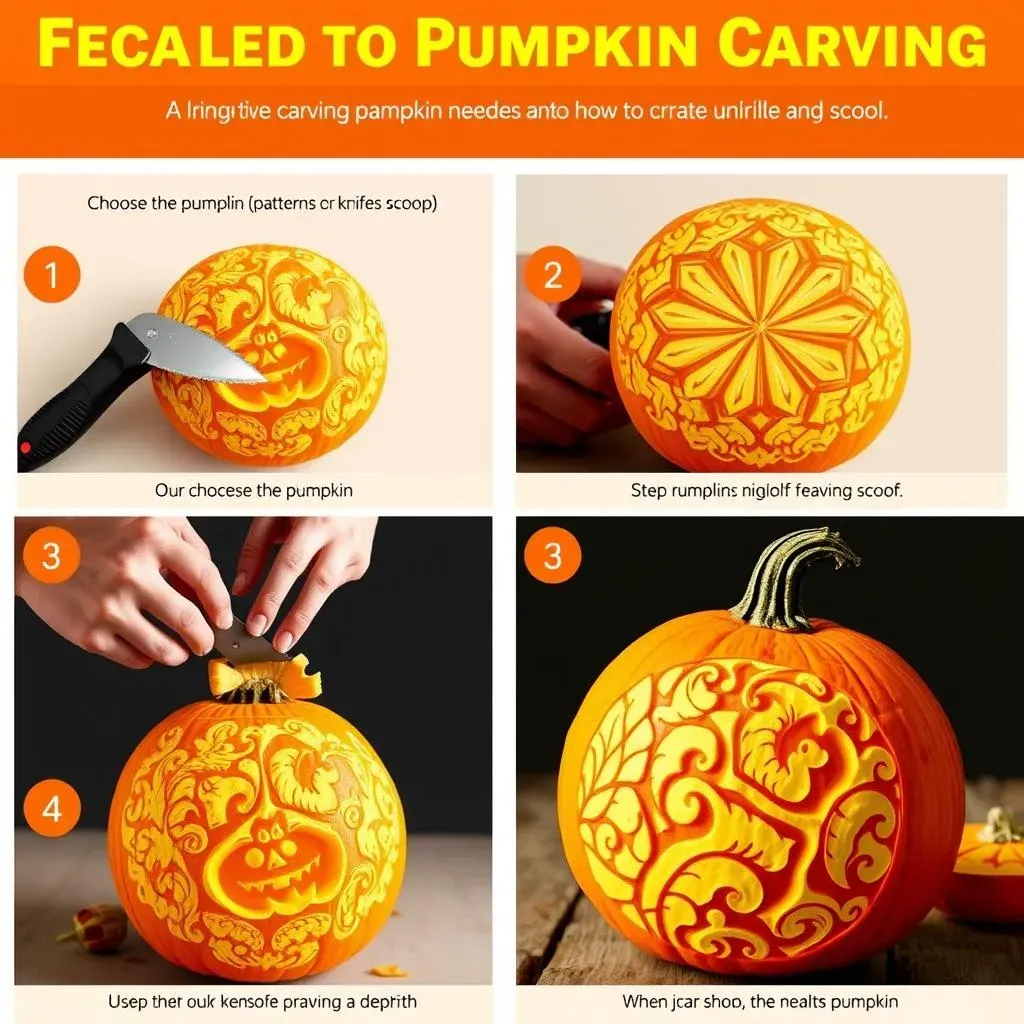
So, you're ready to take on the challenge of intricate pumpkin carving? Awesome! It might seem daunting at first, but trust me, with a little patience and the right approach, you'll be amazed at what you can create. We're not talking about the basic jack-o'-lantern here; we're talking about detailed designs, delicate patterns, and truly stunning results. Think of it like learning to draw – you start with simple shapes, then gradually build up to more complex designs. The same principle applies to pumpkin carving. Start with a smaller, manageable pumpkin – it's easier to handle and less intimidating for beginners. And don't worry about making mistakes; that's part of the learning process! Just remember to have fun and enjoy the process.
Before you even pick up a carving tool, it's important to choose your pumpkin wisely. Look for a pumpkin that’s firm, with a smooth surface and no bruises or soft spots. A good, sturdy pumpkin is key to a successful carving project. Once you've got your pumpkin, you can start thinking about your design. Don't feel pressured to jump straight into complex designs. There are tons of free, printable intricate pumpkin carving patterns online to get you started. You can also find inspiration in nature, art, or even your favorite Halloween movies! Remember, this is your chance to get creative and express your unique style. Once you have your design chosen, lightly sketch it onto the pumpkin surface. This will act as your guide for carving. Remember to check out some detailed pumpkin carving techniques for extra help.
Step | Action | Tip |
|---|---|---|
1 | Choose a pumpkin | Select a firm, smooth pumpkin. |
2 | Select a design | Start with simpler designs. |
3 | Sketch the design | Lightly sketch onto the pumpkin. |
Choosing Your Tools: Essential Equipment for Intricate Carving
Now that you've chosen your pumpkin and design, let's talk tools. Having the right tools is essential for creating intricate details and preventing frustrating accidents. A basic pumpkin carving kit will usually include a few different tools, but you might want to invest in a few extra items for more intricate designs. A good quality saw is crucial for cutting out larger sections, while smaller tools are needed for creating delicate details. Don't forget about a scoop for cleaning out the inside of the pumpkin – you'll need to remove all the seeds and pulp to make it easier to carve. And finally, a sturdy, well-lit workspace is essential for precise work. It's also useful to have a few extra tools for clean up and to help you reach those trickier spots. A small brush and a toothpick can be particularly useful for cleaning out small areas.
While you can certainly find pre-made kits, assembling your own set of tools allows for greater control over quality and selection. Consider investing in a variety of tools with different blade shapes and sizes to handle various aspects of your design. A sharp knife is essential for clean cuts, and various sized gouges will allow you to create different textures and depths in your carving. You might also consider a small drill for creating holes for light effects, or even specialized tools for creating intricate patterns. Remember, the better your tools, the more control you'll have over the finished product. Investing in quality tools will make a noticeable difference in your carving. For more advanced tools, check out our guide on advanced pumpkin carving tools.
- Pumpkin carving saw
- Small carving knives
- Pumpkin scoop
- Stencils (optional)
- Small brush for clean-up
Essential Tools and Techniques for Intricate Pumpkin Carving Patterns
Mastering the Tools of the Trade
Let's be honest, a butter knife isn't going to cut it (pun intended!) when you're aiming for intricate pumpkin carving patterns. You need the right tools for the job, and thankfully, there's a whole world of pumpkin carving tools out there, from basic kits to professional-grade equipment. A good quality saw is essential for making those initial cuts and removing large sections of pumpkin flesh, allowing you to work on the finer details. You’ll also want a selection of smaller tools – think various sizes of gouges and carving knives – for creating texture, depth, and those intricate details that really make your design pop. Don't underestimate the importance of sharp tools; dull tools lead to messy cuts, frustration, and potentially injured fingers!
Beyond the basic carving tools, consider investing in a few extra items to enhance your precision and control. A good quality scoop is crucial for efficiently removing the pumpkin guts (a messy but necessary step!), and a small brush or even a toothpick can help you clean up any stray bits of pumpkin. A stencil can also be a lifesaver for beginners, providing a guide for complex designs. And finally, don't forget about a well-lit workspace. Good lighting is vital for seeing all those fine details and ensuring clean, accurate cuts. For even more advanced tools and techniques, check out our guide on advanced pumpkin carving tools – you might be surprised at what’s available!
Tool | Purpose | Tip |
|---|---|---|
Saw | Large cuts, removing sections | Use a sawing motion, not pushing |
Gouges | Creating texture, depth | Vary pressure for different effects |
Small Knives | Fine details, intricate work | Keep blades sharp for clean cuts |
Essential Techniques for Intricate Designs
Now, having the right tools is only half the battle. Mastering the techniques is where the magic truly happens. One key technique is to start with the outermost parts of your design, working your way inwards. This prevents accidental damage to delicate inner sections. Another important tip is to use a light touch. Avoid applying excessive pressure, especially when working on finer details. Gentle, controlled movements will give you much better results than aggressive carving. Finally, remember that practice makes perfect! Don’t be afraid to experiment, try different techniques, and learn from your mistakes. Each pumpkin you carve will help you hone your skills and develop a unique carving style.
Consider using stencils to transfer your chosen design onto the pumpkin surface. This can be especially helpful for complex patterns. Once you’ve transferred the design, use your saw to carefully cut out the larger sections, then use your smaller tools to create the finer details. Remember to take your time and work methodically. If you make a mistake, don’t panic! Sometimes, a small mistake can even add character to your design. If it’s a major issue though, you might want to consider starting over with a new pumpkin. For more detailed instructions and advanced techniques, check out our guide on detailed pumpkin carving techniques. It’s full of great tips and tricks to help you achieve professional-looking results!
- Start from the outside, working inwards
- Use a light touch for detail work
- Practice makes perfect!
- Use stencils for complex designs
Adding Depth and Dimension to Your Carvings
To elevate your intricate pumpkin carving patterns from good to breathtaking, consider adding depth and dimension. This involves creating varying levels of carving depth. Shallow carvings create subtle shading and texture, while deeper cuts create dramatic highlights and shadows. Experiment with different depths to add visual interest and complexity to your design. Think about how light will interact with your carving; strategically placed deep cuts can create stunning light effects. You can also use different tools to achieve varied textures. For instance, a V-shaped gouge creates a different effect than a U-shaped one. Explore the possibilities and find what works best for your design.
Don't be afraid to experiment with different techniques to add dimension. You can create layered effects by carving multiple levels of depth, or you can use a combination of carving and scraping techniques. Adding small details – like intricate lines or small shapes – within the larger sections can significantly add to the overall complexity and visual appeal. Remember, the key is to create a sense of movement and visual flow within your design. The more you practice, the better you'll become at controlling the depth and texture of your carvings. For more inspiration on achieving stunning depth in your designs, explore our collection of complex pumpkin carving designs.
Stunning Intricate Pumpkin Carving Patterns: Designs and Inspiration
Classic Halloween Designs: Spooky and Fun
Let's start with the classics! Think spooky skeletons, mischievous grinning cats, and friendly ghosts. These designs are timeless for a reason – they're instantly recognizable and always a crowd-pleaser. You can find tons of free printable stencils online, or you can even sketch your own versions. For a truly unique touch, try adding intricate details to these classic designs. Instead of simple eyes, carve detailed eyeballs with tiny pupils. Instead of a basic smile, create a complex, toothy grin. The possibilities are endless!
Don't limit yourself to just the standard Halloween imagery. Think about adding some extra flair. Maybe a haunted house scene, a spooky graveyard, or even a creepy crawly spider web. The level of detail you can achieve is amazing. Consider adding small textures like cobwebs or cracks to add depth and realism. For more advanced Halloween designs, check out our guide on advanced Halloween pumpkin designs. You'll find plenty of inspiration to create a truly memorable pumpkin this year.
- Skeletons
- Cats
- Ghosts
- Haunted Houses
- Gravestones
Nature-Inspired Designs: Leaves, Flowers, and Animals
Looking for something a little different? Nature-inspired designs offer a stunning alternative to the traditional Halloween motifs. Think intricate leaf patterns, delicate flowers, or even majestic animals. These designs can be incredibly detailed, allowing you to showcase your carving skills. Imagine a pumpkin carved with the delicate veins of a maple leaf, or the intricate petals of a blooming rose. The level of detail you can achieve is simply breathtaking. You can find inspiration in your own backyard or search online for images of your favorite plants and animals.
For those who love a challenge, try carving realistic animals onto your pumpkins. Think about a majestic owl perched on a branch, a playful squirrel burying nuts, or a fierce wolf howling at the moon. The possibilities are truly endless. These designs require patience and precision, but the results are well worth the effort. For more inspiration and ideas on complex designs, you might find our article on complex pumpkin carving designs helpful.
Design Type | Difficulty | Tips |
|---|---|---|
Leaves | Medium | Focus on vein detail |
Flowers | Hard | Use fine tools for petals |
Animals | Hard | Start with a simple outline |
Geometric and Abstract Designs: Modern Pumpkin Art
For those who prefer a more modern aesthetic, geometric and abstract designs offer a unique and striking approach to pumpkin carving. Think clean lines, bold shapes, and unexpected patterns. These designs can be surprisingly intricate, allowing you to explore different textures and depths. Experiment with contrasting shapes and sizes to create a visually captivating effect. Use different carving techniques to add depth and dimension, creating a sense of movement and flow.
Geometric and abstract designs offer a blank canvas for your creativity. You can create your own unique patterns or draw inspiration from existing artwork. Consider using stencils to help you achieve clean lines and precise shapes. Once you've mastered the basic shapes, you can start experimenting with more complex patterns and designs. For more intricate and professional-looking results, you can explore professional pumpkin carving tips to elevate your skill level.
From Simple to Spectacular: Level Up Your Intricate Pumpkin Carving Patterns
Taking on Advanced Techniques
So you’ve mastered the basics? Fantastic! Now it’s time to push your pumpkin carving skills to the next level. Think about incorporating more advanced techniques like layering, creating depth with multiple carving levels, and using different tools to achieve varied textures. Experiment with different types of gouges to create a range of effects – from smooth, sweeping curves to sharply defined lines. You can even combine carving with other techniques, such as painting or adding embellishments, to create truly unique and eye-catching designs. Don't be afraid to experiment and see what amazing results you can achieve!
Remember, those advanced pumpkin carving tools we talked about earlier? Now's the time to put them to good use. A rotary tool, for example, can be used to create incredibly fine details and intricate patterns that would be impossible to achieve with just hand tools. And don't forget about the power of light! Strategically placed holes or cutouts can dramatically enhance the overall effect of your carving, creating stunning shadows and highlights. Think about how the light will interact with your design to maximize its visual impact.
- Experiment with layering
- Use various gouges for textural variety
- Combine carving with painting or embellishments
- Utilize rotary tools for fine details
- Consider light interaction in your design
Mastering Intricate Pumpkin Carving Patterns: Design Complexity
Ready to tackle truly intricate designs? The key here is planning and precision. Start by selecting a design that challenges you but doesn't overwhelm you. Begin with a well-defined sketch, paying close attention to detail. Consider using a projector to trace the design onto your pumpkin for greater accuracy. Then, break down the design into smaller, manageable sections. This will make the carving process less daunting and help you maintain accuracy throughout. Remember to take breaks and avoid rushing. A rushed job will often show in the final product.
For those truly ambitious projects, don’t hesitate to explore complex pumpkin carving designs for inspiration. These designs often incorporate multiple elements, intricate details, and advanced techniques. Think about creating a three-dimensional effect, using varying depths of carving to create shadows and highlights. Consider adding small details to enhance the overall design, such as adding small textures or using different carving tools to create a variety of textures. Remember, patience and precision are key to creating truly stunning intricate pumpkin carving patterns. The more you practice, the more confident and skilled you'll become. And remember, even the most experienced carvers started somewhere!
Step | Action | Tip |
|---|---|---|
1 | Choose a complex design | Start with a manageable size |
2 | Sketch and transfer design | Use a projector for accuracy |
3 | Carve in sections | Work methodically |
4 | Add details | Enhance with textures |