Table of Contents
The air gets crisp, leaves turn, and suddenly, pumpkins are everywhere. You see those fantastic, intricate carvings online and think, "Yeah, right." Maybe you've tried before and ended up with a lopsided mess or nearly lost a finger. It's easy to feel intimidated, but creating a classic, spooky jack-o'-lantern doesn't require an art degree or a workshop full of specialized tools. Learning how to carve a simple pumpkin is absolutely achievable, even if your previous attempts looked more like a pumpkin that lost a fight than a festive decoration.
How to Carve a Simple Pumpkin: Getting Started

How to Carve a Simple Pumpkin: Getting Started
Why Bother Learning How to Carve a Simple Pumpkin?
so you've got the pumpkin sitting on your porch, maybe picked it up at the grocery store or braved a muddy patch at a local farm. It's round, it's orange, and right now, it's just a big, heavy squash. The idea of turning it into a glowing face might feel a bit daunting, especially if you picture those intricate, almost sculptural designs. But trust me, learning how to carve a simple pumpkin is rewarding. It's a classic fall activity, a bit messy, sure, but genuinely fun. It gets you off the couch, away from screens, and creates something tangible and festive. Plus, the smell of fresh pumpkin guts? Underrated.
First Things First: Mindset and Workspace
Before you even think about drawing a face or grabbing a knife, get your head in the game. You're not aiming for a museum piece here; you're aiming for a cool jack-o'-lantern. Embrace the mess – pumpkin insides go everywhere. Lay down some old newspapers, a plastic tablecloth, or even a garbage bag on your workspace. The kitchen counter or a sturdy table works best. Make sure it's a place where you can stand comfortably or sit without hunching over. Good lighting is also key; you need to see what you're doing clearly.
Things to have ready:
- A large, flat surface covered for mess
- Plenty of old newspaper or plastic sheeting
- Good lighting
- Maybe some old clothes you don't mind getting dirty
- A trash bag for the guts and scraps
Choosing Your Perfect Pumpkin for Carving
Choosing Your Perfect Pumpkin for Carving
Size, Shape, and Surface: What to Look For
Alright, you're standing in a sea of orange. They all look pretty similar at first glance, right? Wrong. When you're figuring out choosing your perfect pumpkin for carving, especially for a simple design, size matters, but maybe not the way you think. A giant pumpkin looks impressive, sure, but it's a beast to scoop out and can be tough to cut. For a simple design, a medium-sized pumpkin, maybe the size of a basketball or slightly smaller, is usually easier to handle. Look for one that sits relatively flat without wobbling – that makes carving much less frustrating. Also, check the surface. You want it smooth, without deep grooves or weird bumps that will mess up your face design. A few minor imperfections are fine, adds character, but avoid anything that looks like it's been through a wrestling match.
Checking for Health and Longevity
Once you've got a few contenders based on size and shape, give them a good once-over. You're not just looking for a pretty face; you want a pumpkin that's going to last more than a couple of days before turning into a sad, moldy mess. Check the skin for soft spots or bruises. These are red flags – they mean the pumpkin is already starting to break down. Press gently on the sides; it should feel firm, not squishy. Now, look at the stem. The stem should be firmly attached and feel dry and hard. A green or soft stem can indicate the pumpkin was picked too early or isn't healthy. Avoid pumpkins without stems entirely; they tend to spoil faster because the top opening is more vulnerable.
Quick check for your pumpkin:
- Is it a manageable size (medium)?
- Does it sit relatively stable?
- Is the skin smooth enough for your design?
- Are there any soft spots or bruises?
- Does it feel firm when you press on it?
- Is the stem attached, dry, and hard?
Tools You Need for Simple Pumpkin Carving
Tools You Need for Simple Pumpkin Carving
Raid Your Kitchen Drawers First
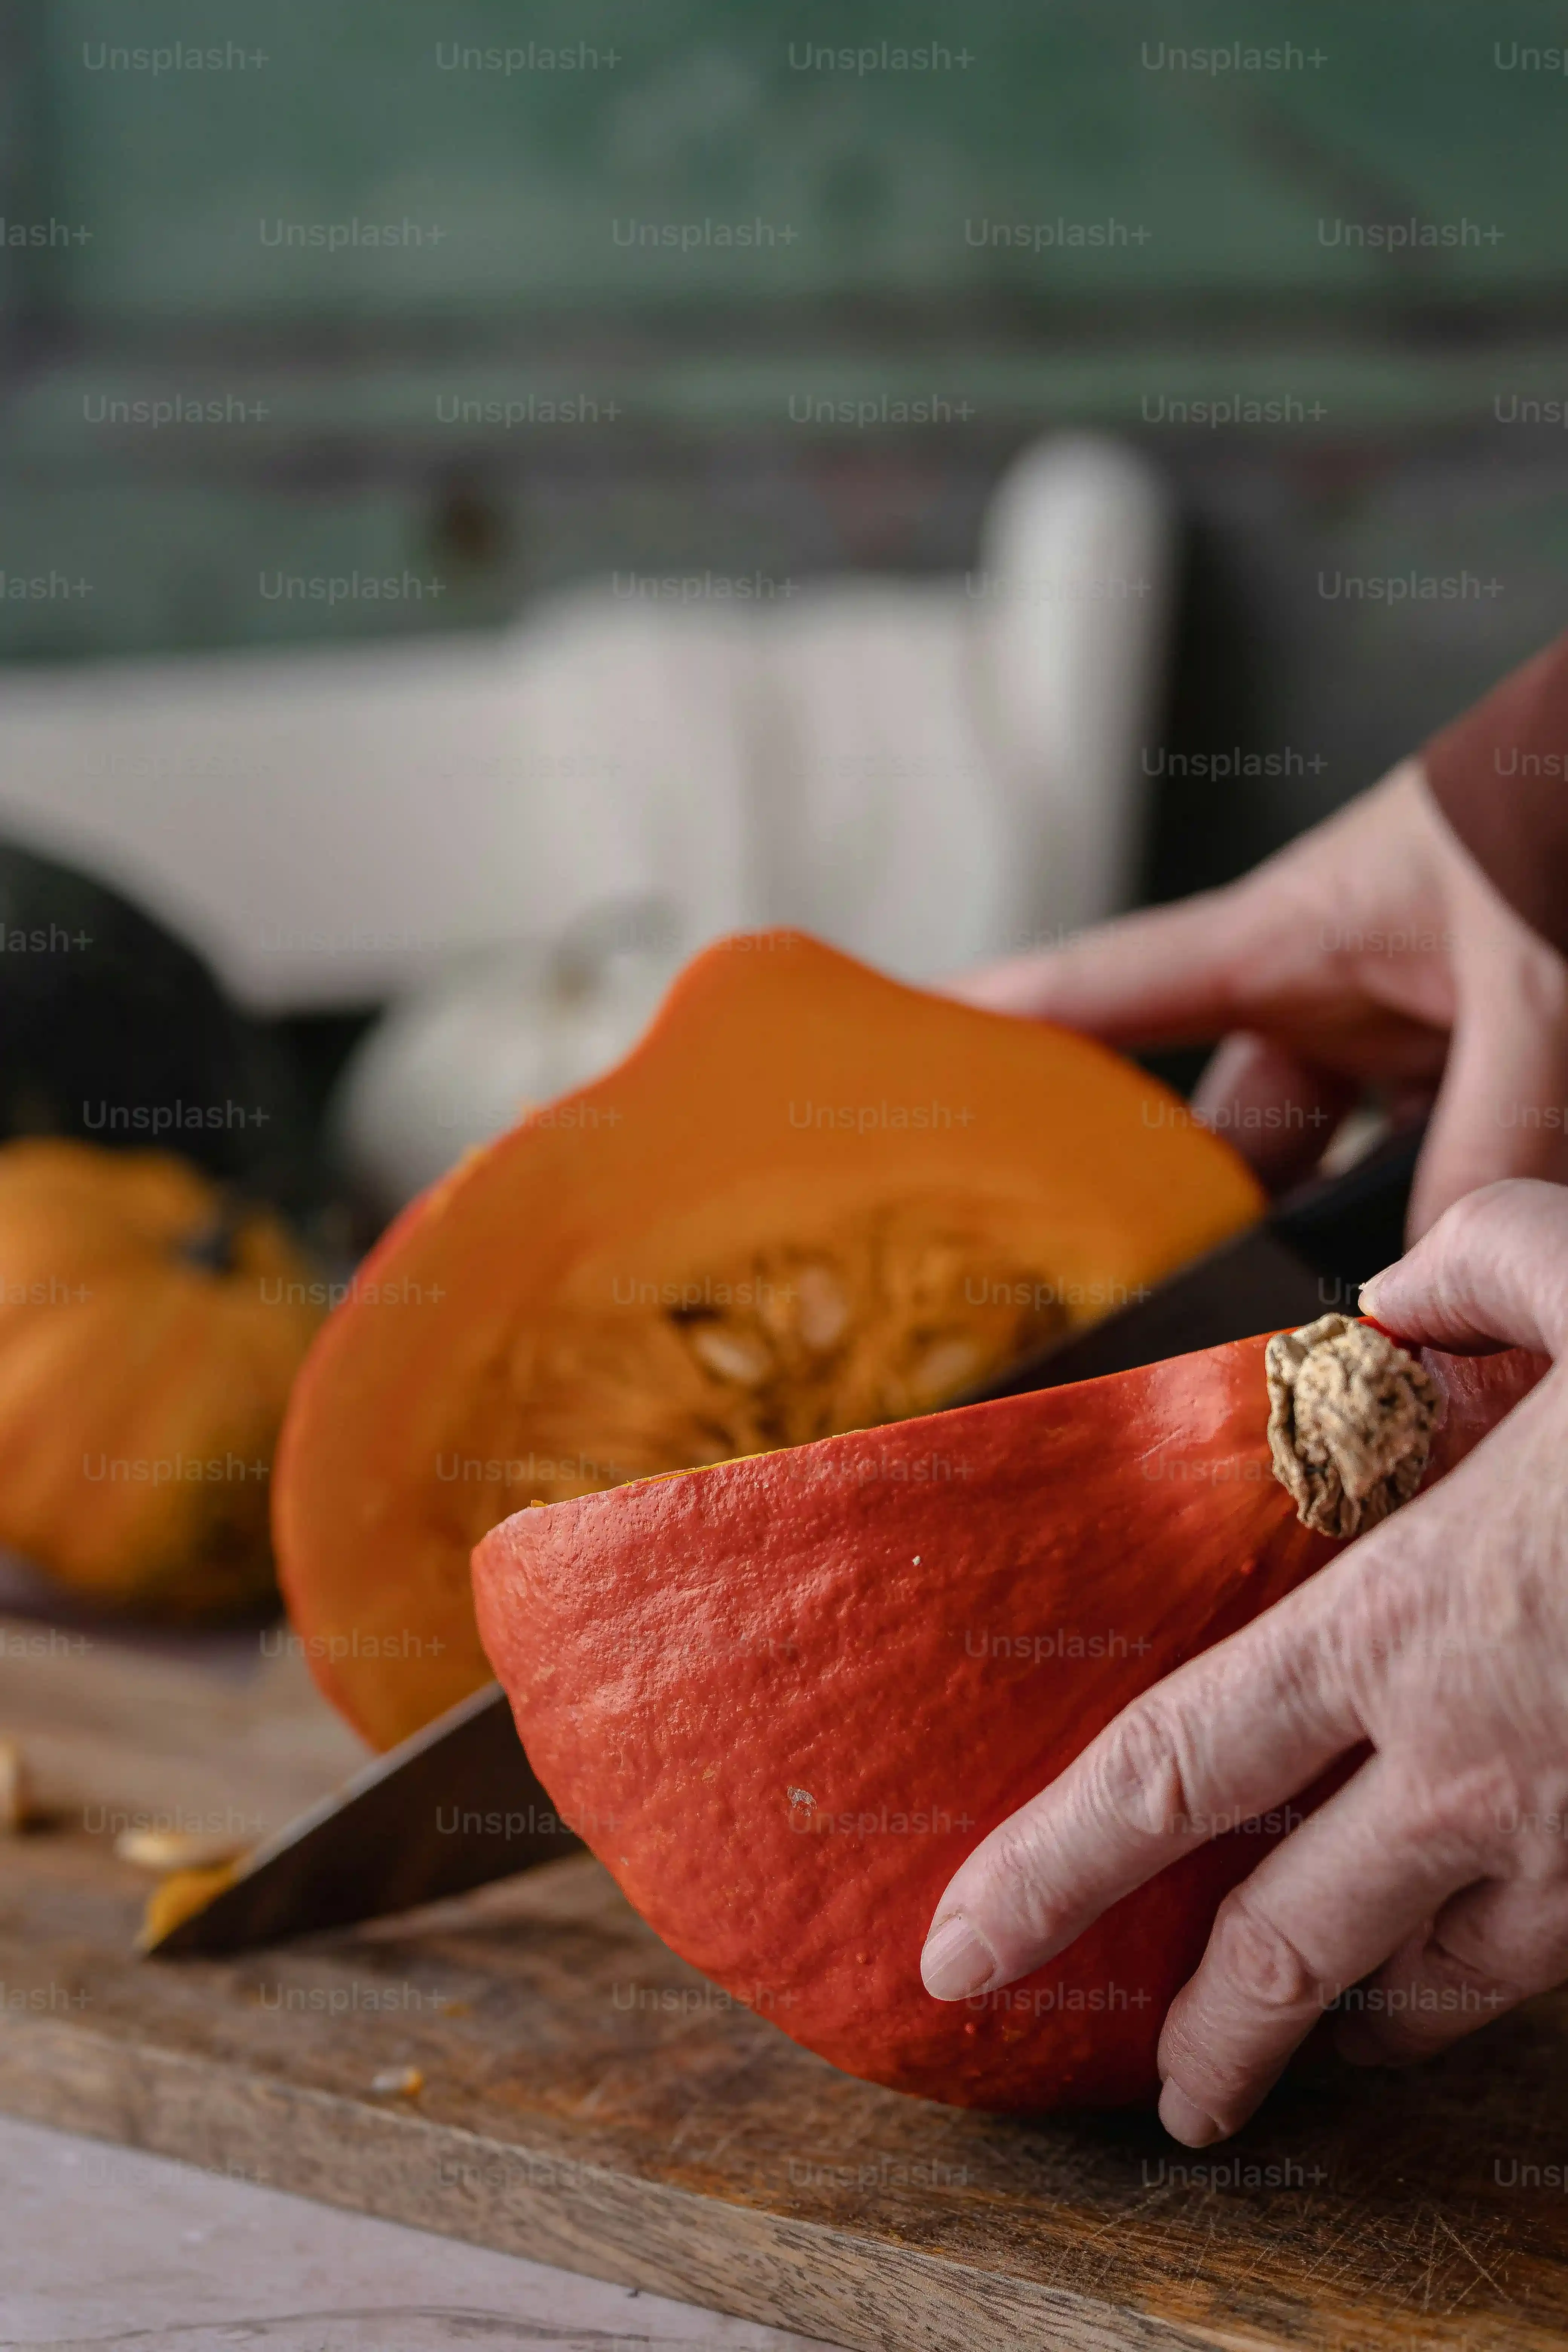
Forget those intimidating 50-piece carving sets with specialized gouges and saws that look like they belong in a dentist's office. For learning how to carve a simple pumpkin, you likely have most of what you need already. You definitely need something to cut the top off. A sturdy kitchen knife, like a chef's knife or a serrated bread knife, works just fine. Just make sure it's sharp enough to get through the thick skin. You'll also need something to scoop out all that stringy, seedy mess. A large metal spoon, maybe an ice cream scoop if you have one, is perfect for this dirty job. The edge of the spoon can help scrape the insides clean.
Basic Carving Tools That Actually Work
While a big kitchen knife cuts the lid, it's too unwieldy for the face details. This is where a smaller, sharper tool comes in. A small paring knife is excellent for cutting out eyes, noses, and mouths. Its size gives you more control. If you're nervous about sharp edges, or carving with kids, those inexpensive pumpkin carving kits you see everywhere actually have some useful bits. They usually include small, serrated saws that are much safer than a knife and surprisingly effective for simple shapes. They also often come with scoopers, which are slightly better than a regular spoon for scraping the walls thin.
Essential Tools Checklist:
- Sharp kitchen knife (chef's or serrated) for the lid
- Large, sturdy spoon or ice cream scoop for gutting
- Small paring knife for details OR a basic pumpkin carving saw
- Bowl for pumpkin guts and seeds
- Marker or pen to draw your design
Don't Forget Safety and Cleanup
Seriously, safety first. A slip of a knife or saw can ruin your fun (and require stitches). Always cut away from yourself, and keep your free hand out of the path of the blade. If you're using a sharp knife, consider wearing a work glove on your non-carving hand. A dull knife is actually more dangerous than a sharp one because you have to use more force, increasing the chance of slipping. Have paper towels or an old rag handy for wiping off juice and seeds from your tools and hands. And remember that trash bag you put down? It's not just for spills; it's the easiest way to bundle up all the pumpkin guts and scraps when you're done.
StepbyStep Guide: How to Carve a Simple Pumpkin Design
StepbyStep Guide: How to Carve a Simple Pumpkin Design
Opening the Top: The Lid Strategy
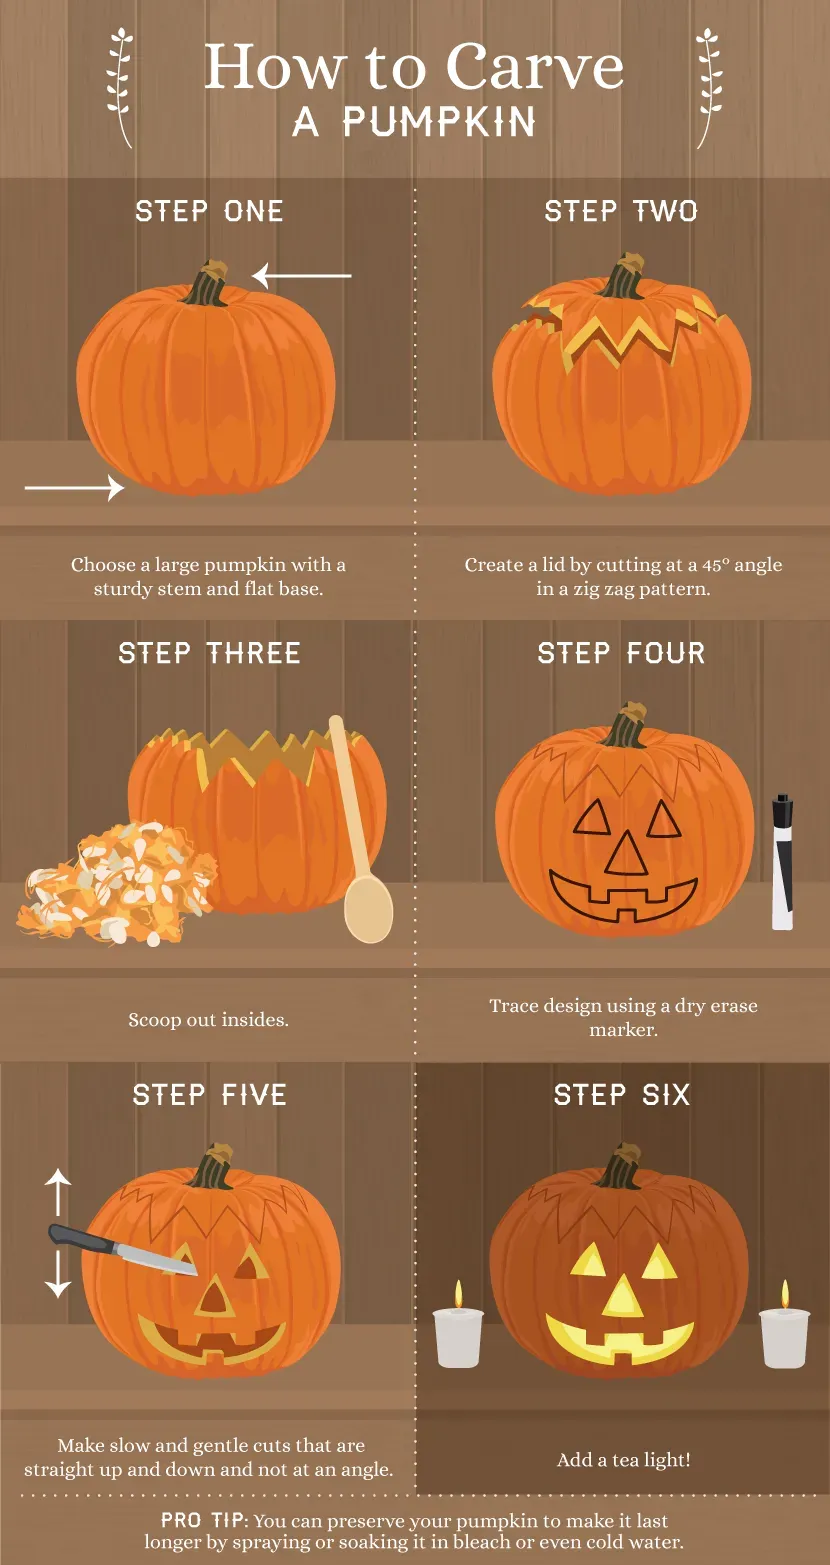
Alright, pumpkin in place, tools ready, newspaper down. The first move in how to carve a simple pumpkin design is getting the lid off. Don't just plunge a knife in randomly. Look at the top of the pumpkin around the stem. You want to cut a lid large enough to get your hand and a scoop inside comfortably, but not so big it weakens the top. Aim for a circle or, even better for stability, a hexagon or octagon shape around the stem. Angle your knife inwards as you cut, towards the center of the pumpkin. This bevels the edge of the lid so it rests nicely on the opening later and doesn't just fall through. Go slow, keep your fingers well clear, and saw through the pumpkin wall. Once you've cut all the way around, you might need to gently twist the stem to pop the lid free. Sometimes it's surprisingly stubborn; a little wiggle usually does the trick.
Operation: Gut and Scrape
Lid off? Good. Now for the messy, but essential, part: scooping. Grab your sturdy spoon or ice cream scoop. Dive in and start pulling out all that stringy pulp and seeds. This is where you fully embrace the glorious, sticky reality of pumpkin carving. Get it all out – every last string. Scrape the inside walls too, especially where you plan to carve the face. Thinning the walls makes it much easier to cut through later and lets more light shine through. Aim for about an inch thickness on the walls, maybe a bit less if you feel brave. Don't forget to scrape the underside of the lid as well. Toss all the guts into your waiting bowl or trash bag.
What to do with the guts?
- Separate the seeds for roasting (delicious!).
- Compost the stringy pulp.
- Admire the sheer volume of goo you just removed.
- Definitely don't leave them on the counter for too long.
Mapping Out Your Simple Face
Pumpkin is clean inside and out. Time to decide on the face. Remember, we're keeping it simple. Think classic shapes: triangles for eyes and a nose, a jagged or toothed grin for the mouth. Grab your marker. Sketch your design directly onto the pumpkin's surface. Don't overthink it. A few simple shapes are far more effective and easier to cut than something complicated. If you mess up, just wipe it off with a damp paper towel and try again. Make the shapes large enough to be easily seen and cut. Small, intricate details are the enemy of a simple, effective jack-o'-lantern and a test of your patience (and carving skill).
Simple Pumpkin Carving Tips and Tricks

Simple Pumpkin Carving Tips and Tricks
Cutting Clean Lines and Avoiding Breakage
you've drawn your classic face. Now for the actual cutting part. This is where a lot of folks get frustrated. Using your small paring knife or the pumpkin saw from a kit, start cutting along the lines you drew. Don't try to do it all in one continuous motion, especially on corners or curves. Think of it more like sawing – small, back-and-forth strokes work better than trying to push straight through. Keep the blade perpendicular to the pumpkin surface as much as possible. If you angle it too much, your shapes will look wonky. Go slow, take your time. If a piece is being stubborn, don't force it. Wiggle the knife or saw slightly or try cutting from a different angle. Forcing it is a surefire way to crack the pumpkin or break off a piece you didn't intend to.
Making it Last and Lighting it Up
You've successfully carved your masterpiece! Now you want it to look good for more than 24 hours before it starts to shrivel. One simple pumpkin carving tip to extend its life is to give the cut edges a little moisture. Some people swear by rubbing petroleum jelly on the cut surfaces to seal them, others spritz them with water daily. Keeping it out of direct sunlight and extreme temperatures helps too. When it comes to lighting, traditional candles are classic, but they can blacken the top and are a fire hazard. Battery-operated LED lights are cheap, safe, and come in various colors and flickering options. They provide a steady, bright glow that really makes your simple design pop in the dark.
Simple Pumpkin Carving Checklist for Success:
- Go slow with your cutting tools.
- Use a sawing motion, not pushing.
- Keep the blade perpendicular to the pumpkin.
- Don't force stubborn pieces; wiggle or change angle.
- Consider petroleum jelly or water spritzing for longevity.
- Use battery-operated LED lights for safety and brightness.
Your Simple Jack-o'-Lantern is Ready
So there you have it. Your hands are probably a bit sticky, maybe there are seeds on the floor, but you did it. You took a round, orange thing and gave it a face. It's not the Mona Lisa of pumpkins, and that's perfectly fine. The goal was learning how to carve a simple pumpkin and creating something that adds a bit of light and personality to the season. Now, go put a candle or an LED light inside and admire your work. Simple, effective, and ready to greet the night.