Table of Contents
Ever looked at a jack-o'-lantern and thought, "I could make that... but scarier?" You're not alone! Carving pumpkins is a classic Halloween tradition, but let's be honest, sometimes those cute little smiles just don't cut it. This year, we're ditching the friendly faces and diving headfirst into the world of spooky. This guide will show you exactly how to carve a scary pumpkin step by step, from choosing the perfect gourd to making it glow with menacing intent. We'll cover everything, including the essential tools, how to prep your pumpkin, and even some expert tips to make your design truly terrifying. Forget those basic triangle eyes; we're going for ghoulish grins and chilling details. And don't worry if you're a beginner; we'll break it all down into easy-to-follow steps. By the time you're done, you'll have a pumpkin that's sure to make even the bravest trick-or-treaters think twice. So, grab your carving tools, and let's get ready to create some Halloween fright!
Gather Your Tools and Prep the Pumpkin for Carving
Gather Your Tools and Prep the Pumpkin for Carving
Tool Time: What You'll Need
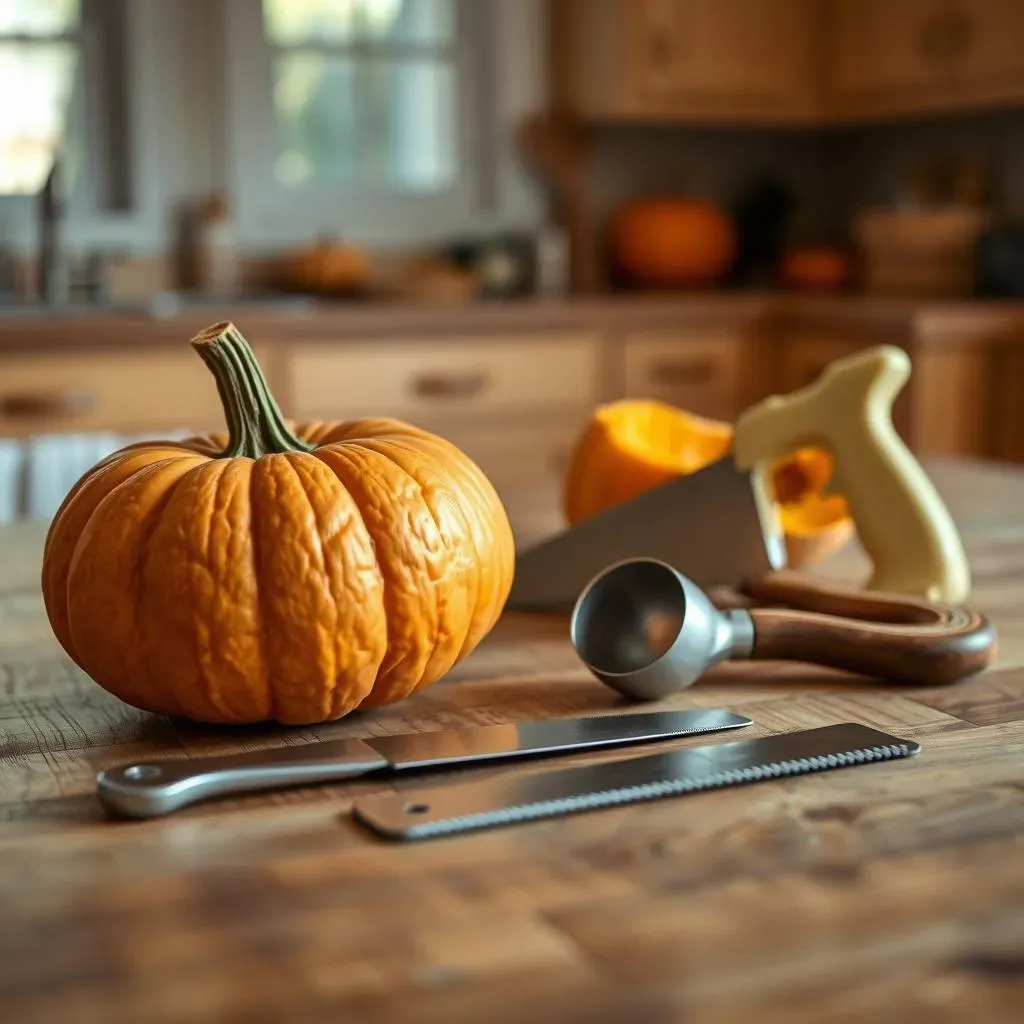
so you're ready to get your hands dirty? Before you even think about making that first cut, you gotta make sure you've got the right gear. Think of it like a chef prepping their station – you wouldn't try to bake a cake without a bowl, right? Same deal here. We're not talking about fancy, expensive tools, just some essentials that'll make your life a whole lot easier and your pumpkin a whole lot scarier. You'll need a good, sturdy knife, something like a filet or paring knife works great for the detail work. Don't grab that butter knife from the drawer, it's not going to cut it, pun intended. An ice cream scoop is your best friend for getting all those gooey pumpkin guts out. And finally, you'll want some kind of poker or small saw for the finer details. It's like surgery for pumpkins, but way more fun and less likely to get you sued.
Pumpkin Prep: The Foundation for Fright
Alright, you've got your tools, now let's talk pumpkins. Not all pumpkins are created equal, you know. You want one that's firm, with a nice, solid stem. That stem is like the pumpkin's lifeline, so make sure it's not wobbly or broken. Give it a little tap too, if it sounds hollow, that's a good sign. Avoid any pumpkins with soft spots or bruises, they're just trouble waiting to happen, and they'll rot faster. Once you've got your perfect pumpkin, give it a good wash to get rid of any dirt or grime. Think of it like giving your canvas a clean slate before you start painting. And here's a little pro tip: keep it cool and out of direct sunlight before you start carving. This will help it last longer and be easier to work with. Trust me, a warm, mushy pumpkin is no fun to carve.
Tool | Purpose |
|---|---|
Filet or paring knife | Detailed carving |
Ice cream scoop | Removing pumpkin guts |
Poker or small saw | Fine details, small cuts |
StepbyStep Guide: How to Carve a Scary Pumpkin
StepbyStep Guide: How to Carve a Scary Pumpkin
The Cut: Backside Entry
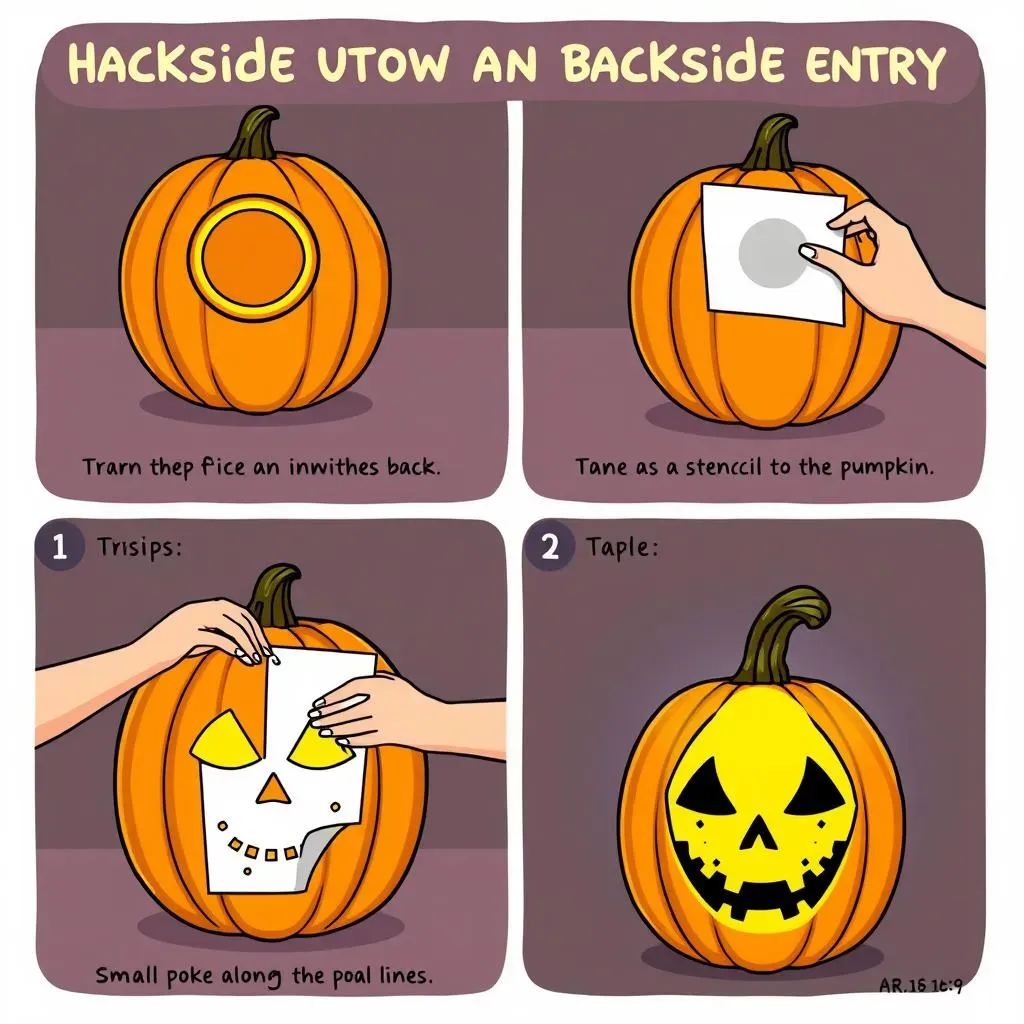
so you've got your pumpkin, you've got your tools, now it's time to make the first cut. And here's a little secret: don't cut the top off like you usually see. Instead, cut a circle in the back of your pumpkin. Why? Well, cutting from the back helps keep the structure of the pumpkin strong. Plus, when you put a light inside, it's easier to manage from the back. Think of it as a secret entrance for your spooky masterpiece. Use your knife and carefully cut out a circle, big enough to get your hand in there. And remember, slow and steady wins the race, no need to rush and risk a pumpkin-related injury.
Once you've made your incision, go ahead and scoop out all that pumpkiny goodness. I mean the seeds and stringy stuff, unless you want a moldy pumpkin mess in a few days. An ice cream scoop is perfect for this job. Scrape the inside walls clean. You want a nice, smooth surface to work with. This also makes the pumpkin lighter and easier to handle. Think of it as giving your pumpkin a spa day before its scary makeover. Now, you should have a clean, hollow pumpkin ready for its scary face.
The Design: From Idea to Pumpkin
Now comes the fun part: the design! Before you even think about making a cut, you need a plan. If you're feeling artistic, go ahead and sketch your design directly onto the pumpkin with a marker. Or, if you prefer a little help, you can print out a stencil or find a template online. There are tons of free resources out there, from classic scary faces to more intricate designs. Once you've got your design, it's time to transfer it to the pumpkin. If you've sketched it freehand, great! If you're using a stencil, tape it to the pumpkin and use a poker or small saw to poke holes along the design lines. These holes will serve as your guide when you start cutting.
Once you've transferred your design, it's time to start carving. Take your time, and use your small knife to trace the outline of your design. Remember, you can always cut away more, but you can't put it back. So start with small, shallow cuts and work your way up. If you have some areas you want to completely remove, carefully saw your way through. Keep in mind the thickness of the pumpkin wall, you don't want to cut all the way through in some areas, and not in others. It's all about controlling the light and creating the desired effect. Once you've cut out all the pieces, go ahead and pop them out. And there you have it, a scary face staring back at you!
“The best way to predict the future is to create it.” - Peter Drucker
Expert Tips for Carving Scary Pumpkins
Expert Tips for Carving Scary Pumpkins
Light it Up: Making Your Pumpkin Glow
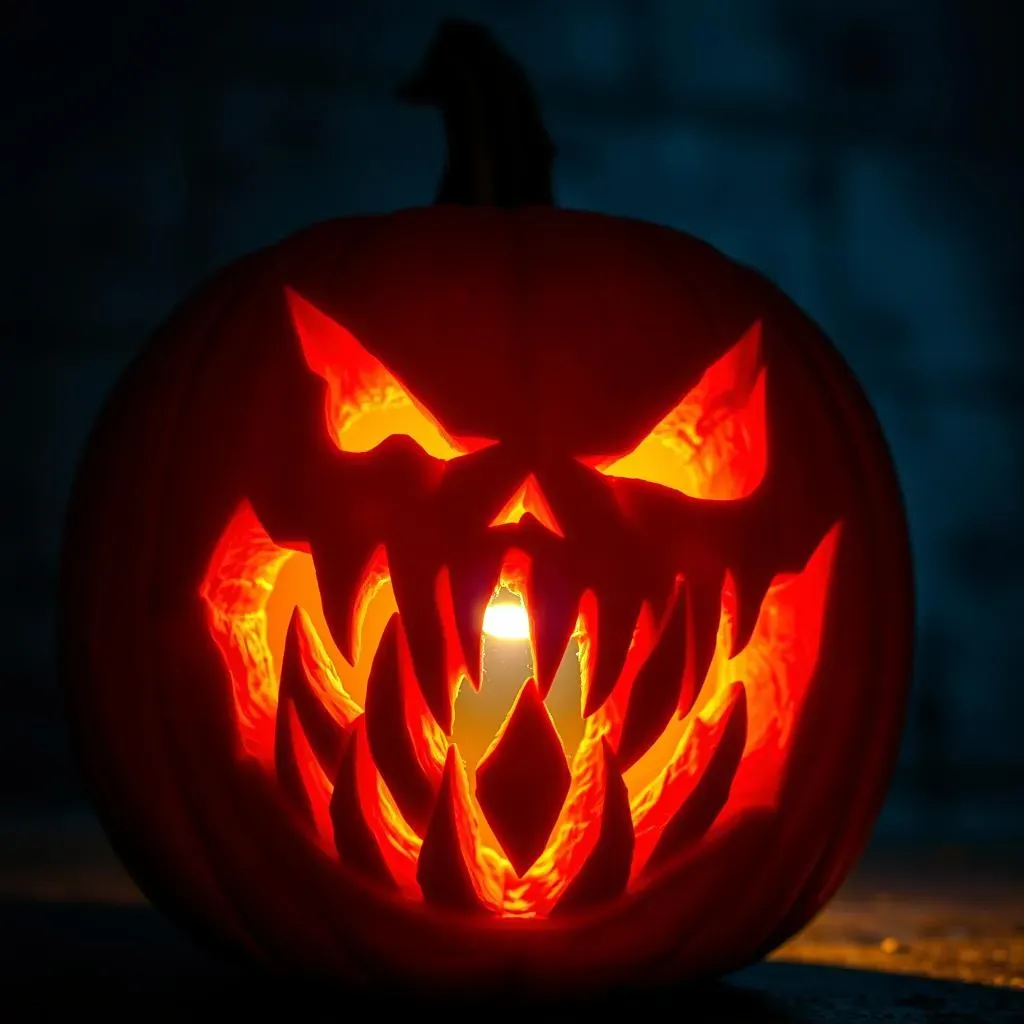
so you've carved your scary masterpiece, but what's a jack-o'-lantern without its spooky glow? Forget those old-school candles; we're in the 21st century now! LED lights or flameless candles are your best bet. They're safer, they last longer, and you don't have to worry about your pumpkin catching fire. Plus, you can get them in different colors to add an extra layer of creepiness. Think green for a zombie vibe, or red for a demonic feel. Place the light inside your pumpkin, and watch your creation come to life. It's like giving your scary pumpkin its own little spotlight. And here's a pro tip: if you use a light with a timer, your pumpkin will light up automatically every night, saving you the hassle of turning it on and off.
Another way to enhance the light effect is to use different sizes of holes in your carving. Smaller holes will create a subtle, eerie glow, while larger holes will cast more dramatic shadows. You can also experiment with different shapes and patterns. Think about how the light will interact with your design. Maybe some jagged teeth that cast long, menacing shadows? Or perhaps some small, pinpoint holes that look like glowing eyes in the dark? The possibilities are endless. It's all about playing with light and shadow to create the perfect spooky ambiance.
Light Source | Pros | Cons |
|---|---|---|
LED Lights | Safe, long-lasting, various colors | May require batteries |
Flameless Candles | Safe, realistic flicker | May not be as bright as LEDs |
Preservation: Keeping Your Pumpkin Scary for Longer
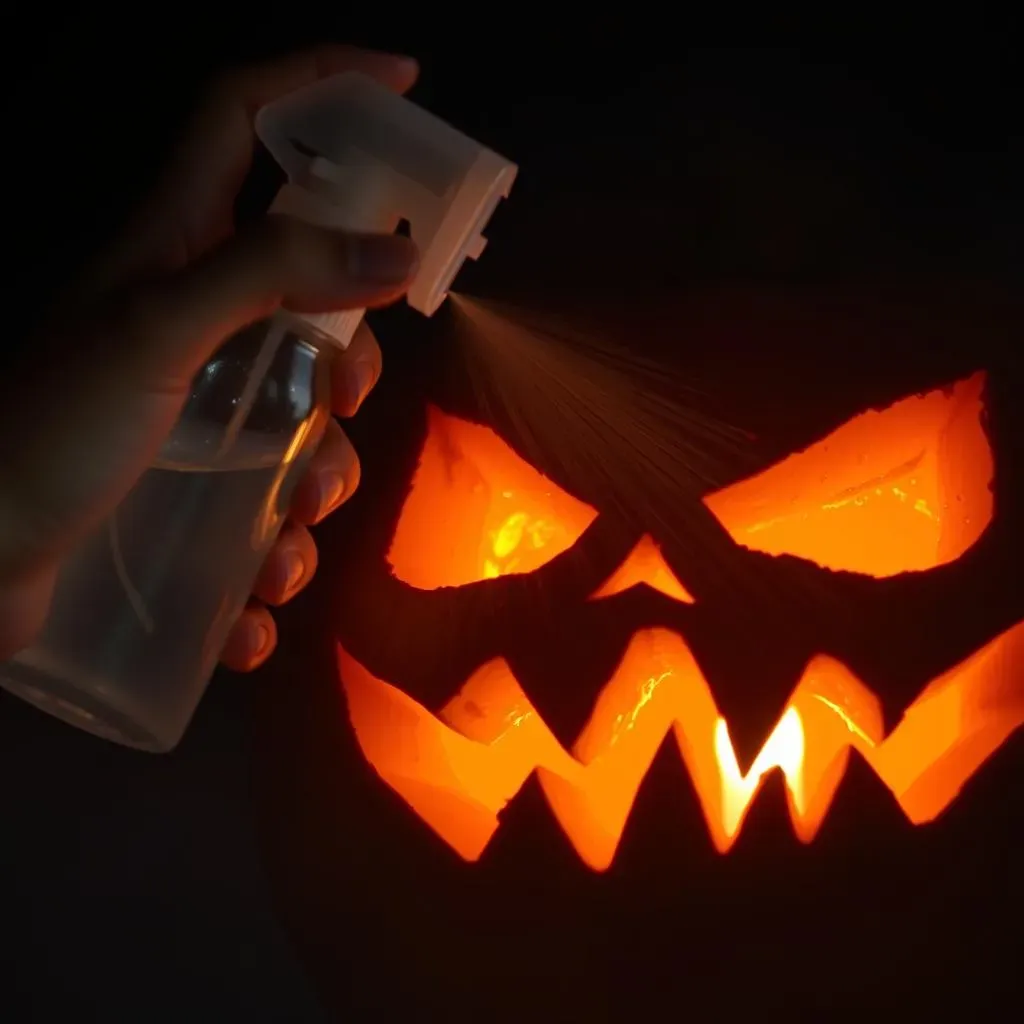
Alright, so you've put all this time and effort into carving the perfect scary pumpkin, but you want it to last more than a couple of days, right? Well, here's a trick that many people don't know about. Grab a spray bottle and fill it with a bathroom cleaner that contains bleach. Now lightly spray the inside and outside of your pumpkin. The bleach will help kill any bacteria and slow down the rotting process. It might sound a bit strange, but trust me, it works. You can also try a diluted vinegar solution, but bleach is more effective. Don't soak the pumpkin just a light mist will do.
Another thing to keep in mind is where you place your pumpkin. Direct sunlight and warm temperatures will cause it to rot faster. Keep it in a cool, shaded area, and it'll last longer. You can even try placing it in the fridge overnight if it's not too big. It's like putting your pumpkin in a time-out, but for a good reason. And here's a little tip to help prevent mold: make sure your pumpkin is completely dry after cleaning or spraying it. If you follow these tips, your scary pumpkin should stay spooky for a few weeks, maybe even longer, depending on your local weather.
“The only way to do great work is to love what you do.” - Steve Jobs
Preserving Your Scary Carved Pumpkin
Preserving Your Scary Carved Pumpkin
Preservation: Keeping Your Pumpkin Scary for Longer
Alright, so you've put all this time and effort into carving the perfect scary pumpkin, but you want it to last more than a couple of days, right? Well, here's a trick that many people don't know about. Grab a spray bottle and fill it with a bathroom cleaner that contains bleach. Now lightly spray the inside and outside of your pumpkin. The bleach will help kill any bacteria and slow down the rotting process. It might sound a bit strange, but trust me, it works. You can also try a diluted vinegar solution, but bleach is more effective. Don't soak the pumpkin just a light mist will do.
Another thing to keep in mind is where you place your pumpkin. Direct sunlight and warm temperatures will cause it to rot faster. Keep it in a cool, shaded area, and it'll last longer. You can even try placing it in the fridge overnight if it's not too big. It's like putting your pumpkin in a time-out, but for a good reason. And here's a little tip to help prevent mold: make sure your pumpkin is completely dry after cleaning or spraying it. If you follow these tips, your scary pumpkin should stay spooky for a few weeks, maybe even longer, depending on your local weather.
“The best way to predict your future is to create it.” - Abraham Lincoln
Another method to keep your carved pumpkin fresh is to apply a thin layer of petroleum jelly to the cut edges. This creates a barrier that helps prevent moisture loss and slows down the drying and shriveling process. It's like giving your pumpkin a little protective shield. You can reapply the petroleum jelly every few days, especially if you notice the edges starting to look dry. This helps keep the carved areas from collapsing in on themselves. And one more thing, if you live in an area with high humidity, consider placing your pumpkin on a wire rack or a plate with some space underneath. This allows air to circulate and prevents moisture buildup which can lead to mold.
Don't forget, the lifespan of your carved pumpkin also depends on the quality of the pumpkin itself. If you started with a pumpkin that was already starting to soften, it's not going to last as long as a fresh, firm one. So, choose wisely when you're picking out your pumpkin at the store. Another tip is to avoid carving your pumpkin too far in advance. If you can hold off until a day or two before you want to display it, you'll get the most out of it. And finally, don't be afraid to experiment with different methods to see what works best for you. Every pumpkin is unique, and what works for one might not work for another. It's all part of the fun of pumpkin carving.
Preservation Method | How to Apply | Frequency |
|---|---|---|
Bleach Spray | Lightly mist inside and out | Once after carving |
Petroleum Jelly | Apply a thin layer to cut edges | Every few days as needed |
Proper Storage | Keep in cool, shaded area | Continuous |
The Final Fright: Your Scary Pumpkin Masterpiece
So, you've successfully transformed a humble pumpkin into a terrifying work of art! It wasn't that hard, right? From selecting the perfect pumpkin to carefully carving out your design, you've navigated the steps of creating a truly scary jack-o'-lantern. Remember, the key is to have fun with it and don't be afraid to experiment. Whether you're a first-timer or a seasoned carver, each pumpkin tells its own unique spooky story. Now, place your creation on your porch, light it up, and watch the shivers run down the spines of all who dare to approach. You've not only mastered how to carve a scary pumpkin step by step but also brought a touch of Halloween horror to life. Happy haunting!