Table of Contents
Halloween is creeping closer, and if you're tired of the same old toothy grins on your pumpkins, it's time to level up your carving game. We're diving deep into the realm of hard scary pumpkin carving ideas that will transform your porch into a horror show masterpiece. Forget the simple triangles and squares; we're talking intricate designs, menacing expressions, and techniques that will make your neighbors do a double-take. This isn't your grandma's pumpkin carving guide. We'll explore the essential tools you need to bring your terrifying visions to life, master advanced carving techniques that separate the pros from the amateurs, and unleash a gallery of gruesome inspiration to spark your creativity. But before you grab your carving knife, we'll also cover crucial safety tips to ensure your quest for pumpkin perfection doesn't end in a trip to the emergency room. So, sharpen your skills, steel your nerves, and prepare to unleash some serious pumpkin terror this Halloween!
Tools of Terror: Essential Gear for Hard Scary Pumpkin Carving
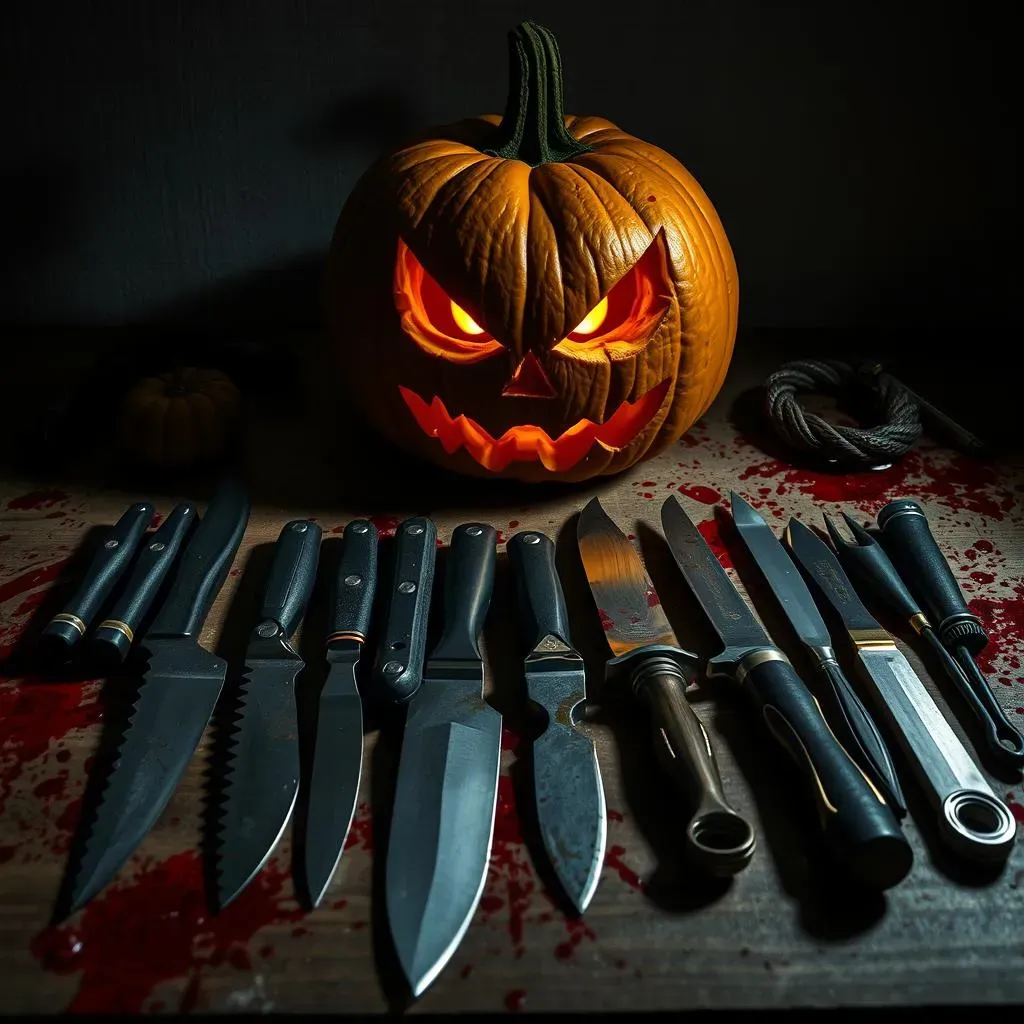
Tools of Terror: Essential Gear for Hard Scary Pumpkin Carving
The Surgeon's Kit: Precision Carving Tools
Alright, let's talk tools. Forget that flimsy plastic knife that comes with the grocery store pumpkin carving kit. We're going for surgical precision here. You'll want a good set of carving tools, including various sizes of saws, gouges, and pokers. A serrated knife is great for removing the pumpkin lid and thinning the walls, while smaller tools are essential for intricate details. Look for tools with comfortable handles; you'll be spending some quality time with them.
Don't underestimate the power of clay sculpting tools either! They're fantastic for refining details and creating textures. A sturdy spoon or scoop is also a must for gutting the pumpkin – because let's face it, that's the least glamorous part of the whole operation. And while not strictly a "tool," a good work surface is crucial. Cover your table with newspaper or a drop cloth; pumpkin guts can get messy fast.
Illumination and Stencils: Bringing Your Vision to Light
Now that you're armed with your carving arsenal, let's think about how to bring your design to life. First, you'll need a good light source. A bright lamp or even a headlamp will help you see what you're doing, especially when working on intricate details. And speaking of designs, stencils are your friend, especially when you're starting out. You can find tons of free stencils online, from classic scary faces to more elaborate designs featuring movie monsters and pop culture icons.
Transferring your stencil to the pumpkin is easy. Just tape it in place and use a poking tool or tracing wheel to transfer the design onto the pumpkin's surface. Alternatively, you can print out your design, tape it to the pumpkin, and then carefully cut along the lines with a sharp knife. Remember, patience is key! Take your time, and don't be afraid to make mistakes. After all, even a slightly wonky pumpkin face can be terrifying in its own way.
Tool | Purpose | Why You Need It |
|---|---|---|
Serrated Knife | Removing lid, thinning walls | Essential for initial pumpkin prep |
Detail Carving Tools | Intricate details, fine lines | Brings your design to life |
Clay Sculpting Tools | Refining details, creating textures | Adds depth and realism |
Sturdy Spoon/Scoop | Gutting the pumpkin | The less-glamorous but necessary task |
Bright Lamp/Headlamp | Illuminating your work | See what you're doing! |
Extreme Pumpkins: Mastering Advanced Carving Techniques
Extreme Pumpkins: Mastering Advanced Carving Techniques
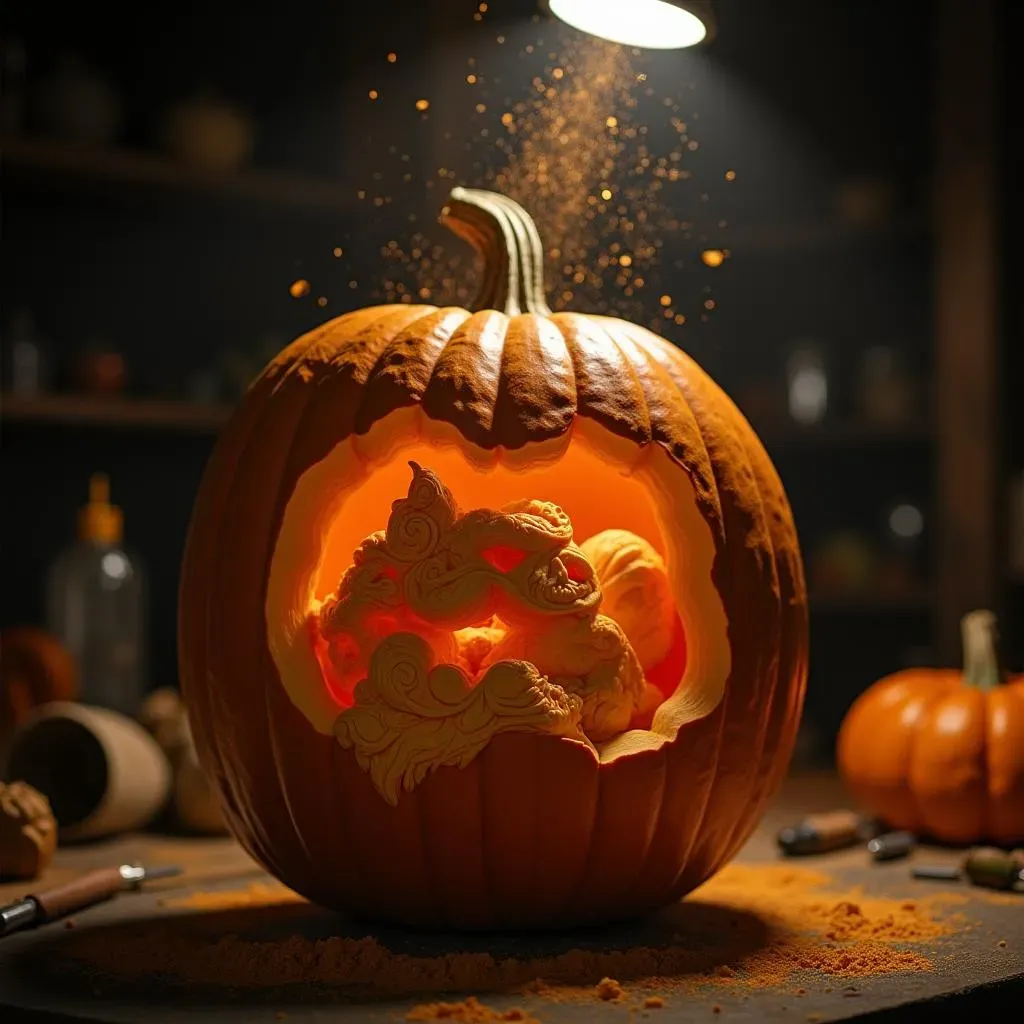
Sculpting with Light and Shadow: 3D Carving
now we're getting serious. Forget flat, two-dimensional carvings. Let's talk about sculpting in three dimensions! This involves carving away layers of the pumpkin to create depth and texture. Think of it like sculpting with clay, but instead of adding material, you're removing it. Start by transferring your design to the pumpkin, then carefully carve away the surface layer to create a base. From there, you can gradually carve deeper, creating shadows and highlights that will make your design pop. This technique is perfect for creating realistic faces, intricate patterns, or even miniature scenes within your pumpkin.
One trick is to use different carving tools for different depths. A small gouge or V-shaped tool is great for creating fine lines and details, while a larger tool can be used to remove larger areas of the pumpkin. Remember to work slowly and carefully, and don't be afraid to experiment. The more you practice, the better you'll get at judging how much to carve away to achieve the desired effect.
Beyond the Blade: Power Tools and Other Tricks
Want to take your pumpkin carving to the next level? Consider using power tools! A rotary tool, like a Dremel, can be a game-changer for creating intricate details and textures. With various bits and attachments, you can grind, sand, and even engrave your pumpkin with incredible precision. Just be sure to wear safety glasses and a dust mask, as pumpkin dust can be irritating.
Another cool trick is to use stencils as guides for power carving. Simply tape the stencil to the pumpkin and then carefully trace the design with the rotary tool. You can also use the rotary tool to create interesting textures, such as stippling or cross-hatching. And if you're feeling really adventurous, you can even try carving your pumpkin from the inside out! This involves hollowing out the pumpkin and then carving the design from the inside, creating a unique and eerie effect.
Technique | Description | Tools |
|---|---|---|
3D Carving | Layering carvings to create depth | Gouges, V-shaped tools, detail knives |
Power Carving | Using power tools for intricate details | Rotary tool (Dremel), various bits |
Inside-Out Carving | Carving from the inside of the pumpkin | Serrated knife, detail knives, patience |
Stenciling | Using stencils as guides for power carving | Stencils, tape, rotary tool |
Scary Pumpkin Gallery: Inspiration for Your Next Carving
Scary Pumpkin Gallery: Inspiration for Your Next Carving
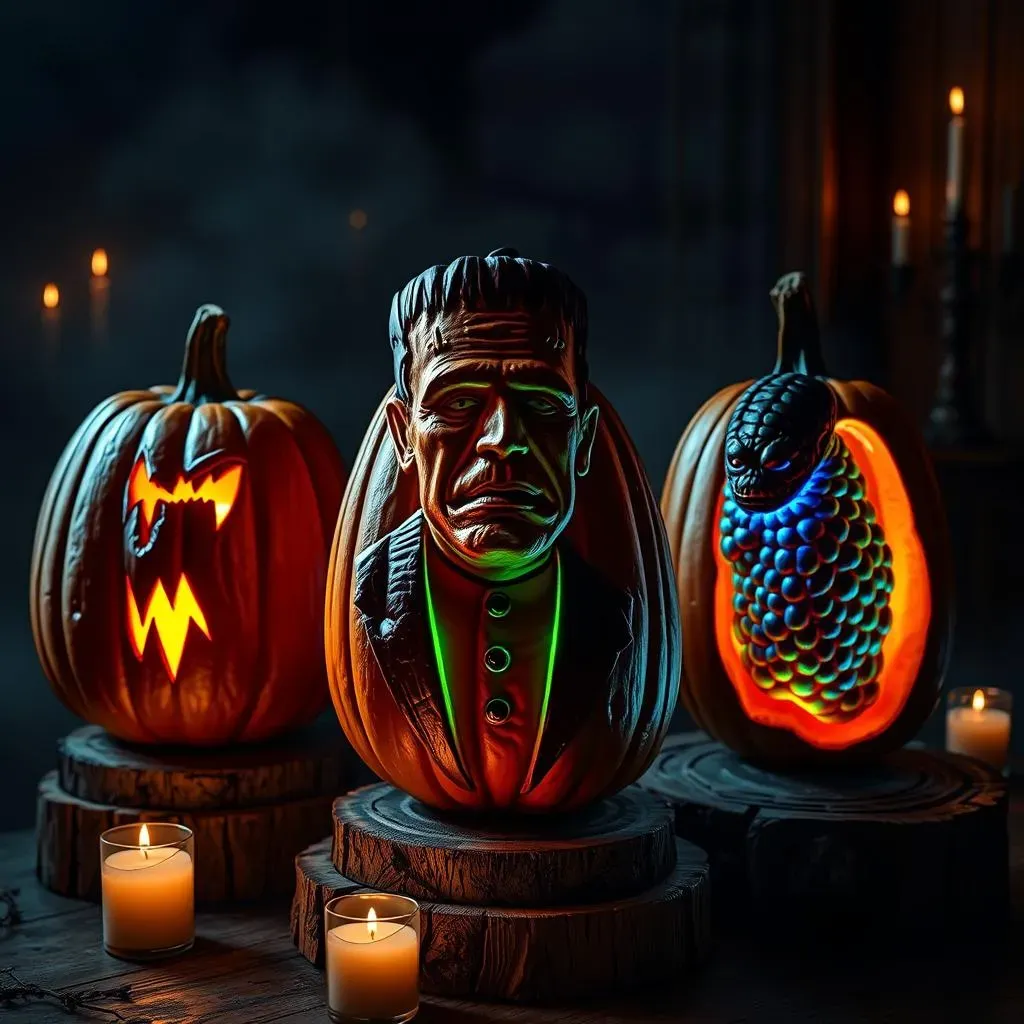
Classic Horror Icons: Bringing the Movie Monsters Home
Let's kick things off with the classics. Think Dracula, Frankenstein's monster, and the Creature from the Black Lagoon. These iconic horror figures are instantly recognizable and make for fantastic pumpkin carvings. You can find stencils online, or, if you're feeling ambitious, try freehanding your own interpretation. The key is to focus on the details that make each monster unique: Dracula's sharp fangs, Frankenstein's square head and neck bolts, and the Creature's scaly texture.
Don't be afraid to get creative with your lighting, either. A green light behind Frankenstein's monster can create an eerie glow, while a red light shining through Dracula's fangs can add a touch of menace. And if you really want to go all out, consider adding some sound effects. A hidden speaker playing spooky music or monster sounds can really take your pumpkin display to the next level.
Ghoulish Grins and Gruesome Faces: The Art of the Scare
Sometimes, the simplest designs are the most effective. A menacing grin, a pair of glowing eyes, or a face contorted in agony can be incredibly scary, especially when carved with precision and lit from within. Experiment with different shapes and sizes of eyes, mouths, and noses to create unique and terrifying expressions. Consider adding details like wrinkles, scars, or even exposed teeth to enhance the realism.
One technique is to use a combination of shallow and deep cuts to create shadows and highlights. This can add depth and dimension to your carving, making it look more realistic and three-dimensional. And don't forget about the power of asymmetry. A slightly lopsided grin or a pair of mismatched eyes can add a touch of unsettling realism to your pumpkin.
Icon | Key Features | Lighting Suggestions |
|---|---|---|
Dracula | Sharp fangs, widow's peak | Red light on fangs |
Frankenstein | Square head, neck bolts | Green light behind |
Creature | Scaly texture, gills | Blue or green light |
Classic Grin | Sharp teeth, wide mouth | Flickering candle |
Beyond the Human: Monster Mashups and Original Creations
Who says your scary pumpkin has to be a traditional monster? Let your imagination run wild and create your own unique creature of the night! Combine elements from different monsters, or invent something entirely new. Maybe a zombie unicorn with glowing eyes, or a cyborg scarecrow with a chainsaw arm. The possibilities are endless!
Consider drawing inspiration from nature, too. A pumpkin carved to resemble a spider's nest, a swarm of bats, or a patch of thorny vines can be just as scary as any movie monster. And don't be afraid to use unconventional materials to add to the effect. Twigs, leaves, or even pieces of metal can be used to create texture and detail.
The key is to have fun and let your creativity shine. After all, the best scary pumpkin is the one that comes from your own twisted imagination.
Safety First: A Guide to Avoiding Carving Catastrophes
Safety First: A Guide to Avoiding Carving Catastrophes
Protecting Your Digits: Carving Safety Essentials
Alright, let's talk about the not-so-glamorous side of pumpkin carving: avoiding injury. Carving pumpkins can be surprisingly dangerous, especially when you're wielding sharp tools and trying to create intricate designs. First and foremost, always carve in a well-lit area and on a stable surface. This will help you see what you're doing and prevent any accidental slips or falls. And speaking of slips, make sure your hands are dry and clean before you start carving. Pumpkin guts can be slippery, and a slippery grip can lead to disaster.
Consider wearing gloves, especially if you're working with power tools. Gloves will protect your hands from cuts, scrapes, and splinters. And if you're using a rotary tool, be sure to wear safety glasses and a dust mask. Pumpkin dust can be irritating to the eyes and lungs. Finally, never carve while distracted or under the influence of anything that could impair your judgment. Carving requires focus and attention, so save the spooky cocktails for after you're done.
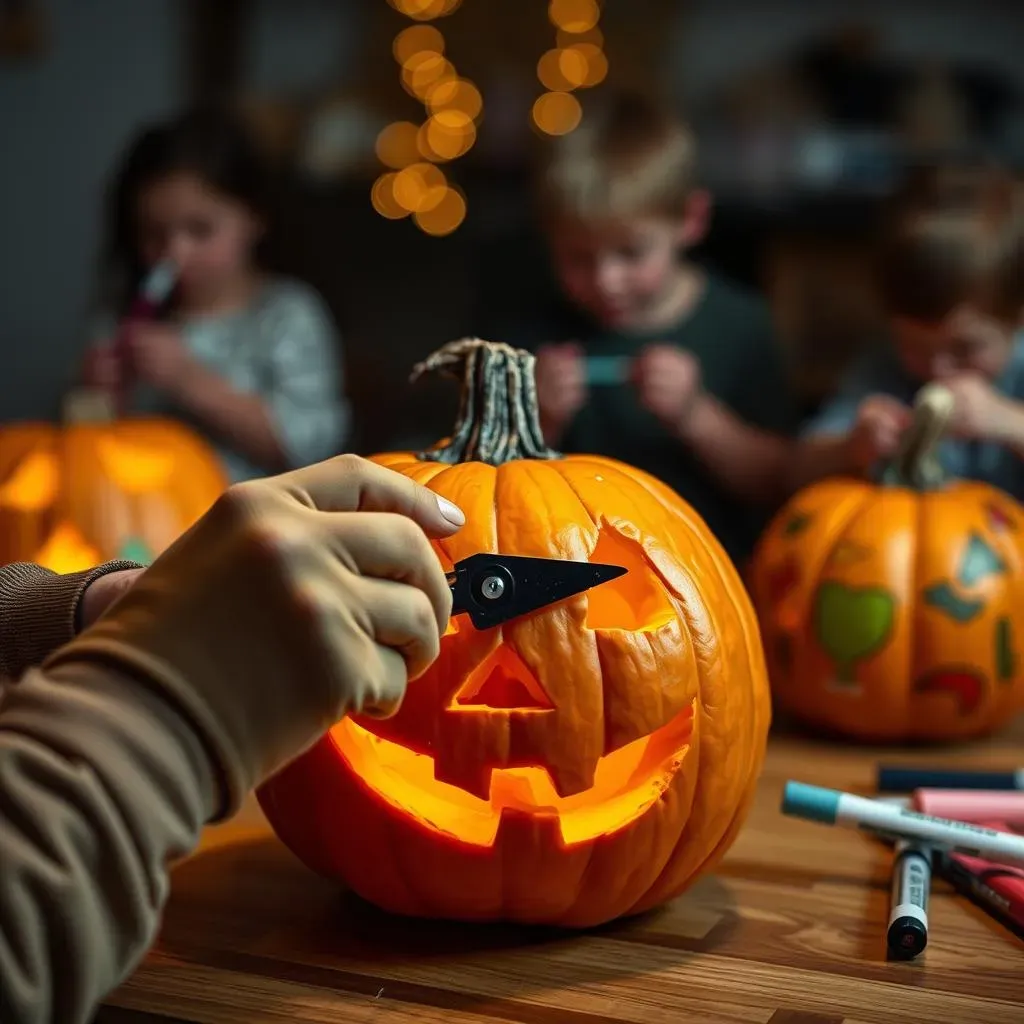
Kid-Friendly Carving: Keeping the Little Ghouls Safe
If you're carving pumpkins with kids, it's essential to take extra precautions. First, never let young children handle sharp carving tools. Instead, consider letting them decorate the pumpkin with paint, markers, or stickers. If they're old enough to use carving tools, make sure they're supervised at all times. And choose age-appropriate tools, such as small, blunt-tipped saws.
Another option is to let kids hollow out the pumpkin and clean out the guts. This is a fun and relatively safe activity that will get them involved in the process. And when it comes to carving the design, consider using stencils that are easy to follow. Simple shapes and patterns are less likely to result in accidents. Finally, make sure kids understand the importance of following safety rules and using tools responsibly.
Safety Tip | Description | Why It Matters |
|---|---|---|
Well-lit Area | Carve in a bright space | Prevents slips and mistakes |
Stable Surface | Carve on a sturdy table | Reduces risk of accidents |
Dry Hands | Keep hands clean and dry | Improves grip, prevents slips |
Gloves | Protect hands from cuts | Adds a layer of safety |
Supervision | Adult supervision for kids | Ensures safe tool use |
Conquer Your Carving Fears: A Pumpkin Horror Finale
So, you've journeyed through the twisted world of hard scary pumpkin carving ideas. You've armed yourself with the right tools, honed your carving skills, and hopefully, found the inspiration to create a truly terrifying masterpiece. Remember, the key to a successful scary pumpkin isn't just about the design; it's about the execution and the passion you pour into it. Don't be afraid to experiment, push your limits, and most importantly, have fun unleashing your inner pumpkin Picasso. Now go forth and carve some scares this Halloween!