Table of Contents
Alright, let's talk pumpkins. Halloween is creeping up, and suddenly you're picturing yourself hunched over a slippery gourd, wrestling with a dull knife, covered in pulp and regret. The dream of a perfectly spooky porch quickly turns into a sticky nightmare. You want that festive glow, but maybe you're short on time, patience, or advanced sculpting skills. You're probably searching for ways to avoid the annual carving catastrophe.
Picking Your Perfect Pumpkin & Simple Tools for Easy Carving
Picking Your Perfect Pumpkin & Simple Tools for Easy Carving
Choosing Your Gourd Gladiator
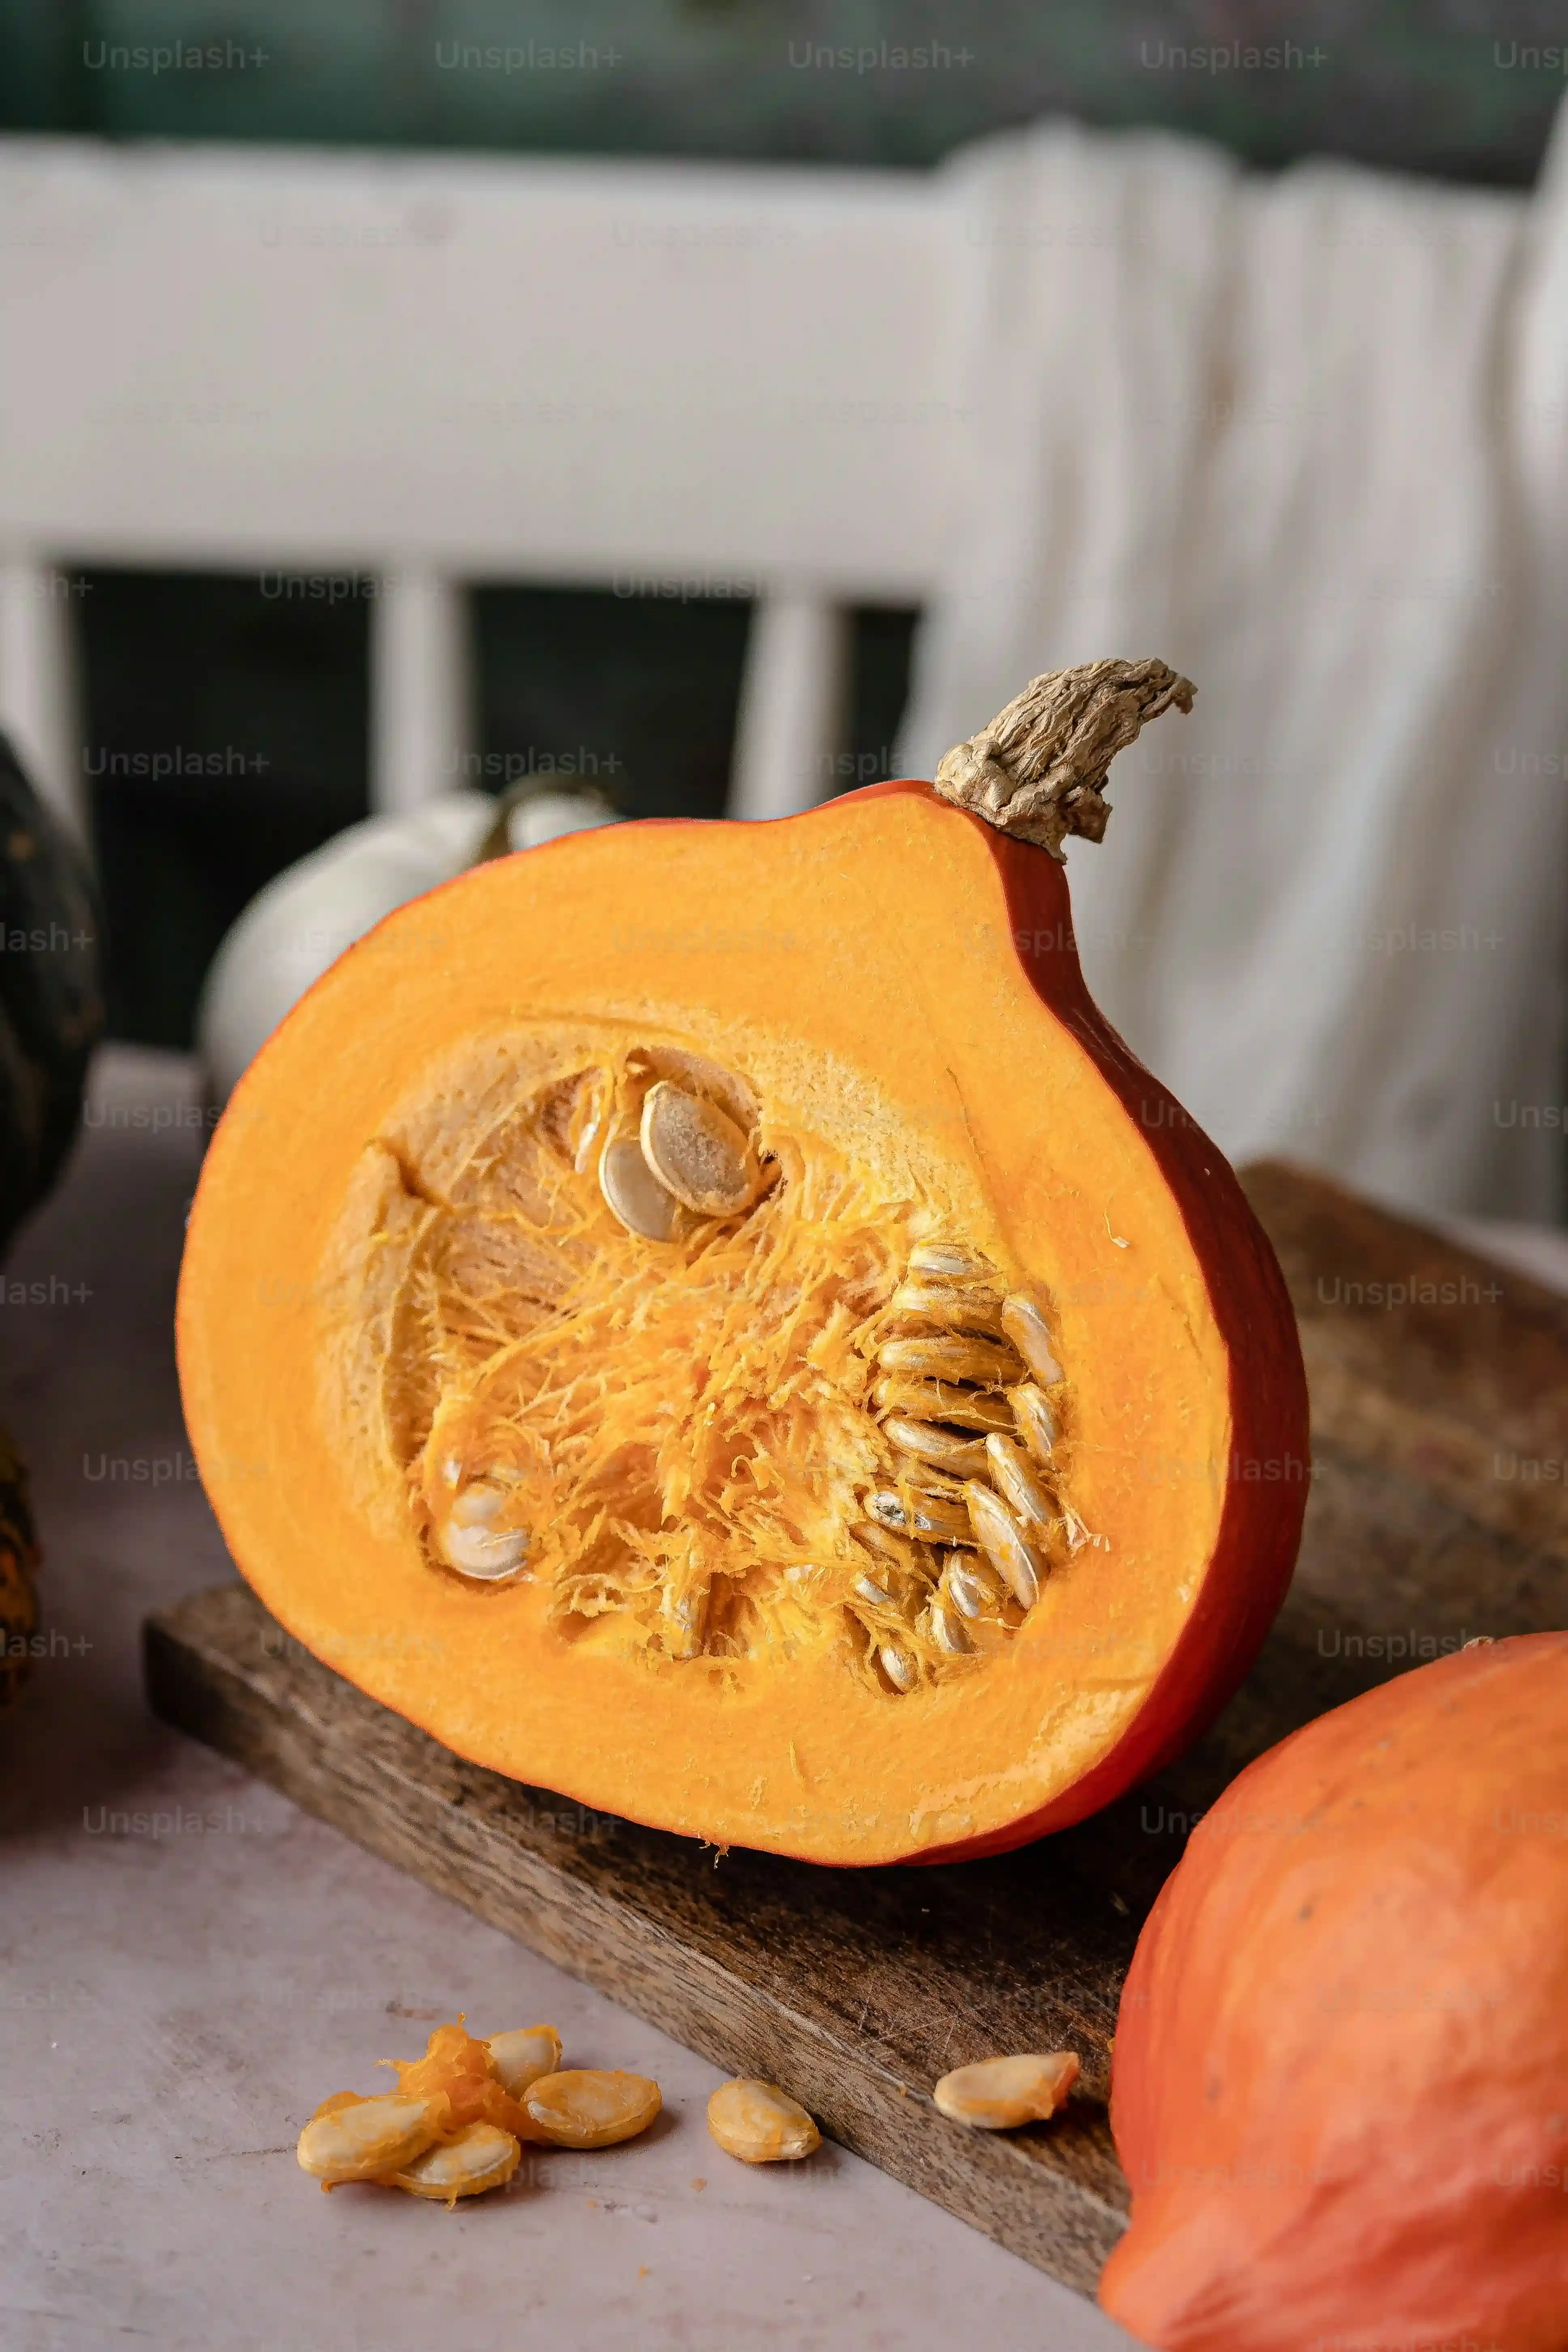
Alright, step one in your *halloween easy pumpkin carving ideas* adventure: find a pumpkin that isn't going to fight you every step of the way. You don't need the biggest one in the patch, sometimes those giants are a pain to hollow out. Look for a pumpkin with smooth, firm skin. Bumps and bruises aren't just ugly, they make carving tricky. Give it a tap; it should sound hollow, like it's ready to become a spooky drum. Check the bottom too – you want it flat and stable so it doesn't roll away mid-carve. A sturdy stem is a good sign of a healthy pumpkin, but honestly, you're probably just going to cut around it anyway. Just avoid anything mushy or with soft spots; that's a fast track to a rotten mess before Halloween even hits.
Essential Gear That Isn't Overkill
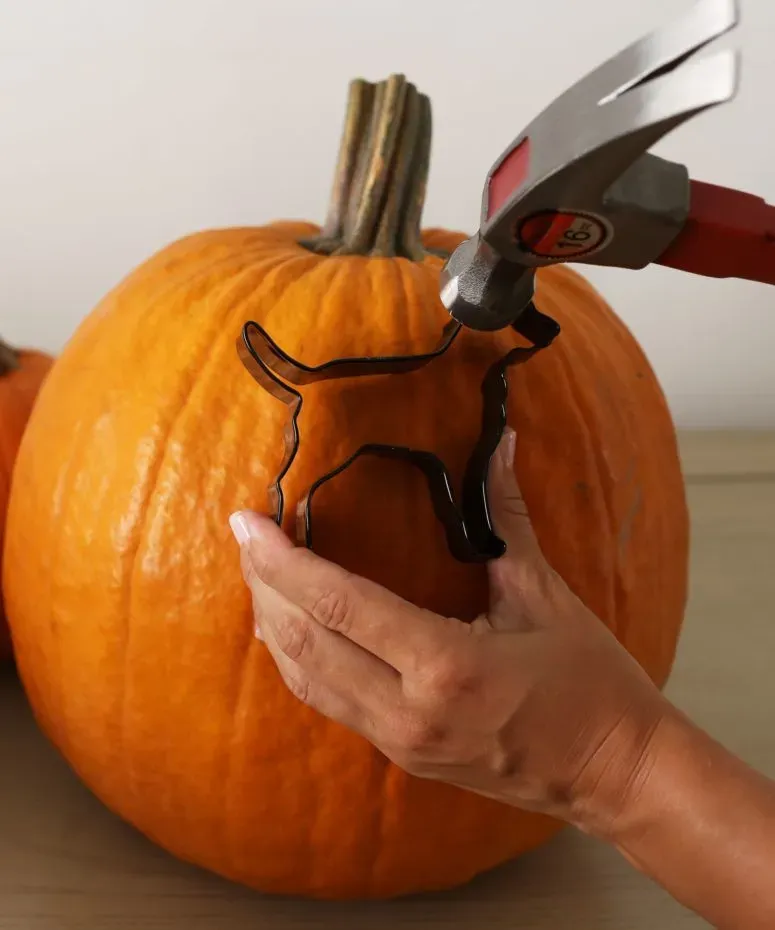
Forget those flimsy little saws that come in cheap carving kits. You need tools that actually work. Start with a decent, sharp knife – a small serrated one from your kitchen drawer often does the job for cutting the lid. For the scooping part, an ice cream scoop or a sturdy metal spoon is way better than the plastic scraper they give you. It digs out the guts and seeds much faster. For the actual carving, small serrated knives designed for pumpkins are helpful, but don't feel obligated to buy a whole kit. Sometimes, simple tools like an apple corer for perfect circles or metal cookie cutters (just tap them in with a mallet) are your secret weapons for *halloween easy pumpkin carving ideas*. Keep it simple, keep it sharp (carefully, obviously), and you'll save yourself a lot of frustration.
Here’s a quick list of genuinely useful tools:
- Sturdy spoon or ice cream scoop for scooping
- Small serrated knife for cutting the lid
- Pumpkin carving saw (if you get one, make sure it feels solid)
- Apple corer or metal cookie cutters for shapes
- A bowl for the seeds (roast 'em later!)
Safety First: How to Light Your Halloween Easy Pumpkin Carving Creations
Safety First: How to Light Your Halloween Easy Pumpkin Carving Creations
The Classic Candle: A Flickering Friend or Fiery Foe?
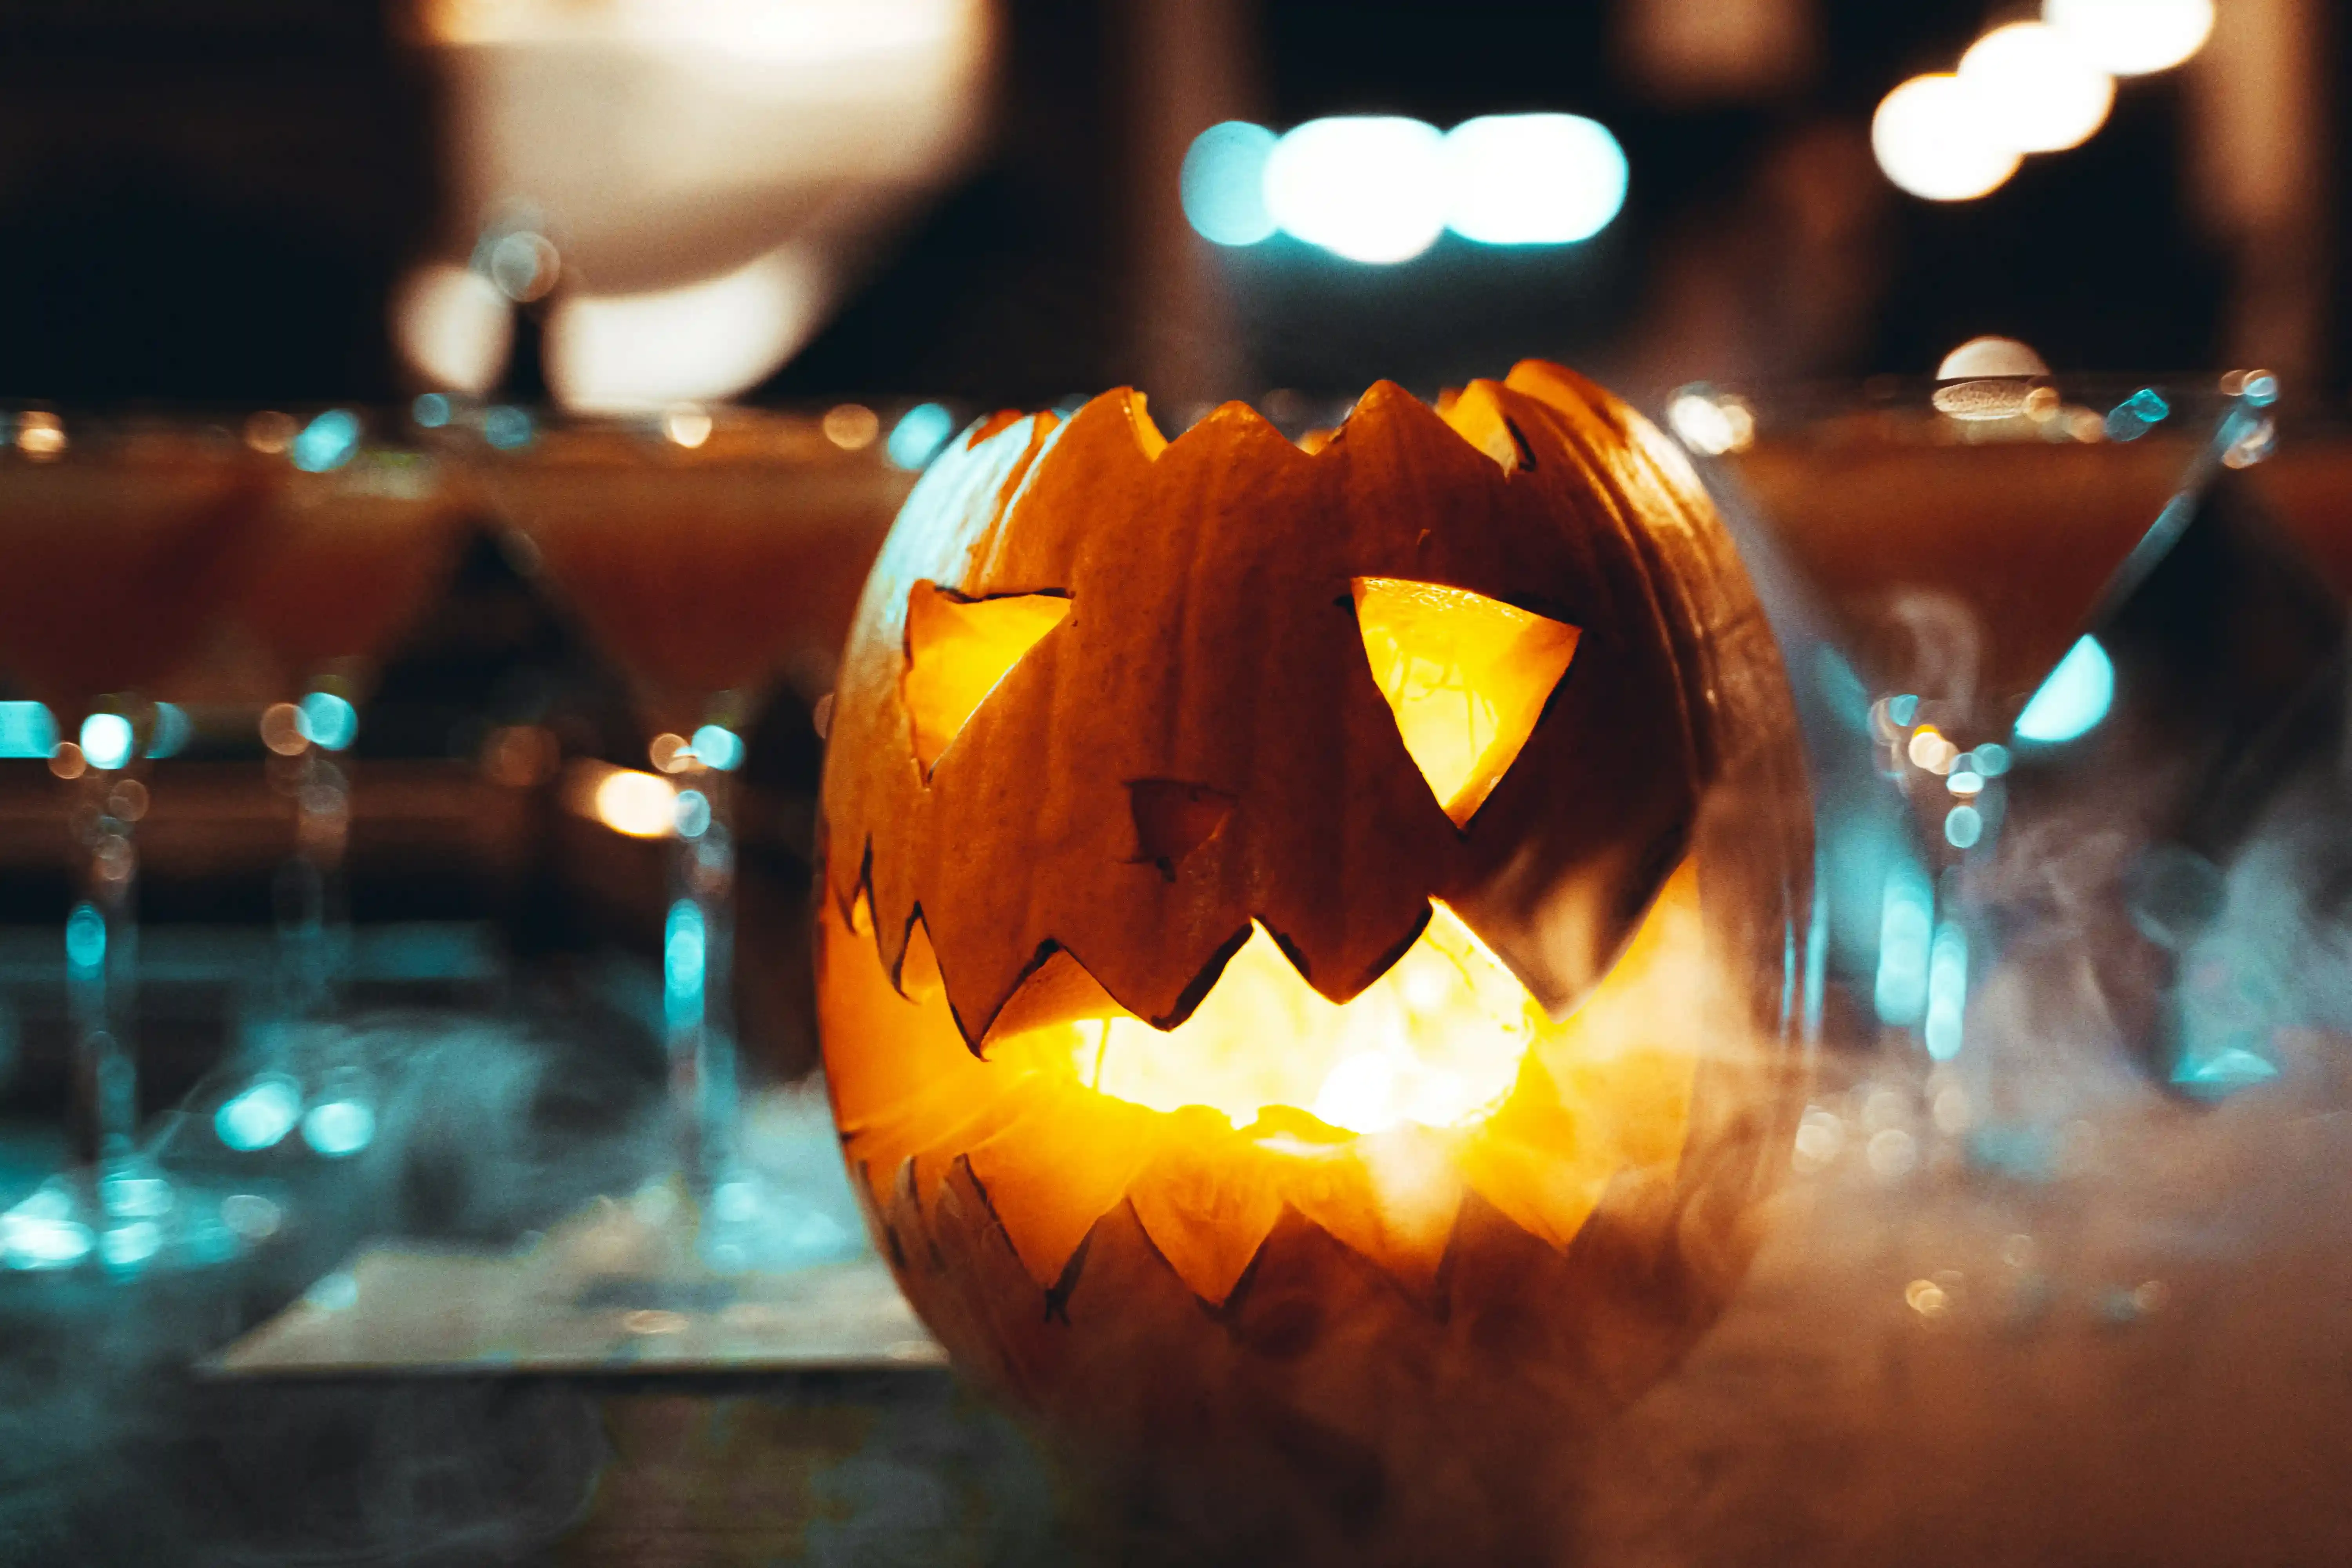
you've carved your masterpiece, one of your fabulous *halloween easy pumpkin carving ideas*. Now for the glow. The traditional choice? A good old-fashioned candle. There’s something about that real flame, the way it flickers and casts dancing shadows, that just screams Halloween ambiance. But let's be real, it's also a tiny, controlled fire sitting inside a drying piece of organic matter. This isn't rocket science, but it requires common sense. Never leave a lit candle unattended, especially if you're putting your pumpkin outside where wind can be a factor, or inside near curtains, costumes, or anything else that likes to catch fire. Use a sturdy votive or tea light holder inside the pumpkin to keep the candle upright and contain any dripping wax. Place your lit pumpkin on a stable, non-flammable surface, far away from foot traffic where it could get knocked over.
Brighter and Safer: Embracing the Electric Glow
Look, if the thought of a naked flame gives you the jitters (and honestly, fair enough), there are fantastic alternatives that provide that spooky glow without the fire risk. Battery-operated LED tea lights are dirt cheap and work perfectly. They don't get hot, they won't blow out in the wind, and you can leave them on for hours without worry. You can also get strings of small LED lights designed for crafts or even mini flashlights. These options are especially great for pumpkins placed indoors or in areas where kids and pets might be running around. They might lack the subtle flicker of a real candle, but they offer consistent, safe illumination for your *halloween easy pumpkin carving ideas*. Plus, no messy wax to clean up inside the pumpkin.
Candle vs. LED: A Quick Look
- Real Candle: Authentic flicker, heat risk, needs monitoring, can blow out.
- LED Light: No fire risk, safe for indoors/kids, consistent light, uses batteries.
Placement is Key: Setting the Scene Safely
So you've picked your light source. Now, where does your glowing gourd go? Don't just plop it on the porch steps where trick-or-treaters might trip over it in the dark. Set it back a bit, maybe on a sturdy table or a raised, flat area. If you're using multiple pumpkins, space them out. Avoid putting them directly under dry bushes or next to flammable decorations like fake spiderwebs made of synthetic fibers. Think about the wind if you're outside – you don't want your light source (especially a real candle) being exposed or knocking the pumpkin over. A little foresight in placement ensures your cool carving project stays a fun decoration and doesn't become a hazard.
Spooktacularly Simple: 15 Halloween Easy Pumpkin Carving Ideas

Spooktacularly Simple: 15 Halloween Easy Pumpkin Carving Ideas
Ditching the Intricate for the Impressive
Look, we've all seen those pumpkins online that look like they were carved by a professional sculptor with a tiny scalpel and way too much free time. Forget those. That's not what *halloween easy pumpkin carving ideas* are about. We're aiming for impact with minimal effort. Think bold shapes, classic symbols, and designs that look great from the street without requiring surgical precision up close. The goal is to get that spooky vibe going without spending hours hunched over, risking carpal tunnel for a design nobody can quite make out in the dark anyway. Simple lines, clear expressions, and repeating patterns are your best friends here. We're talking designs you can knock out in under an hour, leaving you more time for important Halloween activities, like eating candy corn and judging elaborate costumes.
Classic Shapes and Faces That Never Fail
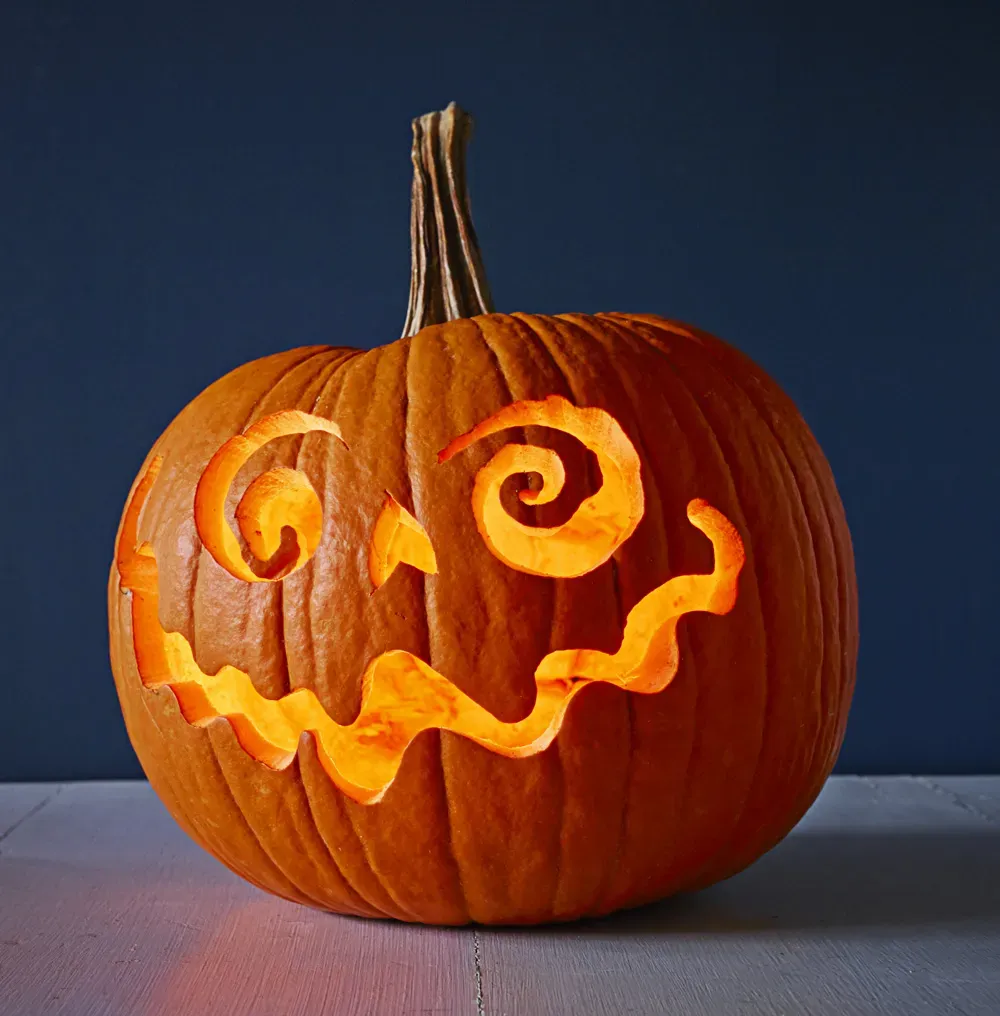
Let's start with the absolute basics that still deliver. The classic jagged-tooth grin and triangle eyes? Timeless for a reason. It’s quick, everyone recognizes it, and it looks surprisingly menacing with a light inside. Same goes for simple ghost shapes or crescent moons. You cut out the outline, and boom, instant Halloween. Don't underestimate the power of repetition either. A bunch of scattered circles (easy with an apple corer!) or simple star shapes can look really effective, especially on a grouping of pumpkins. Think about silhouettes – a simple black cat shape carved out, or maybe a spooky tree. These designs are forgiving; a slightly wobbly line just adds character, right?
Here are a few starting points for genuinely easy designs:
- Classic Jack-o'-Lantern face (triangles, jagged mouth)
- Simple ghost outline
- Crescent moon and stars
- Scattered circles (polka dots of light)
- Basic bat shape
Beyond the Knife: Creative Twists on Easy Pumpkin Designs
Beyond the Knife: Creative Twists on Easy Pumpkin Designs
Scraping, Not Cutting: Texture and Etching Tricks
so maybe the idea of cutting all the way through the pumpkin still feels a bit daunting, or maybe you just want something different for your *halloween easy pumpkin carving ideas*. Good news: you don't always have to make a hole. You can create cool effects just by scraping off the top layer of skin. The flesh underneath is lighter, so when you scrape designs, they'll show up against the darker orange skin. This is way more forgiving than full-on cutting. You can use a linoleum cutter, a small gouge tool, or even just the tip of a sturdy spoon or screwdriver (carefully!). Draw your design on first, then scrape away. Think spiderwebs, spooky phrases written in a creepy font, or even just patterns of dots or lines. It gives your pumpkin texture and dimension without the risk of a wobbly cut ruining the whole thing.
Adding Flair: Paint, Props, and Puncture Power
Who says you have to stick to just carving? You can elevate even the simplest design with a few extra touches. Got some black paint? Use it to paint around the carved areas to make them pop, or paint spooky silhouettes directly onto the pumpkin skin. White paint is great for ghosts or spiderwebs. Googly eyes? Always a win. You can glue them around carved holes or directly onto the pumpkin. Think beyond traditional cuts entirely. Instead of carving eyes, why not drill holes? A drill bit makes perfect circles instantly. You can drill holes of different sizes to create cool patterns or starry nights. Or use metal skewers or thick wire to poke holes for a different kind of light pattern. Combine techniques – carve a simple mouth, then drill a bunch of random holes around it for a truly unsettling look. These little additions take your *halloween easy pumpkin carving ideas* from basic to brilliant with minimal extra effort.
Easy Ways to Add Flair:
- Scrape designs into the skin instead of cutting through.
- Use paint to highlight carved areas or add new elements.
- Glue on googly eyes or other creepy craft supplies.
- Drill holes for perfect circles or patterns.
- Poke patterns with skewers or thick wire.
- Combine scraping, cutting, and paint for layered effects.
Keeping Your Masterpiece Alive: Making Your Carved Pumpkin Last
Keeping Your Masterpiece Alive: Making Your Carved Pumpkin Last
Delaying the Inevitable Sag
you've put in the work, executed your brilliant *halloween easy pumpkin carving ideas*, and your pumpkin looks fantastic. The sad truth is, once you cut into it, you've basically started the clock on its demise. It's going to start drying out, shrinking, and eventually getting a bit... fuzzy. You can't stop time, but you can definitely slow it down. The biggest enemy is dehydration. Keep your carved pumpkin in a cool spot, ideally out of direct sunlight or away from heat sources. Some people swear by rubbing petroleum jelly (like Vaseline) onto all the cut edges – it creates a barrier that helps trap moisture inside. Another trick is giving the whole pumpkin, especially the cut areas, a misting of water every day or two. If it starts looking really sad and shriveled, you can sometimes revive it temporarily by submerging the whole thing in a tub of cold water for a few hours. These aren't magic bullets, but they can often buy you an extra couple of days of spooky display time before your masterpiece starts looking less like a ghoulish face and more like a wrinkled prune.
Carve Out Some Fun (Without the Tears)
So there you have it. Proof that *halloween easy pumpkin carving ideas* aren't some mythical creature. You don't need to be a master sculptor or own a workshop full of specialized tools. With a bit of planning, the right pumpkin, and a few simple techniques, you can absolutely get that classic, spooky look on your porch without wanting to throw the gourd across the yard. These ideas are designed to be low-stress, high-reward. Now go grab a pumpkin, maybe a hot drink, and give it a shot. Worst case? You have a slightly lopsided but endearingly spooky decoration. Best case? You actually enjoy the process. Happy carving, and try not to lose a finger.