Table of Contents
Halloween is creeping up, and that means it's pumpkin time. You see all those amazing, intricate carvings online or on your neighbor's porch and maybe feel a pang of dread. The mess, the difficulty, the potential for a lopsided, sad-looking jack-o'-lantern. It doesn't have to be a complicated, multi-hour ordeal ending in frustration and pumpkin guts everywhere. What if you could actually enjoy the process and end up with something you're genuinely proud of? Something that looks great without requiring an engineering degree or the steady hand of a surgeon?
Why Bother Carving? The Appeal of Easy Pumpkin Fun
Why Bother Carving? The Appeal of Easy Pumpkin Fun
More Than Just a Decoration
so you might be looking at this thinking, "Is carving *really* worth the effort?" I get it. The thought of scooping out slimy guts and wrestling with a sharp object can feel like a chore. But honestly, there's something genuinely satisfying about taking a plain old pumpkin and turning it into something with personality. It's a classic fall activity for a reason. It signals the season, adds that cozy, spooky vibe to your home, and frankly, a glowing jack-o'-lantern on a crisp evening just *feels* right. It's not just about having a decoration; it's about engaging in a ritual that connects us to autumn and Halloween.
The Low-Stress Payoff of Easy Carving
Now, if the thought of intricate patterns makes your hand cramp, that's where the "easy" part comes in. The appeal of easy pumpkin carving ideas is that they strip away the intimidation factor. You don't need fancy tools or hours of dedicated work. We're talking simple shapes, basic designs, things you can realistically accomplish without wanting to throw the pumpkin across the yard. It's about the process being fun and achievable, not a test of your artistic prowess. Less stress, more seasonal cheer. That's the goal.
What makes easy carving appealing?
- Quick results: You get a finished product faster.
- Less mess: Simple cuts mean less scattered debris.
- Higher success rate: Your pumpkin is less likely to collapse or look... sad.
- Great for all ages: Kids can participate more easily.
Creating Simple, Glowing Magic
There's a simple magic to a carved pumpkin lit from within. It casts flickering shadows and creates a warm, inviting glow. Even the most basic face – two triangles for eyes, a jagged mouth – transforms a humble gourd into an iconic symbol of Halloween. Focusing on good and easy pumpkin carving ideas lets you tap into that magic without the headache. It’s about creating that classic, slightly spooky ambiance with minimal fuss, leaving you more time to enjoy cider, candy, and the crisp autumn air. It's a small effort for a significant boost in festive atmosphere.
Picking the Perfect Pumpkin for Good and Easy Carving
Picking the Perfect Pumpkin for Good and Easy Carving
Size, Shape, and Surface for Success
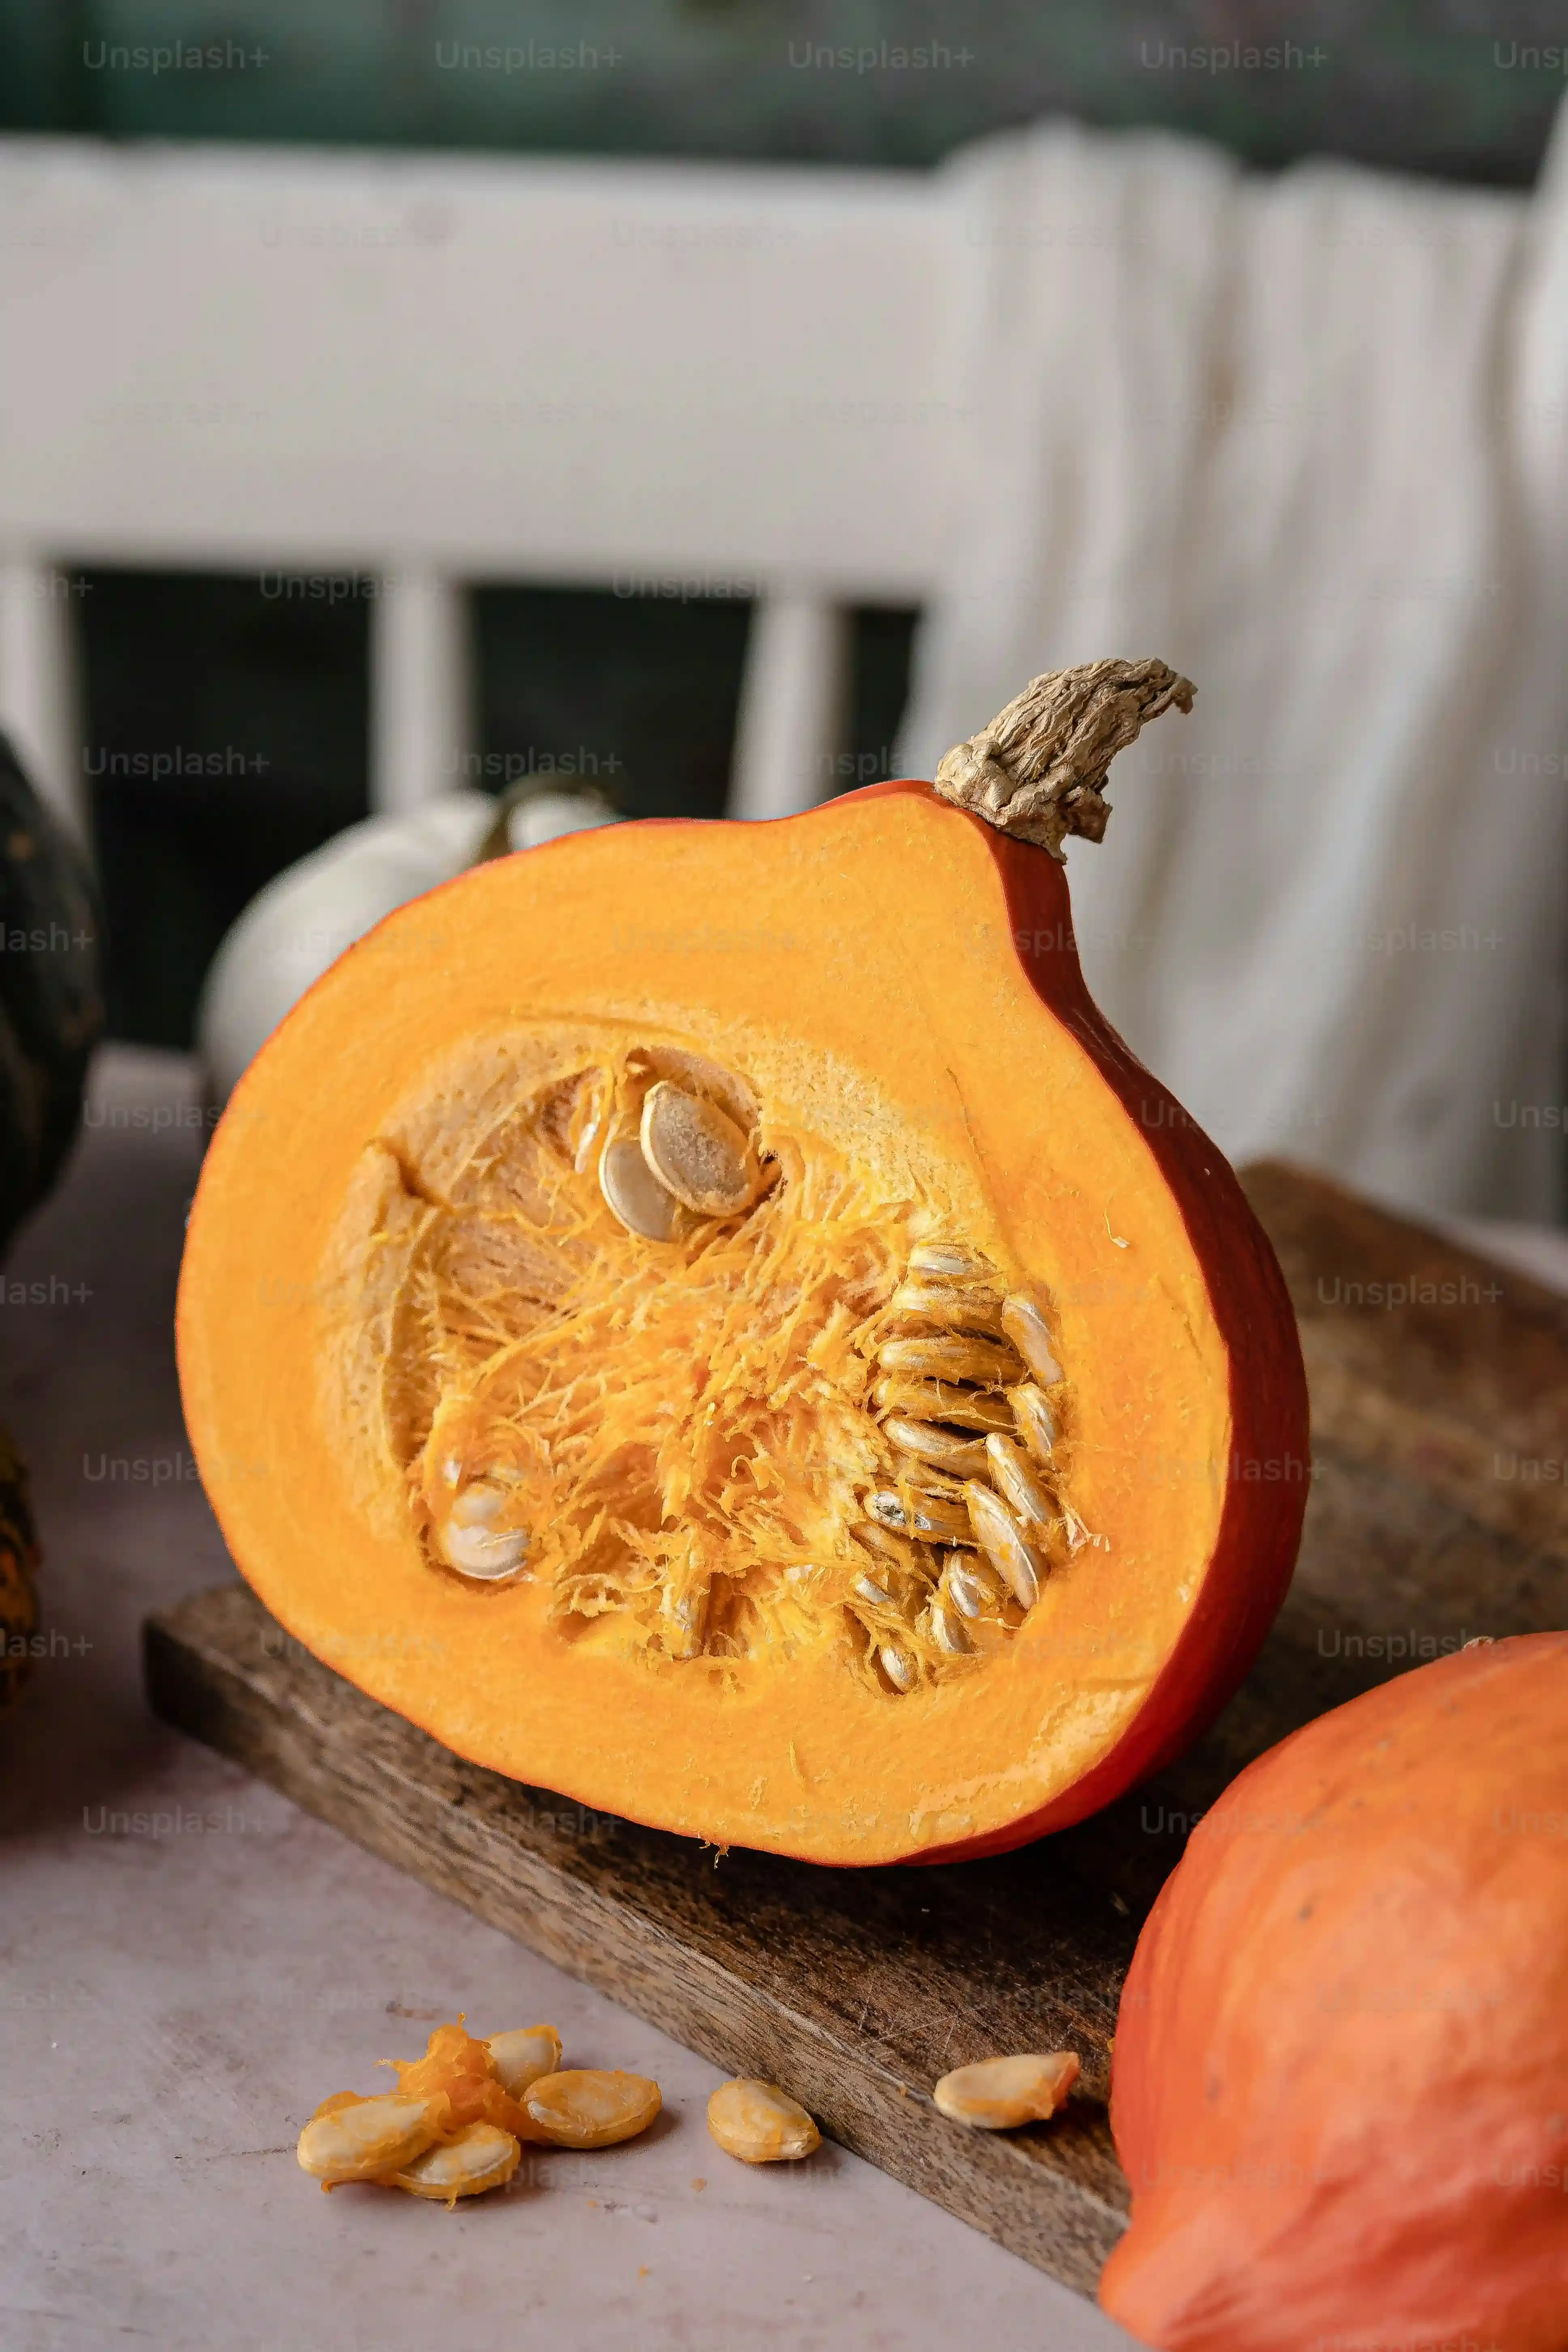
Alright, you're ready to grab a pumpkin. Don't just grab the first orange thing you see. The right pumpkin makes all the difference between a smooth carving session and a frustrating mess. For good and easy pumpkin carving ideas, you want a pumpkin that isn't too huge, but not tiny either. Think medium to large. A bit of surface area gives you room to work without feeling cramped. Look for a shape that feels balanced and sits relatively flat. And this is key: run your hands over the skin. You want it smooth and firm, not bumpy or soft. Warts might look cool, but they're a nightmare to carve through cleanly. Smooth skin is your friend for easy cuts.
Spotting Flaws Before You Commit
Once you've got a few candidates, inspect them closely. This isn't a beauty contest; it's a structural integrity check. Look for bruises, soft spots, or deep cuts. These weak points can make carving difficult and cause your masterpiece to rot faster than a teenager's attention span. Press gently on different areas. If it feels mushy or gives way easily, put it back. You want a pumpkin that feels solid and dense. A healthy pumpkin holds up better to the carving process and lasts longer on your porch, showcasing your good and easy pumpkin carving ideas.
Pumpkin Inspection Checklist:
- Check for a smooth, firm surface.
- Avoid major bruises or soft spots.
- Look for a balanced shape that sits well.
- Ensure the stem is intact and sturdy.
- Skip pumpkins with deep cuts or cracks.
The Importance of a Sturdy Base and Stem
Don't overlook the bottom and the top. A pumpkin needs a stable base so it doesn't wobble or tip over, especially once you put a light inside. Place it on a flat surface in the store and see how it sits. Does it lean precariously? Find another one. The stem should be firmly attached and feel sturdy. Don't carry the pumpkin by the stem, ever. It's like pulling a doorknob off a door – it's not designed for that kind of stress. A broken stem is an open wound for the pumpkin, inviting rot. Picking a pumpkin with a good base and stem sets you up for a smoother, more successful execution of your good and easy pumpkin carving ideas.
Seriously Good and Easy Pumpkin Carving Ideas Anyone Can Do

Seriously Good and Easy Pumpkin Carving Ideas Anyone Can Do
Mastering the Classic Jack-o'-Lantern Face
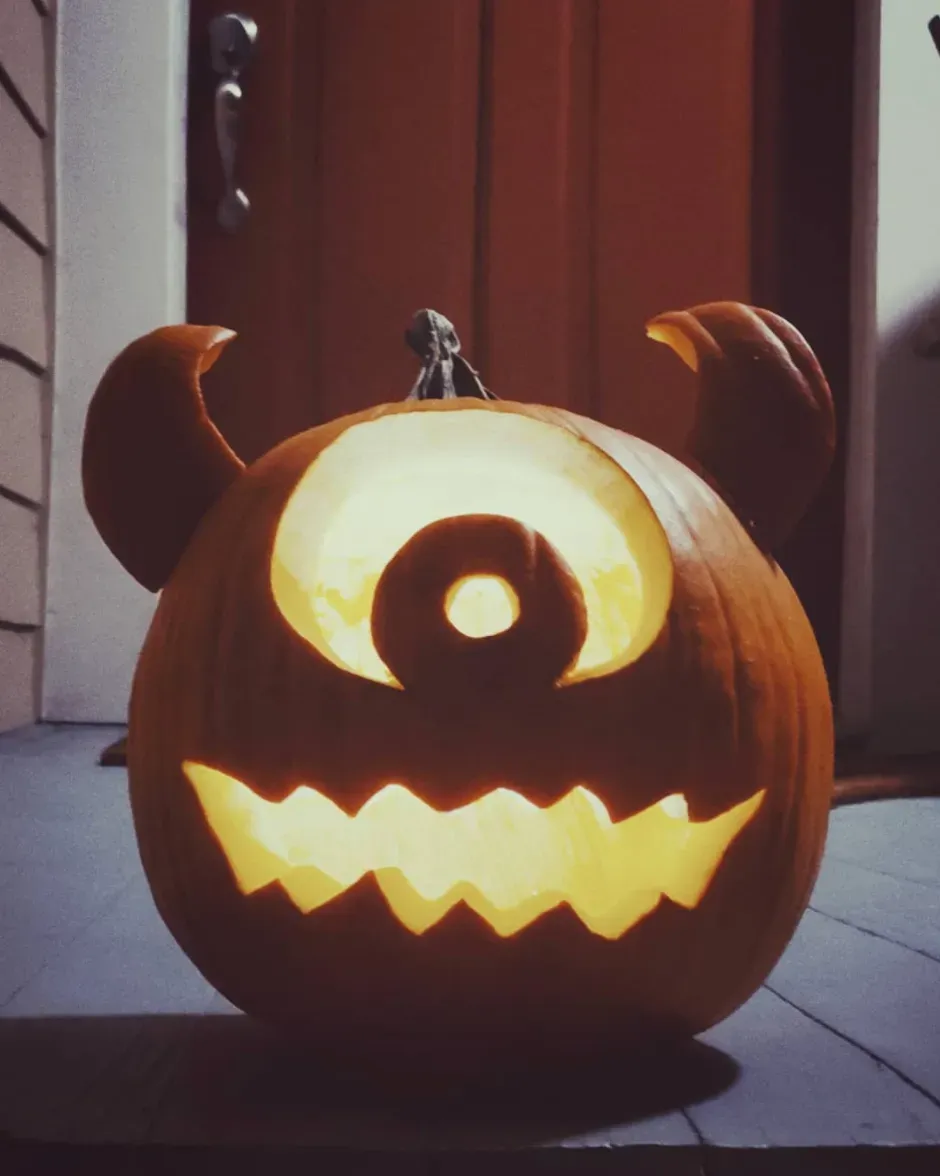
Alright, let's cut to the chase. When you think "pumpkin carving," you probably picture that classic, slightly goofy, slightly spooky face. Two triangle eyes, a triangle nose, and a jagged, toothy grin. Guess what? That's one of the absolute Seriously Good and Easy Pumpkin Carving Ideas Anyone Can Do. Seriously. It's a classic for a reason – it's simple, instantly recognizable, and incredibly forgiving. Mess up a little on a triangle? Nobody cares. Make the mouth a bit wobbly? Adds character. You don't need precision; you need enthusiasm and a sharp-ish tool. This is your go-to if you're short on time or patience. It delivers that iconic Halloween vibe with minimal fuss.
Beyond the Triangle: Simple Shapes and Stencils
Maybe you want something a *little* different than the basic face, but still firmly in the "easy" camp. Think simple shapes. Stars, moons, simple geometric patterns like circles or squares. You can freehand these, or if you're feeling nervous, grab a simple stencil online or even draw your own basic shapes on paper first. Tape the paper onto the pumpkin and use a pokey tool (like a skewer or the poker from a carving kit) to transfer the design by making small holes along the lines. Then, connect the dots with your carving tool. This method ensures your design is exactly where you want it before you commit with the knife, making these Seriously Good and Easy Pumpkin Carving Ideas even more approachable.
Easy Pumpkin Design Ideas:
- Classic Triangle Face (Eyes, Nose, Jagged Mouth)
- Simple Star or Moon Cutouts
- Multiple Circle "Eyes" or Bubbles
- Geometric Patterns (Squares, Rectangles)
- Single Initial or Simple Number
Quick Cuts and Minimalist Magic
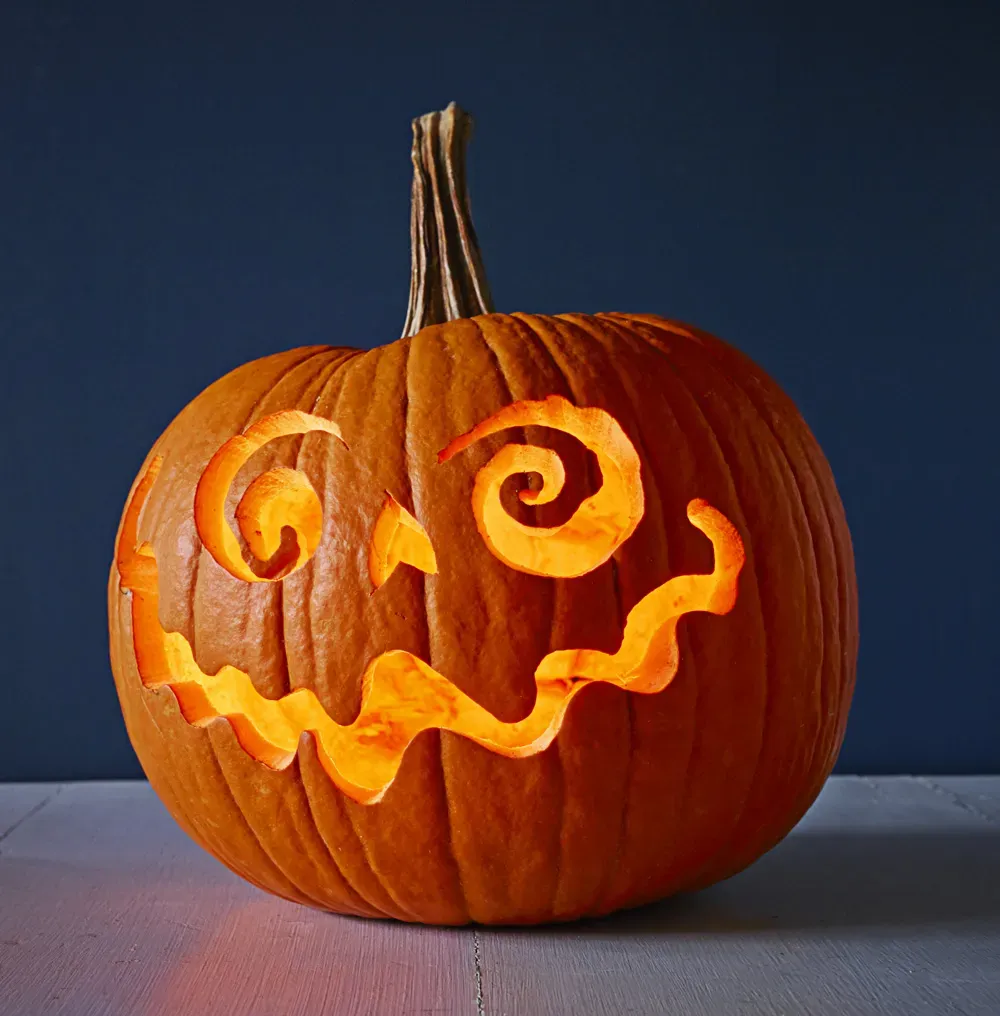
Sometimes, less is more. You don't need to carve out huge sections to make an impact. Think about using a smaller carving tool (or even a sturdy linoleum cutting tool, carefully!) to make simple outlines or patterns just through the skin, not all the way through. This peels away the orange layer to reveal the lighter flesh underneath, creating a cool two-tone effect. You could carve simple dots, stripes, or even just outline shapes without removing the inner pumpkin. These minimalist approaches are incredibly quick and count as some of the most Seriously Good and Easy Pumpkin Carving Ideas because they require less muscle and precision. It's like sketching on a pumpkin instead of sculpting it.
Beyond the Knife: Other Good and Easy Pumpkin Decorating Methods
Beyond the Knife: Other Good and Easy Pumpkin Decorating Methods
Painting and Drawing Your Way to Glory
so maybe the idea of sticking a sharp object into a round, slippery gourd still gives you the creeps. Totally understandable. Luckily, there are tons of Beyond the Knife: Other Good and Easy Pumpkin Decorating Methods that don't involve carving at all. Painting is your best friend here. Grab some acrylic paints – they stick well to pumpkin skin. You can paint classic spooky scenes, friendly monsters, or just simple patterns like polka dots or stripes. Even just painting a solid color, like black or white, can look incredibly chic and modern. Markers work too, especially paint pens, for finer details or outlining. It's like coloring, but on a 3D, seasonal canvas. Way less intimidating than carving, and the possibilities are endless.
Sticking, Gluing, and Accessorizing Pumpkins
If painting isn't your jam, or you want to add some texture, get creative with adhesives. You can glue on felt shapes to make faces or characters. Buttons make great eyes. Yarn can become hair or spiderwebs. Glitter (use responsibly, it gets everywhere!) adds sparkle. Googly eyes are a classic for a reason – they instantly add a touch of goofy personality. Ribbons, fabric scraps, even temporary tattoos designed for skin can often be transferred onto pumpkin surfaces for unique looks. Think of the pumpkin as a blank canvas you can dress up. These Beyond the Knife: Other Good and Easy Pumpkin Decorating Methods are fantastic for involving younger kids who aren't ready for carving tools.
Easy No-Carve Decorating Ideas:
- Paint faces or patterns with acrylics.
- Use paint pens for detailed designs or outlines.
- Glue on felt shapes, buttons, or googly eyes.
- Wrap with yarn or attach fabric scraps.
- Apply temporary tattoos or stickers.
- Dip or splatter paint for abstract effects.
Drilling Holes and Cookie Cutter Cutouts
Want that glowing effect without the full carve? A drill with different sized bits can create fantastic dot patterns or constellations. Just be careful and use a drill press if possible for stability, or have an adult handle this part. It's surprisingly fast and creates a cool, modern look when lit from inside. Another clever trick is using metal cookie cutters. Place a sturdy metal cookie cutter on the pumpkin and gently tap it with a mallet or hammer to push it through the skin. You might need to wiggle it a bit and potentially use a knife to finish the cut, but it gets you started with a clean, recognizable shape without the freehand struggle. These methods fall squarely into the Beyond the Knife: Other Good and Easy Pumpkin Decorating Methods category, offering unique ways to light up your pumpkin.
Keeping Your Good and Easy Pumpkin Carving Ideas Looking Fresh
Keeping Your Good and Easy Pumpkin Carving Ideas Looking Fresh
Cleanliness is Next to Pumpkin Longevity
So you've put in the minimal effort for your good and easy pumpkin carving ideas, and you actually like the result. Now you want it to last longer than a sugar rush on Halloween night, right? The first crucial step is cleaning it up properly *after* you carve. Don't just leave all those stringy bits and seeds clinging to the inside. Scrape it out thoroughly. Get as much of that inner flesh and pulp off the walls as you can. The less organic material left inside, the slower the rot process starts. Wipe down the inside and outside with a damp cloth to remove any lingering goo. Some folks even swear by washing the carved pumpkin gently with a mild bleach solution (like a teaspoon of bleach per quart of water) to kill bacteria, but rinse it *really* well afterward. Just don't soak it.
Moisture Management and Protection
Once your pumpkin is clean, moisture is your next battle. Too much moisture encourages mold and collapse, but too little makes it shrivel. It's a delicate balance. After cleaning, let it air dry completely for a few hours. To keep the carved edges from drying out and shriveling, you can apply a thin layer of petroleum jelly or vegetable oil to all the cut surfaces. This seals in moisture. Some people mist their pumpkins daily with water, or even that weak bleach solution again, but be careful not to make it soggy. Displaying your pumpkin in a cooler spot, out of direct sunlight, also helps significantly in Keeping Your Good and Easy Pumpkin Carving Ideas Looking Fresh and firm for as long as possible.
Simple steps to extend your pumpkin's life:
- Scrape out all insides thoroughly.
- Wipe down inside and out.
- Consider a mild bleach rinse (and thorough rinse).
- Let it air dry completely.
- Apply petroleum jelly or oil to cut edges.
- Keep it out of direct sun and heat.
Wrapping Up Your Easy Pumpkin Masterpiece
So there you have it. Proof that creating a cool Halloween pumpkin doesn't require sacrificing a weekend or developing carpal tunnel. We've covered picking the right gourd, tackled some genuinely good and easy pumpkin carving ideas, and even looked at ways to decorate without touching a blade. The point is, adding some festive character to your space for Halloween should be fun, not a chore you dread. Give one of these simple ideas a shot. Worst case? You make some soup. Best case? You have a pretty decent-looking pumpkin sitting there, and you still have feeling in your fingers. Now go forth and make your porch slightly less boring.